springboot简单搭建Web项目
2018-12-03 09:58
766 查看
版权声明:本文为博主原创文章,遵循 CC 4.0 by-sa 版权协议,转载请附上原文出处链接和本声明。
本文链接:https://blog.csdn.net/aa25117/article/details/84747133
springboot介绍就不用多说了,程序员就喜欢直接进入正题
1.创建springboot项目
1.1 创建springboot web 步骤


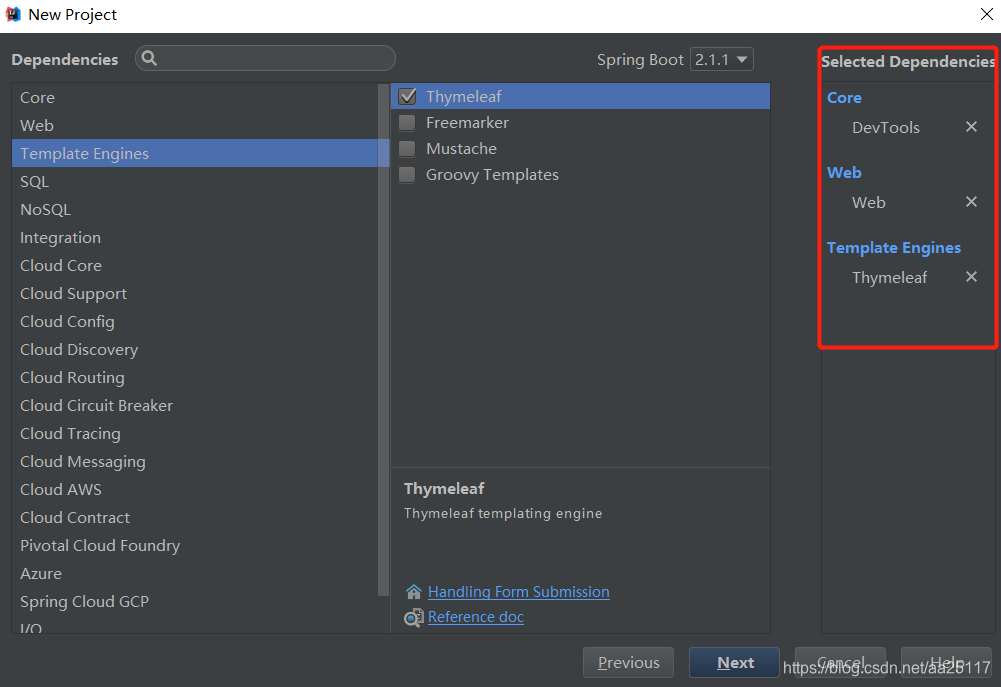 此处选择Devtools热启动,方便改动文件不用每次都重启。
Web不用多说了,WEB项目必用。。。
这里选thymeleaf 是因为用的是HTML5的静态页面,需要用Thymeleaf 标签会动态地替换掉静态内容,使页面动态显示。
1.2 项目建好如下,还添加了几个后面要用的package

2.添加springboot静态资源的路径
2.1添加WEB静态资源
[code]import org.springframework.context.annotation.Configuration;
import org.springframework.web.servlet.config.annotation.EnableWebMvc;
import org.springframework.web.servlet.config.annotation.ResourceHandlerRegistry;
import org.springframework.web.servlet.config.annotation.WebMvcConfigurer;

@Configuration
@EnableWebMvc
public class WebConfig implements WebMvcConfigurer {
@Override
public void addResourceHandlers(ResourceHandlerRegistry registry) {
registry.addResourceHandler("/components/**").addResourceLocations("classpath:/components/");
registry.addResourceHandler("/static/**").addResourceLocations("classpath:/static/");
}
}
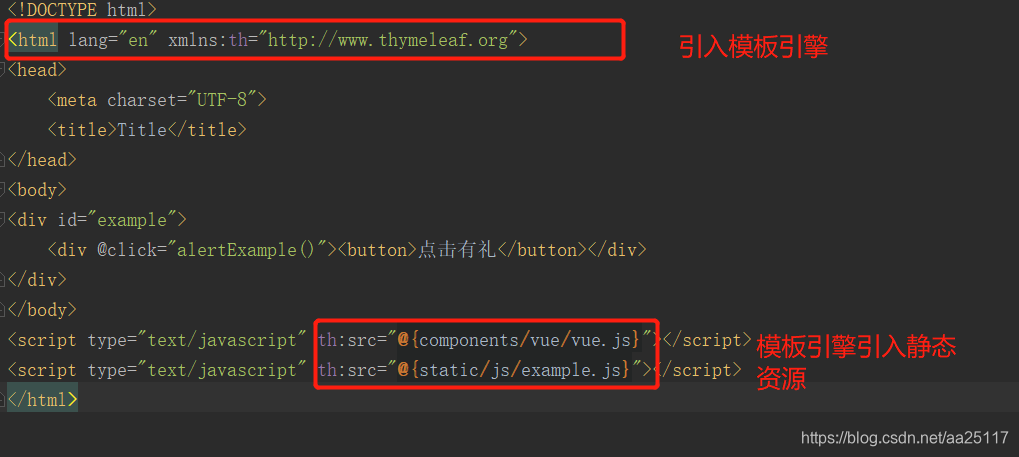
此处代码的components是用来放外部插件比如Vue.js。
2.2添加controller主页映射
[code]
import org.springframework.stereotype.Controller;
import org.springframework.web.bind.annotation.GetMapping;
/**
* User: Young
* Date: 2018/11/29
* Time: 15:12
*/
@Controller
public class HomeController {
@GetMapping("/index")
public String index(){
return "example/index";
}
}
2.3 在index里面写上能触发的事件,测试js等静态资源是否能用

最后一步启动项目运行..


至此WEB项目运行成功!

相关文章推荐
- idea+maven+springboot搭建web简单项目经历小计(RestController)
- 简单搭建 Spring Boot Web项目(二)
- 用Spring Boot搭建简单web项目
- 简单搭建 Spring Boot Web项目(一)
- spring boot学习二:搭建一个简单的web项目
- 简单搭建Spring Boot Web项目(三)
- 利用SpringBoot简单快速搭建WEB项目入门
- 快速搭建第一个简单的SpringBoot项目
- j2ee 简单网站搭建:(三)在搭建好的 spring maven web 项目中加入 mybatis 访问数据库
- 【SpringBoot教程二】:RESTfull API简单项目的快速搭建
- spring boot框架搭建-1 新建一个web项目
- 搭建简单web项目:spring3.0基本配置(2)
- springBoot简介---搭建一个简单的springBoot项目
- 学习用Sts做一个SpringBoot的WEB项目(1)基本框架搭建
- SpringBoot之1分钟快速搭建Web项目(一)
- IDEA搭建SpringBoot项目,以及简单使用
- SpringBoot之Helloword 快速搭建一个web项目(图文)
- IDEA搭建SpringBoot+Maven+Mybatis+MySQL-Web项目流程
- springboot (1) 快速搭建简单项目
- (二)Eclipse+Maven+SpringBoot通过创建Maven项目添加依赖搭建SpringBoot项目,完成简单的增删改查操作。