用Spring Boot搭建简单web项目
2017-06-09 00:00
1006 查看
一,新建maven 项目
新建一个maven工程输入相应的 groupId,artifactId
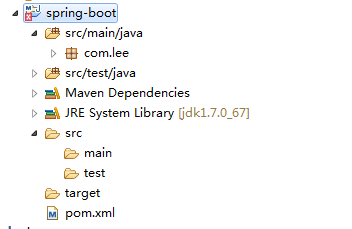
项目建好后,目录结构应该是这样的:
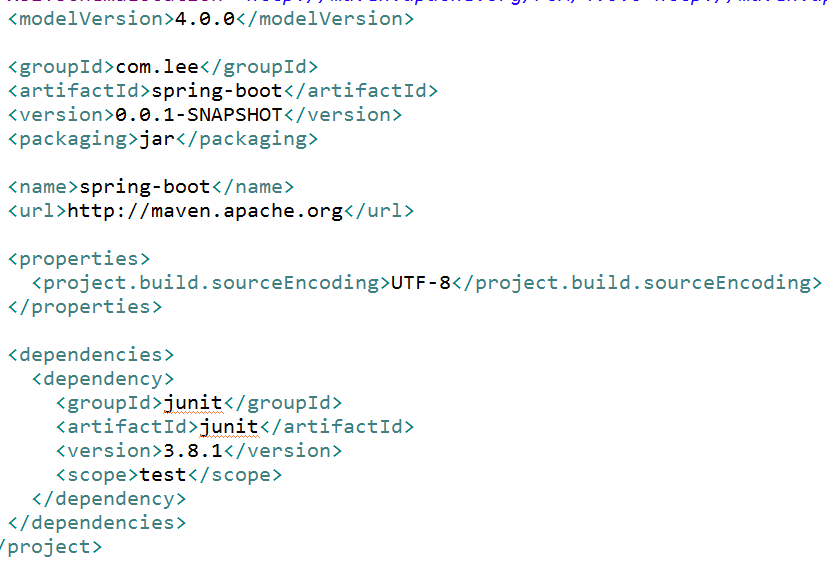
接下来修改pom.xml ,下面是最小配置
<project xmlns="http://maven.apache.org/POM/4.0.0" xmlns:xsi="http://www.w3.org/2001/XMLSchema-instance"
xsi:schemaLocation="http://maven.apache.org/POM/4.0.0 http://maven.apache.org/xsd/maven-4.0.0.xsd"> <modelVersion>4.0.0</modelVersion>

<groupId>com.lee</groupId>
<artifactId>spring-boot</artifactId>
<version>0.0.1-SNAPSHOT</version>
<packaging>jar</packaging>

<name>spring-boot</name>
<url>http://maven.apache.org</url>

<parent>
<groupId>org.springframework.boot</groupId>
<artifactId>spring-boot-starter-parent</artifactId>
<version>1.4.2.RELEASE</version>
</parent>
<properties>
<project.build.sourceEncoding>UTF-8</project.build.sourceEncoding>
</properties>

<dependencies>
<dependency>
<groupId>org.springframework.boot</groupId>
<artifactId>spring-boot-starter-web</artifactId>
</dependency>
<dependency>
<groupId>org.springframework.boot</groupId>
<artifactId>spring-boot-starter-velocity</artifactId>
</dependency>
<dependency>
<groupId>junit</groupId>
<artifactId>junit</artifactId>
<scope>test</scope>
</dependency>
</dependencies>
</project>
可以看到,继承了spring-boot-starter-parent,依赖了junit,spring-boot-starter-web,spring-boot-starter-velocity
以前我们在spring的配置,spring-boot都会按照默认配置,帮我们弄好
二,Hello World
先写一个controllerpackage com.lee.controller;
import org.springframework.stereotype.Controller;
import org.springframework.web.bind.annotation.RequestMapping;
import org.springframework.web.bind.annotation.ResponseBody;
@Controller
public class HelloWorldController {
@RequestMapping("/hello")
@ResponseBody
public String hello(){
return "hello world";
}
}再写一个启动程序
package com.lee;

import org.springframework.boot.SpringApplication;
import org.springframework.boot.autoconfigure.SpringBootApplication;

/**
* Hello world!
*
*/
@SpringBootApplication
public class Application {

public static void main(String[] args) {
SpringApplication.run(Application.class, args);
}
}
PS:注意包路径,启动程序应该放在包目录的最外层。
三,启动,测试
运行main函数启动成功后,在浏览器输入http://localhost:8080/hello
可以看到 hello world

相关文章推荐
- idea+maven+springboot搭建web简单项目经历小计(RestController)
- 基于多个maven module搭建的Spring boot web项目
- spring-boot搭建简单web(一)
- SpringBoot 学习记录(一): 简单web项目
- IDEA上面搭建一个SpringBoot的web-mvc项目
- eclipse搭建简单springboot-mybatis项目实现页面简单跳转
- springboot 简单web简单搭建和jsp界面
- springboot入门,简单能跑的项目快速搭建
- Spring Boot-RESTfull API简单项目的快速搭建
- springboot (1) 快速搭建简单项目
- 搭建简单web项目:spring3.0基本配置
- 【SpringBoot教程二】:RESTfull API简单项目的快速搭建
- IDEA上面搭建一个SpringBoot的web-mvc项目
- 使用idea+springboot+Mybatis搭建web项目
- 搭建简单web项目:spring3.0基本配置(2)
- (3)Spring-boot学习 做一个简单的带访问数据库的web项目
- spring-boot搭建简单web(整合freemarker)(二)
- 使用idea+springboot+Mybatis搭建web项目
- IDEA搭建SpringBoot+Maven+Mybatis+MySQL-Web项目流程
- 一个非常简单的spring-boot web项目(一)