j2ee 简单网站搭建:(三)在搭建好的 spring maven web 项目中加入 mybatis 访问数据库
2017-08-24 00:00
871 查看
《j2ee 简单网站搭建:(一) windows 操作系统下使用 eclipse 建立 maven web 项目》
《j2ee 简单网站搭建:(二)添加和配置 spring + spring-mvc 的 mvc 开发环境》
《j2ee 简单网站搭建:(三)在搭建好的 spring maven web 项目中加入 mybatis 访问数据库》
《j2ee 简单网站搭建:(四)将 freemaker 模板引擎作为 spring-mvc 展现层》
《j2ee 简单网站搭建:(五)使用 jcaptcha 生成验证码图片》
《j2ee 简单网站搭建:(六)使用 hibernate validation 实现 domain 层实体类验证》
《j2ee 简单网站搭建:(七)使用 shiro 结合 jcaptcha 实现用户验证登录》
《j2ee 简单网站搭建:(八)使用 jquery-validate 实现页面验证入门》
《j2ee 简单网站搭建:(九)jquery datatables + jquery ui dialog 插件使用入门》
《j2ee 简单网站搭建:(十)jquery ztree 插件使用入门》
《j2ee 简单网站搭建:(十一)ckeditor 控件使用入门》
在 mybatis 和 hibernate 选择中现在更多人愿意选择 mybatis,sql 能控制,使用简单,而且在 mybatis 3 开始至需要编写数据访问接口就可以配合 mybatis 的 sql 模板文件完成数据库访问层的开发,此外更多开源项目都开始使用 mybatis 。
本例简单演示在 spring 项目环境下完成 mybatis 的配置环境搭建,数据库使用 mysql 数据库,通过从表中查询数据进行测试。
一 在 mysql 数据中创建本示例的基本数据库 webdemo
创建测试表 test
测试表包含 testcol 列
在表中添加3条数据 item1、item2、item3
二 在 pom.xml 中加入 mybatis 相关的库以及数据库访问库,其中包括 mybatis 核心库、mybatis 结合 spring 库、数据库连接库、这里再使用阿里提供的高性能连接池库
三 为 druid 添加配置文件 druid.properties,配置文件中主要关注数据库连接的 ip 地址、数据库名称、管理员用户名、管理员密码,要和 mysql 的环境保持一致
四 新建 spring-mybatis-config.xml 配置文件,添加数据源、mybatis注入等信息
此处需要关注的是需要读取 druid.properties 配置文件中的属性填充数据源,所以使用了 context 命名空间和标签。
org.mybatis.spring.SqlSessionFactoryBean 类的 typeAliasesPackage 属性指明 mybatis 的 mapper 模板文件中使用的实体类在哪个包下查找
org.mybatis.spring.mapper.MapperScannerConfigurer 扫描器需要在哪个包下扫描项目中创建的 mybatis mapper 模板文件
五 在 web.xml 文件 <context-param> 节点的 <param-value> 参数节点中添加一行 spring-mybatis-config.xml 的配置信息,格式为 classpath*:spring-mybatis-config.xml
六 为项目创建配置 log4j 日志记录格式的 log4j.properties 配置文件
六 在项目代码的 dao 层中添加数据处理接口和对应的 mybatis mapper 模板,按 mybatis 的约定,接口类文件和 mybatis mapper 文件的名称应该保持一致,接口类中的方法和 mybatis mapper 中的方法名称也应该保持一致,这样 mybatis 会自动识别并在项目启动时通过 spring 完成注入,接口被注入调用其中的方法时实际执行的是 mybatis mapper 中对应的 sql 语句。
在本例中的 dao 包 com.binux.webdemo.dao 中添加测试接口类 TestMapper.java
@Repository 注解方在类或接口上方,对数据处理层的类进行注入注解
在同一个包中创建 mybatis mapper 文件 TestMapper.xml
文件中 <mapper> 标签的 namespace 属性就是指明对应哪个接口类
文件内每个 sql 执行段的 id 应该同接口类中的方法名称一一对应
七 为了演示相对完整的项目目录结构,在 service 层中加入业务逻辑层的接口和实现类,对数据处理层的逻辑进行包装,本例非常简单,因此只是对 dao 的方法进行封装
在 com.binux.webdemo.service 包下建立 TestService.java (接口类) 和 TestServiceImpl.java (接口实现类)
@Service("testService") 注解放在 service 层的实现类上方,标明该类是业务逻辑层服务,是 spring 的注解类,项目启动时进行注入操作
@Transactional 注解一般放在方法上方,标明执行该方法时使用 spring 事物进行控制
@Cacheable(value="testdata") 注解一般放在方法上方,标明该方法执行完后的数据使用 spring 进行缓存,不需要每次调用该方法都前往数据执行 sql
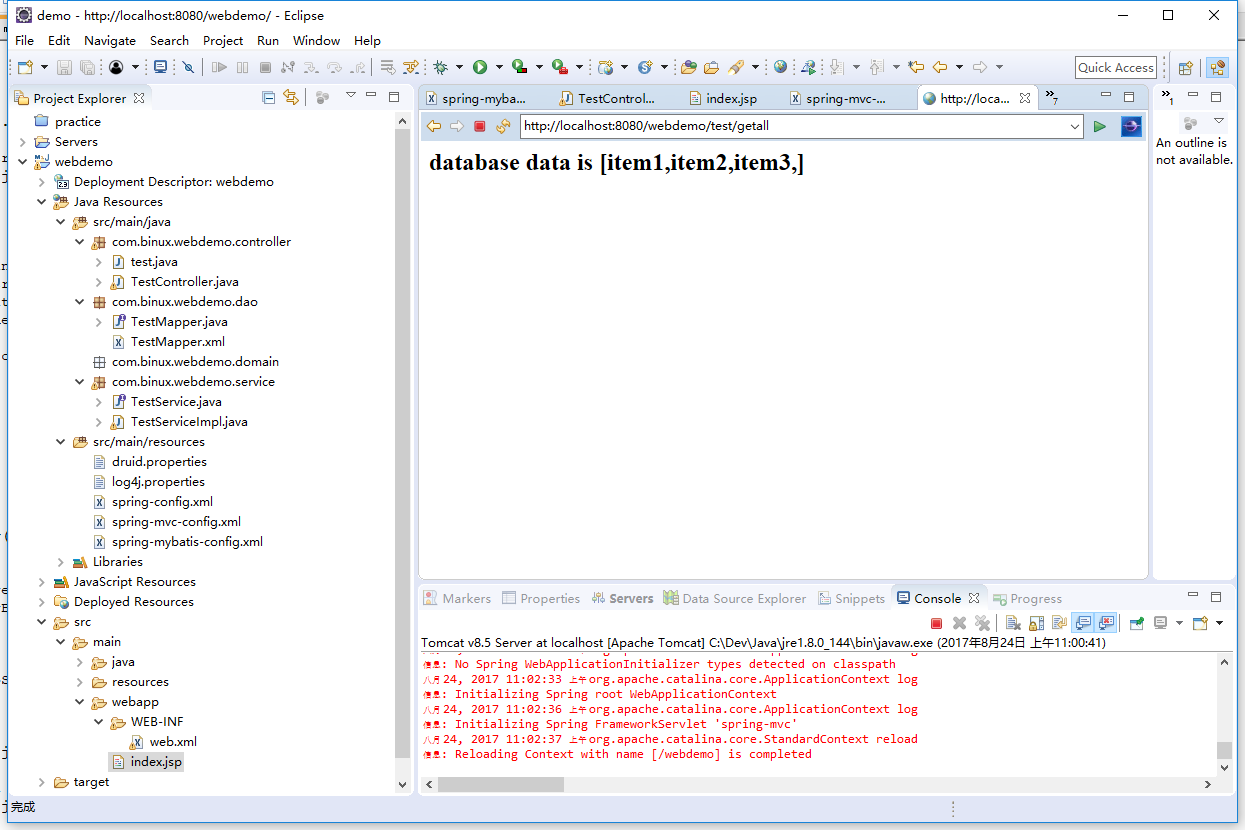
八 在 controller 层 com.binux.webdemo.controller 包建立 TestController.java 类,处理浏览器客户端给出的 http://localhost:8080/webdemo/test/getall 路径请求
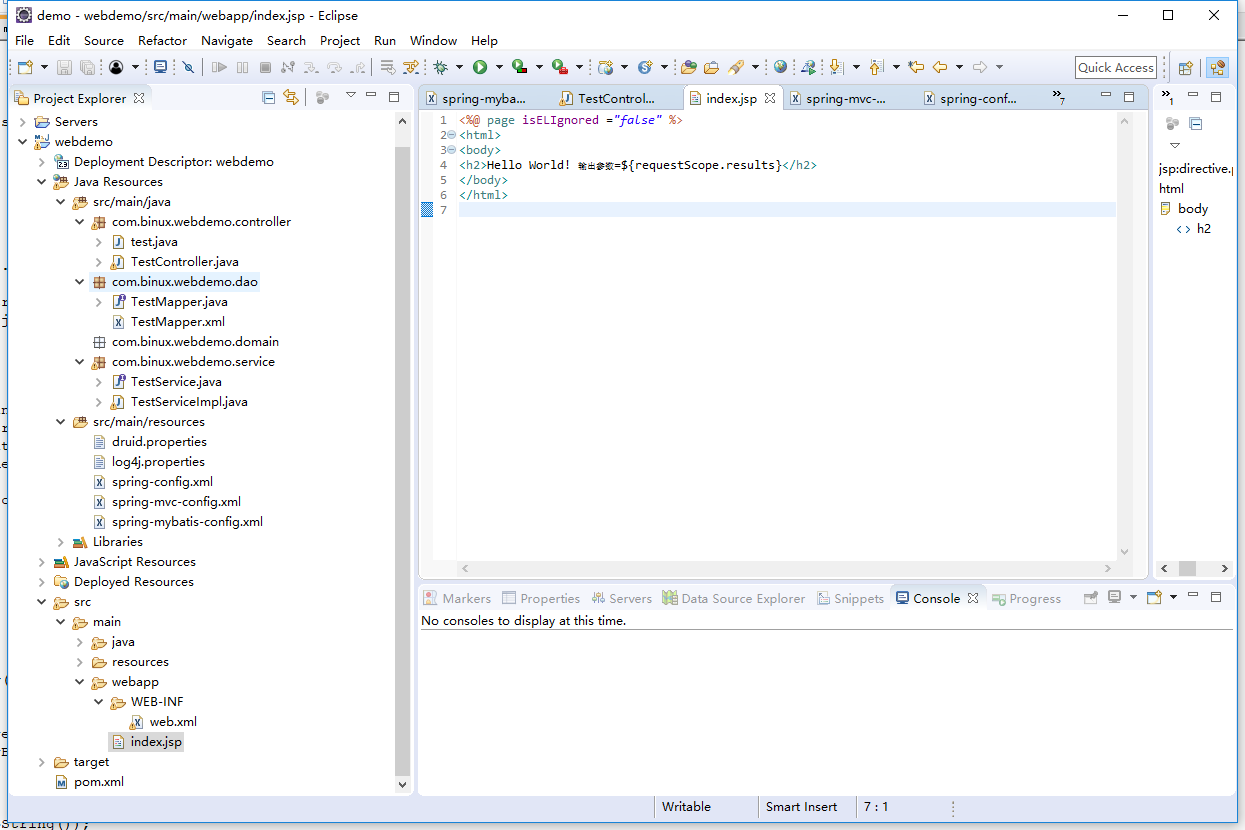
九 在项目默认生成的 index.jsp 页面顶部加入 <%@ page isELIgnored ="false" %> ,页面中加入输出标签 ${requestScope.results},项目启动后通过浏览器打开 http://localhost:8080/webdemo/test/getall 正常应输出 item1,item2,item3,
《j2ee 简单网站搭建:(二)添加和配置 spring + spring-mvc 的 mvc 开发环境》
《j2ee 简单网站搭建:(三)在搭建好的 spring maven web 项目中加入 mybatis 访问数据库》
《j2ee 简单网站搭建:(四)将 freemaker 模板引擎作为 spring-mvc 展现层》
《j2ee 简单网站搭建:(五)使用 jcaptcha 生成验证码图片》
《j2ee 简单网站搭建:(六)使用 hibernate validation 实现 domain 层实体类验证》
《j2ee 简单网站搭建:(七)使用 shiro 结合 jcaptcha 实现用户验证登录》
《j2ee 简单网站搭建:(八)使用 jquery-validate 实现页面验证入门》
《j2ee 简单网站搭建:(九)jquery datatables + jquery ui dialog 插件使用入门》
《j2ee 简单网站搭建:(十)jquery ztree 插件使用入门》
《j2ee 简单网站搭建:(十一)ckeditor 控件使用入门》
在 mybatis 和 hibernate 选择中现在更多人愿意选择 mybatis,sql 能控制,使用简单,而且在 mybatis 3 开始至需要编写数据访问接口就可以配合 mybatis 的 sql 模板文件完成数据库访问层的开发,此外更多开源项目都开始使用 mybatis 。
本例简单演示在 spring 项目环境下完成 mybatis 的配置环境搭建,数据库使用 mysql 数据库,通过从表中查询数据进行测试。
一 在 mysql 数据中创建本示例的基本数据库 webdemo
创建测试表 test
测试表包含 testcol 列
在表中添加3条数据 item1、item2、item3
二 在 pom.xml 中加入 mybatis 相关的库以及数据库访问库,其中包括 mybatis 核心库、mybatis 结合 spring 库、数据库连接库、这里再使用阿里提供的高性能连接池库
<properties>
<mysql.version>5.1.37</mysql.version>
<commons-dbcp.version>1.4</commons-dbcp.version>
<mybatis.version>3.3.0</mybatis.version>
<mybatis-spring.version>1.2.3</mybatis-spring.version>
<druid.version>1.0.16</druid.version>
<slf4j.version>1.7.21</slf4j.version>
<log4j.version>1.2.17</log4j.version>
</properties>
<dependencies>

<!-- mysql 连接库 start -->
<dependency>
<groupId>mysql</groupId>
<artifactId>mysql-connector-java</artifactId>
<version>${mysql.version}</version>
</dependency>
<dependency>
<groupId>commons-dbcp</groupId>
<artifactId>commons-dbcp</artifactId>
<version>${commons-dbcp.version}</version>
</dependency>
<!-- mysql 连接库 end   -->

<!-- mybatis 库 start -->
<dependency>
<groupId>org.mybatis</groupId>
<artifactId>mybatis</artifactId>
<version>${mybatis.version}</version>
</dependency>
<dependency>
<groupId>org.mybatis</groupId>
<artifactId>mybatis-spring</artifactId>
<version>${mybatis-spring.version}</version>
</dependency>
<!-- mybatis 库 end   -->

<!-- 阿里巴巴druid连接池 start -->
<dependency>
<groupId>com.alibaba</groupId>
<artifactId>druid</artifactId>
<version>${druid.version}</version>
</dependency>
<!-- 阿里巴巴druid连接池 end -->

<!-- 日志相关库 start -->
<dependency>
<groupId>org.slf4j</groupId>
<artifactId>slf4j-log4j12</artifactId>
<version>${slf4j.version}</version>
</dependency>
<dependency>
<groupId>org.slf4j</groupId>
<artifactId>slf4j-api</artifactId>
<version>${slf4j.version}</version>
</dependency>
<dependency>
<groupId>log4j</groupId>
<artifactId>log4j</artifactId>
<version>${log4j.version}</version>
</dependency>
<!-- 日志相关库 end -->

</dependencies>
三 为 druid 添加配置文件 druid.properties,配置文件中主要关注数据库连接的 ip 地址、数据库名称、管理员用户名、管理员密码,要和 mysql 的环境保持一致
druid.driverclass=com.mysql.jdbc.Driver
druid.url=jdbc:mysql://192.168.56.30:3306/webdemo?useUnicode=true&characterEncoding=UTF-8&zeroDateTimeBehavior=convertToNull&&allowMultiQueries=true
druid.username=webdemo_operator
druid.password=webdemo_operator
druid.initialSize=10
druid.minIdle=10
druid.maxActive=50
druid.maxWait=60000
druid.timeBetweenEvictionRunsMillis=60000
druid.minEvictableIdleTimeMillis=300000
druid.validationQuery=SELECT 'x'
druid.testWhileIdle=true
druid.testOnBorrow=false
druid.testOnReturn=false
druid.poolPreparedStatements=true
druid.maxPoolPreparedStatementPerConnectionSize=20
druid.removeAbandoned=true
druid.removeAbandonedTimeout=1800
druid.logAbandoned=true
druid.connectionProperties=clientEncoding=UTF-8
druid.filters=wall,stat
四 新建 spring-mybatis-config.xml 配置文件,添加数据源、mybatis注入等信息
此处需要关注的是需要读取 druid.properties 配置文件中的属性填充数据源,所以使用了 context 命名空间和标签。
org.mybatis.spring.SqlSessionFactoryBean 类的 typeAliasesPackage 属性指明 mybatis 的 mapper 模板文件中使用的实体类在哪个包下查找
org.mybatis.spring.mapper.MapperScannerConfigurer 扫描器需要在哪个包下扫描项目中创建的 mybatis mapper 模板文件
<?xml version="1.0" encoding="UTF-8"?>
<beans xmlns="http://www.springframework.org/schema/beans"
xmlns:aop="http://www.springframework.org/schema/aop"
xmlns:context="http://www.springframework.org/schema/context"
xmlns:tx="http://www.springframework.org/schema/tx"
xmlns:xsi="http://www.w3.org/2001/XMLSchema-instance"
xsi:schemaLocation=" http://www.springframework.org/schema/aop http://www.springframework.org/schema/aop/spring-aop.xsd http://www.springframework.org/schema/beans http://www.springframework.org/schema/beans/spring-beans.xsd http://www.springframework.org/schema/context http://www.springframework.org/schema/context/spring-context.xsd http://www.springframework.org/schema/tx http://www.springframework.org/schema/tx/spring-tx.xsd">
<description>mybatis configuration</description>
<!-- 引入资源目录下的所有properties属性文件 -->
<context:property-placeholder location="classpath*:druid.properties"/>
<!-- 简写属性p如果出现 ref引用,需要编写为[p:属性名称-ref="引用的对象名称"],例如[p:dataSource-ref="dataSource"] -->
<bean id="dataSource" name="dataSource" class="com.alibaba.druid.pool.DruidDataSource" init-method="init" destroy-method="close">
<!-- 基本属性 url、user、password -->
<property name="driverClassName" value="${druid.driverclass}"/>
<property name="url" value="${druid.url}"/>
<property name="username" value="${druid.username}"/>
<property name="password" value="${druid.password}"/>
<!-- 配置初始化大小、最小、最大 -->
<property name="initialSize" value="${druid.initialSize}"/>
<property name="minIdle" value="${druid.minIdle}"/>
<property name="maxActive" value="${druid.maxActive}"/>
<!-- 配置获取连接等待超时的时间 -->
<property name="maxWait" value="${druid.maxWait}"/>
<!-- 配置间隔多久才进行一次检测,检测需要关闭的空闲连接,单位是毫秒 -->
<property name="timeBetweenEvictionRunsMillis" value="${druid.timeBetweenEvictionRunsMillis}" />
<!-- 配置一个连接在池中最小生存的时间,单位是毫秒 -->
<property name="minEvictableIdleTimeMillis" value="${druid.minEvictableIdleTimeMillis}" />
<property name="validationQuery" value="${druid.validationQuery}" />
<property name="testWhileIdle" value="${druid.testWhileIdle}" />
<property name="testOnBorrow" value="${druid.testOnBorrow}" />
<property name="testOnReturn" value="${druid.testOnReturn}" />
<!-- 打开PSCache,并且指定每个连接上PSCache的大小  如果用Oracle,则把poolPreparedStatements配置为true,mysql可以配置为false。-->
<property name="poolPreparedStatements" value="${druid.poolPreparedStatements}" />
<property name="maxPoolPreparedStatementPerConnectionSize" value="${druid.maxPoolPreparedStatementPerConnectionSize}" />
<!-- 配置监控统计拦截的filters -->
<property name="filters" value="${druid.filters}" />
<property name="removeAbandoned" value="${druid.removeAbandoned}" />
<property name="removeAbandonedTimeout" value="${druid.removeAbandonedTimeout}" />
<property name="logAbandoned" value="${druid.logAbandoned}" />
<property name="connectionProperties" value="${druid.connectionProperties}" />
</bean>
<!-- MySQL数据源配置开始 -->
<!-- MyBatis配置开始 -->
<!-- 配置sqlSessionFactory -->
<bean id="sqlSessionFactory" class="org.mybatis.spring.SqlSessionFactoryBean">
<property name="dataSource" ref="dataSource" />
<property name="typeAliasesPackage" value="com.binux.webdemo.domain" />
<!-- mapperLocations:它表示我们的Mapper文件存放的位置,当我们的Mapper文件跟对应的Mapper接口处于同一位置的时候可以不用指定该属性的值 -->
<!-- <property name="mapperLocations" value="classpath*:com/binux/webdemo/dao/*.xml" /> -->
</bean>
<!-- 配置扫描器 -->
<bean class="org.mybatis.spring.mapper.MapperScannerConfigurer">
<property name="basePackage" value="com.binux.webdemo.dao" />
<property name="sqlSessionFactoryBeanName" value="sqlSessionFactory" />
</bean>
<!-- MyBatis配置结束 -->
<!--事务管理器配置-->
<!-- 确保注入正确,proxy-target-class="true",强制调用CGLIB执行切面 -->
<!-- 激活自动代理功能-->
<aop:aspectj-autoproxy expose-proxy="true"/>
<bean id="transactionManager" class="org.springframework.jdbc.datasource.DataSourceTransactionManager">
<property name="dataSource" ref="dataSource"/>
</bean>
<tx:advice id="txAdvice" transaction-manager="transactionManager">
<tx:attributes>
<tx:method name="*" propagation="REQUIRED"/>
</tx:attributes>
</tx:advice>
<aop:config expose-proxy="true" proxy-target-class="true">
<!-- 只对业务逻辑层实施事务 -->
<aop:pointcut id="txPointcut" expression="execution(* com.binux.webdemo..service..*+.*(..))"/>
<aop:advisor id="txAdvisor" advice-ref="txAdvice" pointcut-ref="txPointcut"/>
</aop:config>
</beans>
五 在 web.xml 文件 <context-param> 节点的 <param-value> 参数节点中添加一行 spring-mybatis-config.xml 的配置信息,格式为 classpath*:spring-mybatis-config.xml
六 为项目创建配置 log4j 日志记录格式的 log4j.properties 配置文件
log4j.rootLogger=ERROR,A1
log4j.appender.A1=org.apache.log4j.ConsoleAppender
log4j.appender.A1.layout=org.apache.log4j.PatternLayout
log4j.appender.A1.layout.ConversionPattern=%d %5p [%t] (%F:%L) - %m%n
六 在项目代码的 dao 层中添加数据处理接口和对应的 mybatis mapper 模板,按 mybatis 的约定,接口类文件和 mybatis mapper 文件的名称应该保持一致,接口类中的方法和 mybatis mapper 中的方法名称也应该保持一致,这样 mybatis 会自动识别并在项目启动时通过 spring 完成注入,接口被注入调用其中的方法时实际执行的是 mybatis mapper 中对应的 sql 语句。
在本例中的 dao 包 com.binux.webdemo.dao 中添加测试接口类 TestMapper.java
@Repository 注解方在类或接口上方,对数据处理层的类进行注入注解
package com.binux.webdemo.dao;

import java.util.List;

import org.springframework.stereotype.Repository;

/**
* 存储用户 - 操作类
* @author binux
*/
@Repository
public interface TestMapper {
/**
* 获得所有数据
* @return
*/
List<String> getAllItems();
}
在同一个包中创建 mybatis mapper 文件 TestMapper.xml
文件中 <mapper> 标签的 namespace 属性就是指明对应哪个接口类
文件内每个 sql 执行段的 id 应该同接口类中的方法名称一一对应
<?xml version="1.0" encoding="utf-8"?>
<!DOCTYPE mapper PUBLIC "-//mybatis.org//DTD Mapper 3.0//EN" "http://mybatis.org/dtd/mybatis-3-mapper.dtd">
<mapper namespace="com.binux.webdemo.dao.TestMapper">
<select id="getAllItems" resultType="String">
select testcol from test
</select>
</mapper>
七 为了演示相对完整的项目目录结构,在 service 层中加入业务逻辑层的接口和实现类,对数据处理层的逻辑进行包装,本例非常简单,因此只是对 dao 的方法进行封装
在 com.binux.webdemo.service 包下建立 TestService.java (接口类) 和 TestServiceImpl.java (接口实现类)
package com.binux.webdemo.service;

import java.util.List;

public interface TestService {

/**
* 获得所有数据
* @return 单列中的所有行数据,String形式
*/
public abstract List<String> getAllItems();

}
@Service("testService") 注解放在 service 层的实现类上方,标明该类是业务逻辑层服务,是 spring 的注解类,项目启动时进行注入操作
@Transactional 注解一般放在方法上方,标明执行该方法时使用 spring 事物进行控制
@Cacheable(value="testdata") 注解一般放在方法上方,标明该方法执行完后的数据使用 spring 进行缓存,不需要每次调用该方法都前往数据执行 sql
package com.binux.webdemo.service;

import com.binux.webdemo.dao.TestMapper;
import org.springframework.beans.factory.annotation.Autowired;
import org.springframework.cache.annotation.Cacheable;
import org.springframework.stereotype.Service;
import org.springframework.transaction.annotation.Transactional;

import java.util.List;

@Service("testService")
public class TestServiceImpl implements TestService {
@Autowired
private TestMapper testMapper;

public List<String> getAllItems(){
return testMapper.getAllItems();
}
}
八 在 controller 层 com.binux.webdemo.controller 包建立 TestController.java 类,处理浏览器客户端给出的 http://localhost:8080/webdemo/test/getall 路径请求
package com.binux.webdemo.controller;

import java.util.List;

import org.springframework.beans.factory.annotation.Autowired;
import org.springframework.stereotype.Controller;
import org.springframework.web.bind.annotation.RequestMapping;
import org.springframework.web.servlet.ModelAndView;

import com.binux.webdemo.service.TestService;

@Controller
@RequestMapping("/test")
public class TestController {
@Autowired
private TestService testService;

@RequestMapping(value="/getall")
public ModelAndView getAll() {
ModelAndView mv = new ModelAndView();
mv.setViewName("../index.jsp");
String aa = null;
List<String> items = testService.getAllItems();
StringBuilder results = new StringBuilder();
for (String item : items)
results.append(item + ",");

mv.addObject("results", results.toString());
return mv;
}
}
九 在项目默认生成的 index.jsp 页面顶部加入 <%@ page isELIgnored ="false" %> ,页面中加入输出标签 ${requestScope.results},项目启动后通过浏览器打开 http://localhost:8080/webdemo/test/getall 正常应输出 item1,item2,item3,
<%@ page isELIgnored ="false" %>
<html>
<body>
<h2>database data is [${requestScope.results}]</h2>
</body>
</html>

相关文章推荐
- j2ee 简单网站搭建:(一) windows 操作系统下使用 eclipse 建立 maven web 项目
- J2EE项目系列(四)--SSM框架构建积分系统和基本商品检索系统(Spring+SpringMVC+MyBatis+Lucene+Redis+MAVEN)(2)建立商品数据库和Lucene的搭建
- idea+maven+springboot搭建web简单项目经历小计(RestController)
- 使用myeclipse搭建带maven的ava web项目(Spring+SpringMVC+Mybatis)
- (3)Spring-boot学习 做一个简单的带访问数据库的web项目
- 从零开始搭建maven+springmvc+mybatis web项目(1)---maven项目目录创建
- SpringMvc+MyBatis+MySQL+Maven+Redis搭建一个基础的web项目
- java maven、springmvc、mybatis 搭建简单Web项目学习笔记
- 搭建基于SpringMVC+MyBatis+Maven的web项目
- 关于maven+springMVC+mybatis搭建的web项目问题
- 从零开始搭建maven+springmvc+mybatis web项目(2)---springmvc配置文件编写
- 从零开始搭建maven+springmvc+mybatis web项目(3)---springmvc流程测试
- MyBatis学习总结(八)——Mybatis3.x与Spring4.x整合 一、搭建开发环境 1.1、使用Maven创建Web项目 执行如下命令: mvn archetype:create
- IDEA搭建SpringBoot+Maven+Mybatis+MySQL-Web项目流程
- (二)从零搭建maven+spring+mybatis项目之web项目创建
- 【web开发】Eclipse中SpringMVC+Mybatis+Maven搭建的项目框架(SMM框架)
- spring SpringMVC MyBatis 搭建项目 MavenWeb项目
- Java Web学习系列——Maven Web项目中集成使用Spring、MyBatis实现对MySQL的数据访问
- Maven + Spring MVC+Mybatis + MySQL +AngularJS + Bootstrap 实现简单微博应用(二)访问数据库
- 基于Maven项目,搭建Spring+SpringMVC+MyBatis的WEB项目(待更新)