大数据入门第十二天——flume入门
2018-02-26 14:11
323 查看
一、概述
1.什么是flume官网的介绍:http://flume.apache.org/
Flume is a distributed, reliable, and available service for efficiently collecting, aggregating, and moving large amounts of log data. It has a simple and flexible architecture based on streaming data flows. It is robust and fault tolerant with tunable reliability mechanisms and many failover and recovery mechanisms. It uses a simple extensible data model that allows for online analytic application.
简明的介绍:
u Flume是一个分布式、可靠、和高可用的海量日志采集、聚合和传输的系统。
u Flume可以采集文件,socket数据包等各种形式源数据,又可以将采集到的数据输出到HDFS、hbase、hive、kafka等众多外部存储系统中
u 一般的采集需求,通过对flume的简单配置即可实现
u Flume针对特殊场景也具备良好的自定义扩展能力,因此,flume可以适用于大部分的日常数据采集场景
2.flume运行机制
# Name the components on this agent

a1.sources = r1

a1.sinks = k1

a1.channels = c1

# Describe/configure the source

a1.sources.r1.type = netcat

a1.sources.r1.bind = localhost

a1.sources.r1.port = 44444

# Describe the sink

a1.sinks.k1.type = logger

# Use a channel that buffers events in memory

a1.channels.c1.type = memory

a1.channels.c1.capacity = 1000

a1.channels.c1.transactionCapacity = 100

# Bind the source and sink to the channel

a1.sources.r1.channels = c1

a1.sinks.k1.channel = c1
精简配置
当然,如果想要别的机器可以连过来,可以通过设置r1.bind处的localhost改为主机名(此处为mini1)即可!
2.启动
bin/flume-ng agent --conf conf --conf-file conf/netcat-logger.conf --name a1 -Dflume.root.logger=INFO,console
其中,--conf指定指定配置文件目录,--conf-file指定配置方案,--name,指定agent名称,-D的为JVM参数,当然--conf等可以简写如下:
bin/flume-ng agent -c conf -f conf/netcat-logger.conf -n a1 -Dflume.root.logger=INFO,console
//注意这里conf是相对路径了
3.登录
打开另外一个终端(复制SSH隧道):
telnet localhost 44444
// 这里本机没有安装telnet,故先安装telnet:https://www.cnblogs.com/lixuwu/p/6102444.html
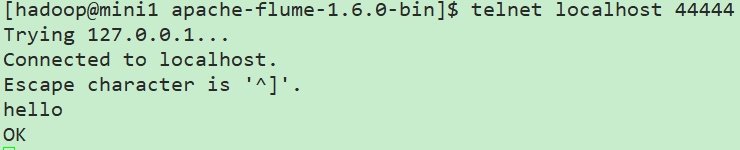
这里在flume服务端就可以看到接收的信息了,如果消息太长被截断,可以通过参数设置:
max-line-length 512 Max line length per event body (in bytes)
完整的参照官网configuration下的sources下的netcat相关的参数设置!
以上这些完整的介绍,都在官方文档中:http://flume.apache.org/FlumeUserGuide.html
配置采集源为spool目录
在conf下新建spool.conf
# Name the components on this agent
a1.sources = r1
a1.sinks = k1
a1.channels = c1

# Describe/configure the source
#监听目录,spoolDir指定目录, fileHeader要不要给文件夹前坠名
a1.sources.r1.type = spooldir
a1.sources.r1.spoolDir = /home/hadoop/flumespool
a1.sources.r1.fileHeader = true

# Describe the sink
a1.sinks.k1.type = logger

# Use a channel which buffers events in memory
a1.channels.c1.type = memory
a1.channels.c1.capacity = 1000
a1.channels.c1.transactionCapacity = 100

# Bind the source and sink to the channel
a1.sources.r1.channels = c1
a1.sinks.k1.channel = c1
启动
bin/flume-ng agent -c ./conf -f ./conf/spool-logger.conf -n a1 -Dflume.root.logger=INFO,console
此时通过cp等命令往flumespool中添加文件即可看到效果!
但是不能有相同的文件名,否则会报错!
四、采集文件到HDFS
1.conf下新建tail-hdfs.conf# Name the components on this agent a1.sources = r1 a1.sinks = k1 a1.channels = c1 #exec 指的是命令 # Describe/configure the source a1.sources.r1.type = exec #F根据文件名追踪, f根据文件的nodeid追踪 a1.sources.r1.command = tail -F /home/hadoop/log/test.log a1.sources.r1.channels = c1 # Describe the sink #下沉目标 a1.sinks.k1.type = hdfs a1.sinks.k1.channel = c1 #指定目录, flum帮做目的替换 a1.sinks.k1.hdfs.path = /flume/events/%y-%m-%d/%H%M/ #文件的命名, 前缀 a1.sinks.k1.hdfs.filePrefix = events- #10 分钟就改目录 a1.sinks.k1.hdfs.round = true a1.sinks.k1.hdfs.roundValue = 10 a1.sinks.k1.hdfs.roundUnit = minute #文件滚动之前的等待时间(秒) a1.sinks.k1.hdfs.rollInterval = 3 #文件滚动的大小限制(bytes) a1.sinks.k1.hdfs.rollSize = 500 #写入多少个event数据后滚动文件(事件个数) a1.sinks.k1.hdfs.rollCount = 20 #5个事件就往里面写入 a1.sinks.k1.hdfs.batchSize = 5 #用本地时间格式化目录 a1.sinks.k1.hdfs.useLocalTimeStamp = true #下沉后, 生成的文件类型,默认是Sequencefile,可用DataStream,则为普通文本 a1.sinks.k1.hdfs.fileType = DataStream # Use a channel which buffers events in memory a1.channels.c1.type = memory a1.channels.c1.capacity = 1000 a1.channels.c1.transactionCapacity = 100 # Bind the source and sink to the channel a1.sources.r1.channels = c1 a1.sinks.k1.channel = c1
注意这里换成exec命令形式了,不采用之前的spoolDir,只是采集源不同而已
2.准备测试数据
[hadoop@mini1 conf]$ mkdir /home/hadoop/log
[hadoop@mini1 conf]$ touch /home/hadoop/log/test.log
[hadoop@mini1 ~]$ while true
> do
> echo 10086 >> /home/hadoop/log/test.log
> sleep 0.5
> done
//当然,通过常规的新建.sh文件运行也是可以的
新开终端可以查看效果
[hadoop@mini1 ~]$ tail -F /home/hadoop/log/test.log
3.启动HDFS
start-dfs.sh
4.启动flume
bin/flume-ng agent -c conf -f conf/tail-hdfs.conf -n a1
5.查看效果
通过网页mini1:50070直接可以查看到相关目录的生成
如果为spoolDir形式,参考:https://www.cnblogs.com/cnmenglang/p/6543927.html
五、多agent串联
主要就是一个的sink为另外一个的source即可!参考:http://blog.csdn.net/killy_uc/article/details/22916479

相关文章推荐
- 大数据架构入门总结(Flume + Kafka + ZooKeeper + Spark Streaming + Drools + ELK)
- 大数据日志收集框架之Flume入门
- Hive入门--4.flume-数据收集工具
- 大数据日志收集框架之Flume入门
- hadoop从入门到放弃(一)之flume获取数据存入hdfs
- hadoop入门--通过Apache Flume向HDFS存储数据
- 大数据入门第十二天——azkaban入门
- _00016 Flume的体系结构介绍以及Flume入门案例(往HDFS上传数据)
- 大数据入门第十二天——sqoop入门
- opencv学习笔记-入门(7)单通道的图像数据访问
- Python数据分析入门
- Python数据挖掘入门与实践(二)——scikit-learn数据的预处理转换器以及流水线
- 5-Python3从入门到实战—基础之数据类型(列表-List)
- ajax入门之XMLHttpRequest和三种数据格式
- ReportStudio入门教程(八) - 数据格式
- Spread for Windows Forms快速入门(12)---数据分组(Outlook风格)
- Learning Data Mining with Python-《Python数据挖掘入门与实践》学习后的分享
- 使用Flume向HDFS持久化数据(日志)
- 大数据架构之:Flume
- Flume快速入门(一):背景简介