Webpack入门教程十一
2017-02-20 10:04
501 查看
60.htmlwebpackplugin插件的配置-title的使用,修改webpack.config.js文件,修改的内容如下
var webpack = require('webpack');
var HtmlWebpackPlugin = require('html-webpack-plugin');

module.exports = {
entry:  __dirname + "/app/Greeter.js",
output: {
path: __dirname + "/build",
filename: "bundle.js"
},
devServer:{
contentBase:"./public",
historyApiFallback:true,
inline:true
},
module:{
loaders:[
{
test:/\.json$/,
loader:"json-loader"
},
{
test:/\.js$/,
exclude:/node_modules/,
loader:'babel-loader'
},
{
test:/\.css$/,
loader:'style-loader!css-loader?modules'
}
]
},
plugins:[
new webpack.BannerPlugin("copyright suyan"),
new HtmlWebpackPlugin({
template:__dirname + "/app/index.tmpl.html",
title:'htmlwebpackplugin title test'
})
]
}
说明
template:表示模板
title:生成的html文档的标题,配置该项,它并不会替换指定模板文件中的title元素的内容,html模板文件中使用模板引擎语法
来获取该配置项值才可以
61.创建模板文件index.tmpl.html,模板内容如下
<!DOCTYPE html>
<html>
<head>
<meta charset="utf-8">
<meta http-equiv="X-UA-Compatible" content="IE=edge">
<title><%= htmlWebpackPlugin.options.title %></title>
<link rel="stylesheet" href="">
</head>
<body>
<div id="root"></div>
</body>
</html>
62.在命令行程序中使用webpack命令进行打包
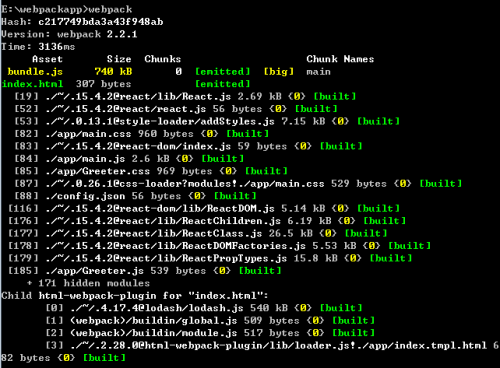
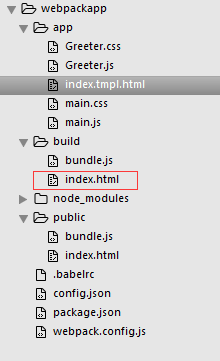
63.查看build目录下的目录结构,会生成一个叫index.html的文件,项目目录结构如下,index.html文件内容如下:
<!DOCTYPE html>
<html>
<head>
<meta charset="utf-8">
<meta http-equiv="X-UA-Compatible" content="IE=edge">
<title>htmlwebpackplugin title test</title>
<link rel="stylesheet" href="">
</head>
<body>
<div id="root"></div>
<script type="text/javascript" src="bundle.js"></script></body>
</html>
说明
index.html文件就是通过我们的模板文件index.tmpl.html生成的,在我们的webpack.config.js文件中,我们使用了HtmlWebpa
ckPlugin插件,在插件配置项中我们配置了title:'htmlwebpackplugin title test',再看我们生成的index.html文件的<titl
e>这个标签中的内容正是我们在webpack.config.js中配置的内容.在模板文件中我们使用了<%=htmlWebpackPlugin.options.t
itle %>来获取配置文件中的title值.

相关文章推荐
- webpack 入门教程
- webpack入门教程之Hello webpack(一)
- Webpack 入门教程7
- Webpack入门教程十
- Webpack入门教程六
- webpack 教科书式入门教程
- Webpack 入门教程1
- Webpack 入门教程一
- Webpack 入门教程4
- Webpack 入门教程5
- Webpack入门教程九
- Webpack简易入门教程
- webpack傻瓜入门教程
- Webpack入门教程
- webpack 入门教程
- webpack+vue.js快速入门教程
- webpack+sass+vue 入门教程(三)
- webpack入门教程
- Webpack入门教程七
- Webpack入门教程五