orton效果_如何使图片发光:Orton效果
orton效果
Have you ever seen an impossibly dream-like landscape photo? One with a slow burning, glowing sunset. That’s really the best way to describe it, the image looks as if it’s glowing. You might be thinking, “wow, I wish I was that good and could take a picture like that.” Sure, great photographers are capable of creating fantastic compositions and take advantage of great light, but a lot of the magic occurs in the post processing. Post processing is really where a photographer will accentuate and achieve that glowing look.
您是否看过一张梦幻般的梦幻风景照? 一个缓慢燃烧,发光的日落。 这实际上是描述它的最佳方法,图像看起来好像在发光。 您可能会想,“哇,我希望我这么好,可以照这样的照片。” 当然,出色的摄影师能够创造出奇妙的构图,并能充分利用出色的光线,但是很多神奇之处都在于后期处理中。 后期处理实际上是摄影师强调并获得发光效果的地方。
This glow added to a photo is known as the Orton Effect. Technically, the Orton Effect is combining two different images of an identical scene to create one final image. That’s really the basic concept behind this glowing effect, we will use two different images to create our final product. Now, before we go any further I want to mention a slight disclaimer. Please don’t add this effect to all of your photos, it will look silly. In my opinion, the orton effect creates a soft, dreamlike image. I love to use it with soft glowing sunsets and waterfalls. When used with waterfalls I think it produces an image that looks like it is straight out of a fairytale. To explain this technique I’m going to walk through an example of how I post processed this image of Aysgarth Falls that I captured last summer. Below is the unedited image.
添加到照片上的这种光晕被称为Orton效果。 从技术上讲,Orton效果是将同一场景的两个不同图像组合在一起以创建一个最终图像。 这实际上是这种发光效果的基本概念,我们将使用两个不同的图像来创建最终产品。 现在,在我们进行进一步讨论之前,我想提一下免责声明。 请不要将此效果添加到所有照片中,它看起来会很愚蠢。 在我看来,orton效果可以营造出柔和,梦幻般的图像。 我喜欢将其与柔和的日落和瀑布搭配使用。 当与瀑布一起使用时,我认为它会产生看起来像是童话般的图像。 为了解释这种技术,我将通过一个例子来说明如何对去年夏天捕获的Aysgarth Falls的这张图像进行后期处理。 下面是未编辑的图像。
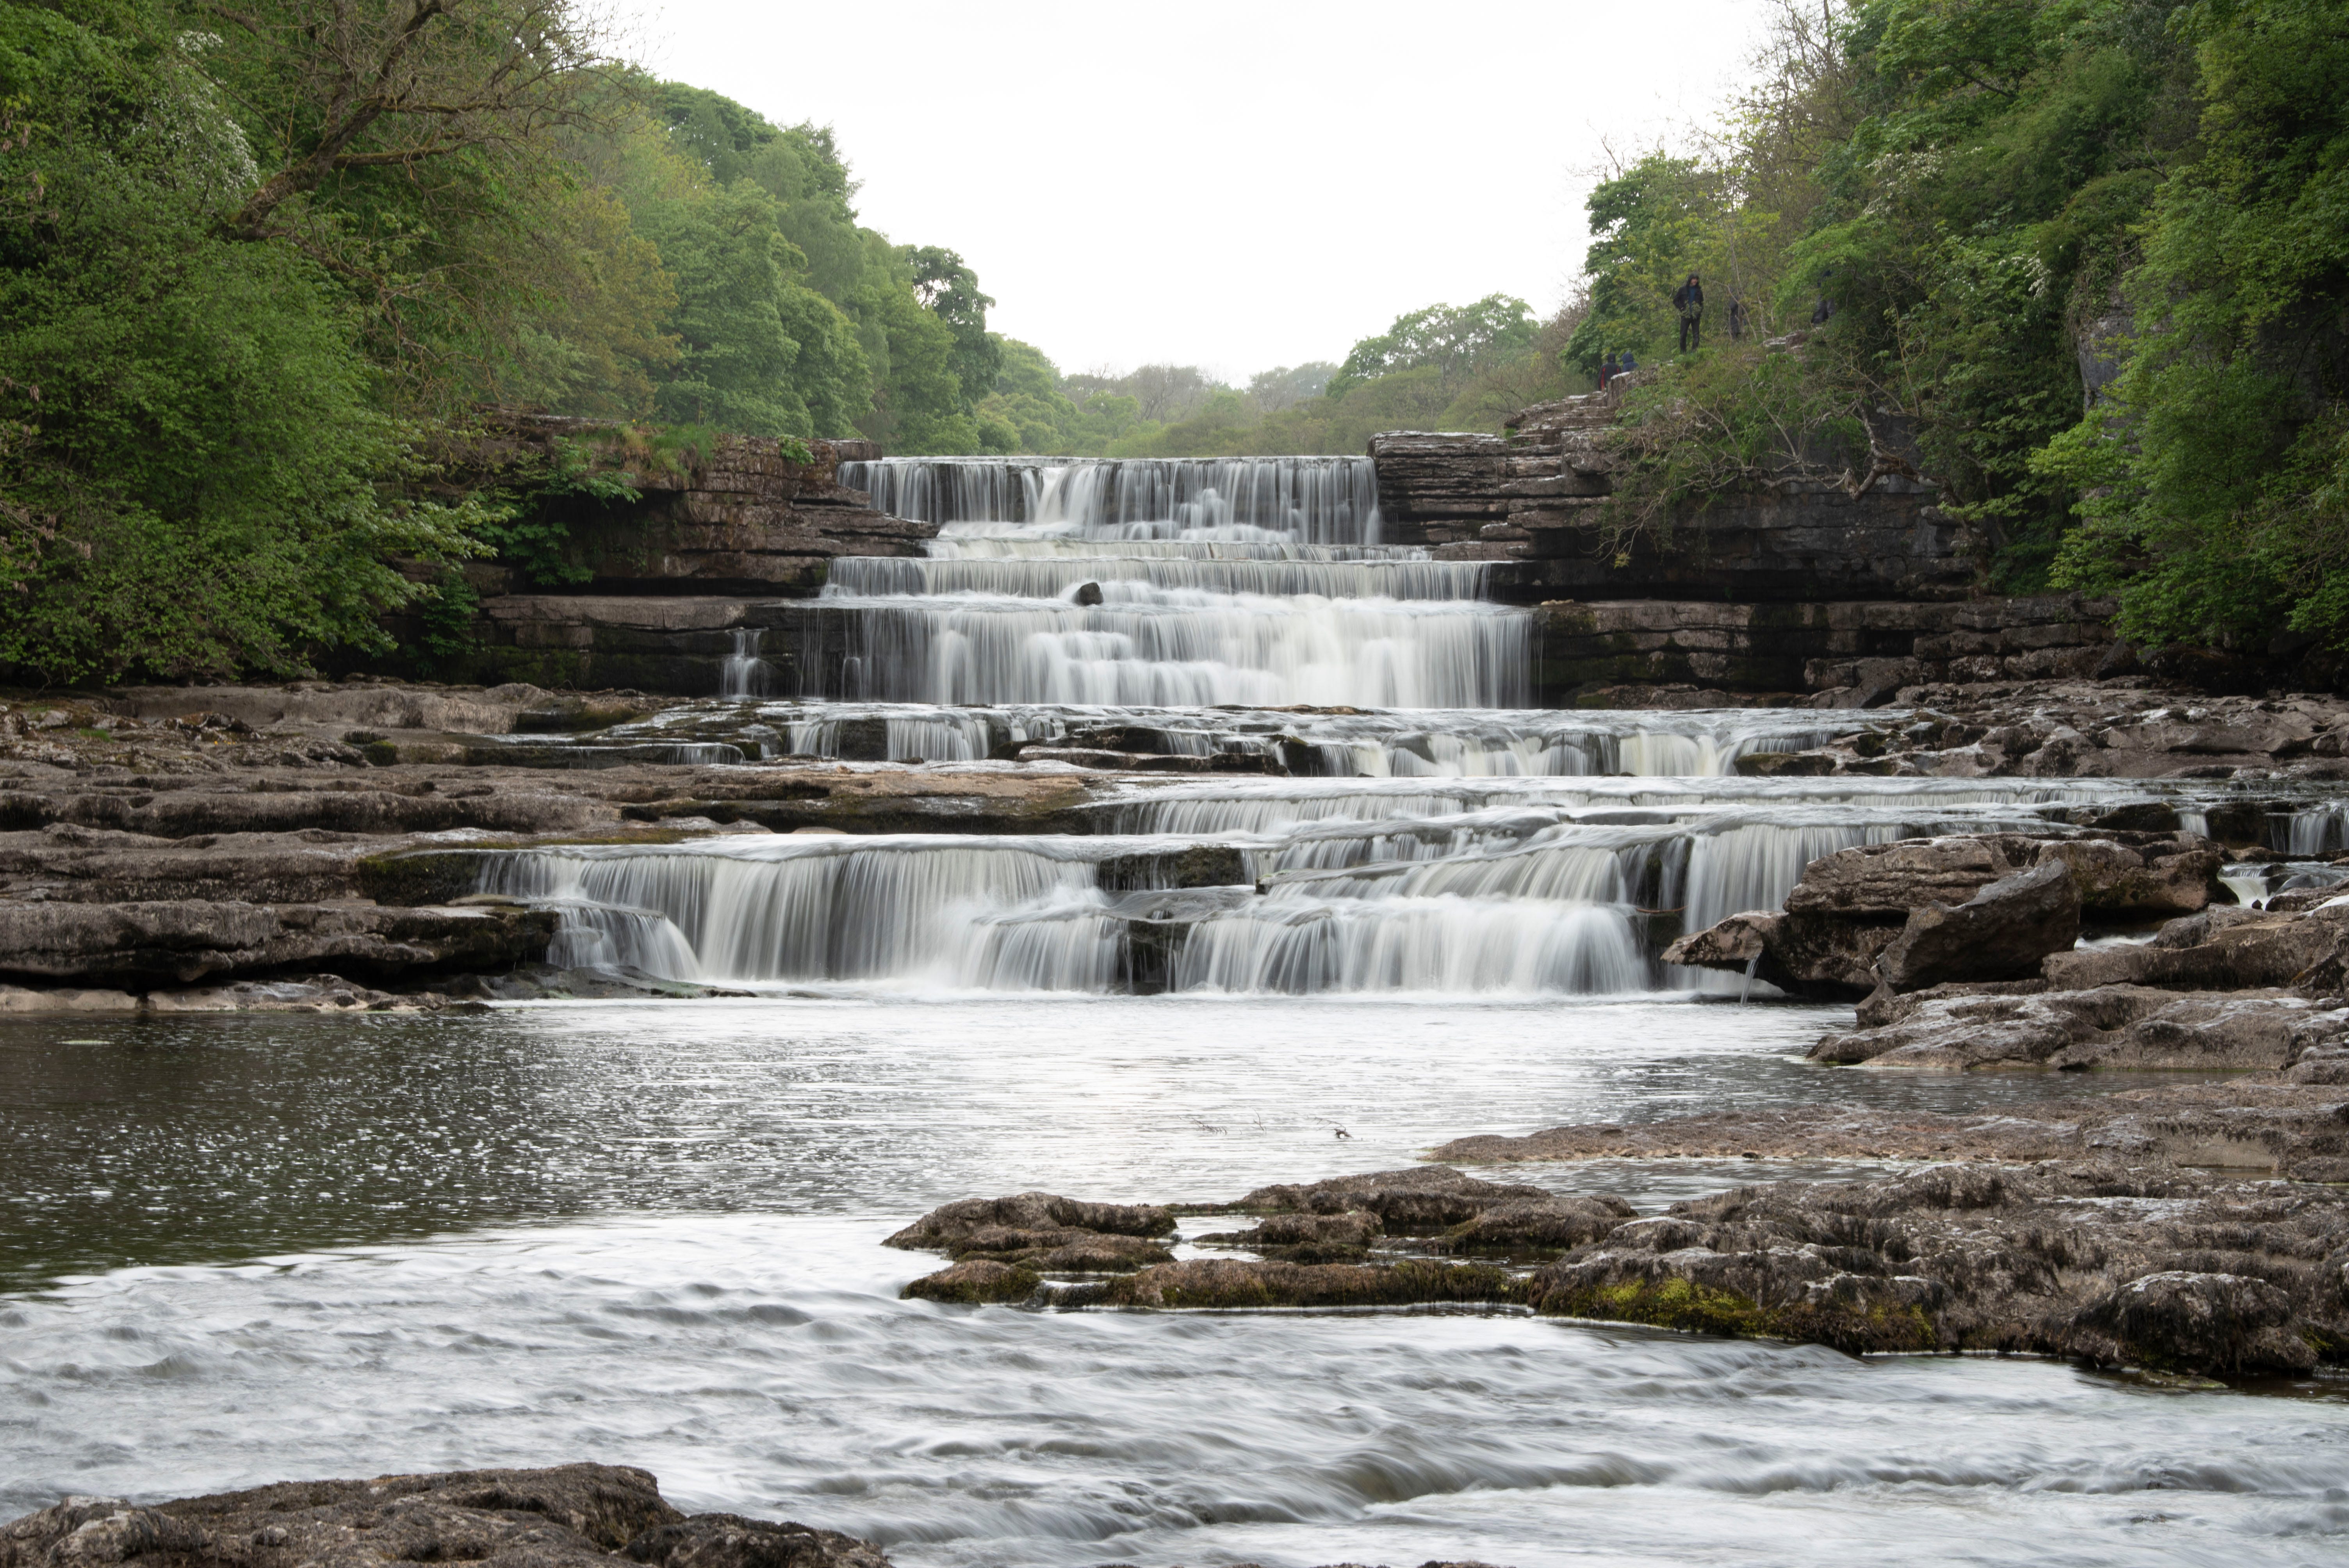 Unedited Aysgarth Falls 未经编辑的艾斯加斯瀑布
 It’s a beautiful waterfall, and I love the way that the long lens here compressed all of the smaller waterfalls in the foreground. Going into this edit I knew there were a few things I wanted to see. First, I wanted to get rid of those people standing at the top right of the waterfall. Second, this was a gloomy, english day, I needed to add some pop of color to the image. Last and most importantly, I wanted to add an orton effect and create that dreamlike look. Below is the finished image. Follow along until the end to learn how to create this look.
这是一个美丽的瀑布,我喜欢这里的长镜头压缩前景中所有较小的瀑布的方式。 进行编辑时,我知道我想看几件事。 首先,我想摆脱站在瀑布右上方的那些人。 其次,这是一个阴沉的英国日子,我需要为图像添加一些色彩。 最后也是最重要的一点是,我想添加一个Orton效果并创造出梦幻般的外观。 下面是完成的图像。 一直进行到最后,以了解如何创建此外观。
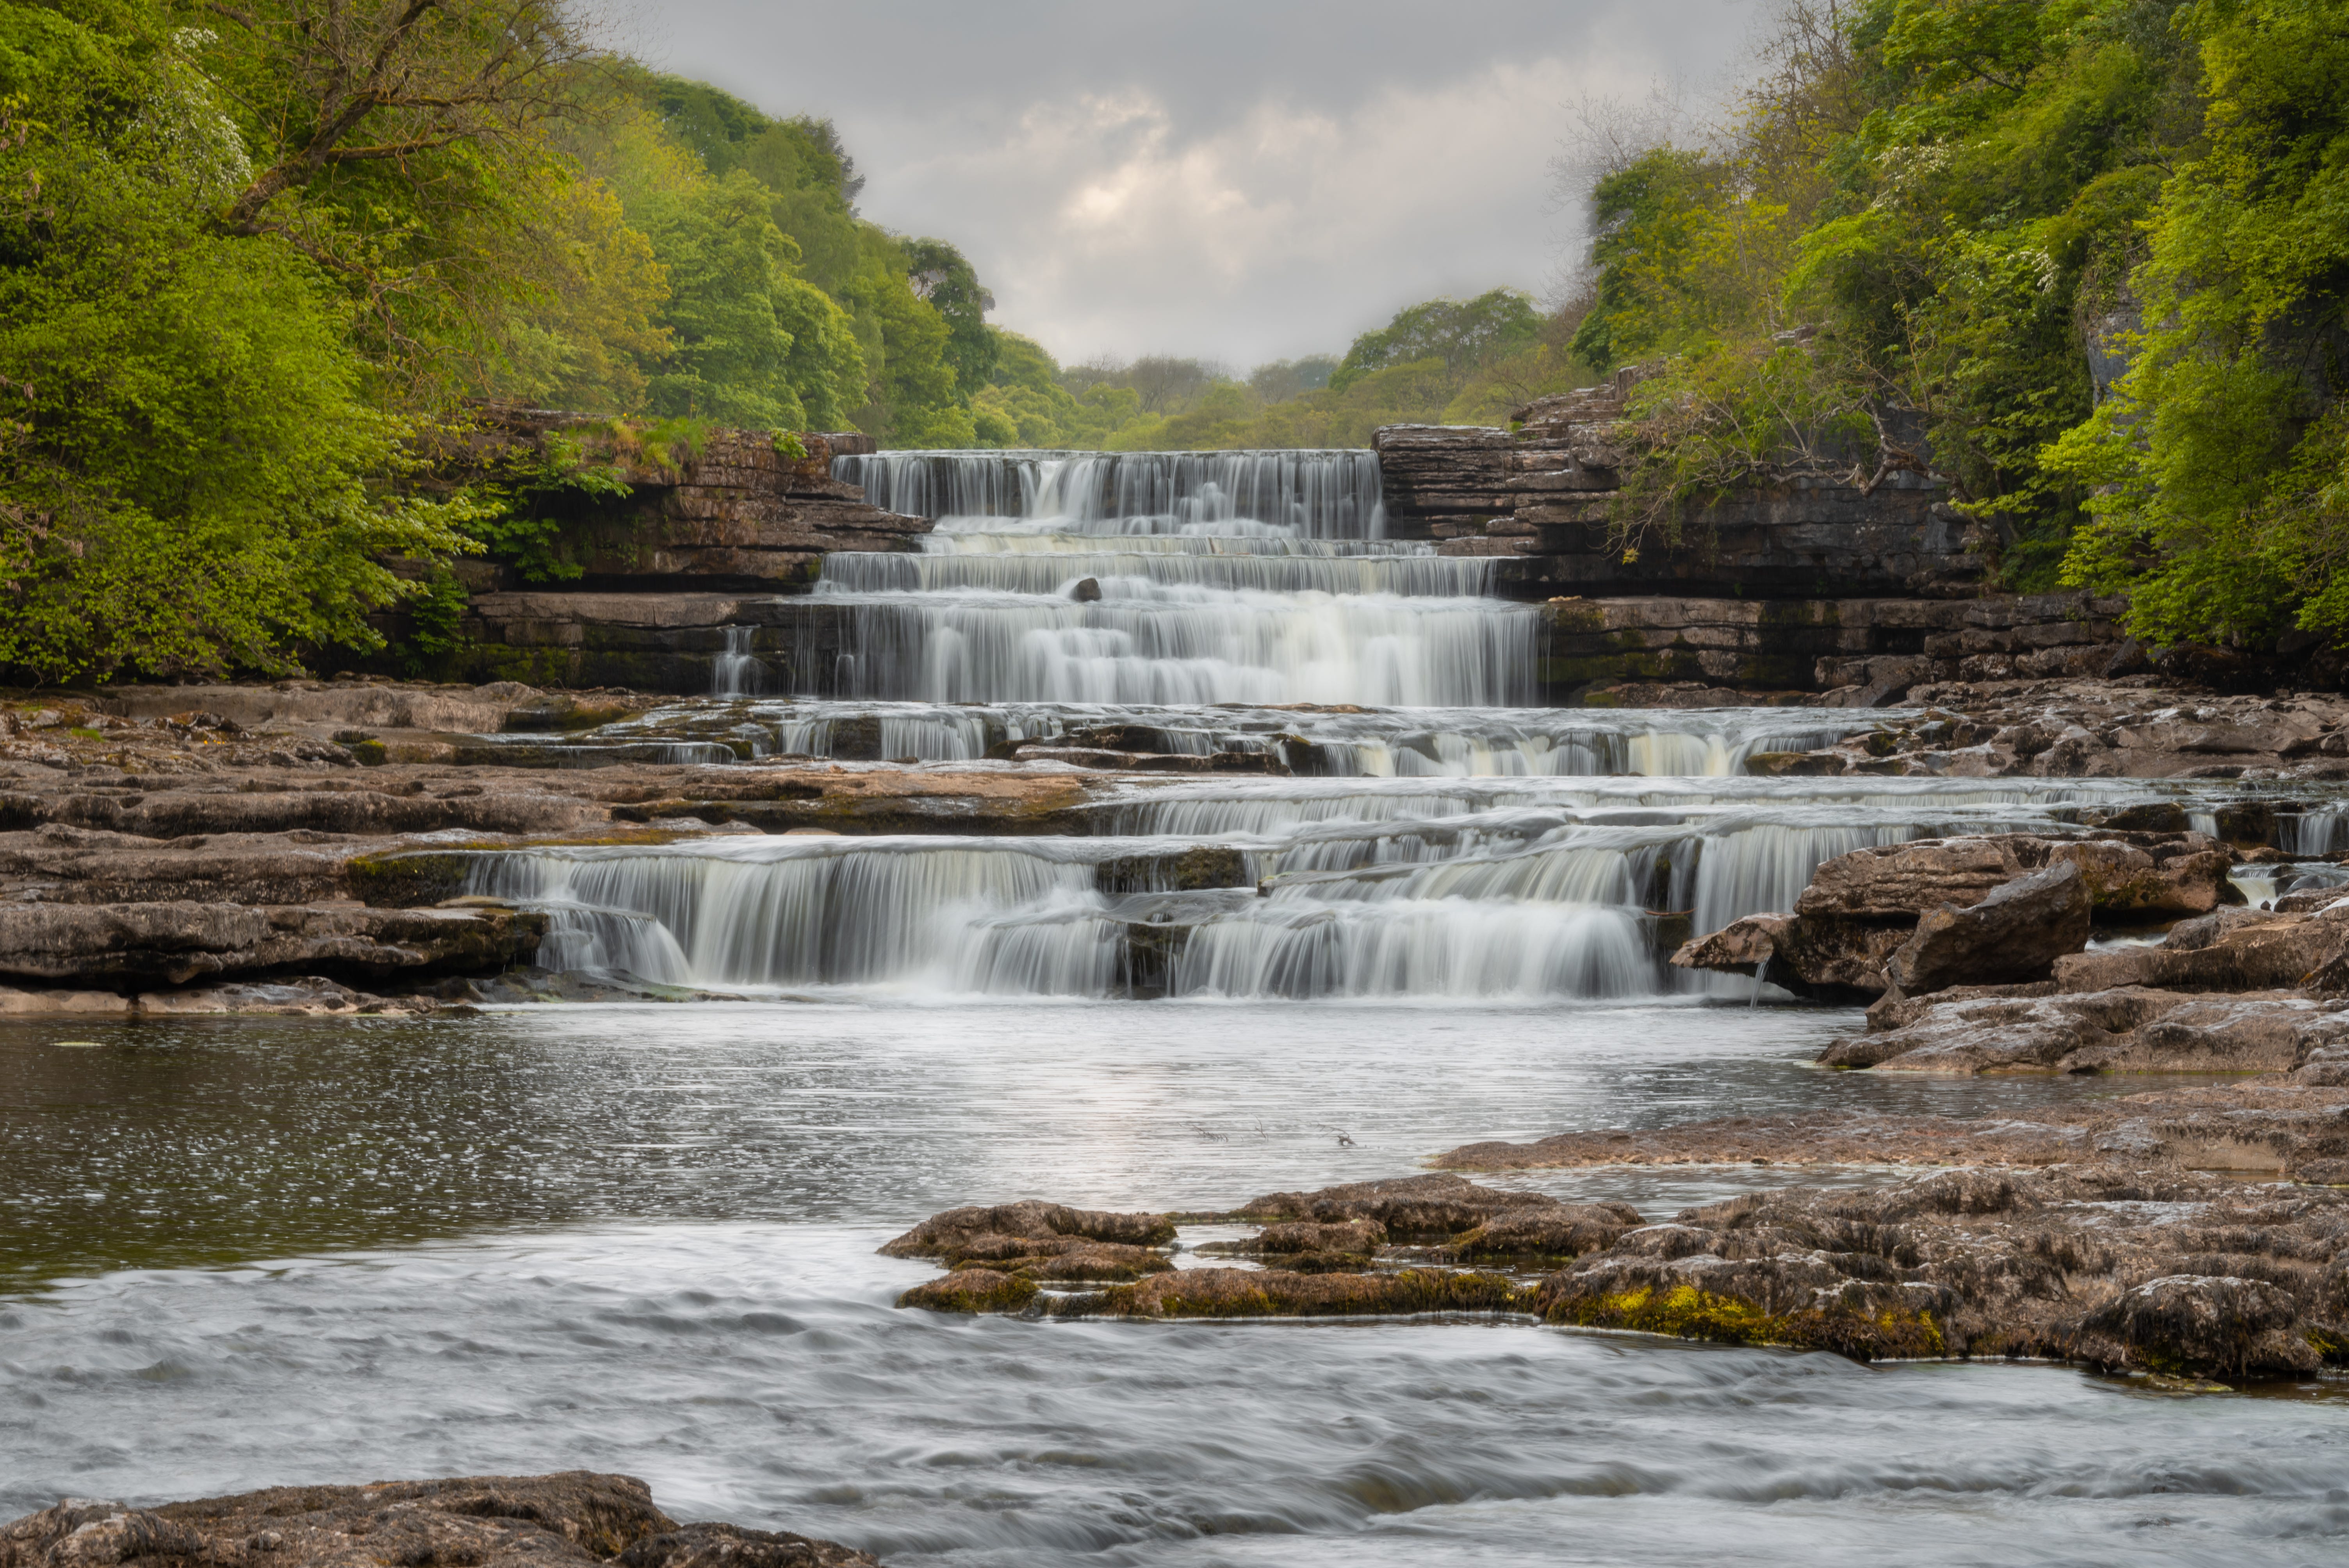 Aysgarth Falls Final Edit 艾斯加斯瀑布最终编辑
 The first thing to do is import the original RAW file into Lightroom. Here I’ll make a few color adjustments, correct my exposure, and recover some shadow and highlight information. Then it’s time to move the file into Photoshop. To do this, right click on the image →edit in →Adobe Photoshop 2020 (I have entire blog post about why this is so important, go check it out). As you can see in the image below, my exposure is in a good place, and the colors are starting to look better.
首先要做的是将原始RAW文件导入Lightroom。 在这里,我将进行一些颜色调整,更正曝光并恢复一些阴影和高光信息。 然后是时候将文件移到Photoshop中了。 为此,请右键单击该图像→在→Adobe Photoshop 2020中进行编辑(我有整个博客文章介绍了为什么这样做如此重要,请检查一下)。 如下图所示,我的曝光处于良好的位置,并且颜色开始看起来更好。
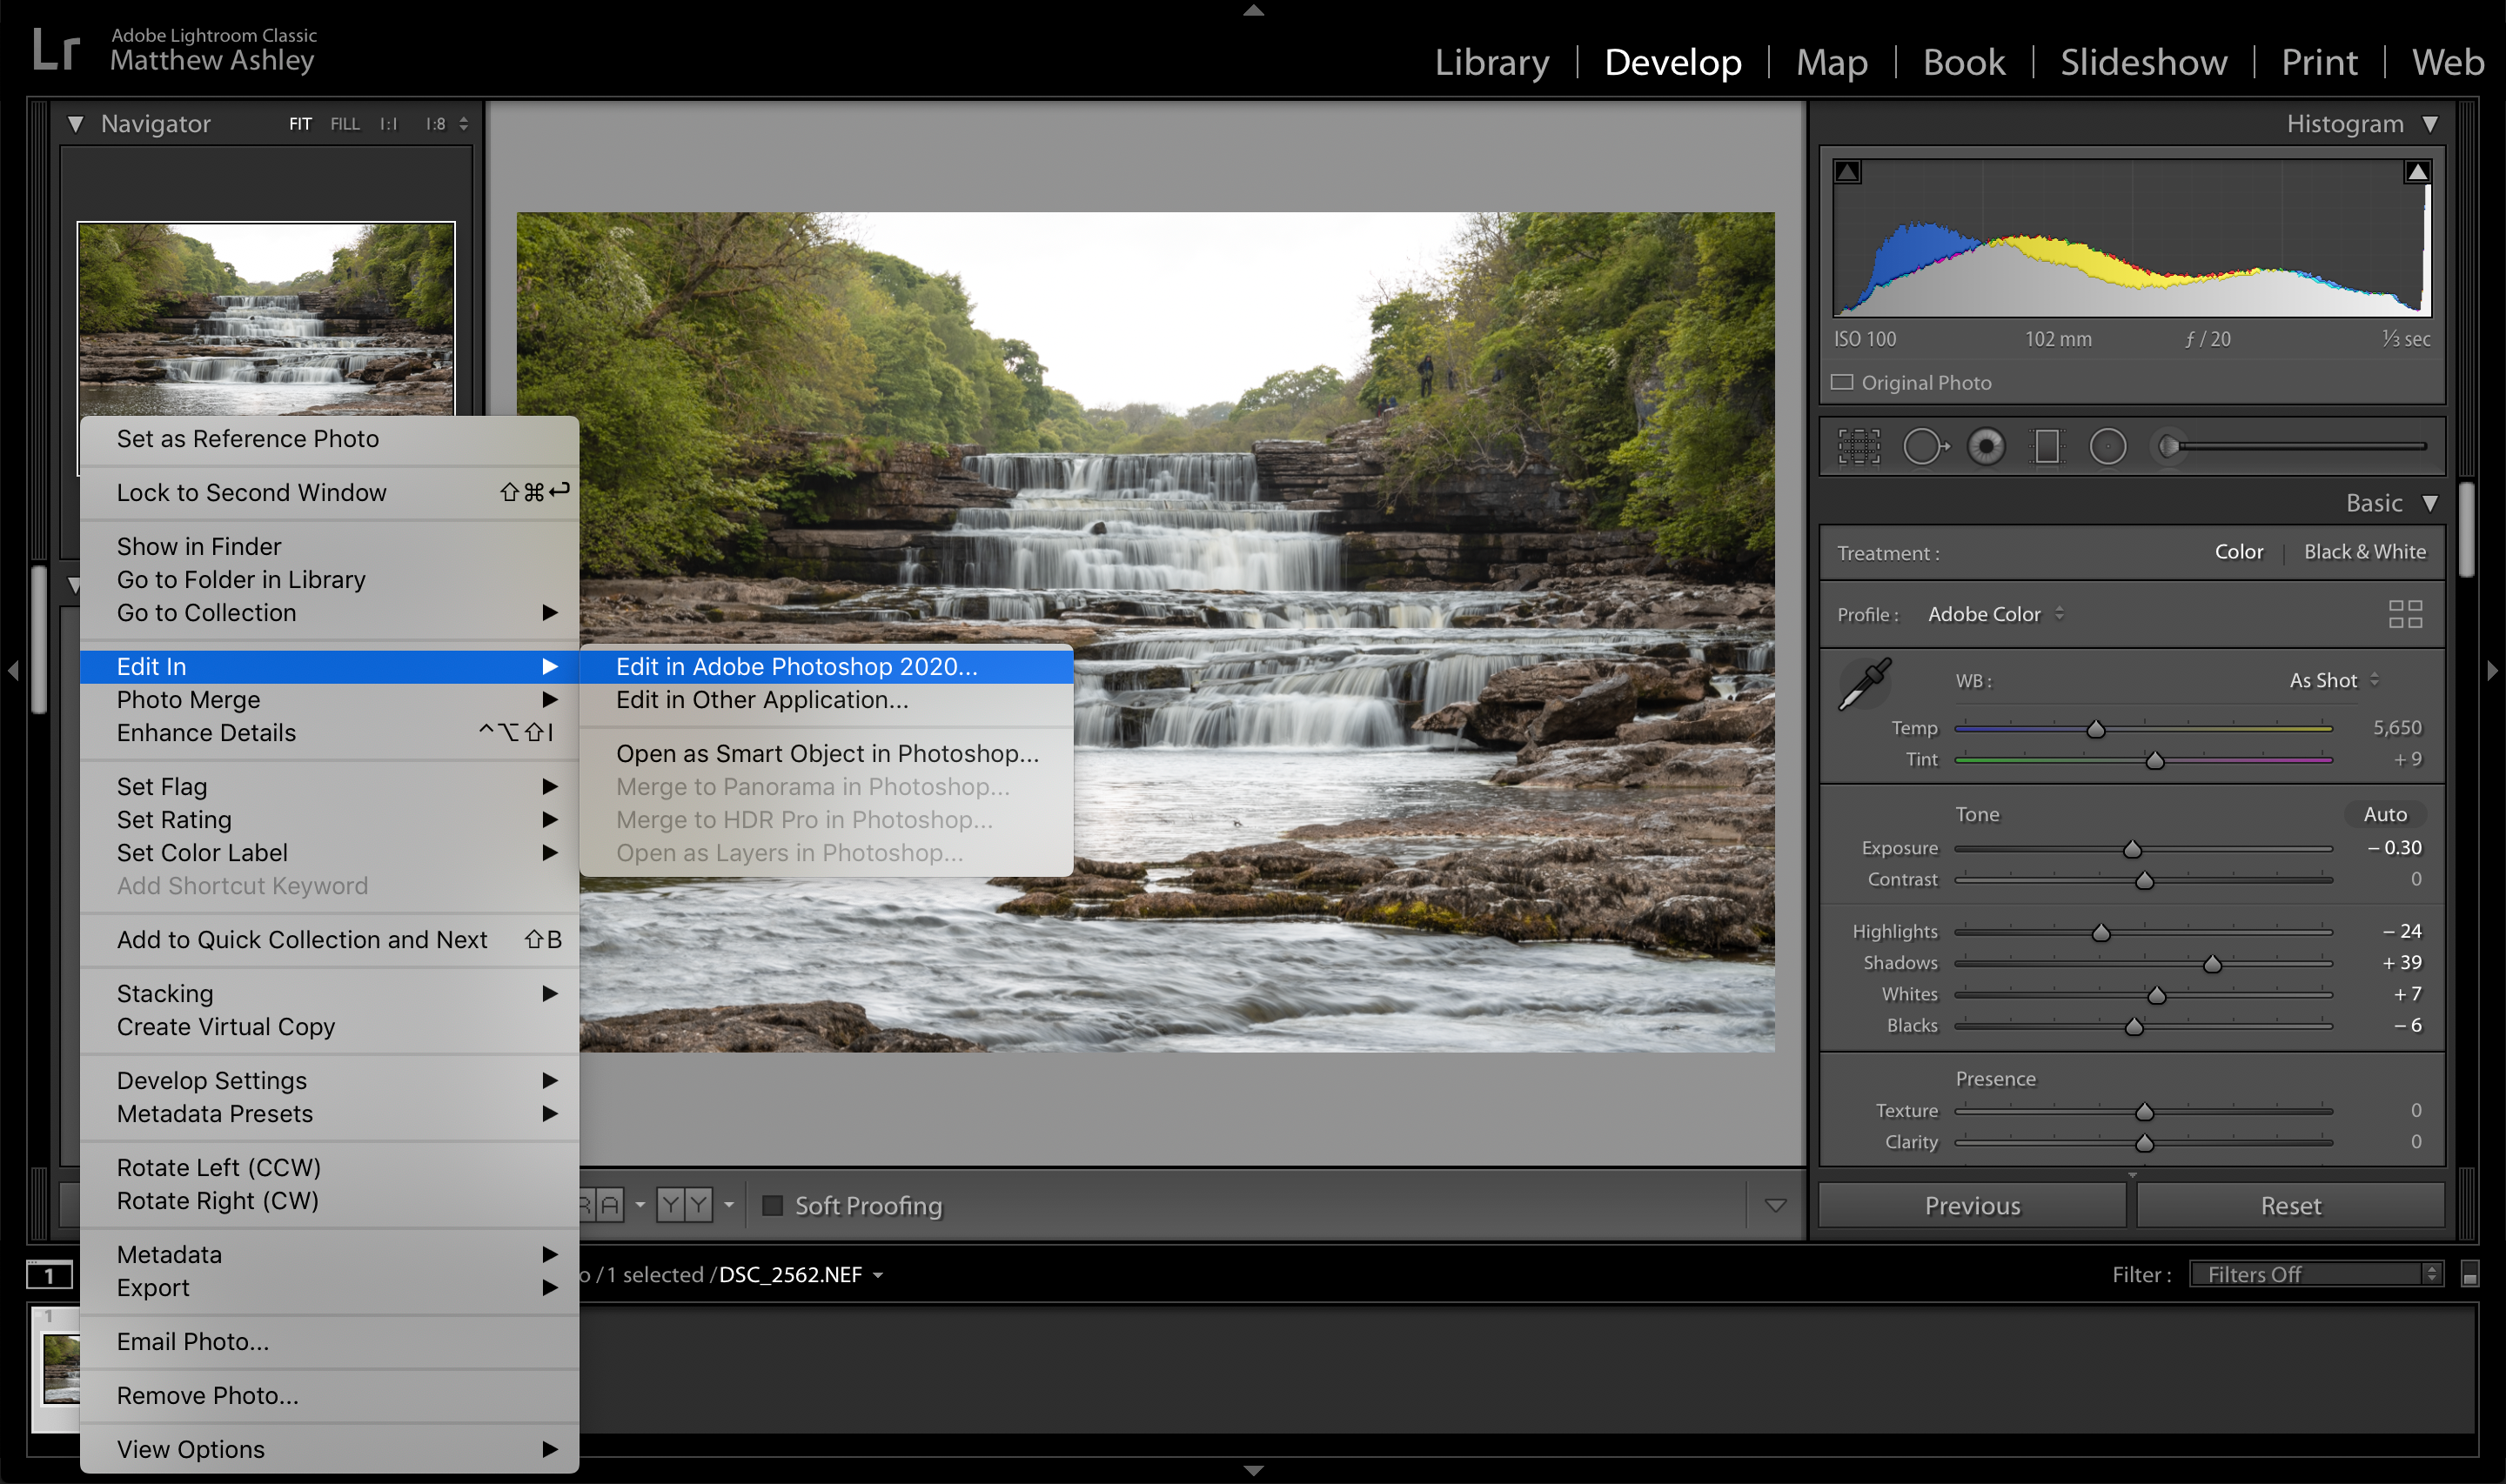 Transfer image from Lightroom to Photoshop 将图像从Lightroom传输到Photoshop
 Now, make any necessary adjustments in Photoshop. For this image, I’m going to further recover the sky, remove the people, and add some color pop. Giving us something like this.
现在,在Photoshop中进行任何必要的调整。 对于此图像,我将进一步恢复天空,移走人员,并添加一些流行色。 给我们这样的东西。
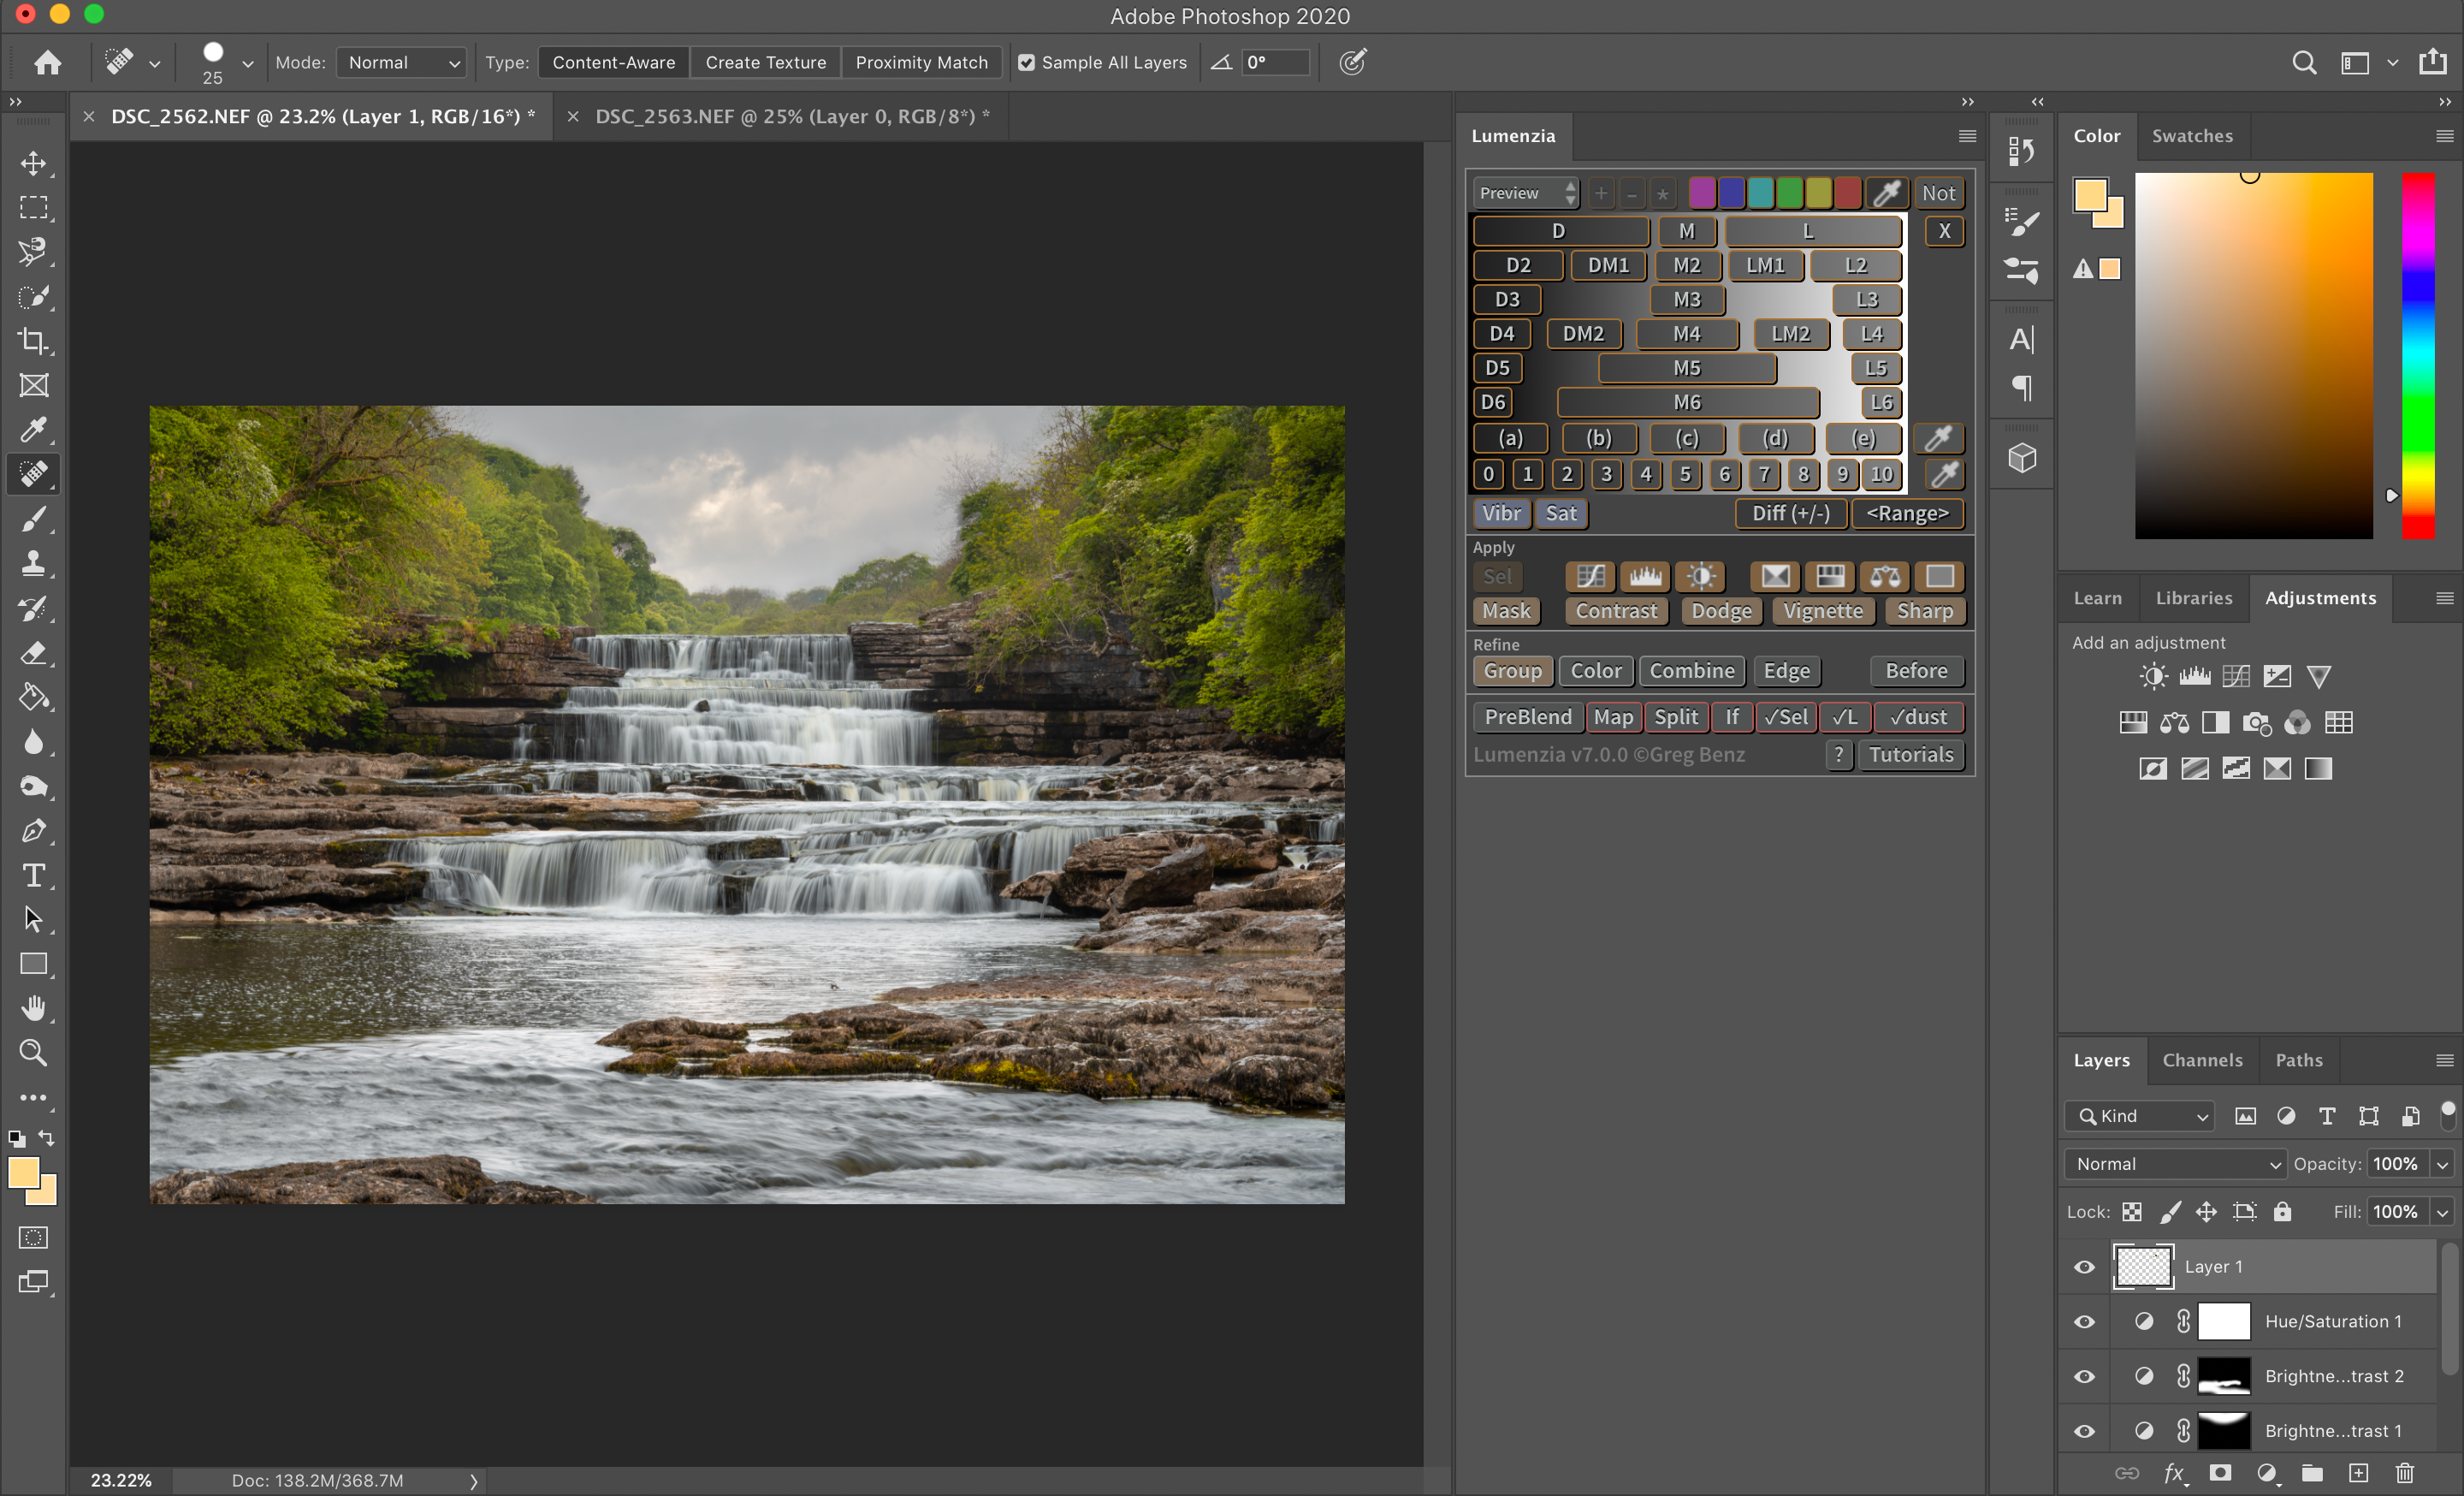 Initial Photoshop Adjustments Photoshop的初始调整
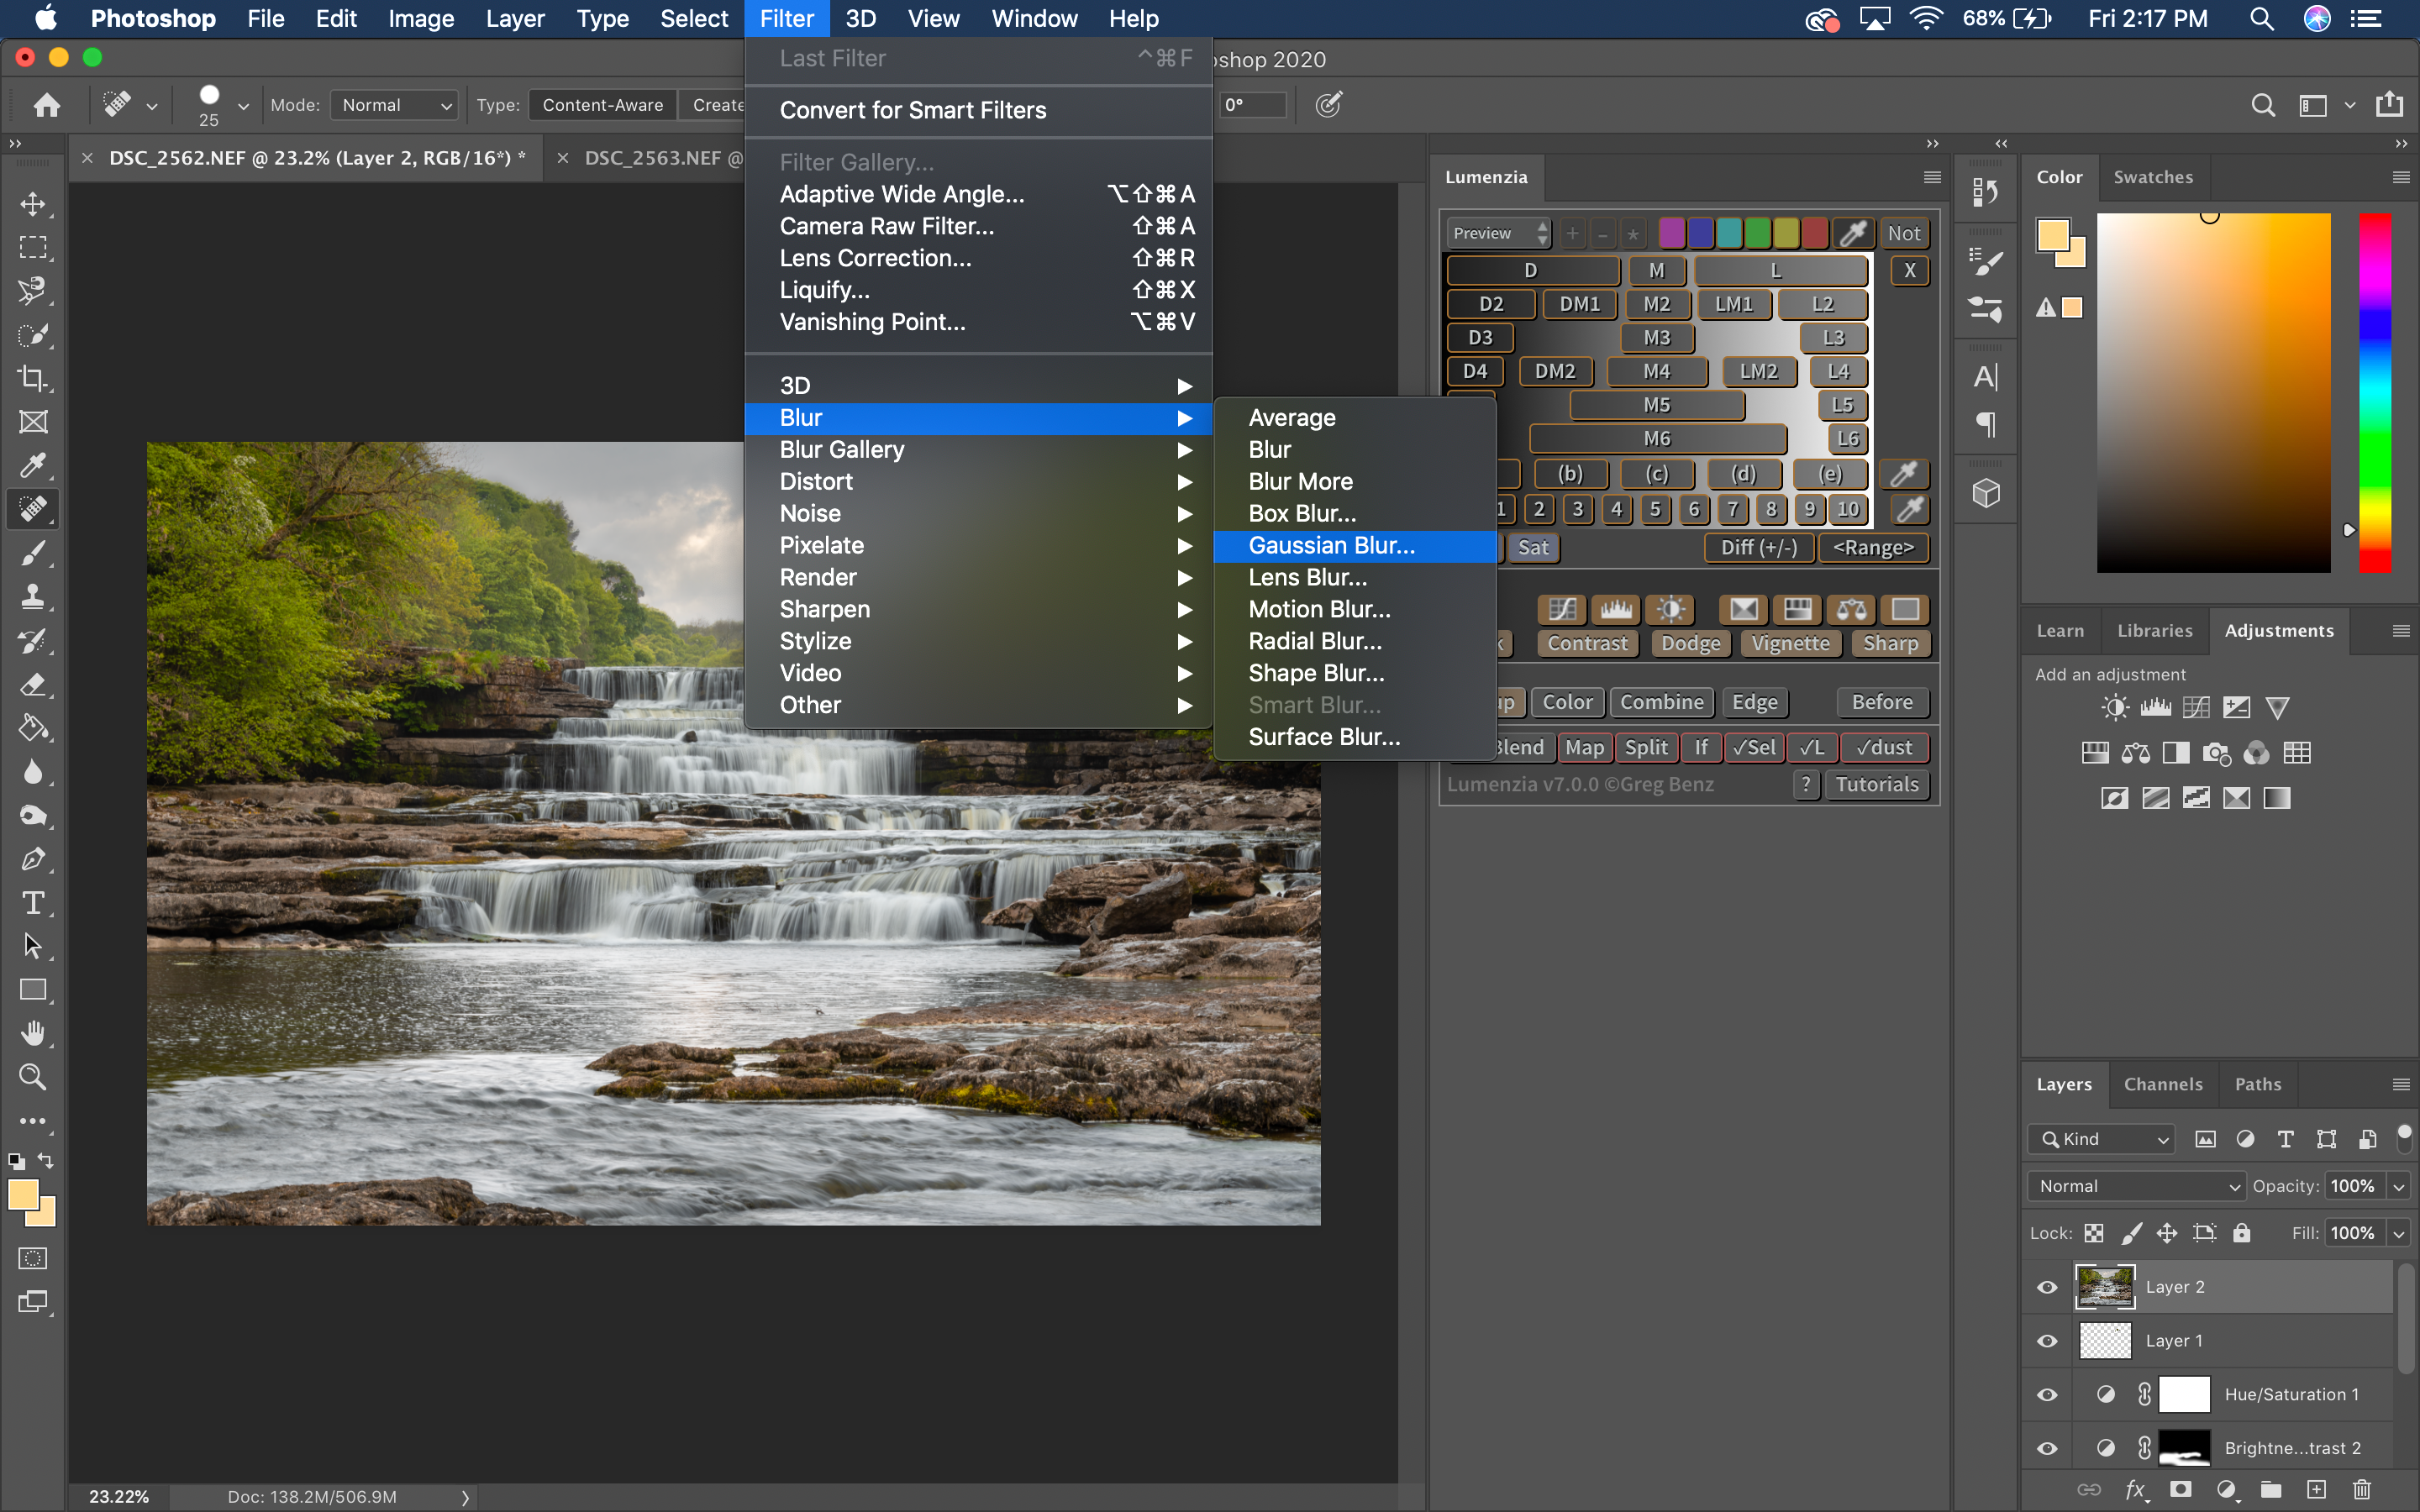
 We have now made our Lightroom adjustments and our basic Photoshop adjustments, and it is now the moment we have all been waiting for, the Orton Effect. The first step is to make sure that you are selected on your top layer. We are going to create a merged visible layer above that layer (this will be our new top layer). To do this on a Mac, hold down [Command+Option+Shift+E]. The next step is to add a Gaussian Blur to that merged visible layer. To do this make sure you are selected on the merged visible layer. Head up to the top and select Filter →Blur →Gaussian Blur. Set the blur somewhere around 30.
现在,我们已经进行了Lightroom调整和基本的Photoshop调整,现在正是我们一直在等待的Orton效果。 第一步是确保您在顶层被选中。 我们将在该层之上创建一个合并的可见层(这将是我们的新顶层)。 要在Mac上执行此操作,请按住[Command + Option + Shift + E]。 下一步是向合并的可见图层添加高斯模糊。 为此,请确保已在合并的可见图层上选择了您。 转到顶部,然后选择滤镜→模糊→高斯模糊。 将模糊设置在30左右。
 Adding blur to Merged Visible Layer 向合并的可见层添加模糊
 This will make your picture look like an out of focus mess. Not to worry, we aren’t finished yet. To create this dream like look, we only want the blur to be showing in the brighter areas of the image. There are two ways we can do this. The first is the most basic, but won’t result in the best outcome in my opinion. Create a layer mask for the blurred layer, and use Command+I to invert the layer mask. Then use a white paintbrush to paint in the blurred layer to the brighter areas of the photo. The second way, which is the method I use, is using a software called Lumenzia. This software will allow you to create precise layer masks with gradients based on the brightness of the photo. These are called Luminosity masks. This will basically apply the blurred layer to the brightest areas for you.
这将使您的图片看起来像是聚焦混乱。 不用担心,我们还没有完成。 为了创造出这种梦幻般的外观,我们只希望将模糊显示在图像的较亮区域。 我们有两种方法可以做到这一点。 首先是最基本的,但我认为不会带来最佳结果。 为模糊的图层创建图层蒙版,然后使用Command + I反转图层蒙版。 然后使用白色画笔在模糊的图层上绘制到照片的较亮区域。 第二种方法,即我使用的方法,是使用称为Lumenzia的软件。 该软件将允许您根据照片的亮度创建带有渐变的精确图层蒙版。 这些被称为光度蒙版。 基本上,这会将模糊的图层应用于您最明亮的区域。
 Layer Mask application using Lumenzia 使用Lumenzia的图层蒙版应用程序
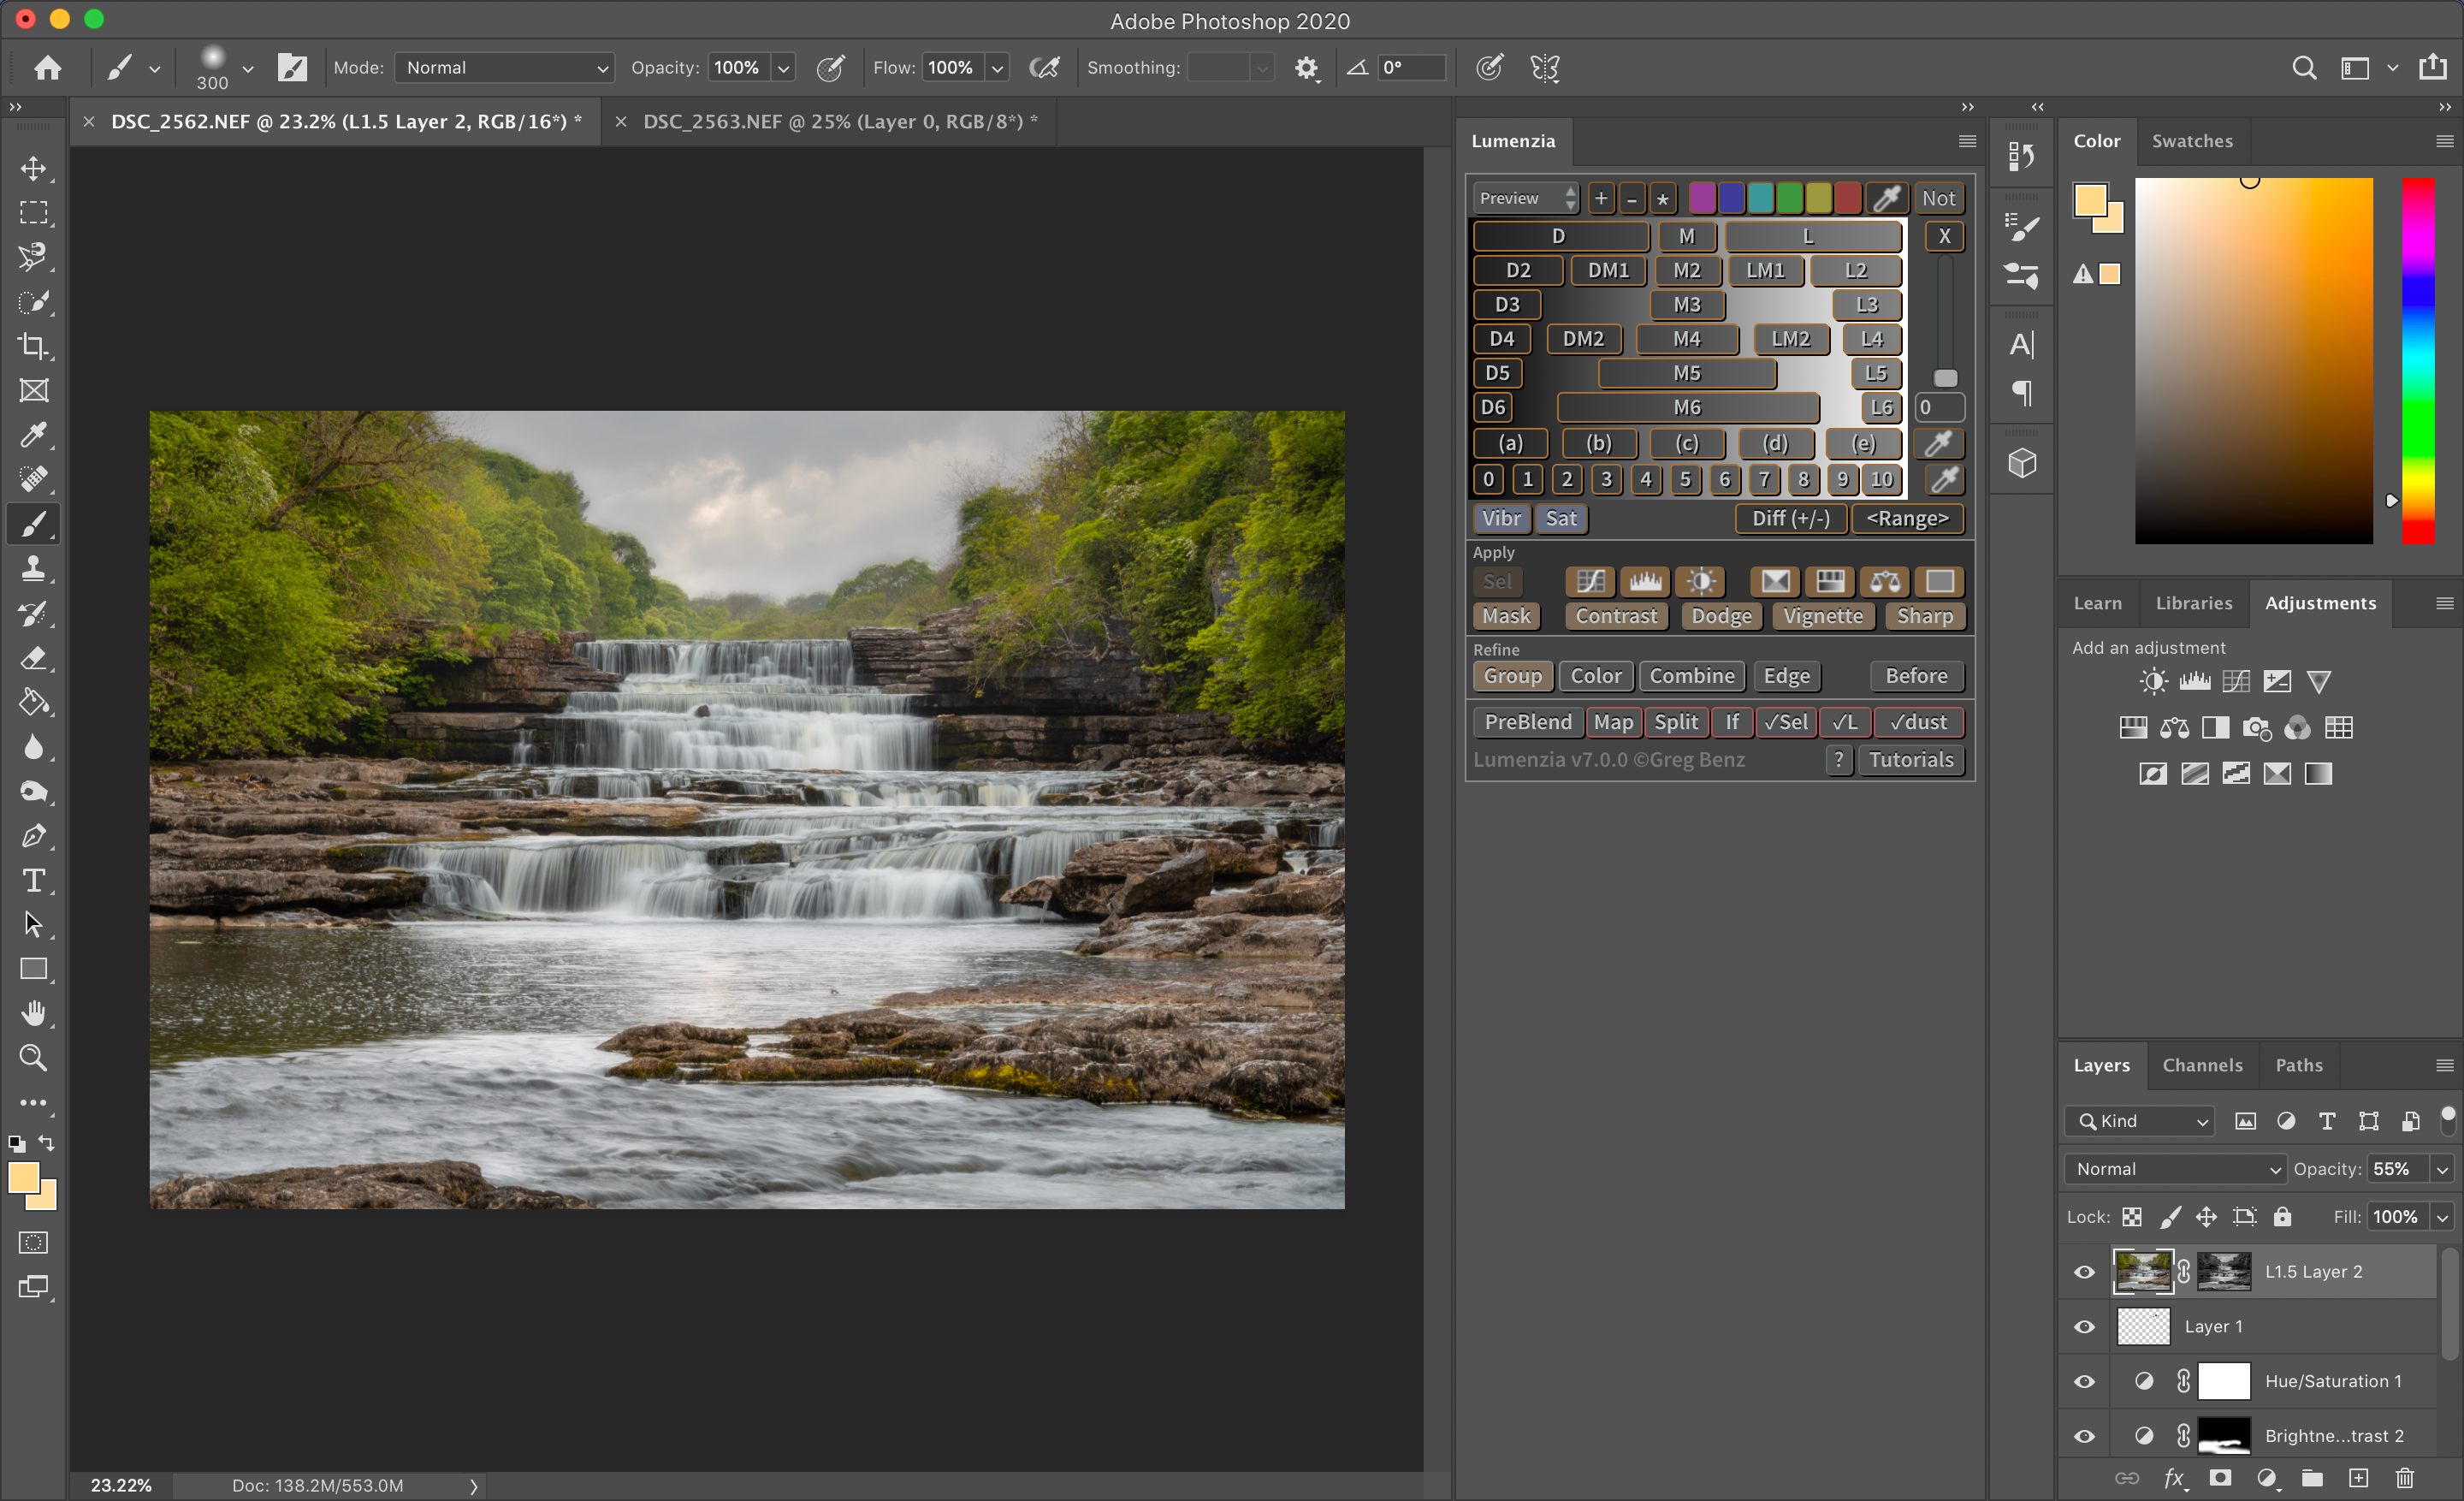
 Once the blurred layer has been masked into the bright areas of the image, you are nearly finished. Chances are the orton effect is looking slightly heavy handed at the moment. I suggest bringing down the layer opacity to around 40%. This will make the image look more professional, and the orton effect less obvious. The final product is a dreamlike landscape, brought to you by the orton effect.
一旦模糊层被蒙版到图像的明亮区域,就快完成了。 此刻,Orton效果可能看起来有些沉重。 我建议将层的不透明度降低到40%左右。 这将使图像看起来更专业,并且orton效果不太明显。 最终的产品是梦幻般的风景,由奥顿效应带给您。
I hope this was helpful in explaining how to create and edit with the orton effect. If you have any questions or comments be sure to reach out, and I will get back to you right away. As always, if you like this technique and use it in your photos, be sure to tag me on Instagram @mashley.media. Also, be on the lookout for my new YouTube Channel. I’m currently in the process of putting together some tutorials and I’m excited to share them with you in video format. Talk to you all on Tuesday!
我希望这有助于解释如何使用orton效果进行创建和编辑。 如果您有任何疑问或意见,请务必与我们联系。我们会尽快与您联系。 与往常一样,如果您喜欢此技术并将其用于照片中,请确保在Instagram @ mashley.media上为我添加标签。 另外,请注意我的新YouTube频道。 我目前正在整理一些教程,很高兴以视频格式与您分享这些教程。 星期二与大家交谈!
翻译自: https://uxdesign.cc/how-to-make-your-pictures-glow-the-orton-effect-d92a28a6ac70
orton效果

- android 如何重写imageview 让图片有圆角效果
- 教你用ps如何将图片、文字做出模糊斑驳的作旧效果
- css如何实现文字环绕图片,--遇到问题及取消文字环绕效果
- 如何让图片点击有水波纹效果?
- Word2010如何设置图片的阴影效果教程
- 如何制造滑动图片公告的效果
- 如何将png图片转换成.9.png格式,textview实现跑马灯效果
- 如何让一个2D图片实现一个模糊效果
- PageAdmin如何实现导航栏滚动图片效果。
- 如何让背景图片实现拉伸效果,且无任何偏移(记录下,以后会用到)
- 如何利用matrix实现图片倒影效果
- 如何使用Java代码给图片增加倒影效果
- 如何实现UltraGrid中的图片按钮效果
- PhotoShop中如何把一张白色背景的图片设为透明效果
- .net中如何生成Flash式的图片切换效果
- 如何实现图片缩放效果?
- 如何使用Java代码给图片增加倒影效果
- 教你如何利用灰度图透明效果制作隐藏图片.Part2
- 如何实现幻灯片效果/图片轮播
- C#如何消除验证码图片的锯齿效果