利用laravel框架实现简单的CMS——过程记录2
按照视频和老师讲解,实现一个简易的CMS。
软件:PHPStorm、Laragon、Google Chrome
—😄-------------😛 -------------😃-------------😄-------------😛 -------------😃-------------😛 -------------😃—
前文链接:
#点此处查看过程记录1的内容#
目录
- 3.2 category列表实现
- 3.2.1 在控制器的index()方法中找到我们填写的categories名称
- 3.2.2 更改index.blade.php中的内容,将category的名称通过表单显示
3.2 category列表实现
3.2.1 在控制器的index()方法中找到我们填写的categories名称

3.2.2 更改index.blade.php中的内容,将category的名称通过表单显示

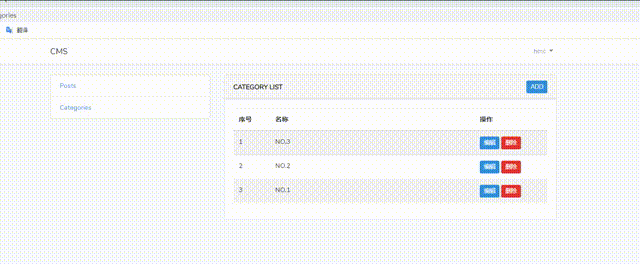
效果展示:

3.3 编辑按钮实现
3.3.1 优化表单请求
- 在终端执行artisan命令创建储存表单的php文件
php artisan make:request Category/StoreCategory
将得到StoreCategory.php文件

2. 去掉StoreCategory类中的authorize方法或直接返回true

3. 并将验证规则和自定义消息分别添加到rules和messages两个方法中

4.删除控制器中,对表单的检查代码


3.3.2 实现编辑效果
- 修改编辑的控制器

- 更改create界面的代码,让创建和更新复用

- 创建updateCategory表单请求,编写更新规则

UpdateCategory.php中的内容:
<?php

namespace App\Http\Requests\Category;

use Illuminate\Foundation\Http\FormRequest;

class UpdateCategory extends FormRequest
{
/**
* Determine if the user is authorized to make this request.
*
* @return bool
*/
public function authorize()
{
return true;
}

/**
* Get the validation rules that apply to the request.
*
* @return array
*/
public function rules()
{
return [
//
'name' => 'required|min:3|max:20|unique:categories'
];
}
public function messages()
{
return [
'required' => ':attribute 必填',
'name.min' => '分类名称不能少于3个字符',
'name.max' => '分类名称不能超过:max字符长度',
'unique' => "分类名称<strong>:input</strong>已存在 "
];
}
}
- 更改控制器中的内容

3.3.3 效果展示

3.4 删除按钮实现
3.4.1 编写JavaScript代码
- 在总布局的末尾添加一个yield占位符

- 为button添加onclick()方法引用js函数

- 编写js函数
在这里插入代码片
写在index.blade.php最后
@section('script')
<script>
function deleteCategory(url,name) {
console.log('url',url);
var formEl = document.getElementById('deleteCategoryForm');
var nameEl = document.getElementById('categoryName');
formEl.action = url;
nameEl.innerText = name;
$('#deleteCategoryDlg').modal('show');
}
</script>
@endsection
- 更改控制器中的代码

3.4.2 添加删除提示弹出框

3.4.3效果展示

4 文章(Post)相关部分
4.1 为posts创建路由、控制器、模型
4.1.1 创建post模型和迁徙表,并定义表的结构
由于我们在3.1.1的时候已经完成了此步骤,所以这里不再截图展示==
4.1.2 实现列表视图
- 创建post控制器

- 创建路由

- 建立post的index.blade.php并添加内容

index.blade.php内容:
@extends('layouts.app')

@section('content')
<div class="card">
<div class="card-header d-flex justify-content-between align-items-center">
<strong>文章列表</strong>
<a  class="btn btn-primary btn-sm float-right" href="{{route('posts.create')}}" >新建文章</a>
</div>
<div class="card-body">

<table class="table table-striped">
<thead>
<tr>
<th width="80">序号</th>
<th>文章海报</th>
<th>文章名称</th>
<th>分类</th>
<th>发布时间</th>
<th width="200">操作</th>
</tr>
</thead>
<tbody>
@foreach($posts as $i => $post)
<tr>
<td>{{$i +1}}</td>
<td><img src="{{$post->image}}" alt="海报" width="80"></td>
<td>{{$post->title}}</td>
<td></td>
<td>{{$post->published_at??'未发布'}}</td>
<td>
<a href="{{route('posts.edit',$post->id)}}" class="btn btn-primary btn-sm">编辑</a>
<button onclick="deleteCategory('{{route('posts.destroy',$post->id)}}','{{$post->name}}')"
type="button" class="btn btn-danger btn-sm">删除</button>
</td>
</tr>
@endforeach
</tbody>
</table>
</div>
</div>

@endsection
- 更改控制器中的内容

- 效果展示
为了使效果更美观,可以在index.blade.php中添加以下代码,在没有文章的时候,会显示创建文章的提示信息

效果:

4.2 实现posts创建页
4.2.1 创建页面
- 建立post的create.blade.php并添加内容

@extends('layouts.app')

@section('content')
<div class="card">
<div class="card-header d-flex justify-content-between align-items-center">
<strong>
{{isset($post)?'编辑文章':'创建文章'}}
</strong>
</div>
<div class="card-body">
<form action="{{isset($post)?route('posts.update',$post->id):route('posts.store')}}"
method="post" enctype="multipart/form-data">
@csrf
@if(isset($post))
@method('patch')
@endif
<div class="form-group">
<label for="title">文章名称:</label>
<input type="text"  name="title" value="{{old('title',isset($post)?$post->title:'')}}"
id="title" class="form-control @error('title') is-invalid @enderror"
placeholder="请输入文章名称....">
@error('title')
<div class="invalid-feedback">
{!! $message !!}
</div>
@enderror
</div>

<div class="form-group">
<label for="description">说明:</label>
<textarea name="description" id="description" cols="30" rows="3"
class="form-control @error('title') is-invalid @enderror">
{{old('description',isset($post)?$post->description:'')}}</textarea>
@error('description')
<div class="invalid-feedback">
{!! $message !!}
</div>
@enderror
</div>

<div class="form-group">
<label for="content">内容:</label>
<textarea name="content" id="content" cols="30" rows="10"
class="form-control @error('title') is-invalid @enderror">
{{old('content',isset($post)?$post->content:'')}}
</textarea>
@error('content')
<div class="invalid-feedback">
{!! $message !!}
</div>
@enderror
</div>

<div class="form-group">
<label for="category_id">分类:</label>
<select name="category_id" id="category_id"
class="form-control @error('title') is-invalid @enderror">
@foreach($categories as $category)
<option value="{{$category->id}}
@if(old('category_id',isset($post)?$post->content:'')==$category->id) selected @endif">
{{$category->name}}
</option>
@endforeach
</select>
@error('category_id')
<div class="invalid-feedback">
{!! $message !!}
</div>
@enderror
</div>

<div class="form-group">
<label for="image"></label>
<input type="file" class="form-control-file @error('title') is-invalid @enderror"
name="image" id="image" placeholder="请上传海报图片...">
@error('image')
<div class="invalid-feedback">
{!! $message !!}
</div>
@enderror
</div>

<div class="form-group">
<button type="submit" class="btn btn-primary">
{{isset($post)?'更新文章':'创建文章'}}
</button>
</div>
</form>
</div>

</div>

@endsection
- 更改控制器内的内容

4.2.2 图片的上传、验证与存储
- 进入.env文件,修改内容


- 在编译器中输入以下指令,可获取图片链接

- 创建Post/StorePost.php文件


- 添加验证的要求

- 更改控制器的内容


4.2.3 添加文章分类的显示
1.在post.php中添加relation,链接数据库

2.在index.blade.php中添加分类的内容

4.2.4 效果展示

4.3 利用软删除,实现Posts回收站
4.3.1 回收站表的创建
-
创建一个表,用于存放删除之后的东西


-
在刚刚创建的文件中添加删除字段

-
在终端中执行migrate

-
更改post模型中的内容,使其具有删除功能

4.3.2 实现删除功能
- 更改文章的index界面

- 修改控制器中的destroy()

- 效果

4.3.3 实现回收站
-
在总布局文件app.blade.php中添加回收站分类

-
修改控制器中index()的代码,使点击回收站后的到数据

-
修改index.blade.php布局


-
修改控制器中destroy()的代码

4.3.4 效果展示

4.3.5 [补充]删除回收站内容时,清除php中保存的图片
上一次实现的删除回收站的内容并不能删除我们phpstorm工程中上传的图片,如下图所示。

只需要在控制器的destroy()中加入下面这个代码即可
Storage::delete($post->image);

第二课 完成~
—😄-------------😛 -------------😃-------------😄-------------😛 -------------😃-------------😛 -------------😃—

- 利用laravel框架实现简单的CMS——过程记录3
- 利用laravel框架实现一个简单的应用(CMS)
- Laravel框架实现利用监听器进行sql语句记录功能
- 利用laravel框架实现CMS应用
- 利用laravel框架实现基本的CMS
- Laravel框架实现利用中间件进行操作日志记录功能
- 中软国际(宁波)实习第四天上午学习记录(主要内容:利用IDEA+Maven+SSM框架实现的简单的数据库数据读取并显示)
- 记录利用ettercap进行简单的arp欺骗和mitm攻击过程
- 记录利用ettercap进行简单的arp欺骗和mitm攻击过程
- 利用Thrift和zk简单实现服务治理框架中的订阅发布机制
- .NET Core微服务之路:利用DotNetty实现一个简单的通信过程
- 1.1XAF框架开发视频教程-简单的订单管理实现过程,视频,提纲,及教程源码
- 利用IDEA实现一个简单的spring Boot 框架 在浏览器输出hello spring boot
- 1.1XAF框架开发视频教程-简单的订单管理实现过程,视频,提纲,及教程源码
- IFC标准是为了满足建筑行业的信息交互与共享而产生的统一数据标准,是建 筑行业事实上的数据交换与共享标准。本文概要介绍了IFC标准的产生及发展 历程,IFC的整体框架结构,简要说明了IFC标准的实现方法和过程,描述了 当前的应用以及我们应该更加积极地利用IFC标准为建筑软件行业服务。
- 在PHP(Laravel框架)中利用UUID实现数据分表
- 利用MailCore框架实现简单的邮箱功能
- 利用laravel框架实现具体的应用
- 详细记录->使用Maven+SSM框架,实现单表简单的增删改查
- 利用boost::asio实现一个简单的服务器框架