Linux系统集群架构线上项目配置实战(二)
2018-04-24 11:54
666 查看
分发hosts文件到其它服务器
分发服务器使用全网备份服务器
首先创建分发用户
[root@centos ~]# useradd fenfa -u 999[root@centos ~]# echo "123456"|passwd --stdin fenfaChanging password for user fenfa.
passwd: all authentication tokens updated successfully.
[root@centos ~]# /bin/cp /etc/sudoers /etc/sudoers.bak[root@centos ~]# echo "fenfa ALL=(root) NOPASSWD:/usr/bin/rsync" >>/etc/sudoers[root@centos ~]# tail -1 /etc/sudoersfenfa ALL=(root) NOPASSWD:/usr/bin/rsync
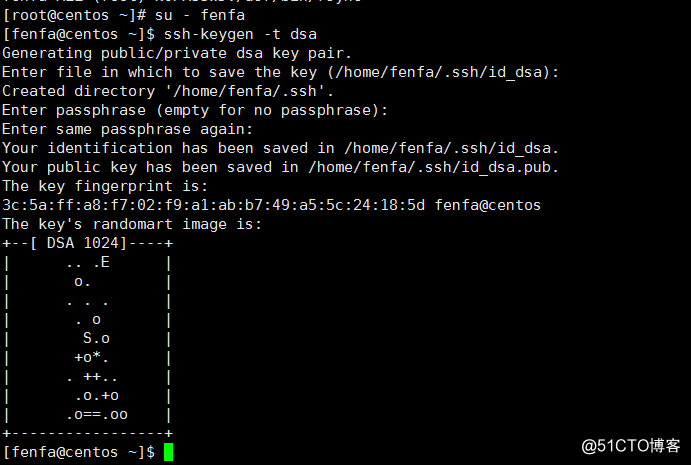
切换到fenfa用户创建密钥
安装配置expect服务
[root@centos ~]$ yum install expect* -y
编写脚本
[fenfa@centos ~]$ vim fenfa.exp#!/usr/bin/expectif {$argc != 2} {
send_user "usage: expect xxxx.exp file host\n"
it
}#define varset file [lindex $argv 0]set host [lindex $argv 1]set password "123456"spawn ssh-copy-id -i $file fenfa@$hostexpect { "yes/no" {send "yes\r";exp_continue} "password" {send "$password\r"}
}
expect eof
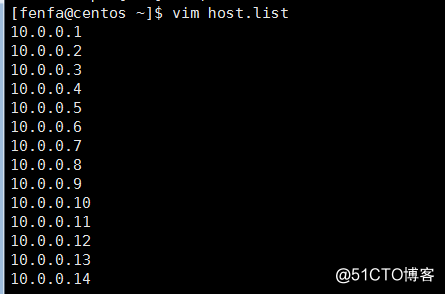
[fenfa@centos ~]$ vim fenfa_key.sh#!/bin/sh. /etc/init.d/functionsfor ip in `cat host.list`doexpect fenfa.exp ~/.ssh/id_dsa.pub $ip >/dev/null 2>&1if [ $? -eq 0 ];then
action "$ip" /bin/true
else
action "$ip" /bin/falsefidone执行脚本结果如下
[fenfa@centos ~]$ sh fenfa_key.sh10.0.0.1                         [  OK  ]10.0.0.2                         [  OK  ]10.0.0.3                         [  OK  ]10.0.0.4                         [  OK  ]10.0.0.5                         [  OK  ]10.0.0.6                         [  OK  ]10.0.0.7                         [  OK  ]10.0.0.8                         [  OK  ]10.0.0.9                         [  OK  ]10.0.0.10                        [  OK  ]10.0.0.11                        [  OK  ]10.0.0.12                        [  OK  ]10.0.0.13                        [  OK  ]10.0.0.14                        [  OK  ]
[root@centos ~]# su - fenfa[fenfa@centos ~]$ ll /home/fenfa/.ssh/
total 4-rw------- 1 fenfa fenfa 602 Sep 21 12:14 authorized_keys
编写分发文件脚本
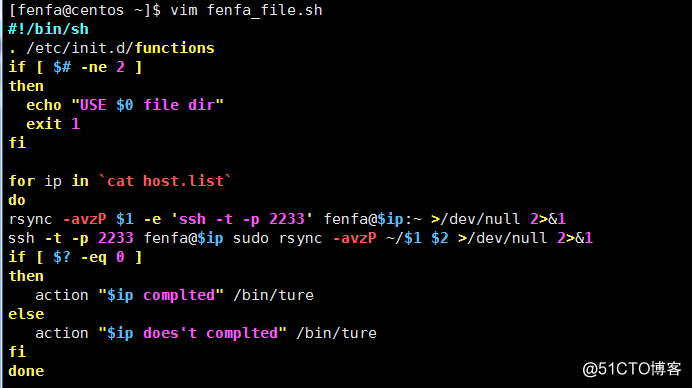

只需要将文件替换成你所需要分发的文件即可
前端反向代理及管理后台服务器的配置
前端nginx反向代理服务器配置
安装所需的依赖包
[root@centos ~]# yum install pcre-devel zlib-devle openssl-devel gcc-c++ –y
编译安装nginx
cd /download/tools/
wget http://nginx.org/download/nginx-1.12.1.tar.gz
tar zxf nginx-1.12.1.tar.gz
cd nginx-1.12.1./configure --prefix=/app/nginx-1.12.1make && make install
[root@centos ~]# cd /app/[root@centos app]# ln -s nginx-1.12.1 nginx[root@centos ~]# cd /app/nginx/conf/[root@centos conf]# mkdir extra[root@centos conf]# cp nginx.conf nginx.conf.bak
在nginx.conf文件后增加下面的配置
include extra/*.conf;
[root@centos ~]# cd /app/nginx/conf/extra/[root@centos extra]# vim admin.mingongge.conf## HTTPS server configuration#server {    listen       80;
    server_name admin.mingongge.com;
    location / {
        proxy_pass http://10.0.0.6:8080;
        proxy_connect_timeout 600;
        proxy_read_timeout 600;
        proxy_send_timeout 600;
    }
}
[root@centos extra]# vim shangjia.mingongge.conf## HTTPS server configuration#server {    listen       80;
    server_name shangjia.mingongge.com;
    location / {
        proxy_pass http://10.0.0.7:8080;
        proxy_connect_timeout 600;
        proxy_read_timeout 600;
        proxy_send_timeout 600;
    }
}
业务平台管理后台admin.mingongge.com
JDK Tomcat环境安装
tar zxf apache-tomcat-8.5.9.tar.gz
mv apache-tomcat-8.5.9 /usr/local/tomcat
tar zxf jdk-8u111-linux-x64.tar.gz -C /usr/local/cd /usr/local/
ln -s jdk1.8.0_111 jdk
cat >>/etc/profile <<EOFexport JAVA_HOME=/usr/local/jdk1.8.0_111export CLASSPATH=.:$JAVA_HOME/lib/dt.jar:$JAVA_HOME/lib/tools.jarexport PATH=$JAVA_HOME/bin:$PATHexport CATALINA_HOME=/usr/local/apache-tomcat-8.5.9
EOF
[root@centos local]# source /etc/profile[root@centos local]# java -versionjava version "1.8.0_111"Java(TM) SE Runtime Environment (build 1.8.0_111-b14)
Java HotSpot(TM) 64-Bit Server VM (build 25.111-b14, mixed mode)
JDK Tomcat环境配置
<Context path="" docBase="/www/admin" debug="0" reloadable="true" crossContext="true" />echo "this is the admin.mingongge.com" >/www/admin/index.html
/usr/local/tomcat/bin/startup.sh
商家管理后台 shangjia.mingongge.com
JDK Tomcat环境安装请参考前面的步骤
<Context path="" docBase="/www/shangjia" debug="0" reloadable="true" crossContext="true" />echo "this is the shangjia.mingongge.com" >/www/shangjia/index.html
/usr/local/tomcat/bin/startup.sh
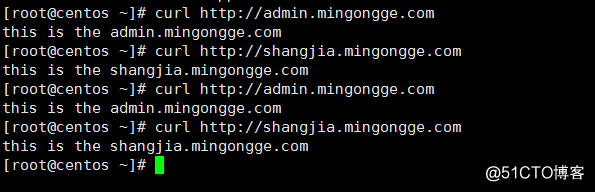
测试反向代理
[root@centos ~]# curl http://admin.mingongge.comthis is the admin.mingongge.com
[root@centos ~]# curl http://shangjia.mingongge.comthis is the shangjia.mingongge.com

相关文章推荐
- Linux系统集群架构线上项目配置实战(二)
- Linux系统集群架构线上项目配置实战
- [置顶] Linux系统集群架构线上项目配置实战(二)
- Linux系统集群架构线上项目配置实战(一)
- Linux系统集群架构线上项目配置实战 五(完结篇)
- [置顶] Linux系统集群架构线上项目配置实战(一)
- Linux系统架构(LB—HA集群)-HA集群配置
- java大型分布式电商项目实战高并发集群分布式系统架构
- 企业级JAVA大型分布式电商项目实战高并发集群分布式系统架构视频教程下载
- 实战Nagios NSCA方式监控Linux系统资源使用情况 -- Nagios配置篇 -- Nagios Server端
- Linux系统构架 - HA集群配置
- 项目实战:Ubuntu系统LNMP环境下安装配置zabbix3.04
- LNAMP(Linux+Nginx+Apache+Mysql+PHP)高性能架构配置实战版
- 红帽GFS集群文件系统配置指南 linux搭建gfs系统--iscsi+GFS实现网络存储
- 企业级DNS服务集群架构设计及BIND部署配置实战 推荐
- Linux高性能集群搭建(2)---NFS共享文件系统安装配置
- Amazon Linux 系统安装配置zookeeper集群
- Linux负载均衡集群之LVS原理 分类: 系统架构 Linux 2015-05-27 22:16 60人阅读 评论(0) 收藏
- linux系统安装增强功能与集群网络配置
- 嵌入式实战项目:基于嵌入式linux花卉大棚温湿度监测与调节系统的设计与实现