[UnityShader2]表面着色器实例(一)
2016-03-21 13:35
429 查看
官方文档:http://docs.unity3d.com/Manual/SL-SurfaceShaderExamples.html
1.纹理采样
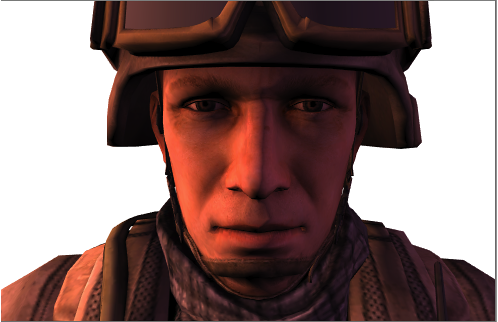
2.法线贴图
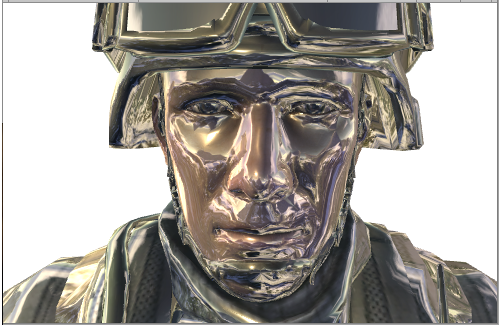
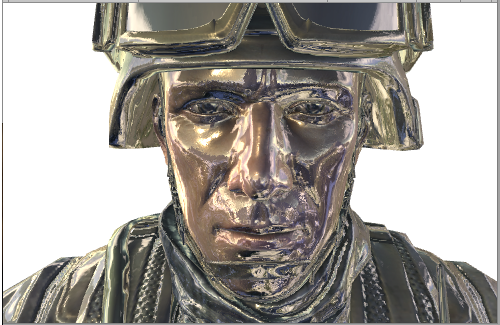
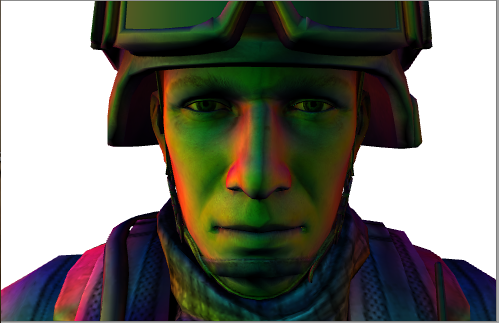
3.边缘光:在表面法线和观察方向的夹角间给予一些自发光
a.viewDir:观察方向
b.saturate(x):cg函数,将x限制在(0,1)之间
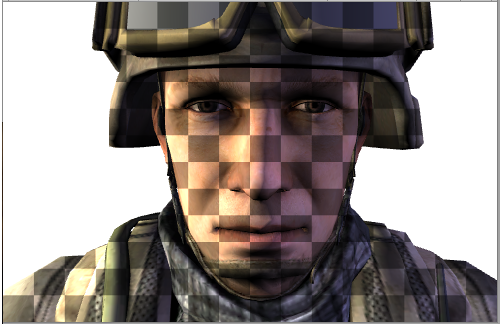
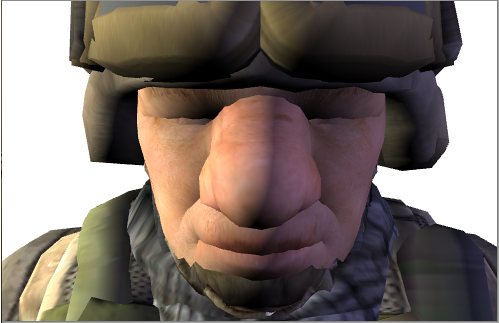
4.细节纹理
For a different effect, let’s add a detail texture that is combined with the base texture. Detail texture uses the same UVs, but usually different Tiling in the Material, so we have to use different input UV coordinates.
5.在屏幕空间的细节纹理
Shader "Example/ScreenPos" {
Properties {
_MainTex ("Texture", 2D) = "white" {}
_Detail ("Detail", 2D) = "gray" {}
}
SubShader {
Tags { "RenderType" = "Opaque" }
CGPROGRAM
#pragma surface surf Lambert
struct Input {
float2 uv_MainTex;
float4 screenPos;
};
sampler2D _MainTex;
sampler2D _Detail;
void surf (Input IN, inout SurfaceOutput o) {
o.Albedo = tex2D (_MainTex, IN.uv_MainTex).rgb;
float2 screenUV = IN.screenPos.xy / IN.screenPos.w;
screenUV *= float2(8,6);
o.Albedo *= tex2D (_Detail, screenUV).rgb * 2;
}
ENDCG
}
Fallback "Diffuse"
}
6.立方体贴图的反射
跟内置的Reflective/Diffuse很相似
Shader "Example/WorldRefl" {
Properties {
_MainTex ("Texture", 2D) = "white" {}
_Cube ("Cubemap", CUBE) = "" {}
}
SubShader {
Tags { "RenderType" = "Opaque" }
CGPROGRAM
#pragma surface surf Lambert
struct Input {
float2 uv_MainTex;
float3 worldRefl;
};
sampler2D _MainTex;
samplerCUBE _Cube;
void surf (Input IN, inout SurfaceOutput o) {
o.Albedo = tex2D (_MainTex, IN.uv_MainTex).rgb * 0.5;
o.Emission = texCUBE (_Cube, IN.worldRefl).rgb;
}
ENDCG
}
Fallback "Diffuse"
}
如果你想让反射受法线贴图影响,需要在Input结构体中加入INTERNAL_DATA;WorldReflectionVector 这个函数的作用就是当你输出法线后,可以计算逐像素的放射向量。
Shader "Example/WorldRefl Normalmap" {
Properties {
_MainTex ("Texture", 2D) = "white" {}
_BumpMap ("Bumpmap", 2D) = "bump" {}
_Cube ("Cubemap", CUBE) = "" {}
}
SubShader {
Tags { "RenderType" = "Opaque" }
CGPROGRAM
#pragma surface surf Lambert
struct Input {
float2 uv_MainTex;
float2 uv_BumpMap;
float3 worldRefl;
INTERNAL_DATA
};
sampler2D _MainTex;
sampler2D _BumpMap;
samplerCUBE _Cube;
void surf (Input IN, inout SurfaceOutput o) {
o.Albedo = tex2D (_MainTex, IN.uv_MainTex).rgb * 0.5;
o.Normal = UnpackNormal (tex2D (_BumpMap, IN.uv_BumpMap));
o.Emission = texCUBE (_Cube, WorldReflectionVector (IN, o.Normal)).rgb;
}
ENDCG
}
Fallback "Diffuse"
}
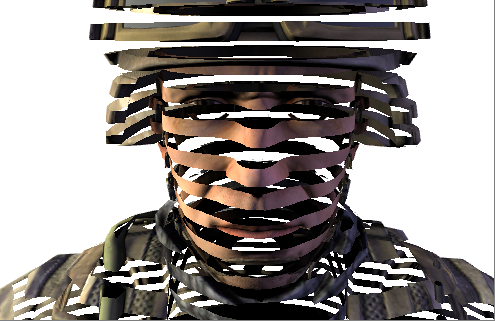
7.用世界空间位置进行裁剪
Shader "Example/Slices" {
Properties {
_MainTex ("Texture", 2D) = "white" {}
_BumpMap ("Bumpmap", 2D) = "bump" {}
}
SubShader {
Tags { "RenderType" = "Opaque" }
Cull Off
CGPROGRAM
#pragma surface surf Lambert
struct Input {
float2 uv_MainTex;
float2 uv_BumpMap;
float3 worldPos;
};
sampler2D _MainTex;
sampler2D _BumpMap;
void surf (Input IN, inout SurfaceOutput o) {
clip (frac((IN.worldPos.y+IN.worldPos.z*0.1) * 5) - 0.5);
o.Albedo = tex2D (_MainTex, IN.uv_MainTex).rgb;
o.Normal = UnpackNormal (tex2D (_BumpMap, IN.uv_BumpMap));
}
ENDCG
}
Fallback "Diffuse"
}
8.使用顶点修改器进行法线挤出
可以使用顶点修改器去修改输入的顶点数据,这在动画、法线挤出上会很有用。surface shader的编译指令vertex:functionName就是用来指定修改顶点的函数的,它的参数是inout appdata_full
Shader "Example/Normal Extrusion" {
Properties {
_MainTex ("Texture", 2D) = "white" {}
_Amount ("Extrusion Amount", Range(-1,1)) = 0.5
}
SubShader {
Tags { "RenderType" = "Opaque" }
CGPROGRAM
#pragma surface surf Lambert vertex:vert
struct Input {
float2 uv_MainTex;
};
float _Amount;
void vert (inout appdata_full v) {
v.vertex.xyz += v.normal * _Amount;
}
sampler2D _MainTex;
void surf (Input IN, inout SurfaceOutput o) {
o.Albedo = tex2D (_MainTex, IN.uv_MainTex).rgb;
}
ENDCG
}
Fallback "Diffuse"
}
9.逐顶点地计算自定义的数据
使用顶点修改器函数可以计算自定义的数据(在顶点程序中),然后就会被传送到surface函数中(可以把surface函数当作片段函数)。如果使用自定义的数据,那么就需要两个参数:inout appdata_full and out Input。inout表示引用,即可以修改顶点的数据;out是输出,即值会返回到Input结构中。自定义数据可以放在Input结构体中(一般Input结构体内的都是内置值),但是要注意命名不能以"uv"开头。
Shader "Example/Custom Vertex Data" {
Properties {
_MainTex ("Texture", 2D) = "white" {}
}
SubShader {
Tags { "RenderType" = "Opaque" }
CGPROGRAM
#pragma surface surf Lambert vertex:vert
struct Input {
float2 uv_MainTex;
float3 customColor;
};
void vert (inout appdata_full v, out Input o) {
UNITY_INITIALIZE_OUTPUT(Input,o);
o.customColor = abs(v.normal);
}
sampler2D _MainTex;
void surf (Input IN, inout SurfaceOutput o) {
o.Albedo = tex2D (_MainTex, IN.uv_MainTex).rgb;
o.Albedo *= IN.customColor;
}
ENDCG
}
Fallback "Diffuse"
}
该用处就是可以计算Input结构体中没有的内置值;或者用于shader的优化,因为逐顶点的计算要优于逐像素的计算(因为顶点数要远小于像素数)
10.最终颜色修改器
可以使用最终颜色修改器修改最终的颜色,此时要使用编译指令: finalcolor:functionName,函数的参数为Input IN, SurfaceOutput o, inout fixed4 color
Shader "Example/Tint Final Color" {
Properties {
_MainTex ("Texture", 2D) = "white" {}
_ColorTint ("Tint", Color) = (1.0, 0.6, 0.6, 1.0)
}
SubShader {
Tags { "RenderType" = "Opaque" }
CGPROGRAM
#pragma surface surf Lambert finalcolor:mycolor
struct Input {
float2 uv_MainTex;
};
fixed4 _ColorTint;
void mycolor (Input IN, SurfaceOutput o, inout fixed4 color)
{
color *= _ColorTint;
}
sampler2D _MainTex;
void surf (Input IN, inout SurfaceOutput o) {
o.Albedo = tex2D (_MainTex, IN.uv_MainTex).rgb;
}
ENDCG
}
Fallback "Diffuse"
}
1.纹理采样
Shader "Example/Diffuse Texture" {
Properties {
_MainTex ("Texture", 2D) = "white" {}
}
SubShader {
Tags { "RenderType" = "Opaque" }
CGPROGRAM
#pragma surface surf Lambert
struct Input {
float2 uv_MainTex;
};
sampler2D _MainTex;
void surf (Input IN, inout SurfaceOutput o) {
o.Albedo = tex2D (_MainTex, IN.uv_MainTex).rgb;
}
ENDCG
}
Fallback "Diffuse"
}
2.法线贴图
Shader "Example/Diffuse Bump" {
Properties {
_MainTex ("Texture", 2D) = "white" {}
_BumpMap ("Bumpmap", 2D) = "bump" {}
}
SubShader {
Tags { "RenderType" = "Opaque" }
CGPROGRAM
#pragma surface surf Lambert
struct Input {
float2 uv_MainTex;
float2 uv_BumpMap;
};
sampler2D _MainTex;
sampler2D _BumpMap;
void surf (Input IN, inout SurfaceOutput o) {
o.Albedo = tex2D (_MainTex, IN.uv_MainTex).rgb;
o.Normal = UnpackNormal (tex2D (_BumpMap, IN.uv_BumpMap));
}
ENDCG
}
Fallback "Diffuse"
}
3.边缘光:在表面法线和观察方向的夹角间给予一些自发光
a.viewDir:观察方向
b.saturate(x):cg函数,将x限制在(0,1)之间
Shader "Example/Rim" {
Properties {
_MainTex ("Texture", 2D) = "white" {}
_BumpMap ("Bumpmap", 2D) = "bump" {}
_RimColor ("Rim Color", Color) = (0.26,0.19,0.16,0.0)
_RimPower ("Rim Power", Range(0.5,8.0)) = 3.0
}
SubShader {
Tags { "RenderType" = "Opaque" }
CGPROGRAM
#pragma surface surf Lambert
struct Input {
float2 uv_MainTex;
float2 uv_BumpMap;
float3 viewDir;
};
sampler2D _MainTex;
sampler2D _BumpMap;
float4 _RimColor;
float _RimPower;
void surf (Input IN, inout SurfaceOutput o) {
o.Albedo = tex2D (_MainTex, IN.uv_MainTex).rgb;
o.Normal = UnpackNormal (tex2D (_BumpMap, IN.uv_BumpMap));
half rim = 1.0 - saturate(dot (normalize(IN.viewDir), o.Normal));
o.Emission = _RimColor.rgb * pow (rim, _RimPower);
}
ENDCG
}
Fallback "Diffuse"
}
4.细节纹理
For a different effect, let’s add a detail texture that is combined with the base texture. Detail texture uses the same UVs, but usually different Tiling in the Material, so we have to use different input UV coordinates.
Shader "Example/Detail" {
Properties {
_MainTex ("Texture", 2D) = "white" {}
_BumpMap ("Bumpmap", 2D) = "bump" {}
_Detail ("Detail", 2D) = "gray" {}
}
SubShader {
Tags { "RenderType" = "Opaque" }
CGPROGRAM
#pragma surface surf Lambert
struct Input {
float2 uv_MainTex;
float2 uv_BumpMap;
float2 uv_Detail;
};
sampler2D _MainTex;
sampler2D _BumpMap;
sampler2D _Detail;
void surf (Input IN, inout SurfaceOutput o) {
o.Albedo = tex2D (_MainTex, IN.uv_MainTex).rgb;
o.Albedo *= tex2D (_Detail, IN.uv_Detail).rgb * 2;
o.Normal = UnpackNormal (tex2D (_BumpMap, IN.uv_BumpMap));
}
ENDCG
}
Fallback "Diffuse"
}
5.在屏幕空间的细节纹理
Shader "Example/ScreenPos" {
Properties {
_MainTex ("Texture", 2D) = "white" {}
_Detail ("Detail", 2D) = "gray" {}
}
SubShader {
Tags { "RenderType" = "Opaque" }
CGPROGRAM
#pragma surface surf Lambert
struct Input {
float2 uv_MainTex;
float4 screenPos;
};
sampler2D _MainTex;
sampler2D _Detail;
void surf (Input IN, inout SurfaceOutput o) {
o.Albedo = tex2D (_MainTex, IN.uv_MainTex).rgb;
float2 screenUV = IN.screenPos.xy / IN.screenPos.w;
screenUV *= float2(8,6);
o.Albedo *= tex2D (_Detail, screenUV).rgb * 2;
}
ENDCG
}
Fallback "Diffuse"
}
6.立方体贴图的反射
跟内置的Reflective/Diffuse很相似
Shader "Example/WorldRefl" {
Properties {
_MainTex ("Texture", 2D) = "white" {}
_Cube ("Cubemap", CUBE) = "" {}
}
SubShader {
Tags { "RenderType" = "Opaque" }
CGPROGRAM
#pragma surface surf Lambert
struct Input {
float2 uv_MainTex;
float3 worldRefl;
};
sampler2D _MainTex;
samplerCUBE _Cube;
void surf (Input IN, inout SurfaceOutput o) {
o.Albedo = tex2D (_MainTex, IN.uv_MainTex).rgb * 0.5;
o.Emission = texCUBE (_Cube, IN.worldRefl).rgb;
}
ENDCG
}
Fallback "Diffuse"
}
如果你想让反射受法线贴图影响,需要在Input结构体中加入INTERNAL_DATA;WorldReflectionVector 这个函数的作用就是当你输出法线后,可以计算逐像素的放射向量。
Shader "Example/WorldRefl Normalmap" {
Properties {
_MainTex ("Texture", 2D) = "white" {}
_BumpMap ("Bumpmap", 2D) = "bump" {}
_Cube ("Cubemap", CUBE) = "" {}
}
SubShader {
Tags { "RenderType" = "Opaque" }
CGPROGRAM
#pragma surface surf Lambert
struct Input {
float2 uv_MainTex;
float2 uv_BumpMap;
float3 worldRefl;
INTERNAL_DATA
};
sampler2D _MainTex;
sampler2D _BumpMap;
samplerCUBE _Cube;
void surf (Input IN, inout SurfaceOutput o) {
o.Albedo = tex2D (_MainTex, IN.uv_MainTex).rgb * 0.5;
o.Normal = UnpackNormal (tex2D (_BumpMap, IN.uv_BumpMap));
o.Emission = texCUBE (_Cube, WorldReflectionVector (IN, o.Normal)).rgb;
}
ENDCG
}
Fallback "Diffuse"
}
7.用世界空间位置进行裁剪
Shader "Example/Slices" {
Properties {
_MainTex ("Texture", 2D) = "white" {}
_BumpMap ("Bumpmap", 2D) = "bump" {}
}
SubShader {
Tags { "RenderType" = "Opaque" }
Cull Off
CGPROGRAM
#pragma surface surf Lambert
struct Input {
float2 uv_MainTex;
float2 uv_BumpMap;
float3 worldPos;
};
sampler2D _MainTex;
sampler2D _BumpMap;
void surf (Input IN, inout SurfaceOutput o) {
clip (frac((IN.worldPos.y+IN.worldPos.z*0.1) * 5) - 0.5);
o.Albedo = tex2D (_MainTex, IN.uv_MainTex).rgb;
o.Normal = UnpackNormal (tex2D (_BumpMap, IN.uv_BumpMap));
}
ENDCG
}
Fallback "Diffuse"
}
8.使用顶点修改器进行法线挤出
可以使用顶点修改器去修改输入的顶点数据,这在动画、法线挤出上会很有用。surface shader的编译指令vertex:functionName就是用来指定修改顶点的函数的,它的参数是inout appdata_full
Shader "Example/Normal Extrusion" {
Properties {
_MainTex ("Texture", 2D) = "white" {}
_Amount ("Extrusion Amount", Range(-1,1)) = 0.5
}
SubShader {
Tags { "RenderType" = "Opaque" }
CGPROGRAM
#pragma surface surf Lambert vertex:vert
struct Input {
float2 uv_MainTex;
};
float _Amount;
void vert (inout appdata_full v) {
v.vertex.xyz += v.normal * _Amount;
}
sampler2D _MainTex;
void surf (Input IN, inout SurfaceOutput o) {
o.Albedo = tex2D (_MainTex, IN.uv_MainTex).rgb;
}
ENDCG
}
Fallback "Diffuse"
}
9.逐顶点地计算自定义的数据
使用顶点修改器函数可以计算自定义的数据(在顶点程序中),然后就会被传送到surface函数中(可以把surface函数当作片段函数)。如果使用自定义的数据,那么就需要两个参数:inout appdata_full and out Input。inout表示引用,即可以修改顶点的数据;out是输出,即值会返回到Input结构中。自定义数据可以放在Input结构体中(一般Input结构体内的都是内置值),但是要注意命名不能以"uv"开头。
Shader "Example/Custom Vertex Data" {
Properties {
_MainTex ("Texture", 2D) = "white" {}
}
SubShader {
Tags { "RenderType" = "Opaque" }
CGPROGRAM
#pragma surface surf Lambert vertex:vert
struct Input {
float2 uv_MainTex;
float3 customColor;
};
void vert (inout appdata_full v, out Input o) {
UNITY_INITIALIZE_OUTPUT(Input,o);
o.customColor = abs(v.normal);
}
sampler2D _MainTex;
void surf (Input IN, inout SurfaceOutput o) {
o.Albedo = tex2D (_MainTex, IN.uv_MainTex).rgb;
o.Albedo *= IN.customColor;
}
ENDCG
}
Fallback "Diffuse"
}
该用处就是可以计算Input结构体中没有的内置值;或者用于shader的优化,因为逐顶点的计算要优于逐像素的计算(因为顶点数要远小于像素数)
10.最终颜色修改器
可以使用最终颜色修改器修改最终的颜色,此时要使用编译指令: finalcolor:functionName,函数的参数为Input IN, SurfaceOutput o, inout fixed4 color
Shader "Example/Tint Final Color" {
Properties {
_MainTex ("Texture", 2D) = "white" {}
_ColorTint ("Tint", Color) = (1.0, 0.6, 0.6, 1.0)
}
SubShader {
Tags { "RenderType" = "Opaque" }
CGPROGRAM
#pragma surface surf Lambert finalcolor:mycolor
struct Input {
float2 uv_MainTex;
};
fixed4 _ColorTint;
void mycolor (Input IN, SurfaceOutput o, inout fixed4 color)
{
color *= _ColorTint;
}
sampler2D _MainTex;
void surf (Input IN, inout SurfaceOutput o) {
o.Albedo = tex2D (_MainTex, IN.uv_MainTex).rgb;
}
ENDCG
}
Fallback "Diffuse"
}

相关文章推荐
- Unity3D插件开发
- Unity Shaders and Effects Cookbook (1-5)使用2D渐变纹理模拟BRDF(双向反射分布函数)
- java程序员图文并茂细说Unity中调用Android的接口 (转)
- unity导入模型无色
- unityassetbundle 打包存放百度云加载
- [UnityShader2]顶点片段着色器实例(六)
- Unity3D学习笔记(5)—— 牧师和魔鬼游戏改进
- Unity脚本事件执行的顺序
- Unity3D开发基础组件提取总结
- [UnityShader2]顶点片段着色器实例(五)
- Unity AssetBundle爬坑手记
- Unity Shaders and Effects Cookbook (1-4) 创建 Ramp Texture(渐变纹理)控制漫反射着色
- [UnityShader2]顶点片段着色器基础
- 关于Unity3D协程的使用
- 破解Unity3D的步骤-为部分人提供帮助
- 配置Unity脚本开发环境visual studio 2013 tools for unity
- unity c# LINQ查询
- unity c# Lambda表达式
- unity c# 泛型委托
- unity c# 标准事件模式