Unity Shaders and Effects Cookbook (1-4) 创建 Ramp Texture(渐变纹理)控制漫反射着色
2016-03-20 03:14
519 查看
在Shader中根据光照来调节效果,会比较繁琐,所以可以直接用纹理。美术做好图之后,程序直接从纹理上取样,来模拟很多光照设置。
有颜色的这两个 Capsule 就是使用了 Ramp Texture的。
转自http://blog.csdn.net/huutu http://www.thisisgame.com.cn
然后选择渐变工具
在图片里面 右键 ,会弹出渐变编辑器
转自http://blog.csdn.net/huutu http://www.thisisgame.com.cn
选择 一种 渐变预设 ,然后按住鼠标左键,从图片的左上角 拖到 右下角。就会自动生成渐变图了。
2、使用渐变纹理控制漫反射着色
原理就是从根据光照强度的强弱,把这个强弱值作为UV,从渐变纹理中取样。
在最基本的漫反射着色器代码中,对 基本漫反射光照函数进行了一点点修改。,添加了一句
float3 ramp=tex2D( _RampTex , float2(difLight,difLight)).rgb;
完整 shader 代码如下:
Shader "CookBookShaders/Ramp Texture" {
Properties {
_EmissiveColor("Emissive Color",Color) = (1,1,1,1) //设置默认值
_AmbientColor("Ambient Color",Color) = (1,1,1,1)
_PowValue("Power Value",Range(-1,1)) = 1
_RampTex("Ramp Texture",2D) = "" //添加_RampTex属性接受一个Texture
}
SubShader {
Tags { "RenderType"="Opaque" }
LOD 200
CGPROGRAM
#pragma surface surf rampTextureDiffuse
float4 _EmissiveColor;
float4 _AmbientColor;
float _PowValue;
sampler2D _RampTex;
struct Input {
float2 uv_MainTex;
};
void surf (Input IN, inout SurfaceOutput o) {
float4 c;
c=pow((_EmissiveColor+_AmbientColor),_PowValue);
o.Albedo = c.rgb;
o.Alpha = c.a;
}
//不需要视角方向的前向着色
inline half4 LightingrampTextureDiffuse(SurfaceOutput s,half3 lightDir,half atten)
{
float difLight = max(0,dot(s.Normal,lightDir) );//dot表示cos值,范围(-1,1) max将difLight的范围限定到了(0,1)
float3 ramp=tex2D( _RampTex , float2(difLight,difLight)).rgb;
half4 color=(0,0,0,0);
color.rgb=s.Albedo * _LightColor0.rgb * (ramp);
color.a=s.Alpha;
return color;
}
//需要视角方向的前向着色
inline half4 LightingBasicDiffuseWithViewDir(SurfaceOutput so,half3 lightDir,half3 viewDir,half atten)
{
half4 color=(0,0,0,0);
return color;
}
//需要使用延迟着色
inline half4 LightingBasicDiffuse_PrePass(SurfaceOutput so,half4 light)
{
half4 color=(0,0,0,0);
return color;
}
ENDCG
}
FallBack "Diffuse"
}
shader 效果如第一张图的 第三个 Capsule。
转自http://blog.csdn.net/huutu http://www.thisisgame.com.cn
在 Half Lambert光照模型上面应用了 Ramp Texture 也写了一下。
Shader "CookBookShaders/Ramp Texture Half Lambert" {
Properties {
_EmissiveColor("Emissive Color",Color) = (1,1,1,1) //设置默认值
_AmbientColor("Ambient Color",Color) = (1,1,1,1)
_PowValue("Power Value",Range(-1,1)) = 1
_RampTex("Ramp Texture",2D) = "" //添加_RampTex属性接受一个Texture
}
SubShader {
Tags { "RenderType"="Opaque" }
LOD 200
CGPROGRAM
#pragma surface surf rampHalfLambertDiffuse
float4 _EmissiveColor;
float4 _AmbientColor;
float _PowValue;
sampler2D _RampTex;
struct Input {
float2 uv_MainTex;
};
void surf (Input IN, inout SurfaceOutput o) {
float4 c;
c=pow((_EmissiveColor+_AmbientColor),_PowValue);
o.Albedo = c.rgb;
o.Alpha = c.a;
}
//不需要视角方向的前向着色
inline half4 LightingrampHalfLambertDiffuse(SurfaceOutput s,half3 lightDir,half atten)
{
float difLight = max(0,dot(s.Normal,lightDir) );//dot表示cos值,范围(-1,1) max将difLight的范围限定到了(0,1)
float hLambert = difLight * 0.5 +0.5;//Half Lamert光照模型就表现在这一句,将漫反射的光照值范围限定到了 (0.5,1),所以原来是 0 的地方现在就是 0.5 了,明亮度顿时提升,而原来已经很亮的地方并没有很大的变化。
float3 ramp=tex2D( _RampTex , float2(hLambert,hLambert)).rgb;
half4 color=(0,0,0,0);
color.rgb=s.Albedo * _LightColor0.rgb * (ramp);
color.a=s.Alpha;
return color;
}
//需要视角方向的前向着色
inline half4 LightingBasicDiffuseWithViewDir(SurfaceOutput so,half3 lightDir,half3 viewDir,half atten)
{
half4 color=(0,0,0,0);
return color;
}
//需要使用延迟着色
inline half4 LightingBasicDiffuse_PrePass(SurfaceOutput so,half4 light)
{
half4 color=(0,0,0,0);
return color;
}
ENDCG
}
FallBack "Diffuse"
}
shader 效果如第一张图的 第二个 Capsule。
使用了 Half Lambert 光照模型之后,然后使用渐变纹理来控制,就像图中的效果,转动查看会法线,只会用到 渐变纹理的右边一半的颜色,左边一边是用不上的。
这是因为 Half Lambert 光照模型中,这一句
float hLambert = difLight * 0.5 +0.5;
Half Lamert光照模型就表现在这一句,将漫反射的光照值范围限定到了 (0.5,1)
所以我们根据 (0.5,1) 这个值 作为 UV 去渐变纹理采样,只能采样到右边一半的颜色。
最终的效果就是,根据光照的方向,计算各点受光照影响的强度,然后把强度作为UV去渐变纹理采样。
示例工程打包下载:
http://pan.baidu.com/s/1jHzC84Y
有颜色的这两个 Capsule 就是使用了 Ramp Texture的。
转自http://blog.csdn.net/huutu http://www.thisisgame.com.cn
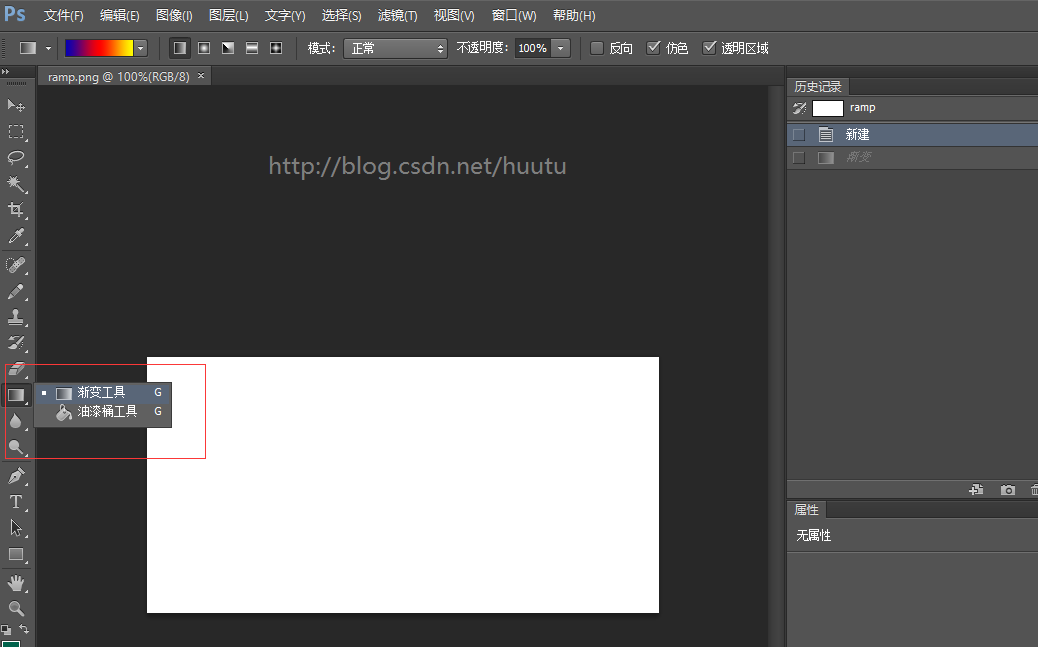
1、首先来创建一张渐变纹理
打开PS CS6,新建一张图片,设置512x256 大小。然后选择渐变工具
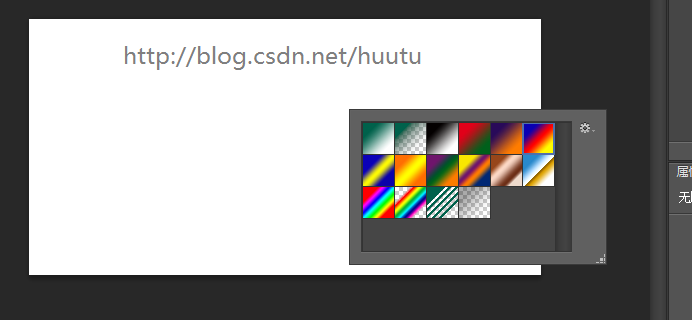
在图片里面 右键 ,会弹出渐变编辑器
转自http://blog.csdn.net/huutu http://www.thisisgame.com.cn
选择 一种 渐变预设 ,然后按住鼠标左键,从图片的左上角 拖到 右下角。就会自动生成渐变图了。
2、使用渐变纹理控制漫反射着色
原理就是从根据光照强度的强弱,把这个强弱值作为UV,从渐变纹理中取样。
在最基本的漫反射着色器代码中,对 基本漫反射光照函数进行了一点点修改。,添加了一句
float3 ramp=tex2D( _RampTex , float2(difLight,difLight)).rgb;
完整 shader 代码如下:
Shader "CookBookShaders/Ramp Texture" {
Properties {
_EmissiveColor("Emissive Color",Color) = (1,1,1,1) //设置默认值
_AmbientColor("Ambient Color",Color) = (1,1,1,1)
_PowValue("Power Value",Range(-1,1)) = 1
_RampTex("Ramp Texture",2D) = "" //添加_RampTex属性接受一个Texture
}
SubShader {
Tags { "RenderType"="Opaque" }
LOD 200
CGPROGRAM
#pragma surface surf rampTextureDiffuse
float4 _EmissiveColor;
float4 _AmbientColor;
float _PowValue;
sampler2D _RampTex;
struct Input {
float2 uv_MainTex;
};
void surf (Input IN, inout SurfaceOutput o) {
float4 c;
c=pow((_EmissiveColor+_AmbientColor),_PowValue);
o.Albedo = c.rgb;
o.Alpha = c.a;
}
//不需要视角方向的前向着色
inline half4 LightingrampTextureDiffuse(SurfaceOutput s,half3 lightDir,half atten)
{
float difLight = max(0,dot(s.Normal,lightDir) );//dot表示cos值,范围(-1,1) max将difLight的范围限定到了(0,1)
float3 ramp=tex2D( _RampTex , float2(difLight,difLight)).rgb;
half4 color=(0,0,0,0);
color.rgb=s.Albedo * _LightColor0.rgb * (ramp);
color.a=s.Alpha;
return color;
}
//需要视角方向的前向着色
inline half4 LightingBasicDiffuseWithViewDir(SurfaceOutput so,half3 lightDir,half3 viewDir,half atten)
{
half4 color=(0,0,0,0);
return color;
}
//需要使用延迟着色
inline half4 LightingBasicDiffuse_PrePass(SurfaceOutput so,half4 light)
{
half4 color=(0,0,0,0);
return color;
}
ENDCG
}
FallBack "Diffuse"
}
shader 效果如第一张图的 第三个 Capsule。
转自http://blog.csdn.net/huutu http://www.thisisgame.com.cn
在 Half Lambert光照模型上面应用了 Ramp Texture 也写了一下。
Shader "CookBookShaders/Ramp Texture Half Lambert" {
Properties {
_EmissiveColor("Emissive Color",Color) = (1,1,1,1) //设置默认值
_AmbientColor("Ambient Color",Color) = (1,1,1,1)
_PowValue("Power Value",Range(-1,1)) = 1
_RampTex("Ramp Texture",2D) = "" //添加_RampTex属性接受一个Texture
}
SubShader {
Tags { "RenderType"="Opaque" }
LOD 200
CGPROGRAM
#pragma surface surf rampHalfLambertDiffuse
float4 _EmissiveColor;
float4 _AmbientColor;
float _PowValue;
sampler2D _RampTex;
struct Input {
float2 uv_MainTex;
};
void surf (Input IN, inout SurfaceOutput o) {
float4 c;
c=pow((_EmissiveColor+_AmbientColor),_PowValue);
o.Albedo = c.rgb;
o.Alpha = c.a;
}
//不需要视角方向的前向着色
inline half4 LightingrampHalfLambertDiffuse(SurfaceOutput s,half3 lightDir,half atten)
{
float difLight = max(0,dot(s.Normal,lightDir) );//dot表示cos值,范围(-1,1) max将difLight的范围限定到了(0,1)
float hLambert = difLight * 0.5 +0.5;//Half Lamert光照模型就表现在这一句,将漫反射的光照值范围限定到了 (0.5,1),所以原来是 0 的地方现在就是 0.5 了,明亮度顿时提升,而原来已经很亮的地方并没有很大的变化。
float3 ramp=tex2D( _RampTex , float2(hLambert,hLambert)).rgb;
half4 color=(0,0,0,0);
color.rgb=s.Albedo * _LightColor0.rgb * (ramp);
color.a=s.Alpha;
return color;
}
//需要视角方向的前向着色
inline half4 LightingBasicDiffuseWithViewDir(SurfaceOutput so,half3 lightDir,half3 viewDir,half atten)
{
half4 color=(0,0,0,0);
return color;
}
//需要使用延迟着色
inline half4 LightingBasicDiffuse_PrePass(SurfaceOutput so,half4 light)
{
half4 color=(0,0,0,0);
return color;
}
ENDCG
}
FallBack "Diffuse"
}
shader 效果如第一张图的 第二个 Capsule。
使用了 Half Lambert 光照模型之后,然后使用渐变纹理来控制,就像图中的效果,转动查看会法线,只会用到 渐变纹理的右边一半的颜色,左边一边是用不上的。
这是因为 Half Lambert 光照模型中,这一句
float hLambert = difLight * 0.5 +0.5;
Half Lamert光照模型就表现在这一句,将漫反射的光照值范围限定到了 (0.5,1)
所以我们根据 (0.5,1) 这个值 作为 UV 去渐变纹理采样,只能采样到右边一半的颜色。
最终的效果就是,根据光照的方向,计算各点受光照影响的强度,然后把强度作为UV去渐变纹理采样。
示例工程打包下载:
http://pan.baidu.com/s/1jHzC84Y

相关文章推荐
- [UnityShader2]顶点片段着色器基础
- 关于Unity3D协程的使用
- 破解Unity3D的步骤-为部分人提供帮助
- 配置Unity脚本开发环境visual studio 2013 tools for unity
- unity c# LINQ查询
- unity c# Lambda表达式
- unity c# 泛型委托
- unity c# 标准事件模式
- unity c# 事件
- unity c# 接口
- Unity4.6 UI按钮绑定事件(一)
- 详解Unity 4.6新UI的布局
- 学习Unity 4.6新GUI系统
- Unity ugui 和 模型 粒子的层级管理
- unity3d热更新插件uLua学习整理
- 初学者学习 - Unity中的热更新 - Lua和C#通信
- Unity3D小小小经验篇——Canvas
- Unity3d 着色器语法(Shader)
- Unity3D Shader
- Change Queue Not Work In Unity Shader