利用Tabbed Application模板实现多视图切换
2012-08-29 10:06
155 查看
在android中我们一般用intent意图来在各个view之间跳转,在以前的ios开发中,如果要实现选项卡切换多视图,需要用到一个现在Xcode版本中没有的模板Window-Based Application模板,然后在里面建一堆的viewController和xib文件,然后再一顿的猛连,新手到这里往往会很痛苦。现在好了,新版的Xcode中的Tabbed Application模板可以简单明了的创建一个选项卡多视图,甚至我们都不需要任何操作。
下面我们先打开Xcode,然后选择该模板创建项目:

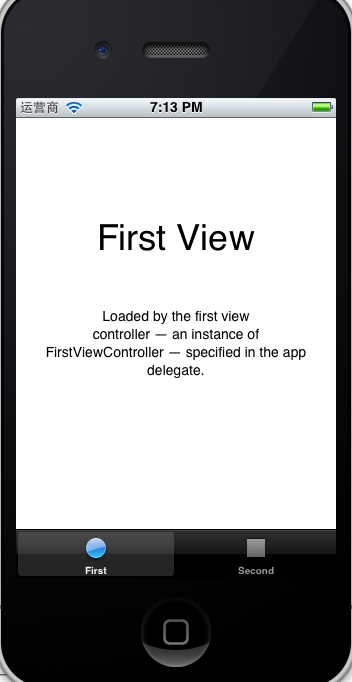
创建成功后直接运行就会在虚拟机上出现一个选项卡(两个选项),点击就会切换不同的view;
现在我们来分析一下这个模板,了解后我们就可以利用该模板来创建我们自己的应用了。
首先该模板并没有主xib文件,所以我们要去AppDelegate中查看是如何代码生成的,在该类的声明中我们发现如下代码:
AppDelegate.h:
[plain] view
plaincopy
#import <UIKit/UIKit.h>
@interface AppDelegate : UIResponder <UIApplicationDelegate, UITabBarControllerDelegate>
@property (strong, nonatomic) UIWindow *window;
@property (strong, nonatomic) UITabBarController *tabBarController;
@end
UIWindow下面就是一个UITabBarController,这里并不是我们常见的viewController,而是一个UIViewController的子类。该类的声明如下:
[plain] view
plaincopy
UIKIT_CLASS_AVAILABLE(2_0) @interface UITabBarController : UIViewController <UITabBarDelegate, NSCoding> {
@package
UITabBar *_tabBar;
UIView *_containerView;
UIView *_viewControllerTransitionView;
id _tabBarItemsToViewControllers;
UIViewController *_selectedViewController;
UINavigationController *_moreNavigationController;
NSArray *_customizableViewControllers;
id<UITabBarControllerDelegate> _delegate;
UIViewController *_selectedViewControllerDuringWillAppear;
UIViewController *_transientViewController;
NSUInteger _maxItems;
struct {
unsigned int isShowingMoreItem:1;
unsigned int needsToRebuildItems:1;
unsigned int isBarHidden:1;
unsigned int editButtonOnLeft:1;
} _tabBarControllerFlags;
}
从上面我们可以发现,该控制器是自带一个UITabBar的,而且里面是有UIViewController作为属性的。现在我们来看AppDelegate的实现:
AppDelegate.m:
[plain] view
plaincopy
#import "AppDelegate.h"
#import "FirstViewController.h"
#import "SecondViewController.h"
#import "ThirdViewController.h"
@implementation AppDelegate
@synthesize window = _window;
@synthesize tabBarController = _tabBarController;
- (void)dealloc
{
[_window release];
[_tabBarController release];
[super dealloc];
}
- (BOOL)application:(UIApplication *)application didFinishLaunchingWithOptions:(NSDictionary *)launchOptions
{
self.window = [[[UIWindow alloc] initWithFrame:[[UIScreen mainScreen] bounds]] autorelease];//1
// Override point for customization after application launch.
UIViewController *viewController1 = [[[FirstViewController alloc] initWithNibName:@"FirstViewController" bundle:nil] autorelease];//2
UIViewController *viewController2 = [[[SecondViewController alloc] initWithNibName:@"SecondViewController" bundle:nil] autorelease];//3
// UIViewController *viewController3 = [[[ThirdViewController alloc] initWithNibName:@"ThirdViewController" bundle:nil] autorelease];//4
self.tabBarController = [[[UITabBarController alloc] init] autorelease];//5
self.tabBarController.viewControllers = [NSArray arrayWithObjects:viewController1, viewController2, viewController3,nil];//6
self.window.rootViewController = self.tabBarController;//7
[self.window makeKeyAndVisible];//8
return YES;
}
@end
没用到的方法被我删掉,现在主要来看应用初始化方法
代码1初始化窗口;
代码2初始化view1的控制器;
代码3初始化view2的控制器;
代码4是我自己后来加的,这里先不管;
代码5初始化根视图控制器(这时只是一般的视图控制器);
代码6将那两个视图的控制器添加为数组给了根视图控制器的viewControllers属性,以便显示;
代码7将根视图器转正(真正成为根视图控制器);
代码8显示窗口;
另外,选项卡上的选项文字和图标是在每一个view的viewController初始化方法里确定的,比如:
FirstViewController.m:
[plain] view
plaincopy
- (id)initWithNibName:(NSString *)nibNameOrNil bundle:(NSBundle *)nibBundleOrNil
{
self = [super initWithNibName:nibNameOrNil bundle:nibBundleOrNil];
if (self) {
self.title = NSLocalizedString(@"First", @"First");
self.tabBarItem.image = [UIImage imageNamed:@"first"];
}
return self;
}
[plain] view
plaincopy
self.title = NSLocalizedString(@"First", @"First");
上面这行代码是给标题,NSLocalizedString方法只是一个宏定义,第二个参数无用,你也可以直接self.title = @"First”这样来赋值。
好了,上面这些模板是系统给我们的,包括图标素材,我们也大概了解了是怎样添加view到应用里和选项卡上的选项对应,我们现在来手动再添加一个view
首先,新建一个viewController,取名为ThirdViewController,注意附带xib文件。
然后在xib文件中拖上一个segmented控件(随便什么都行),将Bottom Bar那一栏修改为Tab Bar用以为选项卡留出位置(好习惯),如下图

在ThirdViewController.m中初始化方法中设置选项名和图标:
[plain] view
plaincopy
- (id)initWithNibName:(NSString *)nibNameOrNil bundle:(NSBundle *)nibBundleOrNil
{
self = [super initWithNibName:nibNameOrNil bundle:nibBundleOrNil];
if (self) {
self.title=@"自定义的";
self.tabBarItem.image = [UIImage imageNamed:@"second"];
//这里我们就用和第二个一样的图片
}
return self;
}
现在将AppDelegate文件在原来的基础上做如下修改:
1,导入新建类ThirdViewController的头文件;
2,将该类实例化,对象名按惯例取名为viewController3;
3,将实例化后的viewController3加到数组里。
[plain] view
plaincopy
#import "AppDelegate.h"
#import "FirstViewController.h"
#import "SecondViewController.h"
#import "ThirdViewController.h"//新增
@implementation AppDelegate
@synthesize window = _window;
@synthesize tabBarController = _tabBarController;
- (void)dealloc
{
[_window release];
[_tabBarController release];
[super dealloc];
}
- (BOOL)application:(UIApplication *)application didFinishLaunchingWithOptions:(NSDictionary *)launchOptions
{
self.window = [[[UIWindow alloc] initWithFrame:[[UIScreen mainScreen] bounds]] autorelease];
// Override point for customization after application launch.
UIViewController *viewController1 = [[[FirstViewController alloc] initWithNibName:@"FirstViewController" bundle:nil] autorelease];
UIViewController *viewController2 = [[[SecondViewController alloc] initWithNibName:@"SecondViewController" bundle:nil] autorelease];
UIViewController *viewController3 = [[[ThirdViewController alloc] initWithNibName:@"ThirdViewController" bundle:nil] autorelease];//新增
self.tabBarController = [[[UITabBarController alloc] init] autorelease];
self.tabBarController.viewControllers = [NSArray arrayWithObjects:viewController1, viewController2, viewController3,nil];//添加
self.window.rootViewController = self.tabBarController;
[self.window makeKeyAndVisible];
return YES;
}
@end
好了,见证奇迹吧:
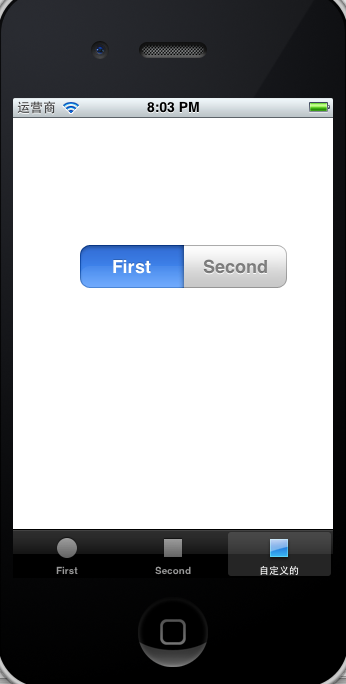
这时我们就实现了在系统模板的基础上添加view,也可以修改原有的,这样就可以很简单的在多个视图之间进行切换,so easy。
下面我们先打开Xcode,然后选择该模板创建项目:
创建成功后直接运行就会在虚拟机上出现一个选项卡(两个选项),点击就会切换不同的view;
现在我们来分析一下这个模板,了解后我们就可以利用该模板来创建我们自己的应用了。
首先该模板并没有主xib文件,所以我们要去AppDelegate中查看是如何代码生成的,在该类的声明中我们发现如下代码:
AppDelegate.h:
[plain] view
plaincopy
#import <UIKit/UIKit.h>
@interface AppDelegate : UIResponder <UIApplicationDelegate, UITabBarControllerDelegate>
@property (strong, nonatomic) UIWindow *window;
@property (strong, nonatomic) UITabBarController *tabBarController;
@end
UIWindow下面就是一个UITabBarController,这里并不是我们常见的viewController,而是一个UIViewController的子类。该类的声明如下:
[plain] view
plaincopy
UIKIT_CLASS_AVAILABLE(2_0) @interface UITabBarController : UIViewController <UITabBarDelegate, NSCoding> {
@package
UITabBar *_tabBar;
UIView *_containerView;
UIView *_viewControllerTransitionView;
id _tabBarItemsToViewControllers;
UIViewController *_selectedViewController;
UINavigationController *_moreNavigationController;
NSArray *_customizableViewControllers;
id<UITabBarControllerDelegate> _delegate;
UIViewController *_selectedViewControllerDuringWillAppear;
UIViewController *_transientViewController;
NSUInteger _maxItems;
struct {
unsigned int isShowingMoreItem:1;
unsigned int needsToRebuildItems:1;
unsigned int isBarHidden:1;
unsigned int editButtonOnLeft:1;
} _tabBarControllerFlags;
}
从上面我们可以发现,该控制器是自带一个UITabBar的,而且里面是有UIViewController作为属性的。现在我们来看AppDelegate的实现:
AppDelegate.m:
[plain] view
plaincopy
#import "AppDelegate.h"
#import "FirstViewController.h"
#import "SecondViewController.h"
#import "ThirdViewController.h"
@implementation AppDelegate
@synthesize window = _window;
@synthesize tabBarController = _tabBarController;
- (void)dealloc
{
[_window release];
[_tabBarController release];
[super dealloc];
}
- (BOOL)application:(UIApplication *)application didFinishLaunchingWithOptions:(NSDictionary *)launchOptions
{
self.window = [[[UIWindow alloc] initWithFrame:[[UIScreen mainScreen] bounds]] autorelease];//1
// Override point for customization after application launch.
UIViewController *viewController1 = [[[FirstViewController alloc] initWithNibName:@"FirstViewController" bundle:nil] autorelease];//2
UIViewController *viewController2 = [[[SecondViewController alloc] initWithNibName:@"SecondViewController" bundle:nil] autorelease];//3
// UIViewController *viewController3 = [[[ThirdViewController alloc] initWithNibName:@"ThirdViewController" bundle:nil] autorelease];//4
self.tabBarController = [[[UITabBarController alloc] init] autorelease];//5
self.tabBarController.viewControllers = [NSArray arrayWithObjects:viewController1, viewController2, viewController3,nil];//6
self.window.rootViewController = self.tabBarController;//7
[self.window makeKeyAndVisible];//8
return YES;
}
@end
没用到的方法被我删掉,现在主要来看应用初始化方法
代码1初始化窗口;
代码2初始化view1的控制器;
代码3初始化view2的控制器;
代码4是我自己后来加的,这里先不管;
代码5初始化根视图控制器(这时只是一般的视图控制器);
代码6将那两个视图的控制器添加为数组给了根视图控制器的viewControllers属性,以便显示;
代码7将根视图器转正(真正成为根视图控制器);
代码8显示窗口;
另外,选项卡上的选项文字和图标是在每一个view的viewController初始化方法里确定的,比如:
FirstViewController.m:
[plain] view
plaincopy
- (id)initWithNibName:(NSString *)nibNameOrNil bundle:(NSBundle *)nibBundleOrNil
{
self = [super initWithNibName:nibNameOrNil bundle:nibBundleOrNil];
if (self) {
self.title = NSLocalizedString(@"First", @"First");
self.tabBarItem.image = [UIImage imageNamed:@"first"];
}
return self;
}
[plain] view
plaincopy
self.title = NSLocalizedString(@"First", @"First");
上面这行代码是给标题,NSLocalizedString方法只是一个宏定义,第二个参数无用,你也可以直接self.title = @"First”这样来赋值。
好了,上面这些模板是系统给我们的,包括图标素材,我们也大概了解了是怎样添加view到应用里和选项卡上的选项对应,我们现在来手动再添加一个view
首先,新建一个viewController,取名为ThirdViewController,注意附带xib文件。
然后在xib文件中拖上一个segmented控件(随便什么都行),将Bottom Bar那一栏修改为Tab Bar用以为选项卡留出位置(好习惯),如下图
在ThirdViewController.m中初始化方法中设置选项名和图标:
[plain] view
plaincopy
- (id)initWithNibName:(NSString *)nibNameOrNil bundle:(NSBundle *)nibBundleOrNil
{
self = [super initWithNibName:nibNameOrNil bundle:nibBundleOrNil];
if (self) {
self.title=@"自定义的";
self.tabBarItem.image = [UIImage imageNamed:@"second"];
//这里我们就用和第二个一样的图片
}
return self;
}
现在将AppDelegate文件在原来的基础上做如下修改:
1,导入新建类ThirdViewController的头文件;
2,将该类实例化,对象名按惯例取名为viewController3;
3,将实例化后的viewController3加到数组里。
[plain] view
plaincopy
#import "AppDelegate.h"
#import "FirstViewController.h"
#import "SecondViewController.h"
#import "ThirdViewController.h"//新增
@implementation AppDelegate
@synthesize window = _window;
@synthesize tabBarController = _tabBarController;
- (void)dealloc
{
[_window release];
[_tabBarController release];
[super dealloc];
}
- (BOOL)application:(UIApplication *)application didFinishLaunchingWithOptions:(NSDictionary *)launchOptions
{
self.window = [[[UIWindow alloc] initWithFrame:[[UIScreen mainScreen] bounds]] autorelease];
// Override point for customization after application launch.
UIViewController *viewController1 = [[[FirstViewController alloc] initWithNibName:@"FirstViewController" bundle:nil] autorelease];
UIViewController *viewController2 = [[[SecondViewController alloc] initWithNibName:@"SecondViewController" bundle:nil] autorelease];
UIViewController *viewController3 = [[[ThirdViewController alloc] initWithNibName:@"ThirdViewController" bundle:nil] autorelease];//新增
self.tabBarController = [[[UITabBarController alloc] init] autorelease];
self.tabBarController.viewControllers = [NSArray arrayWithObjects:viewController1, viewController2, viewController3,nil];//添加
self.window.rootViewController = self.tabBarController;
[self.window makeKeyAndVisible];
return YES;
}
@end
好了,见证奇迹吧:
这时我们就实现了在系统模板的基础上添加view,也可以修改原有的,这样就可以很简单的在多个视图之间进行切换,so easy。

相关文章推荐
- Iphone开发(八)利用Tabbed Application模板实现多视图切换
- Iphone开发(八)利用Tabbed Application模板实现多视图切换
- Iphone开发(八)利用Tabbed Application模板实现多视图切换
- Android中利用ViewPager实现视图切换
- 关于利用js实现css切换布局视图的方法
- Android中利用ListView和GridView实现列表视图和网格(图标)视图的相互切换显示
- Android技术——视图切换(一)利用ActionBar实现Tab导航
- 【iOS开发-24】导航控制器下不同视图控制器之间切换:利用CATrasition和view的layer层来实现自定义的动画效果
- Android中利用ViewPager实现视图切换
- iOS开发导航控制器下不同视图控制器之间切换:利用CATrasition和view的layer层来实现自定义的动画效果
- Android利用ViewFlipper实现随手势滑动视图间切换
- 在rMBP上利用Python的onetimepass库实现Google Authenticator Application的效果
- JavaSE_12_利用抽象类实现模板设计模式
- [置顶] 利用Global.asax的Application_BeginRequest 实现url 重写 无后缀
- 利用C++模板,代替虚函数实现类的静态多态性
- laravel4通过控制视图模板路劲来动态切换主题
- 利用 frameset 框架实现切换网页时不刷新背景音乐(不会中断)
- 在C++中利用模板实现 data variant(propery)
- 利用C++模板,代替虚函数,实现类的静态多态性(加入性能测试部分)
- 2.4 一路酒席招待三路宾朋——利用模板实现跨编程语言