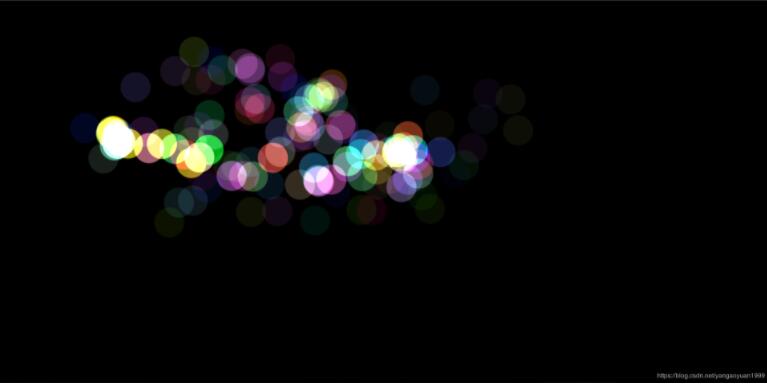
JavaScript实现好看的跟随彩色气泡效果
2020-03-11 17:51
417 查看
本文实例为大家分享了js实现跟随彩色气泡的具体代码,供大家参考,具体内容如下
代码:
<!DOCTYPE html>
<html>
<head>
<meta charset="utf-8" />
<title></title>

<style>
*{
margin:0;padding:0;
}
body{overflow:hidden;}
#canvas{
background-color:black;
/*width:100%;
height:100vh;*/
}

</style>

</head>
<body>

<canvas id="canvas" ></canvas>

</body>

<script>
var canvas = document.querySelector('#canvas');
var ctx = canvas.getContext("2d");
var starlist = [];
function init(){
canvas.width = window.innerWidth;
canvas.height = window.innerHeight;
}
init();
window.onresize = init;

canvas.addEventListener('mousemove',function(e){
starlist.push(new Star(e.offsetX,e.offsetY));
console.log(starlist)
})

function random(min,max){
return Math.floor((max-min)*Math.random()+ min);
}

function Star(x,y){
this.x = x;
this.y = y;
this.vx = (Math.random()-0.5)*3;
this.vy = (Math.random()-0.5)*3;
this.color = 'rgb('+random(0,256)+','+random(0,256)+','+random(0,256)+')';
this.a = 1;
console.log(this.color);
this.draw();
}
Star.prototype={
draw:function(){
ctx.beginPath();
ctx.fillStyle = this.color;
ctx.globalCompositeOperation='lighter'
ctx.globalAlpha= this.a;
ctx.arc(this.x,this.y,30,0,Math.PI*2,false);
ctx.fill();
this.updata();
},
updata(){
this.x+=this.vx;
this.y+=this.vy;
this.a*=0.98;
}
}
console.log(new Star(150,200));
function render(){
ctx.clearRect(0,0,canvas.width,canvas.height)

starlist.forEach((item,i)=>{
item.draw();
if(item.a<0.05){
starlist.splice(i,1);
}
})

requestAnimationFrame(render);
}
render();

</script>
<div style="text-align:center;">
</div>

</html>
以上就是本文的全部内容,希望对大家的学习有所帮助
您可能感兴趣的文章:

相关文章推荐
- javascript实现图片跟随鼠标移动效果的方法
- JavaScript实现小球运动撞击效果,模仿气泡屏保
- 安卓仿手机QQ消息BadgeView气泡跟随手指移动,并实现进出动画效果。
- Qt+html+JavaScript实现类似QQ聊天界面的气泡效果
- JS实现的多个彩色小球跟随鼠标移动动画效果示例
- 利用javaScript+css实现图片跟随鼠标联动效果页面
- JavaScript实现鼠标移动粒子跟随效果
- 使用JS实现气泡跟随鼠标移动的动画效果
- javascript简单实现跟随滚动条漂浮的返回顶部按钮效果
- javascript实现图片跟随鼠标移动效果的方法
- 完整的html+css+javascript实现跟随鼠标移动显示选中效果
- 原生JS实现的多个彩色小球跟随鼠标移动动画效果示例
- Javascript+CSS实现漂亮带缓冲效果的图片展示代码
- JavaScript学习——使用JS实现首页轮播图效果
- 使用javascript实现的雪花飞舞的效果
- 用JavaScript实现全选,批量删除,还有鼠标悬浮在信息上时变色(光棒效果)等...
- JavaScript实现新年倒计时效果
- 基于JavaScript实现TAB标签效果
- HTML5+javascript实现图片加载进度动画效果
- JS DOM 编程艺术(第2版)读书笔记 第10章 用JavaScript实现动画效果