使用Python-opencv3制作简单的人脸识别系统
 版权声明:署名,允许他人基于本文进行创作,且必须基于与原先许可协议相同的许可协议分发本文 (Creative Commons)
分享一下自己做这个小程序的笔记!
使用工具:PyCharm,python版本3.7,opencv3
使用的包:

原理和功能
使用opencv3调用摄像头,获取图像保存,对保存的图片进行OPENCVLBHP算法训练,利用训练集和分类器实现人脸识别。使用语音模块进行人机交互,使用数据库相关操作保存和读取数据库!
详细设计
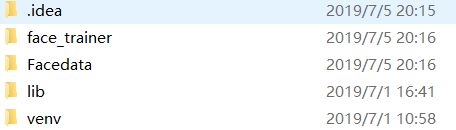
由于保存人脸信息和训练集需要文件夹,这里先进行检测环境,如果没有就进行创建。
def makeDir(engine,x):
if not os.path.exists("face_trainer"):
print("创建预训练环境")
engine.say('检测到第一次启动,正在创建预训练环境')
os.mkdir("face_trainer")
engine.say('创建成功')
engine.runAndWait()
x=2
if not os.path.exists("Facedata"):
print("创建训练环境")
engine.say('正在创建训练环境')
os.mkdir("Facedata")
engine.say('创建成功')
engine.runAndWait()
x=2
return x
通过摄像头采集人脸信息
def getFace(cap,face_id):
face_detector = cv2.CascadeClassifier('./lib/haarcascade_frontalface_default.xml')
print('\n Initializing face capture. Look at the camera and wait ...')
count = 0
while True:
sucess, img = cap.read()
gray = cv2.cvtColor(img, cv2.COLOR_BGR2GRAY)
faces = face_detector.detectMultiScale(gray, 1.3, 5)
for (x, y, w, h) in faces:
cv2.rectangle(img, (x, y), (x+w, y+w), (255, 0, 0))
count += 1
cv2.imwrite("Facedata/User." + str(face_id) + '.' + str(count) + '.jpg', gray[y: y + h, x: x + w])
cv2.imshow('image', img)
# 保持画面的持续。
k = cv2.waitKey(1)
if k == 27:   # 通过esc键退出摄像
break
elif count >= 1000:  # 得到1000个样本后退出摄像
break
cv2.destroyAllWindows()
cv2.CascadeClassifier中加载分类器,使用官方给定的xml分类器进行识别。
接着后面会用到路径有关的读取函数实现如下:
def getImagesAndLabels(path,detector):
imagePaths = [os.path.join(path, f) for f in os.listdir(path)]
faceSamples = []
ids = []
for imagePath in imagePaths:
PIL_img = Image.open(imagePath).convert('L')
img_numpy = np.array(PIL_img, 'uint8')
id = int(os.path.split(imagePath)[-1].split(".")[1])
faces = detector.detectMultiScale(img_numpy)
for (x, y, w, h) in faces:
faceSamples.append(img_numpy[y:y + h, x: x + w])
ids.append(id)
return faceSamples, ids
接下来是对已保存的人脸数据进行训练,生成属于我们自己的训练集 .yml文件
def trainFace():
# 人脸数据路径
path = 'Facedata'
recognizer = cv2.face.LBPHFaceRecognizer_create()
detector = cv2.CascadeClassifier("./lib/haarcascade_frontalface_default.xml")
print('Training faces. It will take a few seconds. Wait ...')
faces, ids = getImagesAndLabels(path,detector)
recognizer.train(faces, np.array(ids))
recognizer.write(r'face_trainer\trainer.yml')
print("{0} faces trained. Exiting Program".format(len(np.unique(ids))))
最后是实现人脸的识别模块
def checkFace(cam,names,engine):

recognizer = cv2.face.LBPHFaceRecognizer_create()
recognizer.read('face_trainer/trainer.yml')
cascadePath = "./lib/haarcascade_frontalface_default.xml"
faceCascade = cv2.CascadeClassifier(cascadePath)
font = cv2.FONT_HERSHEY_SIMPLEX
minW = 0.1 * cam.get(3)
minH = 0.1 * cam.get(4)
while True:
ret, img = cam.read()
gray = cv2.cvtColor(img, cv2.COLOR_BGR2GRAY)
faces = faceCascade.detectMultiScale(
gray,
scaleFactor=1.2,
minNeighbors=5,
minSize=(int(minW), int(minH))
)
for (x, y, w, h) in faces:
cv2.rectangle(img, (x, y), (x + w, y + h), (0, 255, 0), 2)
idnum, confidence = recognizer.predict(gray[y:y + h, x:x + w])
print(idnum)
if confidence < 100:
idnum = names[idnum]
confidence = "{0}%".format(round(100 - confidence))
say(engine, "欢迎      " + idnum + "签到成功!")
cv2.putText(img, str(idnum), (x + 5, y - 5), font, 1, (0, 0, 255), 1)
cv2.putText(img, str(confidence), (x + 5, y + h - 5), font, 1, (0, 0, 0), 1)
cv2.imshow('camera', img)
time.sleep(2)
Insert_Data_Check(conn, cursor, idnum)#签到信息插入数据库
return
else:
idnum = "unknown"
confidence = "{0}%".format(round(100 - confidence))
cv2.putText(img, str(idnum), (x + 5, y - 5), font, 1, (0, 0, 255), 1)
cv2.putText(img, str(confidence), (x + 5, y + h - 5), font, 1, (0, 0, 0), 1)
cv2.imshow('camera', img)
k = cv2.waitKey(10)
if k == 27:
break
本系统中信息的保存和读取是从数据库中保存和获得的
用到的函数如下:
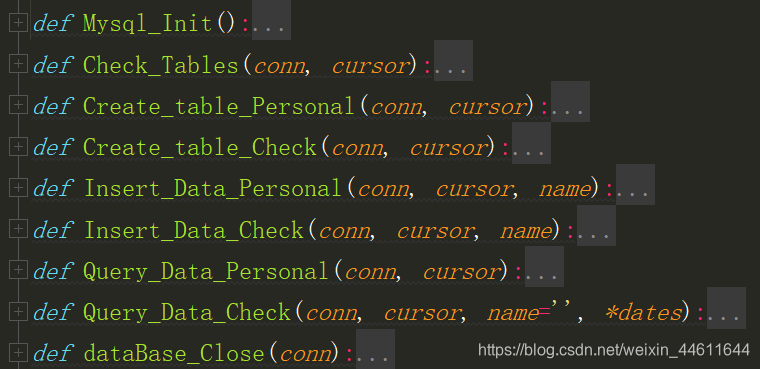
其中包含了数据库的连接和关闭以及初始化函数,表的检测和创建函数,插入和查询函数。重点在两个query函数,首先保存的姓名信息以列表的形式传给names列表,在进行识别签到时id的读取也是从这里读取的,接着是签到记录的查询函数,可以给定名字查询也可以给日期查询当天的所有人记录,也可以直接enter都按默认查询全部的签到记录。
主要代码如下
def Query_Data_Personal(conn, cursor):
sql = "select name from personal"
cursor.execute(sql)
conn.commit()
results = cursor.fetchall()
list_name = []
for x in results:
x = list(x)
list_name += x
return list_name
def Query_Data_Check(conn, cursor, name='', *dates):
if dates is ():
if name == '':
sql = "select * from check_table;"
else:
sql = "select * from check_table where name = '%s';" % (name,)
print(sql)
cursor.execute(sql)
else:
if name == '':
for date in dates:
sql = """select * from check_table where  check_time = any (
select check_time from check_table where DATEDIFF(date(check_time),'%s') < 1)
""" % (date,)
print(sql)
# 执行sql语句
cursor.execute(sql)
else:
for date in dates:
print(date)
sql = """select * from check_table where name = '%s' and check_time = any (
select check_time from check_table where  DATEDIFF(date(check_time),'%s') < 1);
""" % (name, date)
print(sql)
# 执行sql语句
cursor.execute(sql)
# 提交到数据库执行
conn.commit()
results = cursor.fetchall()
for x in results:
print("("+ str(x[0])+",  "+x[1] +",  "+ str(x[2]) +")")
语音模块在py文件的开始进行导入,我这里选择import pyttsx3
对语音模块进行设置和使用如下
def say(engine,str):
engine.say(str)
engine.runAndWait()

`engine = pyttsx3.init()
rate = engine.getProperty('rate')
engine.setProperty('rate', rate - 20)
say(engine, "欢迎使用人脸识别签到系统")``
后续直接使用say()可实现语音播放功能,上述代码的功能是实现语音播放等待和调整语速。
整个程序的主函数流程为,检测环境与初始化→录入人脸信息→对人脸信息进行训练→实现人脸识别签到功能。其中如果是第一次创建环境则不需要询问是否创建新的人脸,直接执行人脸录入模块。签到功能之后会跳转主菜单选择退出,查询签到记录,或者录入新的人脸。主函数代码如下
if __name__ == '__main__':
engine = pyttsx3.init()
rate = engine.getProperty('rate')
engine.setProperty('rate', rate - 20)
say(engine, "欢迎使用人脸识别签到系统")
simply_0=1#标志变量 象征是否第一次使用系统
simply_0=makeDir(engine,simply_0)
say(engine, "正在初始化数据库")
conn, cursor = Mysql_Init()
Check_Tables(conn, cursor)
say(engine, "数据库初始化完毕")
names = []#打印已存在的人员姓名
names = Query_Data_Personal(conn, cursor)
print(names)
while True:
if simply_0 == 1:#不是第一次使用
say(engine, "输入0录入新的人脸信息 输入其他跳转至人脸签到 ")
value = input("0-录入 or other-签到模块")
if value == '0':
say(engine, "请输入您的姓名")
name = input("请输入姓名:")
names.append(name)
# 新成员信息已保存到数据库中
Insert_Data_Personal(conn, cursor, name)
say(engine, "新的人员信息已保存到数据库中")
say(engine,"正在打开摄像头")
cam = cv2.VideoCapture(0)
say(engine, "注视摄像头,开始采集人脸数据")
getFace(cam,len(names)-1)
say(engine, "采集完毕,开始训练")
trainFace()
say(engine, "训练完毕,跳转到人脸签到模块")
else:
say(engine, "正在打开摄像头")
cam = cv2.VideoCapture(0)

else:#是第一次使用系统
say(engine, "这是首次录入人脸信息,请输入您的姓名 ")
name = input("请输入姓名:")
names.append(name)
#新成员信息保存到数据库中
Insert_Data_Personal(conn, cursor, name)
say(engine, "新的人员信息已保存到数据库中")
say(engine, "正在打开摄像头")
cam = cv2.VideoCapture(0)
say(engine, "注视摄像头,开始采集人脸数据")
getFace(cam, len(names) - 1)
say(engine, "采集完毕,开始训练")
tr
1cca8
ainFace()
say(engine, "训练完毕,跳转至人脸签到")

say(engine, "输入0进行人脸签到,输入其他跳转至主菜单")
simply_1 = input("输入0进行人脸签到,输入其他跳转至主菜单")
if simply_1=='0':
checkFace(cam, names, engine)
say(engine, "签到记录信息已保存到数据库中")
cam.release()
cv2.destroyAllWindows()
else:
cam.release()
cv2.destroyAllWindows()

say(engine, "输入 0 退出系统 ,输入1 查询签到记录 其他任意键 录入人脸模块")
key = input("输入key:(0 - 退出系统 ,1-查询签到记录 other - 重新启动系统)")
if key=='1':
say(engine, "输入要查询记录的姓名或日期")
name_0 = input("输入要查询记录的名字")
date_0=input("输入要查询记录的日期")
Query_Data_Check(conn, cursor, name_0, *date_0)
say(engine, "签到记录查询完毕")
say(engine, "系统即将跳转至录入人脸模块")
if key == '0':
say(engine, "系统将退出,欢迎下次使用")
dataBase_Close(conn)
sys.exit(0)
运行的主要结果
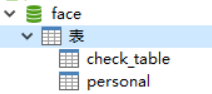
初次运行系统,将自动创建训练环境以及数据库表
运行py文件,首先会打印数据库中已经保存的训练过的人脸信息姓名

因为已经录入过很多信息了,直接选择签到功能!
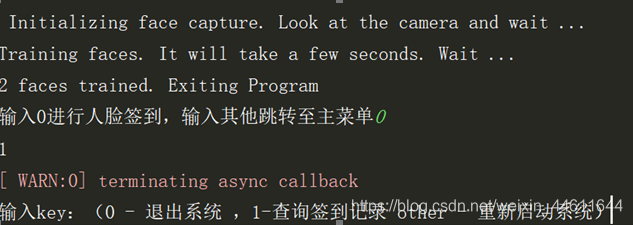
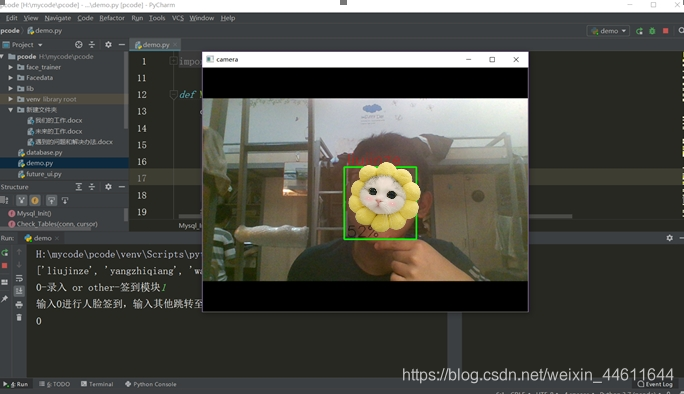
语音提示注视摄像头,签到成功后会弹出签到快照停留三秒,显示签到人员以及识别相似度。语音播放xxx签到成功!
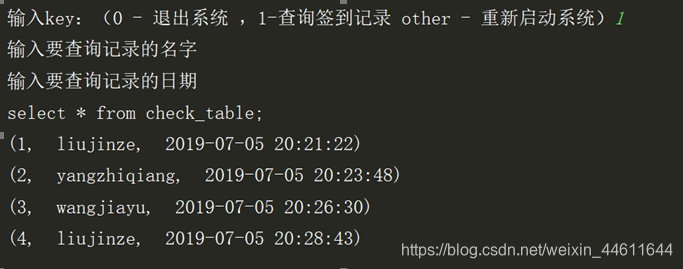
如果选择查询签到记录,这里默认都不输入数据,查询到了全部的记录
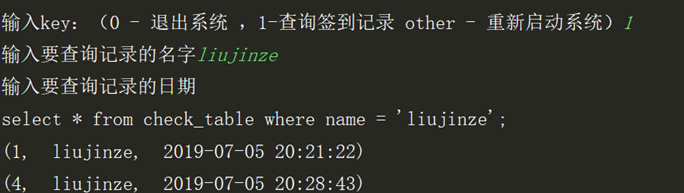
或者输入名字不输入日期查询某一个人的记录
一个简单的识别系统就这样完成了!后续还可以通过设计UI界面和提供CS架构实现数据传输。

- python使用opencv实现人脸识别系统
- 图像识别 python+opencv的简单人脸识别
- python使用opencv2人脸识别
- python+opencv实现的简单人脸识别代码示例
- python使用opencv进行人脸识别
- 使用OpenCV和Python进行人脸识别
- ## 使用python-opencv人脸识别时遇到 error: (-215:Assertion failed) !empty() in function 'cv::CascadeClassifier
- php使用face++实现一个简单的人脸识别系统
- python使用opencv进行人脸识别
- 图像识别 python+opencv的简单人脸识别
- 从零使用OpenCV快速实现简单车牌识别系统
- 从零使用OpenCV快速实现简单车牌识别系统
- 基于OpenCv的人脸检测、识别系统学习制作笔记之三
- Python + OpenCV 实现简单的人脸识别
- 从零使用OpenCV快速实现简单车牌识别系统
- 使用OpenCV+PCA+KNN/SVM进行人脸检测和识别-Python
- opencv for python 之人脸识别
- 使用Python结合Face++ API识别人脸
- python下学生管理系统:从文件中读取30位学生的信息(含邮箱),并实现简单的增、删、查找、统计(邮箱使用人数)。---附程序哦!
- Java使用OpenCV进行人脸识别