SSM框架搭建
新手一个,毕设需要用SSM框架做一个管理系统,之前从没用过SSM,但是通过网上的教程来做,因为各种原因,或是莫名缺包,或是版本不匹配,始终没有搭建起自己的SSM框架,就放弃了。但是今天突发奇想,再试着搭建一次,莫名其妙就成功了,特此记录。
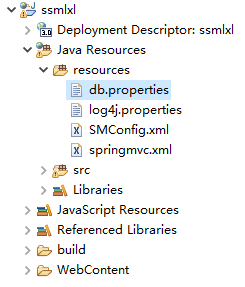
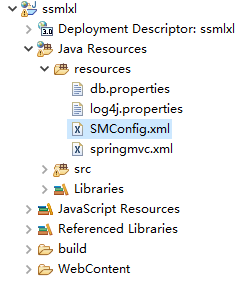
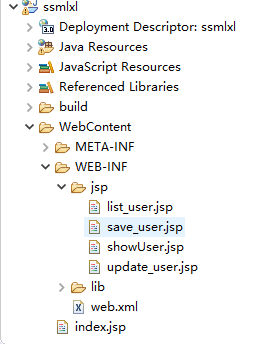
1. 项目结构图

2. JAR包
因为没使用maven,所以用的是导包的形式。


3. Spring与Mybatis的整合
首先,做的是Spring和Mybatis的整合。话不多说,直接上源码。
3.1. JDBC属性文件
db.properties
jdbc.driverClass=com.mysql.jdbc.Driver
jdbc.jdbcUrl=jdbc:mysql://localhost:3306/lxldb?useUnicode=true&characterEncoding=utf8&serverTimezone=GMT%2B8&useSSL=false
jdbc.user=root
jdbc.password=123456
3.2. spring整合mybatis的配置文件
SMConfig.xml
<?xml version="1.0" encoding="UTF-8"?>
<beans xmlns="http://www.springframework.org/schema/beans"
xmlns:xsi="http://www.w3.org/2001/XMLSchema-instance"
xmlns:aop="http://www.springframework.org/schema/aop"
xmlns:context="http://www.springframework.org/schema/context"
xmlns:tx="http://www.springframework.org/schema/tx"
xsi:schemaLocation="http://www.springframework.org/schema/beans http://www.springframework.org/schema/beans/spring-beans.xsd
http://www.springframework.org/schema/context http://www.springframework.org/schema/context/spring-context-4.0.xsd
http://www.springframework.org/schema/aop http://www.springframework.org/schema/aop/spring-aop.xsd
http://www.springframework.org/schema/tx http://www.springframework.org/schema/tx/spring-tx-4.0.xsd">
<context:component-scan base-package="com.lxl"></context:component-scan>
<context:property-placeholder location="classpath:db.properties"/>
<bean id="dataSource" class="com.mchange.v2.c3p0.ComboPooledDataSource">
<property name="driverClass" value="${jdbc.driverClass}"></property>
<property name="jdbcUrl" value="${jdbc.jdbcUrl}"></property>
<property name="user" value="${jdbc.user}"></property>
<property name="password" value="${jdbc.password}"></property>
<property name="initialPoolSize" value="5"></property>
<property name="minPoolSize" value="1"></property>
<property name="maxPoolSize" value="40"></property>
<property name="maxIdleTime" value="20"></property>
</bean>
<!-- 不再需要mybatis的配置映射文件 -->
<bean id="sqlSessionFactory" class="org.mybatis.spring.SqlSessionFactoryBean">
<property name="dataSource" ref="dataSource"></property>
<!-- 自动扫描mapper.xml文件 -->
<property name="mapperLocations" value="classpath:com/lxl/mapper/*.xml"></property>
</bean>

<!-- Mapper接口所在的包 -->
<bean class="org.mybatis.spring.mapper.MapperScannerConfigurer">
<property name="basePackage" value="com.lxl.mapper"></property>
<property name="sqlSessionFactoryBeanName" value="sqlSessionFactory"></property>
</bean>

<!-- 事务管理器 -->
<bean id="transactionManager" class="org.springframework.jdbc.datasource.DataSourceTransactionManager">
<property name="dataSource" ref="dataSource"></property>
</bean>
<tx:annotation-driven/>
</beans>
3.3. Log4j配置文件

log4j.properties
# Global logging configuration
log4j.rootLogger=DEBUG, stdout
# MyBatis logging configuration...
log4j.logger.org.mybatis.example.BlogMapper=TRACE
# Console output...
log4j.appender.stdout=org.apache.log4j.ConsoleAppender
log4j.appender.stdout.layout=org.apache.log4j.PatternLayout
log4j.appender.stdout.layout.ConversionPattern=%5p [%t] - %m%n
这样,spring和mybatis已经整合完成了,下面进行测试。
4. 测试Spring与Mybatis整合结果
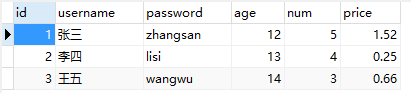
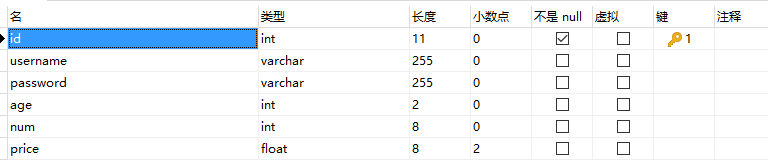
4.1. 建表
建表我用的是Navicat,可以不用SQL语句,但为了方便不用该软件的同志,还是列出SQL。
SQL语句:
CREATE TABLE `t_user` (
`id` int(11) NOT NULL AUTO_INCREMENT,
`username` varchar(255) DEFAULT NULL,
`password` varchar(255) DEFAULT NULL,
`age` int(2) DEFAULT NULL,
`num` int(8) DEFAULT NULL,
`price` float(8,2) DEFAULT NULL,
PRIMARY KEY (`id`)
) ENGINE=InnoDB AUTO_INCREMENT=4 DEFAULT CHARSET=utf8;
4.2. 建立实体和映射
其实mybatis有generator自动生成实体和映射的工具,但是我觉得还是自己建比较实际,虽然累,但是不会有很多冗余的代码存在,看着干净一些。
4.1.1. 建立实体
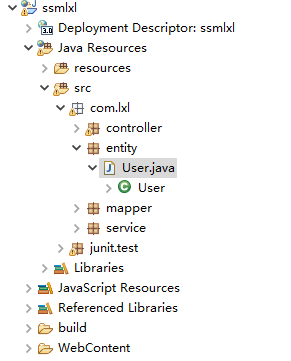
User.java
package com.lxl.entity;

public class User {
private int id;
private String username;
private String password;
private int age;
private int num;
private float price;
public void setId(int id) {
this.id = id;
}
public int getId() {
return this.id;
}
public void setAge(int age) {
this.age = age;
}
public int getAge() {
return this.age;
}
public void setUsername(String username) {
this.username = username;
}
public String getUsername() {
return this.username;
}
public void setPassword(String password) {
this.password = password;
}
public String getPassword() {
return this.password;
}
public void setNum(int num) {
this.num = num;
}
public int getNum() {
return this.num;
}
public void setPrice(float price) {
this.price = price;
}
public float getPrice() {
return this.price;
}
public String toString(){
return "编号为:"+id+",姓名为:"+username+",密码为:"+password+",年龄为:"+age+" "+num+" "+price;
}
}
4.1.2. 建立映射及其接口
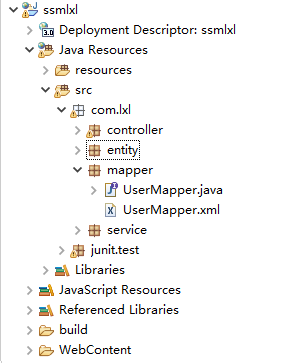
UserMapper.xml
<?xml version="1.0" encoding="UTF-8"?>
<!DOCTYPE mapper PUBLIC "-//mybatis.org//DTD Mapper 3.0//EN" "mybatis-3-mapper.dtd" >
<mapper namespace="com.lxl.mapper.UserMapper">
<resultMap type="com.lxl.entity.User" id="BaseResultMap">
<id column="id" jdbcType="INTEGER" property="id" />
<result column="username" jdbcType="VARCHAR" property="username"/>
<result column="password" jdbcType="VARCHAR" property="password"/>
<result column="age" jdbcType="INTEGER" property="age"/>
<result column="num" jdbcType="INTEGER" property="num"/>
<result column="price" jdbcType="FLOAT" property="price"/>
</resultMap>
<sql id="Base_Column_List">
id,username,password,age,num,price
</sql>
<select id="selectAll" resultMap="BaseResultMap">
select
<include refid="Base_Column_List"></include>
from t_user
</select>
<select id="findUserById" parameterType="int" resultType="com.lxl.entity.User">
select * from t_user where id = #{id}
</select>
<insert id="saveUser" parameterType="com.lxl.entity.User" >
insert into t_user(username) values (#{username})
</insert>
<delete id="deleteUserById" parameterType="int">
delete from t_user where id=#{id}
</delete>
<update id="updateUser" parameterType="com.lxl.entity.User">
update t_user set username=#{username} where id=#{id}
</update>
</mapper>
UserMapper.java
package com.lxl.mapper;

import java.util.List;

import com.lxl.entity.User;

public interface UserMapper {
public List<User> selectAll();
public User findUserById(int id);
public int saveUser(User user);
public int deleteUserById(int id);
public int updateUser(User user);
}
4.3. 建立Service接口及其实现类
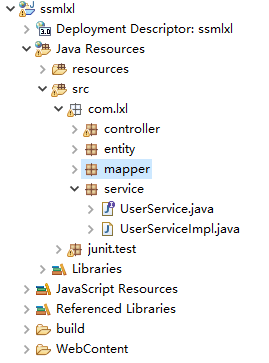
UserService.java
package com.lxl.service;

import java.util.List;

import com.lxl.entity.User;

public interface UserService {
public List<User> findAll();
public User findUserById(int id);
public boolean saveUser(User user);
public boolean deleteUserById(int id);
public boolean updateUser(User user);
}
UserServiceImpl.java
package com.lxl.service;

import java.util.List;

import org.springframework.beans.factory.annotation.Autowired;
import org.springframework.stereotype.Service;
import org.springframework.transaction.annotation.Transactional;

import com.lxl.entity.User;
import com.lxl.mapper.UserMapper;
@Service("userService")
public class UserServiceImpl implements UserService{

@Autowired
private UserMapper userMapper;
@Transactional
public List<User> findAll() {
return userMapper.selectAll();
}
public User findUserById(int id) {
return userMapper.findUserById(id);
}
public boolean saveUser(User user) {
int ret = userMapper.saveUser(user);
if (ret == 1) {
return true;
}
else {
return false;
}
}
public boolean deleteUserById(int id) {
int ret = userMapper.deleteUserById(id);
if (ret == 1) {
return true;
}
else {
return false;
}
}
public boolean updateUser(User user) {
int ret = userMapper.updateUser(user);
if (ret == 1) {
return true;
}
else {
return false;
}
}
}
4.4. 建立Junit测试
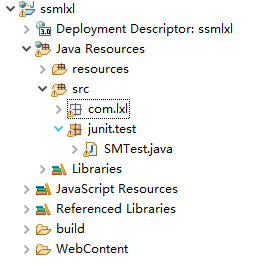
SMTest.java
package junit.test;

import java.util.List;

import org.junit.Test;
import org.springframework.context.ApplicationContext;
import org.springframework.context.support.ClassPathXmlApplicationContext;

import com.lxl.entity.User;
import com.lxl.service.UserService;

public class SMTest {

@Test
public void test() {
String xmlPath = "SMConfig.xml";
ApplicationContext context = new ClassPathXmlApplicationContext(xmlPath);

UserService userService = context.getBean("userService", UserService.class);
List<User> userList = userService.findAll();
for(User temp:userList) {
System.out.println(temp);
}
}

}
右键SMTest.java进行Junit测试。

如果控制台弹出下图结果,则表明整合成功。

5. 整合SpringMVC
5.1. SpringMVC配置文件

springmvc.xml
<?xml version="1.0" encoding="UTF-8"?>
<beans xmlns="http://www.springframework.org/schema/beans"
xmlns:xsi="http://www.w3.org/2001/XMLSchema-instance" xmlns:p="http://www.springframework.org/schema/p"
xmlns:context="http://www.springframework.org/schema/context"
xmlns:mvc="http://www.springframework.org/schema/mvc"
xsi:schemaLocation="http://www.springframework.org/schema/beans
http://www.springframework.org/schema/beans/spring-beans-3.1.xsd
http:
1b5d8
//www.springframework.org/schema/context
http://www.springframework.org/schema/context/spring-context-3.1.xsd
http://www.springframework.org/schema/mvc
http://www.springframework.org/schema/mvc/spring-mvc-4.0.xsd">
<!-- 自动扫描该包,使SpringMVC认为包下用了@controller注解的类是控制器 -->
<context:component-scan base-package="com.lxl.controller" />
<!--避免IE执行AJAX时,返回JSON出现下载文件 -->
<bean id="mappingJacksonHttpMessageConverter"
class="org.springframework.http.converter.json.MappingJackson2HttpMessageConverter">
<property name="supportedMediaTypes">
<list>
<value>text/html;charset=UTF-8</value>
</list>
</property>
</bean>
<!-- 启动SpringMVC的注解功能,完成请求和注解POJO的映射 -->
<bean
class="org.springframework.web.servlet.mvc.annotation.AnnotationMethodHandlerAdapter">
<property name="messageConverters">
<list>
<ref bean="mappingJacksonHttpMessageConverter" />	<!-- JSON转换器 -->
</list>
</property>
</bean>
<!-- 定义跳转的文件的前后缀 ,视图模式配置-->
<bean class="org.springframework.web.servlet.view.InternalResourceViewResolver">
<!-- 这里的配置我的理解是自动给后面action的方法return的字符串加上前缀和后缀,变成一个 可用的url地址 -->
<property name="prefix" value="/WEB-INF/jsp/" />
<property name="suffix" value=".jsp" />
</bean>

<!-- 配置文件上传,如果没有使用文件上传可以不用配置,当然如果不配,那么配置文件中也不必引入上传组件包 -->
<bean id="multipartResolver"
class="org.springframework.web.multipart.commons.CommonsMultipartResolver">
<!-- 默认编码 -->
<property name="defaultEncoding" value="utf-8" />
<!-- 文件大小最大值 -->
<property name="maxUploadSize" value="10485760000" />
<!-- 内存中的最大值 -->
<property name="maxInMemorySize" value="40960" />
</bean>

</beans>
5.2. web.xml
web.xml
<?xml version="1.0" encoding="UTF-8"?>
<web-app xmlns:xsi="http://www.w3.org/2001/XMLSchema-instance"
xmlns="http://java.sun.com/xml/ns/javaee"
xsi:schemaLocation="http://java.sun.com/xml/ns/javaee http://java.sun.com/xml/ns/javaee/web-app_3_0.xsd"
version="3.0">
<display-name>Archetype Created Web Application</display-name>
<welcome-file-list>
<welcome-file>/index.jsp</welcome-file>
</welcome-file-list>
<!-- Spring和mybatis的配置文件 -->
<context-param>
<param-name>contextConfigLocation</param-name>
<param-value>classpath:SMConfig.xml</param-value>
</context-param>
<!-- Spring MVC servlet -->
<servlet>
<servlet-name>SpringMVC</servlet-name>
<servlet-class>org.springframework.web.servlet.DispatcherServlet</servlet-class>
<init-param>
<param-name>contextConfigLocation</param-name>
<param-value>classpath:springmvc.xml</param-value>
</init-param>
<load-on-startup>1</load-on-startup>
<async-supported>true</async-supported>
</servlet>
<servlet-mapping>
<servlet-name>SpringMVC</servlet-name>
<!-- 此处可以可以配置成*.do,对应struts的后缀习惯 -->
<url-pattern>/</url-pattern>
</servlet-mapping>
<!-- Spring监听器 -->
<listener>
<listener-class>org.springframework.web.context.ContextLoaderListener</listener-class>
</listener>
<!-- 防止Spring内存溢出监听器 -->
<listener>
<listener-class>org.springframework.web.util.IntrospectorCleanupListener</listener-class>
</listener>
<!-- 编码过滤器 -->
<filter>
<filter-name>encodingFilter</filter-name>
<filter-class>org.springframework.web.filter.CharacterEncodingFilter</filter-class>
<async-supported>true</async-supported>
<init-param>
<param-name>encoding</param-name>
<param-value>UTF-8</param-value>
</init-param>
</filter>
<filter-mapping>
<filter-name>encodingFilter</filter-name>
<url-pattern>/*</url-pattern>
</filter-mapping>
</web-app>
5.3. 建立controller文件
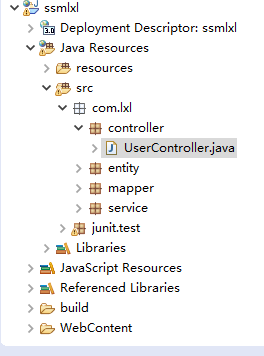
UserController.java
package com.lxl.controller;

import javax.annotation.Resource;

import org.springframework.stereotype.Controller;
import org.springframework.web.bind.annotation.RequestMapping;
import org.springframework.web.servlet.ModelAndView;

import com.lxl.entity.User;
import com.lxl.service.UserService;

@Controller
public class UserController {
@Resource
private UserService userService;

@RequestMapping(value="showuser")
public ModelAndView find(){
//先new一个ModelAndView对象
ModelAndView mav=new ModelAndView();
//以键值队的形式赋值   然后用对象调用方法
mav.addObject("user",userService.findAll());
//要跳转的页面
mav.setViewName("list_user");
//return出来你new的对象
return mav;
}
//预添加
@RequestMapping(value="presaveuser")
public ModelAndView presave(){
return new ModelAndView("save_user");
}
//添加
@RequestMapping(value="saveuser")
public ModelAndView save(User user){
userService.saveUser(user);
return new ModelAndView("redirect:/showuser.do");
}
//删除
@RequestMapping(value="deleteuser")
public ModelAndView delete(int id){
userService.deleteUserById(id);
return new ModelAndView("redirect:/showuser.do");
}
//预修改
@RequestMapping(value="preupdateuser")
public ModelAndView preupdate(int id){
ModelAndView mav=new ModelAndView();
mav.addObject("user", userService.findUserById(id));
mav.setViewName("update_user");
return mav;
}
//修改
@RequestMapping(value="updateuser")
public ModelAndView update(User user){
userService.updateUser(user);
return new ModelAndView("redirect:/showuser.do");
}
}
5.4. 建立JSP文件
index.jsp
<%@ page language="java" import="java.util.*" pageEncoding="UTF-8"%>
<%
String path = request.getContextPath();
String basePath = request.getScheme()+"://"+request.getServerName()+":"+request.getServerPort()+path+"/";
%>

<!DOCTYPE HTML PUBLIC "-//W3C//DTD HTML 4.01 Transitional//EN">
<html>
<head>
<base href="<%=basePath%>">

<title>查询</title>
<meta http-equiv="pragma" content="no-cache">
<meta http-equiv="cache-control" content="no-cache">
<meta http-equiv="expires" content="0">
<meta http-equiv="keywords" content="keyword1,keyword2,keyword3">
<meta http-equiv="description" content="This is my page">
</head>

<body>
<a href="showuser.do">查询</a>
</body>
</html>
list_user.jsp
<%@ page language="java" import="java.util.*" pageEncoding="UTF-8"%>
<%
String path = request.getContextPath();
String basePath = request.getScheme()+"://"+request.getServerName()+":"+request.getServerPort()+path+"/";
%>

<!DOCTYPE HTML PUBLIC "-//W3C//DTD HTML 4.01 Transitional//EN">
<html>
<head>
<base href="<%=basePath%>">

<title>查询</title>
<meta http-equiv="pragma" content="no-cache">
<meta http-equiv="cache-control" content="no-cache">
<meta http-equiv="expires" content="0">
<meta http-equiv="keywords" content="keyword1,keyword2,keyword3">
<meta http-equiv="description" content="This is my page">
</head>

<body>
<a href="showuser.do">查询</a>
</body>
</html>
save_user.jsp
<%@ page language="java" import="java.util.*" pageEncoding="UTF-8"%>
<%
String path = request.getContextPath();
String basePath = request.getScheme()+"://"+request.getServerName()+":"+request.getServerPort()+path+"/";
%>

<!DOCTYPE HTML PUBLIC "-//W3C//DTD HTML 4.01 Transitional//EN">
<html>
<head>
<base href="<%=basePath%>">

<title>增添</title>

<meta http-equiv="pragma" content="no-cache">
<meta http-equiv="cache-control" content="no-cache">
<meta http-equiv="expires" content="0">
<meta http-equiv="keywords" content="keyword1,keyword2,keyword3">
<meta http-equiv="description" content="This is my page">

</head>

<body>
<form action="saveuser.do">
用户名:<input type="text" name="username" />
<br>
<input type="submit" value="点击提交" />
</form>
</body>
</html>
update_user.jsp
<%@ page language="java" import="java.util.*" pageEncoding="UTF-8"%>
<%
String path = request.getContextPath();
String basePath = request.getScheme()+"://"+request.getServerName()+":"+request.getServerPort()+path+"/";
%>
<!DOCTYPE HTML PUBLIC "-//W3C//DTD HTML 4.01 Transitional//EN">
<html>
<head>
<base href="<%=basePath%>">

<title>改</title>

<meta http-equiv="pragma" content="no-cache">
<meta http-equiv="cache-control" content="no-cache">
<meta http-equiv="expires" content="0">
<meta http-equiv="keywords" content="keyword1,keyword2,keyword3">
<meta http-equiv="description" content="This is my page">

</head>

<body>
<form action="updateuser.do">
编号:<input type="text" value="${user.id}" name="id" />
<br>
用户名:<input type="text" value="${user.username}" name="username" />
<br>
<input type="submit" value="点击修改" />
</form>
</body>
</html>
5.5. 测试
右键index.jsp运行,

运行结果如下:


至此,SSM框架的整合就结束了。
工程下载地址:链接:https://pan.baidu.com/s/1fWE4zInmXshdew5zje_XHg
提取码:vnv4

- SSM框架项目搭建系列(七)—Spring AOP之基于注解的声明式AspectJ
- idea在搭建ssm框架时mybatis整合问题 无法找到mapper
- Spring+SpringMVC+Mybatis(SSM)框架搭建教程(五)-扩展:过滤器Filter应用
- SSM框架+Log4j框架搭建
- SSM框架(Spring+SpringMVC+MyBatis)详细搭建过程
- 从0开始,搭建SSM服务器框架
- SSM框架的搭建及项目开发的步骤
- MyEclipse使用Maven创建web项目+搭建SSM框架教
- 使用IDEA2017.3.4搭建SSM项目框架
- 总结自己重新搭建SSM框架中遇到的几种奇葩问题
- 基于Maven的SSM框架搭建
- SSM框架搭建
- 基于Maven工具搭建Spring+SpringMVC++MyBatis(ssm)框架步骤
- IntelliJ IDEA-搭建SSM框架步骤
- Java Web编程入门--SSM框架搭建
- 快速搭建基于springboot的ssm框架
- 在maven下搭建SSM开发框架
- 关于ssm框架搭建注意事项
- SSM框架——Spring+SpringMVC+Mybatis的搭建教程
- [置顶] Spring4.0.9+SpringMVC4.0.9+SpringSecurity3.2.5+MyBatis3.2.5+Activiti5.21即:SSM框架的企业级搭建——二