Hexo-Next6-5主题配置优化
2018-12-04 10:59
253 查看
基于Next 6.5版本,网上有很多Next主题配置优化的教程,查找下来感觉比较杂乱,因此总结一些自己所使用的。
持续更新见个人博客:https://ilibing.github.io/
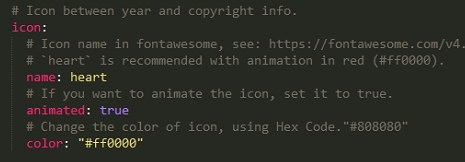
1.Next底部图标设置
将底部的图标设置为动态红心效果。
2.实现点击出现桃心效果
在
/themes/next/source/js/src下新建文件 clicklove.js ,接着把如下的代码拷贝粘贴到 clicklove.js 文件中。
!function(e,t,a){function n(){c(".heart{width: 10px;height: 10px;position: fixed;background: #f00;transform: rotate(45deg);-webkit-transform: rotate(45deg);-moz-transform: rotate(45deg);}.heart:after,.heart:before{content: '';width: inherit;height: inherit;background: inherit;border-radius: 50%;-webkit-border-radius: 50%;-moz-border-radius: 50%;position: fixed;}.heart:after{top: -5px;}.heart:before{left: -5px;}"),o(),r()}function r(){for(var e=0;e<d.length;e++)d[e].alpha<=0?(t.body.removeChild(d[e].el),d.splice(e,1)):(d[e].y--,d[e].scale+=.004,d[e].alpha-=.013,d[e].el.style.cssText="left:"+d[e].x+"px;top:"+d[e].y+"px;opacity:"+d[e].alpha+";transform:scale("+d[e].scale+","+d[e].scale+") rotate(45deg);background:"+d[e].color+";z-index:99999");requestAnimationFrame(r)}function o(){var t="function"==typeof e.onclick&&e.onclick;e.onclick=function(e){t&&t(),i(e)}}function i(e){var a=t.createElement("div");a.className="heart",d.push({
2f9cf
el:a,x:e.clientX-5,y:e.clientY-5,scale:1,alpha:1,color:s()}),t.body.appendChild(a)}function c(e){var a=t.createElement("style");a.type="text/css";try{a.appendChild(t.createTextNode(e))}catch(t){a.styleSheet.cssText=e}t.getElementsByTagName("head")[0].appendChild(a)}function s(){return"rgb("+~~(255*Math.random())+","+~~(255*Math.random())+","+~~(255*Math.random())+")"}var d=[];e.requestAnimationFrame=function(){return e.requestAnimationFrame||e.webkitRequestAnimationFrame||e.mozRequestAnimationFrame||e.oRequestAnimationFrame||e.msRequestAnimationFrame||function(e){setTimeout(e,1e3/60)}}(),n()}(window,document);
在
\themes\next\layout\_layout.swig文件末尾添加:
<!-- 页面点击小红心 -->
<script type="text/javascript" src="/js/src/clicklove.js"></script>
3.修改文章内链接文本样式
修改文件
themes\next\source\css\_common\components\post\post.styl,在末尾添加如下css样式:
// 文章内链接文本样式
.post-body p a{
color: #0593d3;
border-bottom: none;
border-bottom: 1px solid #0593d3;
&:hover {
color: #fc6423;
border-bottom: none;
border-bottom: 1px solid #fc6423;
}
}
4.修改文章底部的那个带#号的标签
修改模板
/themes/next/layout/_macro/post.swig,搜索
rel="tag">#,将 # 换成
<i class="fa fa-tag"></i>
5.在每篇文章末尾统一添加“本文结束”标记
在路径
\themes\next\layout\_macro中新建
passage-end-tag.swig文件,并添加以下内容:
<div>
{% if not is_index %}
<div style="text-align:center;color: #ccc;font-size:14px;">-------------本文结束<i class="fa fa-paw"></i>感谢您的阅读-------------</div>
{% endif %}
</div>
接着打开
\themes\next\layout\_macro\post.swig文件,在
post-body之后,
post-footer之前添加如下代码(post-footer之前两个DIV):
<div>
{% if not is_index %}
{% include 'passage-end-tag.swig' %}
{% endif %}
</div>
然后打开next主题配置文件(
_config.yml),在末尾添加:
# 文章末尾添加“本文结束”标记
passage_end_tag:
enabled: true
6.主页文章添加阴影效果
打开
\themes\next\source\css\_custom\custom.styl,向里面加入:
// 主页文章添加阴影效果
.post {
margin-top: 60px;
margin-bottom: 60px;
padding: 25px;
-webkit-box-shadow: 0 0 5px rgba(202, 203, 203, .5);
-moz-box-shadow: 0 0 5px rgba(202, 203, 204, .5);
}
7.动态背景
进入
theme/next目录,执行命令:
git clone https://github.com/theme-next/theme-next-canvas-nest source/lib/canvas-nest
将主题配置文件
_config.yml中的
canvas_nest: false改为
canvas_nest: true生效。
8.添加搜索功能
安装
hexo-generator-searchdb,在站点的根目录下执行以下命令:
$ npm install hexo-generator-searchdb --save
编辑根配置文件,新增以下内容到任意位置:
search:
path: search.xml
field: post
format: html
limit: 10000
编辑Next主题配置文件,启用本地搜索功能:
# Local search
local_search:
enable: true
9.文章置顶
在博客根目录下执行:
$ npm uninstall hexo-generator-index --save
$ npm install hexo-generator-index-pin-top --save
打开:
/blog/themes/next/layout/_macro目录下的
post.swig文件,定位到
<div class="post-meta">标签下,插入如下代码:
{% if post.top %}
<i class="fa fa-thumb-tack"></i>
<font color=7D26CD>置顶</font>
<span class="post-meta-divider">|</span>
{% endif %}
然后在需要置顶的文章的
Front-matter中加上
top: true即可.
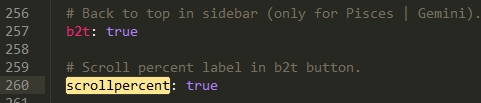
10.添加顶部加载条和返回顶部显示百分比

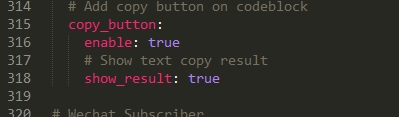
11.代码复制功能
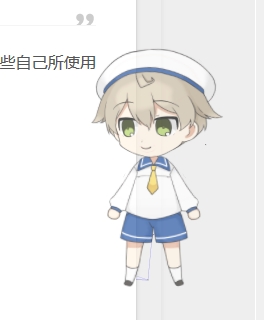
12.添加宠物
博客根目录安装插件:
npm install --save hexo-helper-live2d
下载模型,模型名称可以到这里参考,一些模型的预览可以在这里。
npm install live2d-widget-model-haruto //我使用的这个
在
hexo根路径下的
_config.yml中添加参数:
live2d:
enable: true #启用
scriptFrom: local
pluginRootPath: live2dw/
pluginJsPath: lib/
pluginModelPath: assets/
model:
use: live2d-widget-model-wanko #模型名称
display: #位置和大小
position: right
width: 150
height: 300
mobile: #手机端是否显示
show: true
效果如下:
13.添加音乐
第一种方法直接网易云生成外链,放在
layout/_macro/sidebar.swig文件下:

<iframe frameborder="no" border="0" marginwidth="0" marginheight="0" width=330 height=86 src="//music.163.com/outchain/player?type=2&id=490106148&auto=1&height=66"></iframe> //auto为1,自动播放
效果如下:
第二种方式,根目录安装插件:
npm install hexo-tag-aplayer --save
文章中的写法:
{% aplayer "歌曲名" "歌手名" "https://什么什么什么.mp3" "https://封面图.jpg" "lrc:https://歌词.lrc" %}
{% aplayer “妄越” “代鑫” “https://ilibing.nos-eastchina1.126.net/music/代鑫 - 妄越.mp3” “http://p2.music.126.net/MRZDcno4qbfqNb0g03OaFQ==/109951163049991008.jpg”%}
另外可以支持歌单:
{% aplayerlist %}
{
"autoplay": false,
"showlrc": 3,
"mutex": true,
"music": [
{
"title": "歌曲名",
"author": "歌手名",
"url": "https://什么什么什么.mp3",
"pic": "https://封面图.jpg",
"lrc": "https://歌词.lrc"
},
{
"title": "歌曲名",
"author": "歌手名",
"url": "https://什么什么什么.mp3",
"pic": "https://封面图.jpg",
"lrc": "https://歌词.lrc"
}
]
}
{% endaplayerlist %}

相关文章推荐
- Mac搭建Hexo博客及NexT主题配置优化
- Hexo下Next主题配置与优化
- 2018最新版Hexo博客Next主题6.0配置优化
- Hexo系列教程之三:next主题的配置和优化
- Hexo之Next主题优化(一)
- hexo干货系列:(二)hexo主题下载及配置
- hexo干货系列:(三)hexo的Jacman主题优化
- Hexo主题优化
- github+hexo搭建自己的博客网站(三)主题之外的一些基本配置(图片位置,文章目录功能)
- hexo : 在主题配置文件配置友链后,hexo s --debug报错
- Hexo的Next主题配置
- hexo的jacman主题配置
- Hexo站点优化更换主题添加多说评论增加百度统计
- hexo干货系列:(二)hexo主题下载及配置
- Hexo配置使用Next主题
- hexo配置主题发表文章
- 【转】Hexo的Next主题配置
- 在Github上使用Hexo搭建博客并配置tranquilpeak主题(原)
- Hexo主题优化
- github+hexo搭建自己的博客网站(四)主题之外的一些基本配置(百度/google统计配置,不蒜子网站访问量显示)