Ubuntu18.04LTS下基于 Anaconda3 安装和编译 Caffe-GPU
这篇博客为在Ubuntu18.04上基于 Anaconda3 安装编译 Caffe-GPU的详细教程中第三步。由于教程之详细,放在一篇博客中影响阅读体验,所以按照安装顺序分为了三个部分,具体每一部分点开链接即可访问。
一、Ubuntu18.04下Anaconda3的安装与配置
二、Ubuntu18.04下安装Cudnn9.0和Cuda7.0
三、Ubuntu18.04下基于 Anaconda3 安装和编译 Caffe-GPU
文章目录
在终端输入
sudo apt install caffe-cuda
1. 基本依赖库的安装
sudo apt-get install libprotobuf-dev libleveldb-dev libsnappy-dev libopencv-dev
sudo apt-get install libhdf5-serial-dev protobuf-compiler
sudo apt-get install --no-install-recommends libboost-all-dev
sudo apt-get install libopenblas-dev liblapack-dev libatlas-base-dev
sudo apt-get install libgflags-dev libgoogle-glog-dev liblmdb-dev
安装截图如下:

2. 配置
2.1. Clone源码
首先我们要从GitHub的远端下载caffe的源码
git clone https://github.com/BVLC/caffe.git

2.2. 配置Makefile.config文件
cd caffe
sudo cp Makefile.config.example Makefile.config
sudo vim Makefile.config
vim编辑器中,在命令行输入set number ,回车,可以显示行号。
将第5行注释去除
USE_CUDNN:= 1

OPENCV_VERSION := 3

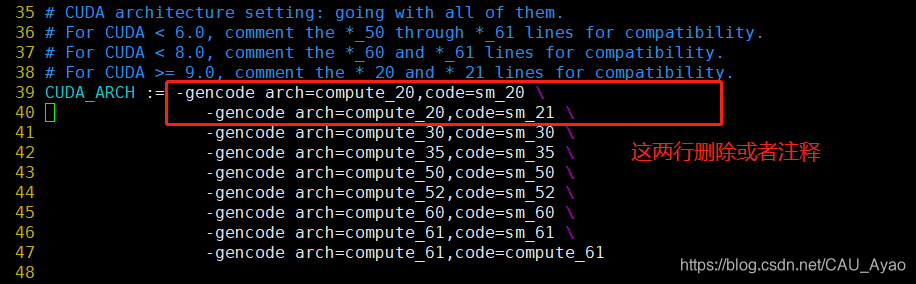
将第37和38行注释或者删除.
修改前:
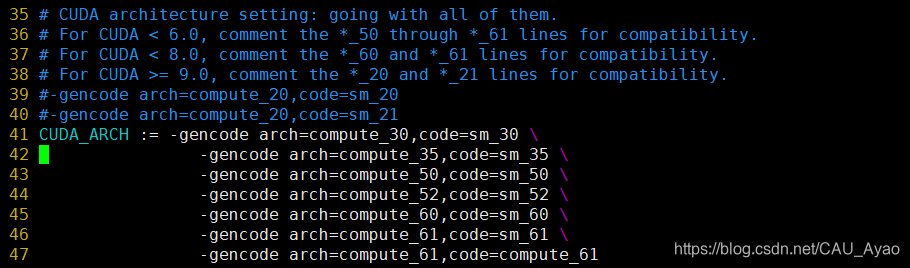
修改后:
将第53行BLAS:= atlas注销,换成BLAS := open.

将Python2环境注销,换成Anaconda3下的Python环境.
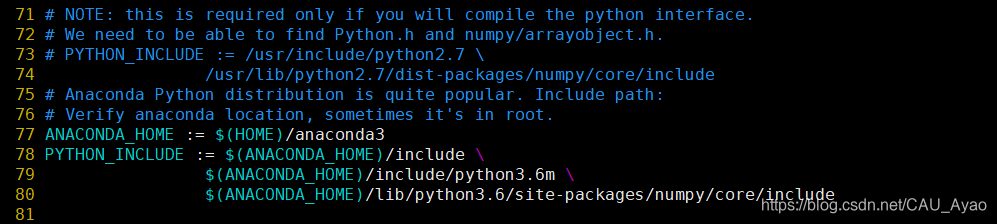
对这句取消注释:
PYTHON_LIBRARIES := boost_python-py36 python3.6m
将PYTHON_LIB:= /usr/lib注释
取消PYTHON_LIB:= $(ANACONDA_HOME)/lib的注释

若要使用python来编写layer,则将#WITH_PYTHON_LAYER := 1取消注释.

将# Whatever else you find you need goes here.下面的代码修改
INCLUDE_DIRS := $(PYTHON_INCLUDE) /usr/local/include
LIBRARY_DIRS := $(PYTHON_LIB) /usr/local/lib /usr/lib
修改为:
INCLUDE_DIRS := $(PYTHON_INCLUDE) /usr/local/include /usr/include/hdf5/serial
LIBRARY_DIRS := $(PYTHON_LIB) /usr/local/lib /usr/lib /usr/lib/x86_64-linux-gnu /usr/lib/x86_64-linux-gnu/hdf5/serial
vim命令行中输入:wq,可以保存并退出。
2.3. 配置Makefile文件
在终端输入:
sudo vim Makefile
做如下修改:
PYTHON_LIBRARIES ?= boost_python python2.7
修改为:
PYTHON_LIBRARIES ?= boost_python-py36 python3.6m
NVCCFLAGS +=-ccbin=$(CXX) -Xcompiler-fPIC $(COMMON_FLAGS)
修改为:
NVCCFLAGS += -D_FORCE_INLINES -ccbin=$(CXX) -Xcompiler -fPIC $(COMMON_FLAGS)
如图所示:

将:
LIBRARIES += glog gflags protobuf boost_system boost_filesystem m hdf5_hl hdf5
改为:
LIBRARIES += glog gflags protobuf boost_system boost_filesystem m hdf5_serial_hl hdf5_serial
3. Caffe源码中安装Python的必要项
在终端输入:
cd /home/li.guangyao/Programming/caffe/python
pip install --upgrade python-dateutil
for req in $(cat requirements.txt); do pip install $req; done
此步可能会出现以下错误(如果没出现请忽略此步):
pandas 0.22.0 has requirement python-dateutil>=2, but you'll have python-dateutil 1.5 which is incompatible.
matplotlib 2.1.2 has requirement python-dateutil>=2.1, but you'll have python-dateutil 1.5 which is incompatible.
jupyter-client 5.2.2 has requirement python-dateutil>=2.1, but you'll have python-dateutil 1.5 which is incompatible.
bokeh 0.12.13 has requirement python-dateutil>=2.1, but you'll have python-dateutil 1.5 which is incompatible.
anaconda-client 1.6.9 has requirement python-dateutil>=2.6.1, but you'll have python-dateutil 1.5 which is incompatible.
解决办法见:错误:pandas 0.23.3 has requirement python-dateutil>=2.5.0, but you’ll have python-dateutil 1.5解决方法
4. 编译
进入caffe的根目录下
cd /home/li.guangyao/Programming/caffe
sudo make clean
sudo make all -j16 		//-j16表示使用16核处理器执行当前指令
继续在终端执行:
sudo make test -j16 //最好加上sudo防止有些文件的访问权限不够
继续在终端执行:
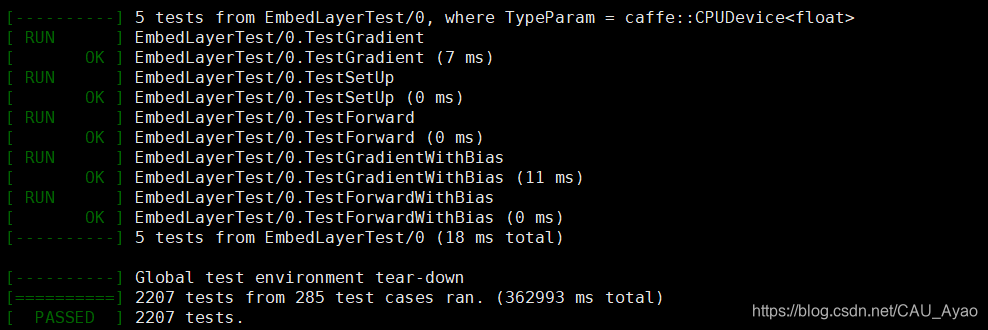
sudo make runtest -j16 //最好加上sudo防止有些文件的访问权限不够
此步可能会出现以下错误(如果没出现请忽略此步):
.build_release/tools/caffe
.build_release/tools/caffe: error while loading shared libraries: libhdf5_hl.so.100: cannot open shared object file: No such file or directory
Makefile:545: recipe for target 'runtest' failed
make: *** [runtest] Error 127
解决办法见:完美解决错误:libhdf5_hl.so.100(XXX): cannot open shared object file: No such file or directory,Error127
继续在终端执行:
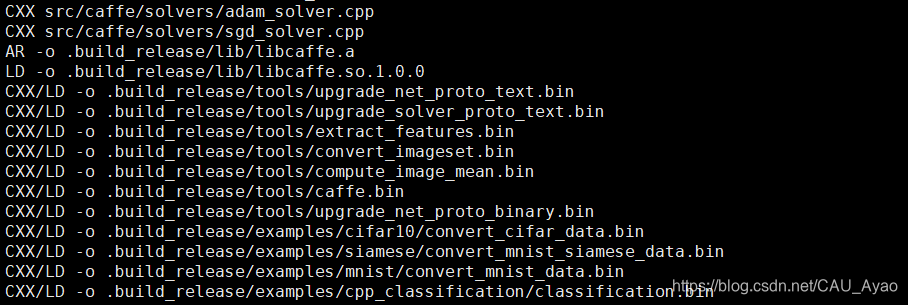
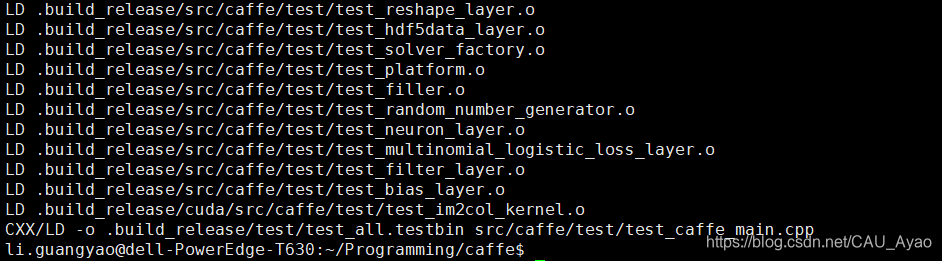
sudo make pycaffe -j16 //配置pycaffe
结果如图:

在终端执行:
vim ~/.bashrc
在最后加入以下代码:
export PYTHONPATH=~/Programming/caffe/python:$PYTHONPATH

source ~/.bashrc
5. 验证测试
在终端输入Python,进行测试.
在命令行输入:
import caffe
回车。
此步可能出现以下错误(如果不报错,请忽略此步)
Traceback (most recent call last):
File "<stdin>", line 1, in <module>
File "/home/li.guangyao/Programming/caffe/python/caffe/__init__.py", line 1, in <module>
from .pycaffe import Net, SGDSolver, NesterovSolver, AdaGradSolver, RMSPropSolver, AdaDeltaSolver, AdamSolver, NCCL, Timer
File "/home/li.guangyao/Programming/caffe/python/caffe/pycaffe.py", line 13, in <module>
from ._caffe import Net, SGDSolver, NesterovSolver, AdaGradSolver, \
ImportError: /home/li.guangyao/Programming/caffe/python/caffe/_caffe.so: undefined symbol: _ZN5boost6python6detail11init_moduleER11PyModuleDefPFvvE
解决方法见:

Congratulations!Caffe-GPU编译成功!
如需查看上一步,请点击:
第二步:Ubuntu18.04下安装Cudnn9.0和Cuda7.0

- Ubuntu18.04下基于 Anaconda3 安装编译 Caffe-GPU(超详细)
- Ubuntu18.04LTS下基于 Anaconda3 安装 Caffe及 Python3.6 + Pycharm + Mnist
- (ubuntu16.04)关于caffe+python3.5(非anaconda安装)编译的一些问题
- Ubuntu 16.04安装使用--Ubuntu16.04下基于Docker的Caffe-GPU版本环境搭建总结
- ubuntu16.04安装NIVIDIA显卡驱动,cuda8.0,cuDNN6.0以及基于Anaconda安装Tensorflow-GPU
- 风雨caffe(一):基于ubuntu14.04的无GPU模式的caffe安装
- Caffe安装:Ubuntu16.04 + GPU + CUDA-8.0 + cuDNN v5.1 + OpenCV 3.0.0 + Anaconda2
- Windows7 64位 安装caffe基于Python3.5.2(Anaconda3)无GPU安装+VS2015+cmake3.11
- ubuntu16.04 安装caffe(GPU)
- Ubuntu14.04基于Anaconda安装Keras并切换后端到Theano
- Ubuntu14.04通过make或cmake编译安装caffe
- 基于Anaconda的TensorFlow安装(Ubuntu 16.04 LTS)
- 深度学习篇——Ubuntu16.04下安装caffe(GPU加速)
- Ubuntu16.04+anaconda+cuda+cudnn+caffe+opencv新手曲折安装之路
- ubuntu 16.04 无GPU版caffe安装简记
- Windows下VS2015编译caffe(无GPU版本),安装简单
- 基于Anaconda的TensorFlow安装,Windows,Linux,Ubuntu
- (新)windows下GPU版本caffe及py-faster-rcnn的编译及安装
- Ubuntu14.04 + cuda8.0 + Anaconda3 (python3.5)下编译caffe
- Ubuntu 16.04下Matlab2014a+Anaconda2+OpenCV3.1+Caffe安装