CAS之5.2x版本登录验证码-yellowcong
2018-02-08 00:33
435 查看
系统验证码 或者邮箱验证等,这个都是必须的,不然你搞个机器人注入 啥的,我咋玩。首先声明,这个5.2.x的和5.1.x的有所区别,有的时候,不通用,需要注意点,我这个地方,以5.2.x讲解,如果需要5.1.x的请自己研究,或则联系我。实现自定义ajax验证码的步骤:1、创建控制器。2、配置到springboot、3、配置spring.factories文件。4、配置自定义的界面、5、添加js的配置。


解决办法,单独导入配置

解决办法

代码地址
https://gitee.com/yellowcong/springboot_cas/tree/master/cas-server-code
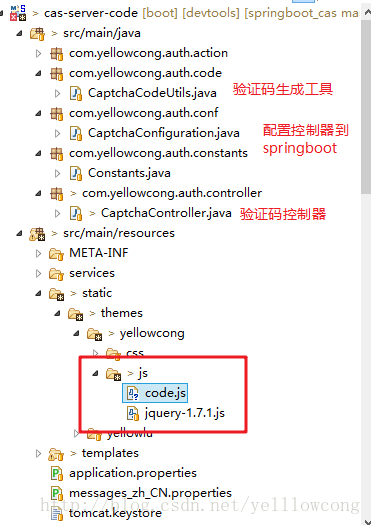
工程目录
注册控制器到cas
1、创建控制器
我们需要创建 一个代码控制器,这个同普通的springmvc是没有啥区别的。package com.yellowcong.auth.controller;
import java.io.IOException;
import java.io.OutputStream;
import java.io.PrintWriter;
import java.util.HashMap;
import java.util.Map;
import javax.servlet.http.HttpServletRequest;
import javax.servlet.http.HttpServletResponse;
import org.springframework.stereotype.Controller;
import org.springframework.util.StringUtils;
import org.springframework.web.bind.annotation.GetMapping;
import org.springframework.web.bind.annotation.RequestMapping;
import org.springframework.web.bind.annotation.RequestMethod;
import com.fasterxml.jackson.databind.ObjectMapper;
import com.yellowcong.auth.code.CaptchaCodeUtils;
import com.yellowcong.auth.code.CaptchaCodeUtils.CaptchaCode;
import com.yellowcong.auth.constants.Constants;
@Controller
public class CaptchaController {
/**
* 创建日期:2018/02/07<br/>
* 创建时间:8:36:28<br/>
* 创建用户:yellowcong<br/>
* 机能概要: 写数据到客户端
* @param request
* @param response
* @throws Exception
*/
@GetMapping(value = Constants.REQUEST_MAPPING, produces = "image/png")
public void handleRequestInternal(HttpServletRequest request, HttpServletResponse response) throws Exception {
OutputStream out = null;
try {
//设置response头信息
//禁止缓存
response.setHeader("Cache-Control", "no-cache");
response.setContentType("image/png");
//存储验证码到session
CaptchaCode code = CaptchaCodeUtils.getInstance().getCode();
//获取验证码code
String codeTxt = code.getText();
request.getSession().setAttribute(Constants.STORE_CODE, codeTxt);
//写文件到客户端
out = response.getOutputStream();
byte[] imgs = code.getData();
out.write(imgs, 0, imgs.length);
out.flush();
} finally {
if(out != null) {
out.close();
}
}
}
/**
* 创建日期:2018年2月7日<br/>
* 创建时间:下午10:09:29<br/>
* 创建用户:yellowcong<br/>
* 机能概要:验证码比对
* @param code
* @param req
* @param resp
*/
@RequestMapping(value="/chkCode",method=RequestMethod.POST)
public void checkJSON(String code,HttpServletRequest req,HttpServletResponse resp) {
//获取session中的验证码
String storeCode = (String)req.getSession().getAttribute(Constants.STORE_CODE);
code = code.trim();
//返回值
Map<String,Object> map = new HashMap<String, Object>();
//验证是否对,不管大小写
if(!StringUtils.isEmpty(storeCode) && code.equalsIgnoreCase(storeCode)) {
map.put("error", false);
map.put("msg", "验证成功");
}else if (StringUtils.isEmpty(code)){
map.put("error", true);
map.put("msg", "验证码不能为空");
}else {
map.put("error", true);
map.put("msg", "验证码错误");
}
this.writeJSON(resp, map);
}
/**
* 在SpringMvc中获取到Session
* @return
*/
public void writeJSON(HttpServletResponse response,Object object){
try {
//设定编码
response.setCharacterEncoding("UTF-8");
//表示是json类型的数据
response.setContentType("application/json");
//获取PrintWriter 往浏览器端写数据
PrintWriter writer = response.getWriter();
ObjectMapper mapper = new ObjectMapper(); //转换器
//获取到转化后的JSON 数据
String json = mapper.writeValueAsString(object);
//写数据到浏览器
writer.write(json);
//刷新,表示全部写完,把缓存数据都刷出去
writer.flush();
//关闭writer
writer.close();
} catch (IOException e) {
e.printStackTrace();
}
}
}2、配置到springboot
我们创建action后,需要通过CaptchaConfiguration 来注册到cas上。package com.yellowcong.auth.conf;
import org.apereo.cas.configuration.CasConfigurationProperties;
import org.springframework.boot.autoconfigure.condition.ConditionalOnMissingBean;
import org.springframework.boot.context.properties.EnableConfigurationProperties;
import org.springframework.context.annotation.Bean;
import org.springframework.context.annotation.Configuration;
import com.yellowcong.auth.controller.CaptchaController;
/**
* 创建日期:2018/02/07<br/>
* 创建时间:8:38:31<br/>
* 创建用户:yellowcong<br/>
* 机能概要:自定义控制器
*/
@Configuration("captchaConfiguration")
@EnableConfigurationProperties(CasConfigurationProperties.class)
public class CaptchaConfiguration {
// 注册bean到spring容器
@Bean
@ConditionalOnMissingBean(name = "captchaController")
public CaptchaController captchaController() {
return new CaptchaController();
}
}3、配置spring.factories 文件
org.springframework.boot.autoconfigure.EnableAutoConfiguration=\
com.yellowcong.auth.conf.CaptchaConfiguration
4、界面
界面添加了一个验证码表的图片,但是没有通过表单提交的方式提交到后台。界面的搭建,需要大家明白如何引入js资源文件,通过th:src的这种方式<!DOCTYPE html>
<html>
<head>
<meta charset="UTF-8"/>
<meta name="viewport" content="width=device-width, initial-scale=1"/>
<meta http-equiv="X-UA-Compatible" content="IE=edge"/>
<title th:text="${#themes.code('yellowcong.pageTitle')}"></title>
<link rel="stylesheet" th:href="@{${#themes.code('yellowcong.css.file')}}"/>
<script type="text/javascript" th:src="@{/themes/yellowcong/js/jquery-1.7.1.js}" ></script>
<script type="text/javascript" th:src="@{/themes/yellowcong/js/code.js}" ></script>
</head>
<body>
<h1 th:text="${#themes.code('yellowcong.pageTitle')}"></h1>
<h2>yellowcong的登录模板</h2>
<div>
<form method="post" th:object="${credential}">
<div th:if="${#fields.hasErrors('*')}">
<span th:each="err : ${#fields.errors('*')}" th:utext="${err}"/>
</div>
<h2 th:utext="#{screen.welcome.instructions}"></h2>
<section class="row">
<label for="username" th:utext="#{screen.welcome.label.netid}"/>
<div th:unless="${openIdLocalId}">
<input class="required"
id="username"
size="25"
tabindex="1"
type="text"
th:disabled="${guaEnabled}"
th:field="*{username}"
th:accesskey="#{screen.welcome.label.netid.accesskey}"
autocomplete="off"/>
</div>
</section>
<section class="row">
<label for="password" th:utext="#{screen.welcome.label.password}"/>
<div>
<input class="required"
type="password"
id="password"
size="25"
tabindex="2"
th:accesskey="#{screen.welcome.label.password.accesskey}"
th:field="*{password}"
autocomplete="off"/>
</div>
</section>
<!-- 验证码信息 -->
<section>
<img id="captcha_img" th:src="@{/captcha}" onclick="changeCode()" style="width: 125px;"/>
<input type="text" id="code"/>
<span id="code_str"></span>
</section>
<section>
<input type="hidden" name="execution" th:value="${flowExecutionKey}"/>
<input type="hidden" name="_eventId" value="submit"/>
<input type="hidden" name="geolocation"/>
<input class="btn btn-submit btn-block"
name="submit"
accesskey="l"
th:value="#{screen.welcome.button.login}"
tabindex="6"
type="submit"/>
</section>
</form>
</div>
</body>
</html>5、js验证
这个js验证,只是简单的做了切换验证码和验证码的ajax验证。$(function(){
//验证码验证
$("#code").blur(function(){
var codeStr = $("#code").val();
if(codeIsError()){
console.log("验证失败");
}else{
console.log("验证成功");
}
});
});
//---------------------------------------------------------------------
//检查验证码是否正确
//---------------------------------------------------------------------
function changeCode(){
//修改验证码
$("#captcha_img").attr('src','/captcha?id='+uuid());
}
//-------------------------------------------------------------------------------------------
//生成UUID
//-------------------------------------------------------------------------------------------
function uuid(){
//获取系统当前的时间
var d = new Date().getTime();
//替换uuid里面的x和y
var uuid = 'xxxxxxxx-xxxx-4xxx-yxxx-xxxxxxxxxxxx'.replace(/[xy]/g, function(c) {
//取余 16进制
var r = (d + Math.random()*16)%16 | 0;
//向下去整
d = Math.floor(d/16);
//toString 表示编程16进制的数据
return (c=='x' ? r : (r&0x3|0x8)).toString(16);
});
return uuid;
};
//---------------------------------------------------------------------
//检查验证码是否正确
//---------------------------------------------------------------------
function codeIsError(){
var error = true;
var codeStr = $("#code").val();
if(codeStr == ""){
setCodeInfo(error,"验证码不能为空");
return error;
}
//请求地址,你们最好注意一下,这个地方可能报错需要修改,
$.ajax({
type : "post", //使用提交的方法 post、get
url : contextPath()+"/chkCode", //提交的地址
data : { code:$("#code").val() }, //数据
async : false, //配置是否
dataType:"json",//返回数据类型的格式
success : function(data){ //回调操作
console.log(data);
error = data.error;
setCodeInfo(error,data.msg);
}
});
return error;
}
//设定验证码的错误提示消息
function setCodeInfo(error,msg){
if(error){
$("#code_str").html("<font color='red'>"+msg+"</font>");
}else{
$("#code_str").html("<font color='blue'>"+msg+"</font>");
}
}
// 获取到当前项目的名称
var contextPath = function() {
var path = "/" + location.pathname.split("/")[1];
//当项目的目录是根目录的情况
if(path == "/login"){
return "";
}else{
return path;
}
}配置pom.xml
为啥我会把pom.xml单独拿出来说一下,因为一般我们在pom中,还需要添加cas-server-core-configuration的依赖,不然就会报错,说找不到配置类,这个问题以前也讲过
<!-- 单独导入cas的配置依赖到项目中 -->
<dependency>
<groupId>org.apereo.cas</groupId>
<artifactId>cas-server-core-configuration</artifactId>
<version>${cas.version}</version>
<scope>system</scope>
<optional>true</optional>
<systemPath>${project.basedir}/src/main/webapp/WEB-INF/lib/cas-server-core-configuration-${cas.version}.jar</systemPath>
</dependency>
完整pom.xml配置文件
<?xml version="1.0" encoding="UTF-8"?>
<project xmlns="http://maven.apache.org/POM/4.0.0"
xmlns:xsi="http://www.w3.org/2001/XMLSchema-instance"
xsi:schemaLocation="http://maven.apache.org/POM/4.0.0 http://maven.apache.org/xsd/maven-4.0.0.xsd ">
<modelVersion>4.0.0</modelVersion>
<groupId>org.apereo.cas</groupId>
<artifactId>cas-server-code</artifactId>
<packaging>war</packaging>
<version>1.0</version>

<dependencies>
<dependency>
<groupId>org.apereo.cas</groupId>
<artifactId>cas-server-webapp${app.server}</artifactId>
<version>${cas.version}</version>
<type>war</type>
<scope>system</scope>
<optional>true</optional>
<systemPath>${project.basedir}/src/main/webapp/WEB-INF/lib/cas-server-webapp-tomcat-${cas.version}.war</systemPath>
</dependency>

<!-- 自定义认证的方式 begin -->
<dependency>
<groupId>org.apereo.cas</groupId>
<artifactId>cas-server-core-webflow</artifactId>
<version>${cas.version}</version>
</dependency>
<dependency>
<groupId>org.apereo.cas</groupId>
<artifactId>cas-server-core-authentication</artifactId>
<version>${cas.version}</version>
</dependency>
<dependency>
<groupId>org.apereo.cas</groupId>
<artifactId>cas-server-webapp-config</artifactId>
<version>${cas.version}</version>
<scope>provided</scope>
</dependency>

<!-- 单独导入cas的配置依赖到项目中 -->

<!-- 单独导入cas的配置依赖到项目中 -->
<dependency>
<groupId>org.apereo.cas</groupId>
<artifactId>cas-server-core-configuration</artifactId>
<version>${cas.version}</version>
<scope>system</scope>
<optional>true</optional>
<systemPath>${project.basedir}/src/main/webapp/WEB-INF/lib/cas-server-core-configuration-${cas.version}.jar</systemPath>
</dependency>

<!-- <dependency>
<groupId>org.apereo.cas</groupId>
<artifactId>cas-server-support-redis-ticket-registry</artifactId>
<version>${cas.version}</version>
</dependency> -->

<!-- 数据库驱动 -->
<!-- MYSQL -->
<dependency>
<groupId>mysql</groupId>
<artifactId>mysql-connector-java</artifactId>
<version>5.1.21</version>
</dependency>

<!-- servlet 的依赖 -->
<dependency>
<groupId>javax.servlet</groupId>
<artifactId>servlet-api</artifactId>
<version>2.5</version>
</dependency>
<dependency>
<groupId>org.jboss.marshalling</groupId>
<artifactId>jboss-marshalling-osgi</artifactId>
<version>1.4.10.Final</version>
</dependency>

</dependencies>

<build>
<plugins>
<plugin>
<groupId>com.rimerosolutions.maven.plugins</groupId>
<artifactId>wrapper-maven-plugin</artifactId>
<version>0.0.4</version>
<configuration>
<verifyDownload>true</verifyDownload>
<checksumAlgorithm>MD5</checksumAlgorithm>
</configuration>
</plugin>
<plugin>
<groupId>org.springframework.boot</groupId>
<artifactId>spring-boot-maven-plugin</artifactId>
<version>${springboot.version}</version>
<configuration>
<mainClass>${mainClassName}</mainClass>
<addResources>true</addResources>
<executable>${isExecutable}</executable>
<layout>WAR</layout>
</configuration>
<executions>
<execution>
<goals>
<goal>repackage</goal>
</goals>
</execution>
</executions>
</plugin>
<!-- 添加依赖的插件 -->
<plugin>
<groupId>org.apache.maven.plugins</groupId>
<artifactId>maven-dependency-plugin</artifactId>
<version>2.10</version>
<executions>
<execution>
<id>copy-dependencies</id>
<phase>compile</phase>
<goals>
<goal>copy-dependencies</goal>
</goals>
<configuration>
<outputDirectory>${project.build.directory}/${project.build.finalName}/WEB-INF/lib</outputDirectory>
<includeScope>system</includeScope>
</configuration>
</execution>
</executions>
</plugin>
<plugin>
<groupId>org.apache.maven.plugins</groupId>
<artifactId>maven-war-plugin</artifactId>
<version>3.1.0</version>
<configuration>
<warName>cas</warName>
<failOnMissingWebXml>false</failOnMissingWebXml>
<recompressZippedFiles>false</recompressZippedFiles>
<archive>
<compress>false</compress>
<manifestFile>${manifestFileToUse}</manifestFile>
</archive>
<overlays>
<overlay>
<groupId>org.apereo.cas</groupId>
<artifactId>cas-server-webapp${app.server}</artifactId>
</overlay>
</overlays>
</configuration>
</plugin>
<plugin>
<groupId>org.apache.maven.plugins</groupId>
<artifactId>maven-compiler-plugin</artifactId>
<version>3.3</version>
</plugin>
</plugins>
<finalName>cas</finalName>
</build>

<properties>
<cas.version>5.2.1</cas.version>
<springboot.version>1.5.8.RELEASE</springboot.version>
<!-- app.server could be -jetty, -undertow, -tomcat, or blank if you plan to provide appserver -->
<app.server>-tomcat</app.server>

<mainClassName>org.springframework.boot.loader.WarLauncher</mainClassName>
<isExecutable>false</isExecutable>
<manifestFileToUse>${project.build.directory}/war/work/org.apereo.cas/cas-server-webapp${app.server}/META-INF/MANIFEST.MF</manifestFileToUse>

<maven.compiler.source>1.8</maven.compiler.source>
<maven.compiler.target>1.8</maven.compiler.target>
<project.build.sourceEncoding>UTF-8</project.build.sourceEncoding>
</properties>

<repositories>
<repository>
<id>sonatype-releases</id>
<url>http://oss.sonatype.org/content/repositories/releases/</url>
<snapshots>
<enabled>false</enabled>
</snapshots>
<releases>
<enabled>true</enabled>
</releases>
</repository>
<repository>
<id>sonatype-snapshots</id>
<url>https://oss.sonatype.org/content/repositories/snapshots/</url>
<snapshots>
<enabled>true</enabled>
</snapshots>
<releases>
<enabled>false</enabled>
</releases>
</repository>
<repository>
<id>shibboleth-releases</id>
<url>https://build.shibboleth.net/nexus/content/repositories/releases</url>
</repository>
</repositories>

<profiles>
<profile>
<activation>
<activeByDefault>true</activeByDefault>
</activation>
<id>exec</id>
<properties>
<mainClassName>org.apereo.cas.web.CasWebApplication</mainClassName>
<isExecutable>true</isExecutable>
<manifestFileToUse></manifestFileToUse>
</properties>
<build>
<plugins>
<plugin>
<groupId>com.soebes.maven.plugins</groupId>
<artifactId>echo-maven-plugin</artifactId>
<version>0.3.0</version>
<executions>
<execution>
<phase>prepare-package</phase>
<goals>
<goal>echo</goal>
</goals>
</execution>
</executions>
<configuration>
<echos>
<echo>Executable profile to make the generated CAS web application executable.</echo></echos>
</configuration>
</plugin>
</plugins>
</build>
</profile>

<profile>
<activation>
<activeByDefault>false</activeByDefault>
</activation>
<id>pgp</id>
<build>
<plugins>
<plugin>
<groupId>com.github.s4u.plugins</groupId>
<artifactId>pgpverify-maven-plugin</artifactId>
<version>1.1.0</version>
<executions>
<execution>
<goals>
<goal>check</goal>
</goals>
</execution>
</executions>
<configuration>
<pgpKeyServer>hkp://pool.sks-keyservers.net</pgpKeyServer>
<pgpKeysCachePath>${settings.localRepository}/pgpkeys-cache</pgpKeysCachePath>
<scope>test</scope>
<verifyPomFiles>true</verifyPomFiles>
<failNoSignature>false</failNoSignature>
</configuration>
</plugin>
</plugins>
</build>
</profile>
</profiles>
</project>
测试
这个地方做的是验证码的功能,具体更加严密的逻辑可以你们自己添加,我就实现了部分校验功能常见问题
找不到类CasConfigurationProperties
解决办法,单独导入配置
cas-server-core-configuration的依赖包。
<!-- 单独导入cas的配置依赖到项目中 -->
<dependency>
<groupId>org.apereo.cas</groupId>
<artifactId>cas-server-core-configuration</artifactId>
<version>${cas.version}</version>
<scope>system</scope>
<optional>true</optional>
<systemPath>${project.basedir}/src/main/webapp/WEB-INF/lib/cas-server-core-configuration-${cas.version}.jar</systemPath>
</dependency>
端口占用
刚刚弄完springboot,可能调试端口没有关闭,所以包的这个错ERROR: transport error 202: bind failed: Address already in use ERROR: JDWP Transport dt_socket failed to initialize, TRANSPORT_INIT(510) JDWP exit error AGENT_ERROR_TRANSPORT_INIT(197): No transports initialized [debu gInit.c:750]
解决办法
#关闭java web的进程
taskkill /f /t /im javaw.exe

#关闭java的进程
taskkill /f /t /im java.exe
参考文章
http://blog.csdn.net/yelllowcong/article/details/79281705
相关文章推荐
- CAS之5.2x版本之单点登录退出-yellowcong
- CAS之5.2x版本单点登录服务安装-yellowcong
- CAS之5.2x版本自定义登录,多数据源登录-yellowcong
- CAS之5.2x版本自定义登录页面-yellowcong
- CAS之5.2x版本之服务器开发调试(eclipse调试cas)-yellowcong
- CAS之5.2x版本自定义返回消息-yellowcong
- CAS之5.2x版本之客户端集成(Springboot)-yellowcong
- CAS 之3.x版本,单点登录服务搭建(Window)-yellowcong
- CAS之5.2x版本之jdbc配置多返回值-yellowcong
- CAS之5.2x版本配置密码加密(MD5和SHA)-yellowcong
- CAS之5.2x版本自定义JDBC认证-yellowcong
- CAS之5.2x版本之中文返回值乱码问题-yellowcong
- Cas之5.2.x版本单点登录自定义REST认证-yellowcong
- Cas之5.2.x版本之单点登录服务安装(SpringBoot启动)-yellowcong
- CAS之5.2x版本自定义错误信息-yellowcong
- CAS之5.2x版本自定义密码验证-yellowcong
- CAS之5.2x版本之通过yml的方式配置cas-yellowcong
- CAS之5.2x版本存储Ticket到redis-yellowcong
- CAS之5.2x版本之Ajax方式提交表单-yellowcong
- CAS之 5.2x版本配置数据库认证-yellowcong