weexapp 开发流程(一)开发环境配置
2017-12-16 22:53
239 查看
1.创建项目
2.安装必要插件
3.修改 scripts 指令
package.json
4.配置 weex-ui
.babelrc
5.修改 webpack 模块管理
webpack.config.js
步骤一:

步骤二:
步骤三:

步骤四:

步骤五:
修改后:
webpack.config.js
6.修改 webpack 开发环境文件
webpack.dev.js
7.提取 weex-ui 组件
项目名称 / index.js
.
weexpack create weexapp
2.安装必要插件
npm i jwt-simple vue-resource vue-router vuex vuex-router-sync weex-ui -S

npm i babel-plugin-component babel-preset-stage-0 history quick-local-ip weex-builder weex-router -D
3.修改 scripts 指令
package.json
"scripts": {
"build": "webpack",
"build_plugin": "webpack --config ./tools/webpack.config.plugin.js --color",
"dev": "webpack --config webpack.config.js --watch",
"serve": "webpack-dev-server --config webpack.dev.js --progress --watch --open",
"start": "webpack && webpack-dev-server --config webpack.dev.js --progress --watch --open",
"create": "weexpack run android"
},
4.配置 weex-ui
.babelrc
{
"presets": ["es2015", "stage-0"],
"plugins": [
[
"component",
{
"libraryName": "weex-ui",
"libDir": "packages"
}
]
]
}
5.修改 webpack 模块管理
webpack.config.js
步骤一:
步骤二:
步骤三:
步骤四:
步骤五:
修改后:
webpack.config.js
const pathTo = require('path');
const fs = require('fs-extra');
const webpack = require('webpack');
const entry = {index: pathTo.resolve('src', 'entry.js')};
const weexEntry = {index: pathTo.resolve('src', 'entry.js')};
const vueWebTemp = 'temp';
const hasPluginInstalled = fs.existsSync('./web/plugin.js');
var isWin = /^win/.test(process.platform);
function getEntryFileContent(entryPath, vueFilePath) {
let relativePath = pathTo.relative(pathTo.join(entryPath, '../'), vueFilePath);
let contents = '';
if (hasPluginInstalled) {
const plugindir = pathTo.resolve('./web/plugin.js');
contents = 'require(\'' + plugindir + '\') \n';
}
if (isWin) {
relativePath = relativePath.replace(/\\/g,'\\\\');
}
contents += 'var App = require(\'' + relativePath + '\')\n';
contents += 'App.el = \'#root\'\n';
contents += 'new Vue(App)\n';
return contents;
}
var fileType = '';
function walk(dir) {
dir = dir || '.';
const directory = pathTo.join(__dirname, 'src', dir);
fs.readdirSync(directory)
.forEach((file) => {
const fullpath = pathTo.join(directory, file);
const stat = fs.statSync(fullpath);
const extname = pathTo.extname(fullpath);
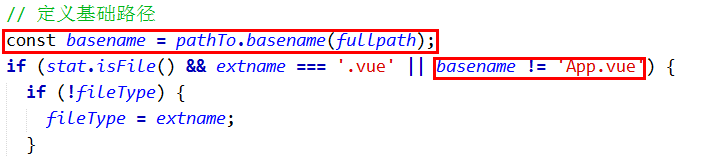
const basename = pathTo.basename(fullpath);
if (stat.isFile() && extname === '.vue' && basename != 'App.vue' ) {
if (!fileType) {
fileType = extname;
}
if (fileType && extname !== fileType) {
console.log('Error: This is not a good practice when you use ".we" and ".vue" togither!');
}
const name = pathTo.join(dir, pathTo.basename(file, extname));
if (extname === '.vue') {
const entryFile = pathTo.join(vueWebTemp, dir, pathTo.basename(file, extname) + '.js');
fs.outputFileSync(pathTo.join(entryFile), getEntryFileContent(entryFile, fullpath));
entry[name] = pathTo.join(__dirname, entryFile) + '?entry=true';
}
weexEntry[name] = fullpath + '?entry=true';
} else if (stat.isDirectory() && ['build','include','assets','filters','mixins'].indexOf(file) == -1 ) {
const subdir = pathTo.join(dir, file);
walk(subdir);
}
});
}
walk();
// web need vue-loader
const plugins = [
new webpack.optimize.UglifyJsPlugin({minimize: true}),
new webpack.BannerPlugin({
banner: '// { "framework": ' + (fileType === '.vue' ? '"Vue"' : '"Weex"') + '} \n',
raw: true,
exclude: 'Vue'
})
];
const webConfig = {
context: pathTo.join(__dirname, ''),
entry: entry,
output: {
path: pathTo.join(__dirname, 'dist'),
filename: '[name].web.js',
},
module: {
// webpack 2.0
rules: [
{
test: /\.js$/,
use: [{
loader: 'babel-loader',
options: {
presets: ['es2015']
}
}]
},
{
test: /\.css$/,
use: [{
loader: 'css-loader'
}]
},
{
test: /\.vue(\?[^?]+)?$/,
use: [{
loader: 'vue-loader'
}]
}
]
},
plugins: plugins
};
const weexConfig = {
entry: weexEntry,
output: {
path: pathTo.join(__dirname, 'dist'),
filename: '[name].js',
},
module: {
rules: [
{
test: /\.js$/,
use: [{
loader: 'babel-loader',
}]
},
{
test: /\.vue(\?[^?]+)?$/,
use: [{
loader: 'weex-loader'
}]
},
{
test: /\.we(\?[^?]+)?$/,
use: [{
loader: 'weex-loader'
}]
}
],
},
plugins: plugins,
};
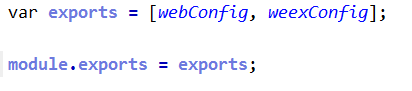
var exports = [webConfig, weexConfig];
module.exports = exports;6.修改 webpack 开发环境文件
webpack.dev.js
const ip = require('quick-local-ip').getLocalIP4();
const configs = require('./webpack.config.js');
const webpack = require('webpack');
const pathTo = require('path');
const chalk = require('chalk');
let config = Array.isArray(configs) ? configs[0] : configs;
config.devServer = {
contentBase: pathTo.join(__dirname, ''),
compress: true,
// hot: true,
host: '0.0.0.0',
public: ip + ':8080/web',
// publicPath: '/dist/',
};
// configs.plugins.push(new webpack.HotModuleReplacementPlugin());
console.log('server is running! Please open ' + chalk.green('http://' + ip + ':8080/web/index.html'));
module.exports = config;
7.提取 weex-ui 组件
项目名称 / index.js
/**
* weex-ui 常用组件
*/

import Utils from './packages/utils';
import WxcButton from './packages/wxc-button';
import WxcCell from './packages/wxc-cell';
import WxcCheckbox from './packages/wxc-checkbox';
import WxcCheckboxList from './packages/wxc-checkbox-list';
import WxcCountdown from './packages/wxc-countdown';
import WxcDialog from './packages/wxc-dialog';
import WxcEpSlider from './packages/wxc-ep-slider';
import WxcPanItem from './packages/wxc-pan-item';
import WxcGridSelect from './packages/wxc-grid-select';
import WxcIndexlist from './packages/wxc-indexlist';
import WxcLightbox from './packages/wxc-lightbox';
import WxcLoading from './packages/wxc-loading';
import WxcPartLoading from './packages/wxc-part-loading';
import WxcMask from './packages/wxc-mask';
import WxcMinibar from './packages/wxc-minibar';
import WxcLotteryRain from './packages/wxc-lottery-rain';
import WxcNoticebar from './packages/wxc-noticebar';
import WxcOverlay from './packages/wxc-overlay';
import WxcPageCalendar from './packages/wxc-page-calendar';
import WxcPopup from './packages/wxc-popup';
import WxcProgress from './packages/wxc-progress';
import WxcRadio from './packages/wxc-radio';
import WxcResult from './packages/wxc-result';
import WxcRichText from './packages/wxc-rich-text';
import WxcSpecialRichText from './packages/wxc-special-rich-text';
import WxcSearchbar from './packages/wxc-searchbar';
import WxcSimpleFlow from './packages/wxc-simple-flow';
import WxcSlideNav from './packages/wxc-slide-nav';
import WxcSliderBar from './packages/wxc-slider-bar';
import WxcStepper from './packages/wxc-stepper';
import WxcTabPage from './packages/wxc-tab-page';
import WxcTabBar from './packages/wxc-tab-bar';
import WxcTag from './packages/wxc-tag';

export {
Utils,
WxcButton,
WxcCell,
WxcCheckbox,
WxcCheckboxList,
WxcCountdown,
WxcDialog,
WxcEpSlider,
WxcPanItem,
WxcGridSelect,
WxcIndexlist,
WxcLightbox,
WxcLoading,
WxcPartLoading,
WxcMask,
WxcMinibar,
WxcLotteryRain,
WxcNoticebar,
WxcOverlay,
WxcPageCalendar,
WxcPopup,
WxcProgress,
WxcRadio,
WxcResult,
WxcRichText,
WxcSpecialRichText,
WxcSearchbar,
WxcSimpleFlow,
WxcSlideNav,
WxcSliderBar,
WxcStepper,
WxcTabPage,
WxcTabBar,
WxcTag
};
.

相关文章推荐
- AndroidStudio进行JNI开发完整流程之环境配置
- (学习笔记2)开发环境的配置及MFC创建流程
- Android studio下NDK开发环境配置及开发流程
- Win10下Nao机器人的C++开发平台搭建环境配置流程,这学期综合实践的内容,做了一个星期,总算做出来了,写个总结吧哈哈
- 重装系统还有配置开发环境的流程
- android NDK/JNI环境配置及实例开发流程
- Android studio3.0环境下进行NDK开发的环境配置与流程
- PHP开发环境&MySQL下载安装及配置流程
- Linux/Windows配置stm32免费开发环境详细流程
- PHP开发环境&MySQL下载安装及配置流程
- 重装系统还有配置开发环境的流程
- OpenGL 在Win7(32)上配置开发环境流程及注意问题
- java开发环境安装配置流程【图文解说】
- 安装OpenCV +VS2010 开发环境配置
- Mac下IDEA开发环境Tomcat配置
- linux、内核源码、内核编译与配置、内核模块开发、内核启动流程
- Eclipse配置Android开发环境
- pyhon开发环境的配置与开发软件的安装
- centos7+qt5开发环境配置