TensorFlow学习--tensorflow图像处理--图像翻转及大小色彩调整
2017-11-15 15:59
363 查看
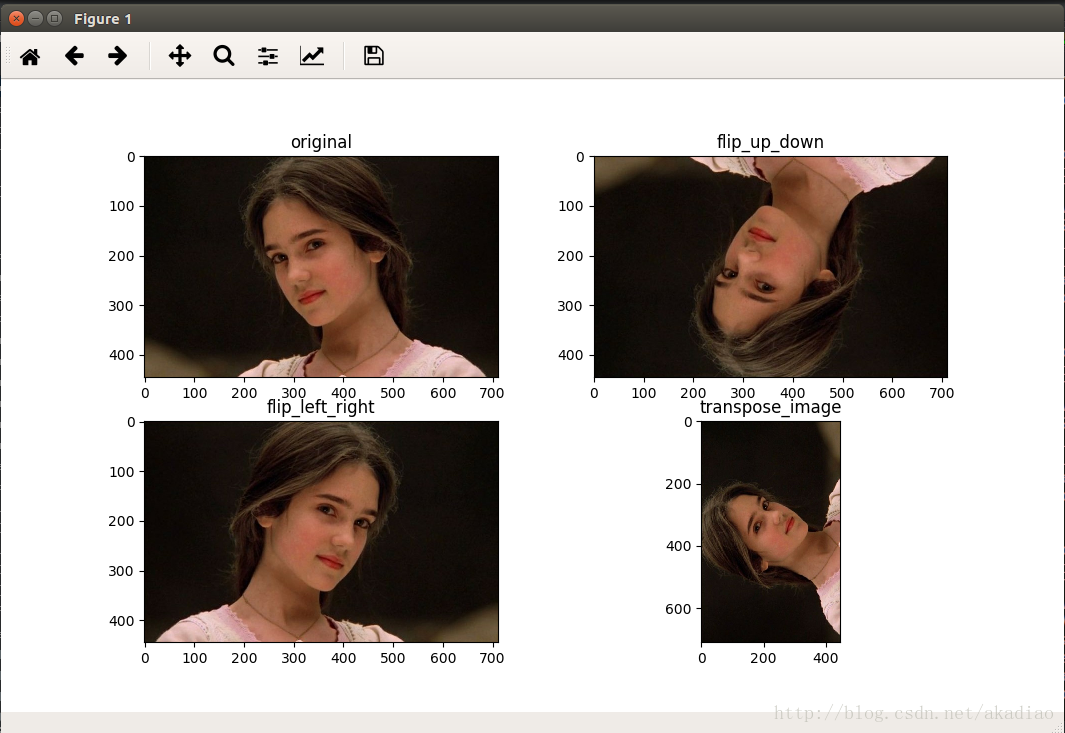
翻转图像
tf.image.flip_up_down()
将图像上下翻转tf.image.flip_left_right()
将图像左右翻转tf.image.transpose_image()
通过交换第一维和第二维来转置图像随机翻转
tf.image.random_flip_up_down()将图像上下翻转的概率为0.5,即输出的图像有50%的可能性是上下翻转的否则就输出原图.
tf.image.random_flip_left_right()
将图像左右翻转的概率为0.5,即输出的图像有50%的可能性是左右翻转的否则就输出原图
在训练图像时,利用随机翻转对图像进行预处理来增加训练数据.
#!/usr/bin/python
# coding:utf-8

import matplotlib.pyplot as plt
import tensorflow as tf
# 读取图像数据
img = tf.gfile.FastGFile('daibola.jpg').read()

with tf.Session() as sess:
img_data = tf.image.decode_jpeg(img)
# 将图像上下翻转
flipped0 = tf.image.flip_up_down(img_data)
# 将图像左右翻转
flipped1 = tf.image.flip_left_right(img_data)
# 通过交换第一维和第二维来转置图像
flipped2 = tf.image.transpose_image(img_data)

plt.subplot(221), plt.imshow(img_data.eval()), plt.title('original')
plt.subplot(222), plt.imshow(flipped0.eval()), plt.title('flip_up_down')
plt.subplot(223), plt.imshow(flipped1.eval()), plt.title('flip_left_right')
plt.subplot(224), plt.imshow(flipped2.eval()), plt.title('transpose_image')

plt.show()
输出:
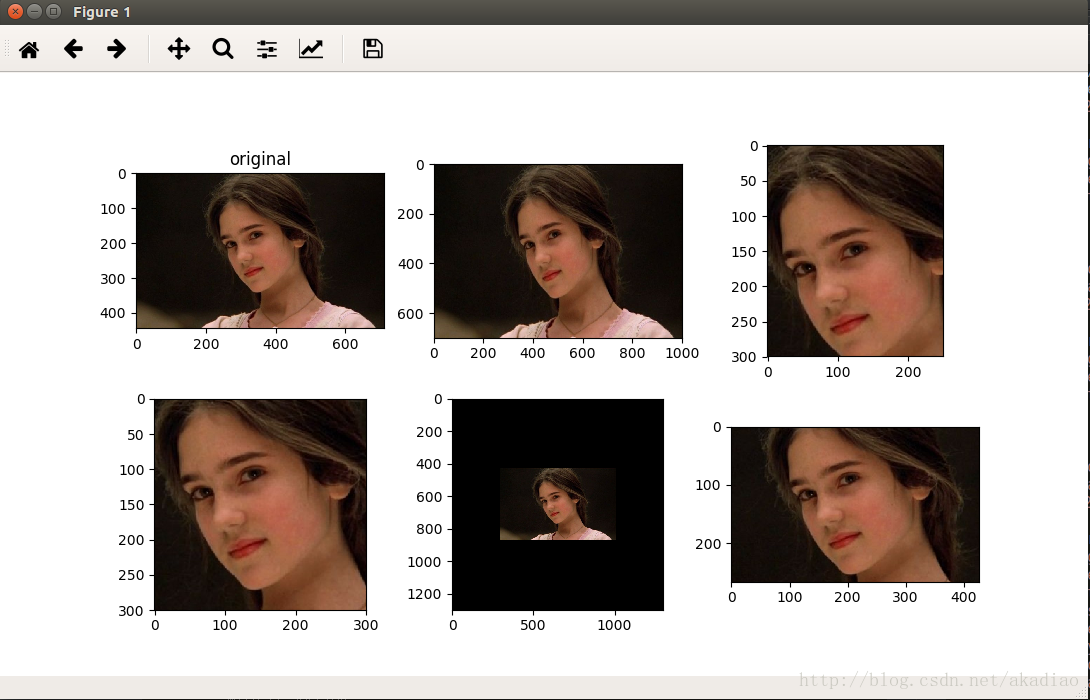
调整图像大小
tf.image.resize_images()
tensorflow中函数tf.image.resize_images可以实现对图像大小的调整,对应的API为:def resize_images(images, size, method=ResizeMethod.BILINEAR, align_corners=False):
其中,method的取值与对应的插值算法为:
| Methold取值 | 图像大小调整算法 |
|---|---|
| 0 | 双线性插值法(Bilinear interprolation) |
| 1 | 最临近插值法 (Nearest neighbor interprolation) |
| 2 | 双三次插值法 (Bicubic interprolation) |
| 3 | 面积插值法 (Area interprolation) |
tf.image.crop_to_bounding_box()
API:def crop_to_bounding_box(image, offset_height, offset_width, target_height,target_width)
将图像裁剪到指定的边界框
image:shape为[height, width, channels]的3维张量;shape为[batch, height, width, channels]的4维张量
offset_height:结果图像左上角点的垂直坐标
offset_width:结果图像左上角点的水平坐标
target_height:结果图像的高度
target_width:结果图像的宽度
tf.image.resize_image_with_crop_or_pad()
API:def resize_image_with_crop_or_pad(image, target_height, target_width)
将图像裁剪或填充到目标宽度和高度。
tf.image.central_crop()
裁剪图像的中心区域,删除图像的外部部分,但保留图像的中心区域.#!/usr/bin/python
# coding:utf-8
import matplotlib.pyplot as plt
import tensorflow as tf
# 读取图像数据
img = tf.gfile.FastGFile('daibola.jpg').read()
with tf.Session() as sess:
img_data = tf.image.decode_jpeg(img)
resized0 = tf.image.resize_images(img_data, (700, 1000), method=1)
resized1 = tf.image.crop_to_bounding_box(img_data, 30, 220, 300, 250)
resized2 = tf.image.resize_image_with_crop_or_pad(img_data, 300, 300)
resized3 = tf.image.resize_image_with_crop_or_pad(img_data, 1300, 1300)
# 函数tf.image.central_crop可以通过比例调整图像的大小
resized4 = tf.image.central_crop(img_data, 0.6)
plt.subplot(231), plt.imshow(img_data.eval()), plt.title('original')
plt.subplot(232), plt.imshow(resized0.eval())
plt.subplot(233), plt.imshow(resized1.eval())
plt.subplot(234), plt.imshow(resized2.eval())
plt.subplot(235), plt.imshow(resized3.eval())
plt.subplot(236), plt.imshow(resized4.eval())
plt.show()输出:
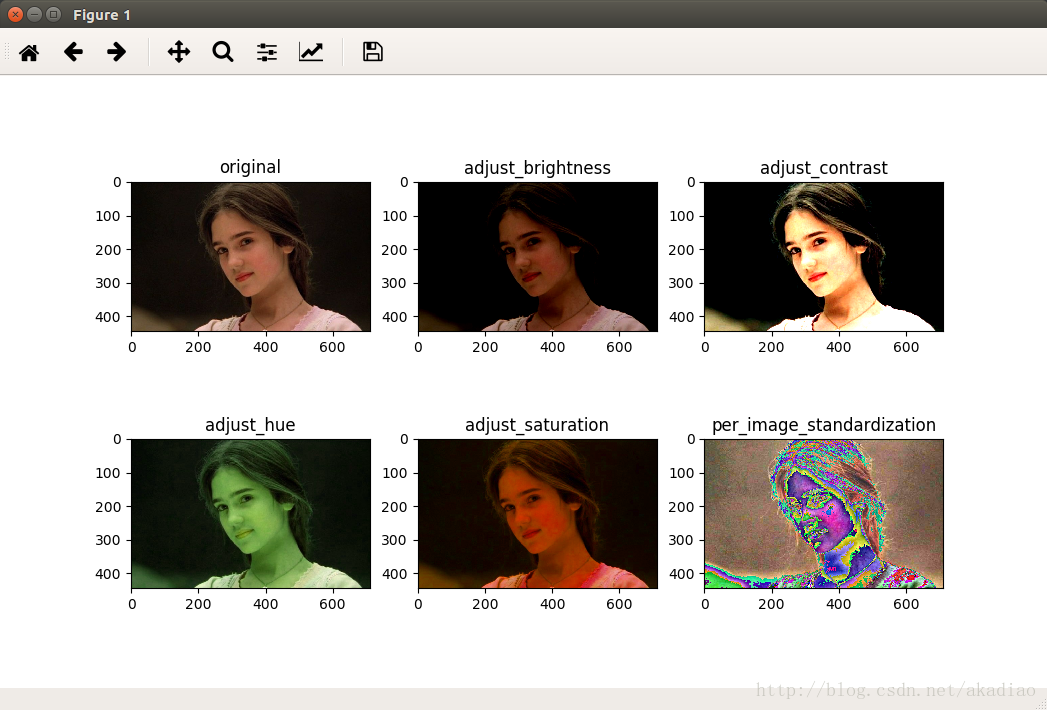
调整图像色彩
tf.image.adjust_brightness()
调整图像的亮度tf.image.adjust_contrast()
调整图像的对比度tf.image.adjust_hue()
调整图像的色相tf.image.adjust_saturation()
调整图像的饱和度tf.image.per_image_standardization()
将图像线性缩放为零均值和单位范数随机调整
在指定范围内随机调整图像的亮度/对比度/色相/饱和度tf.image.random_brightness(img_data,max_delta)
tf.image.random_contrast(img_data, lower, upper)
tf.image.random_hue(img_data, max_delta)
tf.image.random_saturation(img_data, lower, upper)
随机调整这些属性,使训练得到的模型尽可能小的受到无关因素的影响.
#!/usr/bin/python
# coding:utf-8

import matplotlib.pyplot as plt
import tensorflow as tf
# 读取图像数据
img = tf.gfile.FastGFile('daibola.jpg').read()

with tf.Session() as sess:
img_data = tf.image.decode_jpeg(img)
# 将图像的亮度-0.2
adjusted0 = tf.image.adjust_brightness(img_data, -0.2)
# 将图像的对比度+3
adjusted1 = tf.image.adjust_contrast(img_data, +3)
# 将图像的色相+0.2
adjusted2 = tf.image.adjust_hue(img_data, 0.2)
# 将图像的饱和度+3
adjusted3 = tf.image.adjust_saturation(img_data, 3)
# 将图像线性缩放为零均值和单位范数
adjusted4 = tf.image.per_image_standardization(img_data)

plt.subplot(231), plt.imshow(img_data.eval()), plt.title('original')
plt.subplot(232), plt.imshow(adjusted0.eval()), plt.title('adjust_brightness')
plt.subplot(233), plt.imshow(adjusted1.eval()), plt.title('adjust_contrast')
plt.subplot(234), plt.imshow(adjusted2.eval()), plt.title('adjust_hue')
plt.subplot(235), plt.imshow(adjusted3.eval()), plt.title('adjust_saturation')
plt.subplot(236), plt.imshow(adjusted4.eval()), plt.title('per_image_standardization')

plt.show()
输出:

相关文章推荐
- C#图像处理(各种旋转、改变大小、柔化、锐化、雾化、底片、浮雕、黑白、滤镜效果,滤波,图像截取) 对图片的处理 : 亮度调整 抓屏 翻转 随鼠标画矩形
- Tensorflow中图像处理函数(图像大小调整)
- TensorFlow 图像预处理(二) 图像翻转,图像色彩调整
- TensorFlow学习--tensorflow图像处理--随机调整亮度/对比度/饱和度/色相
- Tensorflow图像调整大小
- 【深度学习】TensorFlow图像处理
- tensorflow实现图像色彩的调整
- TensorFlow:实战Google深度学习框架(六)图像数据处理
- TensorFlow学习(十):图像预处理
- Android图像处理之色彩特效处理(学习笔记)
- 学习FotoVision 进行C# colorMatrix 对图片的处理 : 亮度调整 抓屏 翻转 随鼠标画矩形
- javacpp-opencv图像处理之1:实时视频添加文字水印并截取视频图像保存成图片,实现文字水印的字体、位置、大小、粗度、翻转、平滑等操作
- javacpp-opencv图像处理之1:实时视频添加文字水印并截取视频图像保存成图片,实现文字水印的字体、位置、大小、粗度、翻转、平滑等操作
- 学习FotoVision 进行C# colorMatrix 对图片的处理 : 亮度调整 抓屏 翻转 随鼠标画矩形
- TensorFlow学习--tensorflow图像处理--图像读取/格式转换
- Photoshop学习(三)色彩与图像偏色处理
- 旋转翻转UIImage 不是UIImageView 适用于源图像的处理,例如截图后旋转----改变图片大小
- TensorFlow学习笔记-图像预处理
- 【Matlab学习笔记】【编程实例】一(将两幅图像调整为相同的尺寸大小)
- 使用python进行图像处理-调整图片大小