Android 超简单的自定义SeachView
2017-11-14 00:00
344 查看
摘要: 方便理解,简单的自定义查询组件,注意当前这个是不可以编辑的。
1.创建一个 cm_layout_search_view.xml 用来布局
2. 创建 SearchView.java
3.在其他布局引用
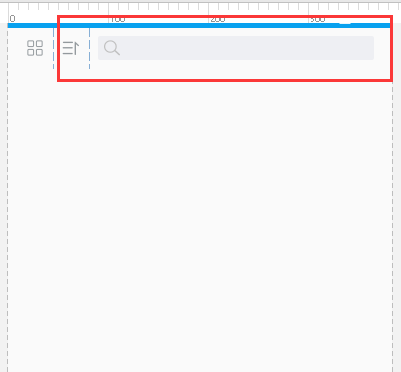
4.最后看看效果吧
5.补充一个 样式 cm_search_bg.xml
1.创建一个 cm_layout_search_view.xml 用来布局
<?xml version="1.0" encoding="utf-8"?>
<LinearLayout xmlns:android="http://schemas.android.com/apk/res/android"
android:layout_width="match_parent"
android:layout_height="24dp"
android:background="@drawable/cm_search_bg"
android:gravity="center_vertical"
android:orientation="horizontal">

<ImageView
android:layout_width="18dp"
android:layout_height="18dp"
android:layout_gravity="center"
android:layout_marginLeft="5dp"
android:scaleType="fitCenter"
android:src="@drawable/cloud_icon_search" />

<!--如果想换成可以输入的,直接把这里换成 EditTextView即可-->
<TextView
android:id="@+id/tv_title"
android:layout_width="match_parent"
android:layout_height="match_parent"
android:layout_marginLeft="5dp" />
</LinearLayout>
2. 创建 SearchView.java
import android.content.Context;
import android.util.AttributeSet;
import android.view.LayoutInflater;
import android.view.View;
import android.widget.LinearLayout;

/**
* <p>
* Created by Xulin on 2017/11/14
* email: xulin67@163.com.
* description:
*/

public class SearchView extends LinearLayout implements View.OnClickListener {
private Context context;

public SearchView(Context context) {
super(context);
this.context = context;
initView();
}

public SearchView(Context context, AttributeSet attrs) {
super(context, attrs);
this.context = context;
initView();
}

public SearchView(Context context, AttributeSet attrs, int defStyleAttr) {
super(context, attrs, defStyleAttr);
this.context = context;

initView();
}

private void initView() {
//加载布局文件
LayoutInflater.from(context).inflate(R.layout.cm_layout_search_view, this);
setOnClickListener(this);
}

@Override
public void onClick(View v) {
}
}
3.在其他布局引用
<com.cust.base.view.SearchView
android:id="@+id/sch_view"
android:layout_width="match_parent"
android:layout_height="wrap_content"
android:layout_gravity="center"
android:layout_marginLeft="@dimen/margin_18"
android:layout_marginRight="@dimen/margin_18" />
4.最后看看效果吧
5.补充一个 样式 cm_search_bg.xml
<?xml version="1.0" encoding="utf-8"?>
<shape xmlns:android="http://schemas.android.com/apk/res/android">

<solid android:color="#eeeff3" />
<corners
android:bottomLeftRadius="2dp"
android:bottomRightRadius="2dp"
android:topLeftRadius="2dp"
android:topRightRadius="2dp" />
</shape>

相关文章推荐
- 最简单的android自定义进度条样式
- Android自定义Notification并没有那么简单
- 超简单实现Android自定义Toast(附源码)
- android自定义加载数据动画dialog和简单的timer计时器
- Android之不需要自定义View(ViewfindView.java)最简单的二维码扫描
- Android自定义EditText:你需要一款简单实用的SuperEditText(一键删除&自定义样式)
- android简单自定义view
- Android简单自定义圆形Imageview
- 基于百度地图 Android SDKv1.3.5实现简单的定位功能,自定义标题栏
- Android简单自定义圆形和水平ProgressBar
- android 简单自定义注解
- Android自定义View----时钟/仪表盘的简单实现
- Android简单实现自定义弹框(PopupWindow)
- 最简单的自定义Android广播
- Android对话框(简单对话框,等待对话框,自定义对话框)
- Android 视频播放器之JieCaoVideoPlayer的简单实用以及自定义UI
- Android 一个简单的自定义WheelView实现
- Android EditText简单自定义边框样式
- android自定义Button样式(清晰简单)
- Android编程实现Toast自定义布局简单示例