Markdown编辑器editor.md的使用---markdown上传图片
2017-11-09 10:39
1261 查看
http://kindeditor.org/
确定下有没有查找替换功能
http://pandao.github.io/editor.md/ http://pandao.github.io/editor.md/examples/html-preview-markdown-to-html.html https://github.com/helloworldtang/spring-boot-rte-study
editor.md是国内开源的一款在线Markdown编辑器,单纯基于前端JavaScript实现,和后端什么语言无关。这个还可以画流程图,以及数学公式。官网Demo示例使用的是PHP语言,我后端使用的是Java,Springmvc。
如下记录我在个人开源项目17Smart中使用的方法和过程。17Smart源码目前托管在Github上,感兴趣的可以参考了解。
http://pandao.github.io/editor.md/examples/index.html The open source embeddable online markdown editor (component). https://pandao.github.io/editor.md/
>1.examples文件中是使用PHP做的所有示例(可以在文档编辑器里打开,并查看源代码);
>2.lib中是editor.md所依赖的第三方js资源;
>3.plugins中是如emoji表情支持、代码格式化等插件;
注意事项1:
需要注意的是,LEGACYHTML5需要搭配一个额外的库NekoHTML才可用。到项目根目录的build.gradle文件里这样添加它到dependencies
具体内容如下:
非严格的thymeleaf格式
你可能会发现在默认配置下,thymeleaf对.html的内容要求很严格,比如<meta charset="UTF-8" />,如果少最后的标签封闭符号/,就会报错而转到错误页。也比如你在使用Vue.js这样的库,然后有<div v-cloak></div>这样的html代码,也会被thymeleaf认为不符合要求而抛出错误。
因此,建议增加下面这段:
spring.thymeleaf.mode = LEGACYHTML5
spring.thymeleaf.mode的默认值是HTML5,其实是一个很严格的检查,改为LEGACYHTML5可以得到一个可能更友好亲切的格式要求。
需要注意的是,LEGACYHTML5需要搭配一个额外的库NekoHTML才可用。到项目根目录的build.gradle文件里这样添加它到dependencies:
compile('net.sourceforge.nekohtml:nekohtml:1.9.22')
然后运行一次Gradle刷新(有任何Gradle改动,都应该这样运行一次):
Gradle刷新
最后重启项目就可以感受到不那么严格的thymeleaf了。
参考
http://acgtofe.com/posts/2016...
https://segmentfault.com/q/1010000008308601/a-1020000008308882
基于spring boot的示例代码2:
https://github.com/wchstrife/blog 配套的文章:http://blog.csdn.net/wchstrife/article/details/76725317
Editor.md和markdown实现Sg一样的截图粘贴上传https://segmentfault.com/a/1190000010776967
Java Markdown parser with source level AST. CommonMark 0.28, emulation of: pegdown, kramdown, markdown.pl, MultiMarkdown. With HTML to MD, MD to PDF, MD to DOCX conversion modules.
https://github.com/vsch/flexmark-java
另一个Markdown的博客:
使用SpringBoot快速搭建个人博客https://zhuanlan.zhihu.com/p/28428463
另一个基于markdown的code:https://github.com/mrdear/MarkdownViewTools
采用自身模块规范编写的前端UI框架,遵循原生HTML/CSS/JS的书写形式,极低门槛,拿来即用。 http://www.layui.com http://www.layui.com/doc/base/infrastructure.html SpringBoot项目实战(一)--Markdown展示工具http://dev.dafan.info/detail/209683?p=54-68
need to do :https://github.com/jetaggart/spring-boot-markdown
need to do:好像很有趣的代码,Kotlin 使用 Spring WebFlux 实现响应式编程: https://github.com/EasyKotlin/kotlin-with-webflux
need to do:一个小博客https://github.com/OverrideRe/MyBlog
需要鉴别下,下面这篇文章是否有效
https://course.tianmaying.com/web-development+markdown#0
博客是要显示在HTML之中的,大多博客网站都会提供HTML编辑器,这样的编辑器通常会包含一组格式按钮、一系列快捷键和一个输入框。然而,HTML编辑器难以精确地编写文档,同时可视化的编辑产生大量冗余的标签和属性(这也是dreamweaver逐渐淡出开发者圈子的原因之一)。我们可以使用更高端的方式编辑HTML文档:使用Markdown。
Markdown 是一种轻量级标记语言。通过markdown,可以使用易读易写的纯文本格式编写文档,然后转换成有效的HTML文档。类似在电子邮件中通过某些纯文本标记生成HTML片段。如果你还不确定Markdown是什么东西,请打开 markdown-live-preview 来马上体验一下!Markdown语法细节可以查看: http://wowubuntu.com/markdown/
另一个markdown开源库https://github.com/sirthias/pegdown
富文本编辑器https://dev.ckeditor.com/
这个代码没有深入分析过https://github.com/jetaggart/spring-boot-markdown
开源博客系统 - 分享(这个没有测试,need to do) https://juejin.im/entry/5934cdefac502e0068ab9727
这里值得注意两点:
>1.后端要想获得第二个textarea中的值,首先需要打开editor.md的
>2.textarea中name属性值,应该跟着div的ID
这里值得注意三点:
>1.注意1:这里的就是上面的DIV的id属性值;
>2.注意2:你的path路径(原资源文件中lib包在我们项目中所放的位置);
>3.注意3:saveHTMLToTextarea 设置true或false关乎后端是否可以获取到值;
这样我们就完成了一个最简单的
我们都知道在编写Markdown文档时,图片语法是
注意:
我的后台使用的是springmvc,代码如下:
(注意:
首先引入必要JS(下面不是所有必要):
然后,本页面中,加入如下DIV:
最后,再引入如下JS代码:
源码:Github
eBook:《深入剖析Tomcat》
http://blog.csdn.net/lovejavaydj/article/details/73692917
确定下有没有查找替换功能
http://pandao.github.io/editor.md/ http://pandao.github.io/editor.md/examples/html-preview-markdown-to-html.html https://github.com/helloworldtang/spring-boot-rte-study
一、Markdown和editor.md简介:
Markdown在技术圈里(估计更多是程序猿吧)越来越流行。简单的语法,统一的格式,使用过程中,手基本上不用从键盘上移到鼠标上去,超级方便。写好了一篇md文档(也就是含Markdown语法格式的普通TXT文件),可以随意放到别的支持Markdown格式的网站上发布。
editor.md是国内开源的一款在线Markdown编辑器,单纯基于前端JavaScript实现,和后端什么语言无关。这个还可以画流程图,以及数学公式。官网Demo示例使用的是PHP语言,我后端使用的是Java,Springmvc。
如下记录我在个人开源项目17Smart中使用的方法和过程。17Smart源码目前托管在Github上,感兴趣的可以参考了解。
二、editor.md的使用:
2.1、下载:
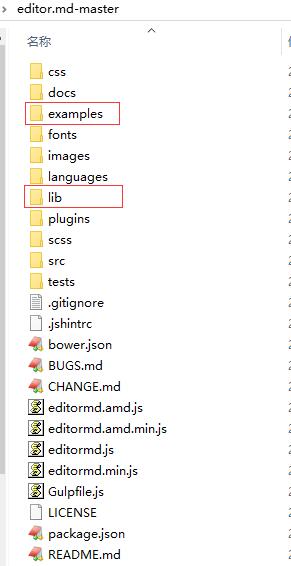
我们可以从其官网中找到下载最新版V1.5.0,解压资源包如下图:http://pandao.github.io/editor.md/examples/index.html The open source embeddable online markdown editor (component). https://pandao.github.io/editor.md/
>1.examples文件中是使用PHP做的所有示例(可以在文档编辑器里打开,并查看源代码);
>2.lib中是editor.md所依赖的第三方js资源;
>3.plugins中是如emoji表情支持、代码格式化等插件;
注意事项1:
需要注意的是,LEGACYHTML5需要搭配一个额外的库NekoHTML才可用。到项目根目录的build.gradle文件里这样添加它到dependencies
具体内容如下:
非严格的thymeleaf格式
你可能会发现在默认配置下,thymeleaf对.html的内容要求很严格,比如<meta charset="UTF-8" />,如果少最后的标签封闭符号/,就会报错而转到错误页。也比如你在使用Vue.js这样的库,然后有<div v-cloak></div>这样的html代码,也会被thymeleaf认为不符合要求而抛出错误。
因此,建议增加下面这段:
spring.thymeleaf.mode = LEGACYHTML5
spring.thymeleaf.mode的默认值是HTML5,其实是一个很严格的检查,改为LEGACYHTML5可以得到一个可能更友好亲切的格式要求。
需要注意的是,LEGACYHTML5需要搭配一个额外的库NekoHTML才可用。到项目根目录的build.gradle文件里这样添加它到dependencies:
compile('net.sourceforge.nekohtml:nekohtml:1.9.22')
然后运行一次Gradle刷新(有任何Gradle改动,都应该这样运行一次):
Gradle刷新
最后重启项目就可以感受到不那么严格的thymeleaf了。
参考
http://acgtofe.com/posts/2016...
https://segmentfault.com/q/1010000008308601/a-1020000008308882
基于spring boot的示例代码2:
https://github.com/wchstrife/blog 配套的文章:http://blog.csdn.net/wchstrife/article/details/76725317
Editor.md和markdown实现Sg一样的截图粘贴上传https://segmentfault.com/a/1190000010776967
Java Markdown parser with source level AST. CommonMark 0.28, emulation of: pegdown, kramdown, markdown.pl, MultiMarkdown. With HTML to MD, MD to PDF, MD to DOCX conversion modules.
https://github.com/vsch/flexmark-java
另一个Markdown的博客:
使用SpringBoot快速搭建个人博客https://zhuanlan.zhihu.com/p/28428463
另一个基于markdown的code:https://github.com/mrdear/MarkdownViewTools
采用自身模块规范编写的前端UI框架,遵循原生HTML/CSS/JS的书写形式,极低门槛,拿来即用。 http://www.layui.com http://www.layui.com/doc/base/infrastructure.html SpringBoot项目实战(一)--Markdown展示工具http://dev.dafan.info/detail/209683?p=54-68
need to do :https://github.com/jetaggart/spring-boot-markdown
need to do:好像很有趣的代码,Kotlin 使用 Spring WebFlux 实现响应式编程: https://github.com/EasyKotlin/kotlin-with-webflux
need to do:一个小博客https://github.com/OverrideRe/MyBlog
需要鉴别下,下面这篇文章是否有效
https://course.tianmaying.com/web-development+markdown#0
博客是要显示在HTML之中的,大多博客网站都会提供HTML编辑器,这样的编辑器通常会包含一组格式按钮、一系列快捷键和一个输入框。然而,HTML编辑器难以精确地编写文档,同时可视化的编辑产生大量冗余的标签和属性(这也是dreamweaver逐渐淡出开发者圈子的原因之一)。我们可以使用更高端的方式编辑HTML文档:使用Markdown。
Markdown 是一种轻量级标记语言。通过markdown,可以使用易读易写的纯文本格式编写文档,然后转换成有效的HTML文档。类似在电子邮件中通过某些纯文本标记生成HTML片段。如果你还不确定Markdown是什么东西,请打开 markdown-live-preview 来马上体验一下!Markdown语法细节可以查看: http://wowubuntu.com/markdown/
另一个markdown开源库https://github.com/sirthias/pegdown
富文本编辑器https://dev.ckeditor.com/
这个代码没有深入分析过https://github.com/jetaggart/spring-boot-markdown
开源博客系统 - 分享(这个没有测试,need to do) https://juejin.im/entry/5934cdefac502e0068ab9727
2.2、简单使用:
将上面的解压的editormd资源文件拷贝(选取需要的)到我们的项目适合目录下面。2.2.1、在自己的页面上引入相关的css和js,代码如下:
<link rel="stylesheet"href="/smart-api/htdocs/mdeditor/css/editormd.css" />

<script src="/smart-api/htdocs/mdeditor/js/jquery.min.js"></script>
<script src="/smart-api/htdocs/mdeditor/js/editormd.min.js"></script>
2.2.2、在自己的页面中加上DIV:
DIV的id为my-editormd(这个div在form表单中)。DIV中包含二个textarea,其实官方demo中只有一个,第二个是否方便我们POST提交时,后端可以获取到md文档内容,如java中
request.getParameter("my-editormd-html-code")。<div id="my-editormd" > <textarea id="my-editormd-markdown-doc" name="my-editormd-markdown-doc" style="display:none;"></textarea> <!-- 注意:name属性的值--> <textarea id="my-editormd-html-code" name="my-editormd-html-code" style="display:none;"></textarea> </div>
这里值得注意两点:
>1.后端要想获得第二个textarea中的值,首先需要打开editor.md的
saveHTMLToTextarea : true设置(见下面);
>2.textarea中name属性值,应该跟着div的ID
my-editormd值来定,即
$-html-code(刚开始,后端死活获取不到值,翻看了源码才知道)
2.2.3、在同页面中再加上如下JS代码:
<script type="text/javascript">
$(function() {
editormd("my-editormd", {//注意1:这里的就是上面的DIV的id属性值
width   : "90%",
height  : 640,
syncScrolling : "single",
path    : "/smart-api/htdocs/mdeditor/lib/",//注意2:你的路径
saveHTMLToTextarea : true//注意3:这个配置,方便post提交表单
});
});
</script>
这里值得注意三点:
>1.注意1:这里的就是上面的DIV的id属性值;
>2.注意2:你的path路径(原资源文件中lib包在我们项目中所放的位置);
>3.注意3:saveHTMLToTextarea 设置true或false关乎后端是否可以获取到值;
这样我们就完成了一个最简单的
editor.md的编辑器了,我们可以在这里面书写自己熟悉的Markdown文档,包括代码,右侧有实时预览。
2.3、上传图片:
上面最简单的editor.md的编辑器,目前还是不可以上传图片的。我们需要略作配置修改,还是很简单的。
我们都知道在编写Markdown文档时,图片语法是
。可是,往往我们需要上传本地图片。在上面的基础之上,略做如下修改即可(当然后端的代码得自己写):
<script type="text/javascript">
$(function() {
editormd("my-editormd", {//注意1:这里的就是上面的DIV的id属性值
width   : "90%",
height  : 640,
syncScrolling : "single",
path    : "/smart-api/htdocs/mdeditor/lib/",//注意2:你的路径
saveHTMLToTextarea : true,//注意3:这个配置,方便post提交表单

/**上传图片相关配置如下*/
imageUpload : true,
imageFormats : ["jpg", "jpeg", "gif", "png", "bmp", "webp"],
imageUploadURL : "/smart-api/upload/editormdPic/",//注意你后端的上传图片服务地址
});
});
</script>
注意:
editor.md期望你上传图片的服务返回如下json格式的内容
{
success : 0 | 1, //0表示上传失败;1表示上传成功
message : "提示的信息",
url     : "图片地址" //上传成功时才返回
}
我的后台使用的是springmvc,代码如下:
(注意:
@RequestParam(value = "editormd-image-file", required = true注解) //参数名不能改
@RequestMapping("editormdPic")
@ResponseBody
public JSONObject editormdPic (@RequestParam(value = "editormd-image-file", required = true) MultipartFile file, HttpServletRequest request,HttpServletResponse response) throws Exception{

String trueFileName = file.getOriginalFilename();

String suffix = trueFileName.substring(trueFileName.lastIndexOf("."));

String fileName = System.currentTimeMillis()+"_"+CommonUtils.getRandomNumber(100, 999)+suffix;

String path = request.getSession().getServletContext().getRealPath("/assets/msg/upload/");
System.out.println(path);

File targetFile = new File(path, fileName);
if(!targetFile.exists()){
targetFile.mkdirs();
}

//保存
try {
file.transferTo(targetFile);
} catch (Exception e) {
e.printStackTrace();
}

JSONObject res = new JSONObject();
res.put("url", Constant.WEB_ROOT+"assets/msg/upload/"+fileName);
res.put("success", 1);
res.put("message", "upload success!");

return res;

}
2.4、Markdown文档页面展示:
上面我们通过post提交,后端获取到MD文档内容后,往往存在数据库中,然后在页面展示时,我们需要把MD语法文档,转换为HTML语法(也可以先转换为标准的HTML存储,但我觉得先转换的话,会占用较多存储空间)。首先引入必要JS(下面不是所有必要):
<script src="/smart-api/htdocs/mdeditor/js/jquery.min.js"></script>
<script src="/smart-api/htdocs/mdeditor/lib/marked.min.js"></script>
<script src="/smart-api/htdocs/mdeditor/lib/prettify.min.js"></script>
<script src="/smart-api/htdocs/mdeditor/lib/raphael.min.js"></script>
<script src="/smart-api/htdocs/mdeditor/lib/underscore.min.js"></script>
<script src="/smart-api/htdocs/mdeditor/lib/sequence-diagram.min.js"></script>
<script src="/smart-api/htdocs/mdeditor/lib/flowchart.min.js"></script>
<script src="/smart-api/htdocs/mdeditor/lib/jquery.flowchart.min.js"></script>
<script src="/smart-api/htdocs/mdeditor/js/editormd.min.js"></script>
然后,本页面中,加入如下DIV:
<div id="doc-content">
<textarea style="display:none;">${message.detail }</textarea>
</div>
最后,再引入如下JS代码:
<script type="text/javascript">
var testEditor;
$(function () {
testEditor = editormd.markdownToHTML("doc-content", {//注意:这里是上面DIV的id
htmlDecode: "style,script,iframe",
emoji: true,
taskList: true,
tex: true, // 默认不解析
flowChart: true, // 默认不解析
sequenceDiagram: true, // 默认不解析
codeFold: true,
});});
</script>
三、editor.md的更多配置项:
这配置,可以根据官方提供的Demo和源码找到(editor.md-master/examples目录下面)。如,主题颜色设置;上传图片后的特殊处理等。
<script type="text/javascript">
var myEditor;

$(function() {
myEditor = editormd("my-editormd", {
width   : "90%",
height  : 800,
syncScrolling : "single",
path    : "/smart-api/htdocs/mdeditor/lib/",
saveHTMLToTextarea : true,

emoji: true,//emoji表情,默认关闭
taskList: true,
tocm: true, // Using [TOCM]
tex: true,// 开启科学公式TeX语言支持,默认关闭

flowChart: true,//开启流程图支持,默认关闭
sequenceDiagram: true,//开启时序/序列图支持,默认关闭,

dialogLockScreen : false,//设置弹出层对话框不锁屏,全局通用,默认为true
dialogShowMask : false,//设置弹出层对话框显示透明遮罩层,全局通用,默认为true
dialogDraggable : false,//设置弹出层对话框不可拖动,全局通用,默认为true
dialogMaskOpacity : 0.4, //设置透明遮罩层的透明度,全局通用,默认值为0.1
dialogMaskBgColor : "#000",//设置透明遮罩层的背景颜色,全局通用,默认为#fff

codeFold: true,

imageUpload : true,
imageFormats : ["jpg", "jpeg", "gif", "png", "bmp", "webp"],
imageUploadURL : "/smart-api/upload/editormdPic/",

/*上传图片成功后可以做一些自己的处理*/
onload: function () {
//console.log('onload', this);
//this.fullscreen();
//this.unwatch();
//this.watch().fullscreen();
//this.width("100%");
//this.height(480);
//this.resize("100%", 640);
},

/**设置主题颜色*/
editorTheme: "pastel-on-dark",
theme: "gray",
previewTheme: "dark"
});

});
</script>
四、网站&源码:
网站:17Smart源码:Github
eBook:《深入剖析Tomcat》
http://blog.csdn.net/lovejavaydj/article/details/73692917

相关文章推荐
- markdown(editor.md)编辑器-图片上传
- 在JAVA-WEB项目使用Editor.md实现MarkDown编辑器
- Laravel中使用 Editor.md 上传图片如何处理?
- SpringBoot+Editormd实现markdown文本编辑和图片上传
- JAVA WEB项目中使用并改造editor.md实现Markdown编辑器
- Markdown编辑器editor.md的使用
- 快速入门 Editor.MD---在Web项目里使用 Markdown 编辑器
- editor.md国产markdown编辑器使用实例
- JavaWEB之Markdown 编辑器Editor.md集成使用教程
- ewebeditor上传文件大小及在线编辑器jsp版使用心得
- Struts2使用Kindeditor4.0.3在线编辑器--上传图片、视频、FLASH、附件
- [csdn markdown]使用摘记一源代码高亮及图片上传和链接
- onethink 后台编辑器 上传图片使用七牛驱动云存储
- SouthidcEditor编辑器如何支持上传png图片
- PHPCMS调用form类编辑器editor函数动态上传图片附件
- [csdn markdown]使用摘记一源代码高亮及图片上传和链接
- 关于使用ueditor编辑器--ueditor文件夹与编辑器初始化页面不在同一目录下,上传图片显示问题
- 页面编辑器上传本地图片的使用
- 百度Ueditor编辑器的使用,ASP.NET也可上传图片
- 使用Activex插件复制剪贴板中的word或excel内容到web HTML编辑器并自动上传图片或文件