Android-UI :手机信息页面
2017-03-11 15:41
471 查看
为了检测这几天的学习成果,综合知识点,老师给我们出了一个练习题,将国际化、样式和主题、布局结合起来,从而达到以下成果。
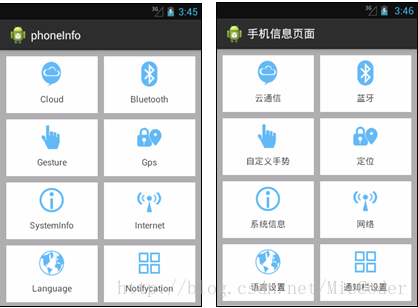
看到这个图片,首先想到的是,怎么才能在中英文中互换,这就要考虑到国际化的问题。
第一步:先把用到的图片导入到drawable中,方便使用。
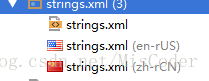
第二步:在strings.xml文件夹中建立两个xml文件,来实现国际化的效果,并在其中进行命名分配,将图片一一对应起来。
中文版:
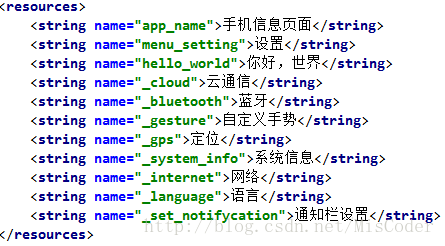
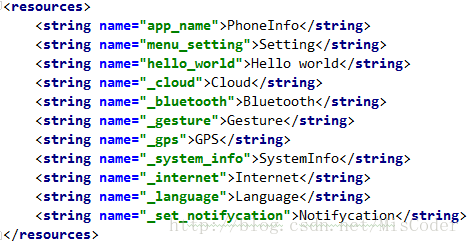
英文版:
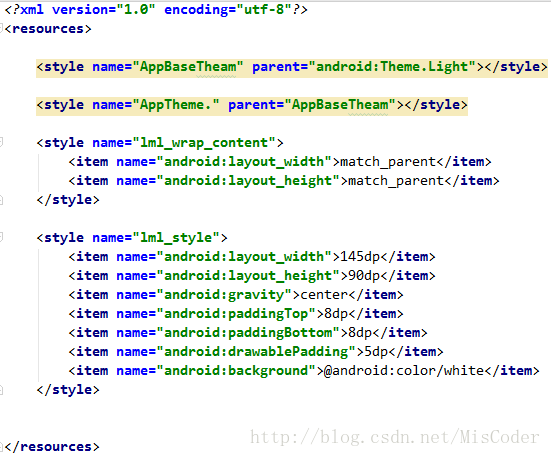
第三步:由于这个布局方式呢,每个控件之间的距离,宽高都是固定的,为了使主显示区简单化,我们可以新建一个style.xml文件来单独存放所需要的样式,避免重复,用到时可以直接引用。
第四步:最重要的一步,就是我们的主界面的编写,有两种方法,一个是 线性布局中引用相对布局,一种是表格布局中引用网格布局,因为我看这个界面就像一个四行两列的表格,个人表示要比线性布局简单很多。
下面我就简单介绍一下这个主界面思路…
首先建立一个表格布局,配置好背景,在表格布局中插入网格布局,长宽高都引用之前建立的style.xml,而整体看界面,控件距离最上边和最下边都是有一定距离的,因此,先控制好整体距离,并将表格设置为两列。
之后便加入两个TextView控件,为第一排,下面三排就可以复制第一排再稍作修改即可。
注意的问题:
1.两个控件均分这一整行,四个控件均分这一整列,而网格布局和相对布局不一样的是,网格布局中权重分为行权重(columnWeight)和列权重(rowWeight),因此两个权重分别设为1。
2.控件与控件之间有一定的距离,要考虑每个控件的上下左右之间距离。
这样就任务完成了!有错误我会随时改正。
看到这个图片,首先想到的是,怎么才能在中英文中互换,这就要考虑到国际化的问题。
第一步:先把用到的图片导入到drawable中,方便使用。
第二步:在strings.xml文件夹中建立两个xml文件,来实现国际化的效果,并在其中进行命名分配,将图片一一对应起来。
中文版:
英文版:
第三步:由于这个布局方式呢,每个控件之间的距离,宽高都是固定的,为了使主显示区简单化,我们可以新建一个style.xml文件来单独存放所需要的样式,避免重复,用到时可以直接引用。
第四步:最重要的一步,就是我们的主界面的编写,有两种方法,一个是 线性布局中引用相对布局,一种是表格布局中引用网格布局,因为我看这个界面就像一个四行两列的表格,个人表示要比线性布局简单很多。
<?xml version="1.0" encoding="utf-8"?>
<TableLayout xmlns:android="http://schemas.android.com/apk/res/android"
android:layout_width="match_parent"
android:layout_height="match_parent"
android:background="@android:color/darker_gray">

<GridLayout
style="@style/lml_wrap_content"
android:layout_marginBottom="10dp"
android:layout_marginTop="10dp"
android:columnCount="2">

<TextView
style="@style/lml_style"
android:layout_width="wrap_content"
android:layout_height="wrap_content"
android:layout_column="0"
android:layout_columnWeight="1"
android:layout_marginLeft="10dp"
android:layout_rowWeight="1"
android:drawableTop="@drawable/cloud"
android:text="@string/_cloud"

/>

<TextView
style="@style/lml_style"
android:layout_width="wrap_content"
android:layout_height="wrap_content"
android:layout_column="1"
android:layout_columnWeight="1"
android:layout_marginLeft="10dp"
android:layout_marginRight="10dp"
android:layout_rowWeight="1"
android:drawableTop="@drawable/bluetooth"
android:text="@string/_bluetooth"

/>

<TextView
style="@style/lml_style"
android:layout_width="wrap_content"
android:layout_height="wrap_content"
android:layout_columnWeight="1"
android:layout_marginLeft="10dp"
android:layout_marginTop="10dp"
android:layout_rowWeight="1"
android:drawableTop="@drawable/gesture"
android:text="@string/_gesture"

/>

<TextView
style="@style/lml_style"
android:layout_width="wrap_content"
android:layout_height="wrap_content"
android:layout_column="1"
android:layout_columnWeight="1"
android:layout_marginLeft="10dp"
android:layout_marginRight="10dp"
android:layout_marginTop="10dp"
android:layout_rowWeight="1"
android:drawableTop="@drawable/gps"
android:text="@string/_gps"

/>

<TextView
style="@style/lml_style"
android:layout_width="wrap_content"
android:layout_height="wrap_content"
android:layout_column="0"
android:layout_columnWeight="1"
android:layout_marginLeft="10dp"
android:layout_marginTop="10dp"
android:layout_rowWeight="1"
android:drawableTop="@drawable/info"
android:text="@string/_system_info"

/>

<TextView
style="@style/lml_style"
android:layout_width="wrap_content"
android:layout_height="wrap_content"
android:layout_column="1"
android:layout_columnWeight="1"
android:layout_marginLeft="10dp"
android:layout_marginRight="10dp"
android:layout_marginTop="10dp"
android:layout_rowWeight="1"
android:drawableTop="@drawable/internet"
android:text="@string/_internet"

/>

<TextView
style="@style/lml_style"
android:layout_width="wrap_content"
android:layout_height="wrap_content"
android:layout_column="0"
android:layout_columnWeight="1"
android:layout_marginLeft="10dp"
android:layout_marginTop="10dp"
android:layout_rowWeight="1"
android:drawableTop="@drawable/language"
android:text="@string/_language"

/>

<TextView
style="@style/lml_style"
android:layout_width="wrap_content"
android:layout_height="wrap_content"
android:layout_column="1"
android:layout_columnWeight="1"
android:layout_marginLeft="10dp"
android:layout_marginRight="10dp"
android:layout_marginTop="10dp"
android:layout_rowWeight="1"
android:drawableTop="@drawable/notifycation"
android:text="@string/_set_notifycation"

/>
</GridLayout>

</TableLayout>
下面我就简单介绍一下这个主界面思路…
首先建立一个表格布局,配置好背景,在表格布局中插入网格布局,长宽高都引用之前建立的style.xml,而整体看界面,控件距离最上边和最下边都是有一定距离的,因此,先控制好整体距离,并将表格设置为两列。
之后便加入两个TextView控件,为第一排,下面三排就可以复制第一排再稍作修改即可。
注意的问题:
1.两个控件均分这一整行,四个控件均分这一整列,而网格布局和相对布局不一样的是,网格布局中权重分为行权重(columnWeight)和列权重(rowWeight),因此两个权重分别设为1。
2.控件与控件之间有一定的距离,要考虑每个控件的上下左右之间距离。
这样就任务完成了!有错误我会随时改正。

相关文章推荐
- Android UI手机信息页面
- Android UI手机信息页面设计
- Android UI——手机信息页面
- Android UI手机信息页面
- 实验3 Android UI 任务:手机信息页面
- Android UI 手机信息页面
- Android-UI:一个手机页面信息
- Android UI中手机信息页面国际化
- Android UI手机信息页面
- 手机信息页面制作(android UI)
- Android UI---手机信息页面
- Android UI 手机信息页面
- Android UI手机信息页面
- Android-UI 手机信息页面相关设计
- 实验:Android UI编写手机信息页面
- Android UI 手机页面信息(布局、样式及程序国际化问题)
- Android UI——手机信息页面
- 实验3 Android UI(2)创建“手机信息页面”
- 做一个Android UI手机信息页面
- Android UI 手机信息页面