spring-boot搭建简单web(整合freemarker)(二)
2017-02-17 23:30
661 查看
一、maven引入jar包(spring-boot-starter.jar和spring-boot-starter-web.jar和spring-boot-starter-freemarker.jar)
二、启动引导应用程序
三、freemarker配置信息配置到application.properties
server.port,server.contextPath对应配置 服务端口号,和项目名
spring.freemarker.template-loader-path配置自定义模板加载路径,springboot默认加载路径为src/main/resources/templates
四、index.html页面
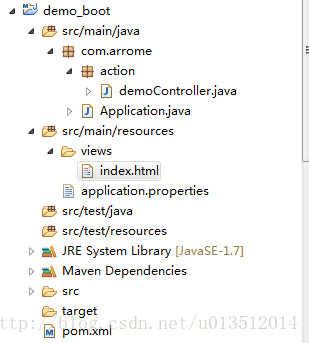
文件目录结构如图示:
浏览器访问http://localhost:8081/demo_boot/demo/index获取相应的index.html页面信息
<project xmlns="http://maven.apache.org/POM/4.0.0" xmlns:xsi="http://www.w3.org/2001/XMLSchema-instance" xsi:schemaLocation="http://maven.apache.org/POM/4.0.0 http://maven.apache.org/xsd/maven-4.0.0.xsd"> <modelVersion>4.0.0</modelVersion>
<groupId>demo_boot</groupId>
<artifactId>demo_boot</artifactId>
<version>0.0.1-SNAPSHOT</version>
<dependencies>
<dependency>
<groupId>org.springframework.boot</groupId>
<artifactId>spring-boot-starter</artifactId>
<version>1.5.1.RELEASE</version>
</dependency>
<dependency>
<groupId>org.springframework.boot</groupId>
<artifactId>spring-boot-starter-web</artifactId>
<version>1.5.1.RELEASE</version>
</dependency>
<dependency>
<groupId>org.springframework.boot</groupId>
<artifactId>spring-boot-starter-freemarker</artifactId>
<version>1.3.0.RELEASE</version>
</dependency>
</dependencies>
</
4000
project>
二、启动引导应用程序
import org.springframework.boot.SpringApplication;
import org.springframework.boot.autoconfigure.SpringBootApplication;

@SpringBootApplication
public class Application {

public static void main(String[] args) {
SpringApplication.run(Application.class, args);
}
}
三、freemarker配置信息配置到application.properties
###server
server.port=8081
server.contextPath=/demo_boot

###FREEMARKER (FreeMarkerAutoConfiguration)
spring.freemarker.allow-request-override=false
spring.freemarker.cache=true
spring.freemarker.check-template-location=true
spring.freemarker.charset=UTF-8
spring.freemarker.content-type=text/html
spring.freemarker.expose-request-attributes=true
spring.freemarker.expose-session-attributes=false
spring.freemarker.expose-spring-macro-helpers=false
#spring.freemarker.prefix=
spring.freemarker.request-context-attribute=rc
#spring.freemarker.settings.*=
spring.freemarker.suffix=.html
spring.freemarker.template-loader-path=classpath:/views/
server.port,server.contextPath对应配置 服务端口号,和项目名
spring.freemarker.template-loader-path配置自定义模板加载路径,springboot默认加载路径为src/main/resources/templates
四、index.html页面
<!DOCTYPE html>
<html>
<head>
<meta charset="UTF-8">
<title>Insert title here</title>
</head>
<body>
Hello world!
</body>
</html>
文件目录结构如图示:
浏览器访问http://localhost:8081/demo_boot/demo/index获取相应的index.html页面信息

相关文章推荐
- 用Spring Boot搭建简单web项目
- springboot 简单web简单搭建和jsp界面
- SpringBoot整合SpringSecurity简单实现登入登出从零搭建
- springboot搭建web(整合mybatis)(四)
- Spring Boot整合Spring Security简单实现登入登出从零搭建教程
- 数据可视化 三步走(二):springboot整合mybatis 搭建Java Web
- CXF框架整合SPring 搭建WebServce简单实例
- spring-boot搭建简单web(一)
- idea+maven+springboot搭建web简单项目经历小计(RestController)
- [置顶] WEB开发----Spring Boot项目快速搭建
- springBoot(5):web开发-模板引擎FreeMarker与thymeleaf
- Springboot 整合 Mybatis 的完整 Web 案例
- spring boot activiti工作流的搭建与简单使用
- [置顶] WEB开发----spring boot与mybatis整合
- idea+springboot+Mybatis搭建web项目
- 简单的SpringBoot+Mybatis框架整合
- SpringBoot + Gradle + mysql 搭建web 项目
- Springboot 整合 Mybatis 的完整 Web 案例
- Spring Boot 与 Kotlin使用Freemarker模板引擎渲染web视图
- spring-boot(2) - RESTfull API简单项目的快速搭建