fragment的生命周期,它与Activity生命周期的关联;
2017-02-12 20:20
399 查看
一、概论
随着Android系统的多样化,不仅仅在手机上,在平板、电视等设备上应用的也越来越多,这样就会有一个需要适应不同屏幕的问题。在Android3.0之后,谷歌推出了Fragment,Fragment在Android中被称为碎片。我们可以把Fragment看作是Activity的一个界面或者组成部分,而且Fragment具有与Activity很相似的生命周期,我们可以在Activity中动态的添加或者移除某个Fragment。
二、生命周期
(一)Fragment的生命周期
谷歌技术文档上Fragment的生命周期截图为: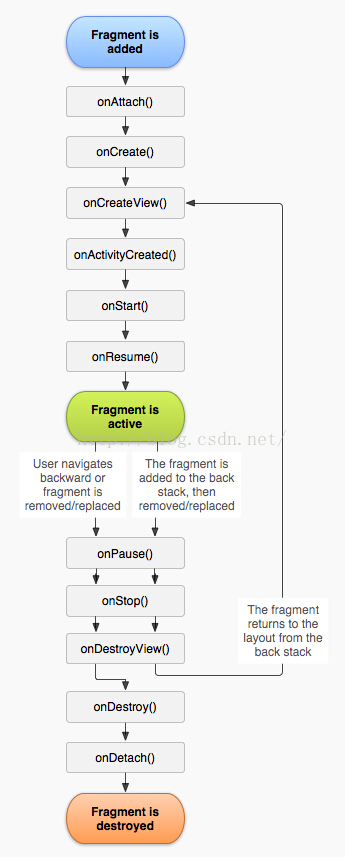
为了更直观的看到Fragment切换时候的生命周期,我们在每个生命周期方法中打印一句Log日志,更直观的看到Fragment在创建、隐藏、显示、销毁时候的生命周期。
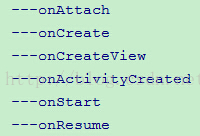
1.第一次打开应用:
2.按home键隐藏应用:

3.从后台切换回来时:

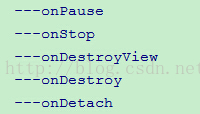
4.退出应用时:
(二)Fragment的生命周期与Activity之间的关系
我们会发现跟Activity对比,Fragment会多几个生命周期,等下会介绍这你个不同生命周期方法的作用,先来看一张谷歌技术文档上Fragment与Activity生命周期之间的关系图: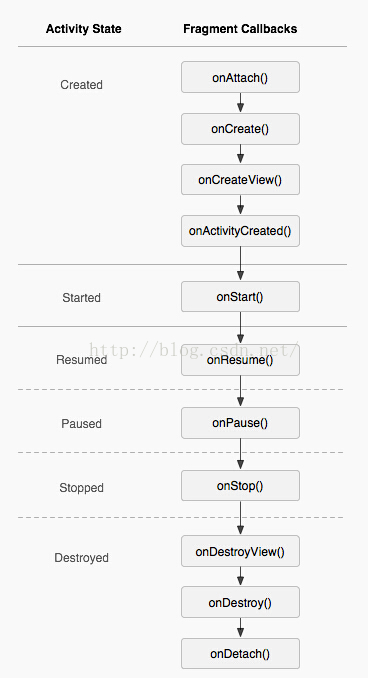
onCreate( )、onStart( )、 onStop( )等生命周期方法是跟Activity的生命周期一一对应的,这里不做详细介绍,最主要的就是跟Activity不一样的生命周期。
(1)onAttach( ):当Fragment与Activity绑定、关联的时候调用;
(2)onCreateView( ):创建该Fragment对应的视图,并把视图返回给调用者,与onCreate( )的区别是你可以在onCreate( )中初始化与View无关的东西;
(3)onActivityCreated( ):在Activity完成其onCreate()方法后调用;
(4)onDestroyView( ):当Fragment销毁视图的时候调用;
(5)onDetach( ):当Fragment与Activity脱离关系的时候调用;
三、Fragment与Activity的关联
如图:我们要实现这种效果,上面的标题与下面的内容区域,我们分别用两个Fragment来显示。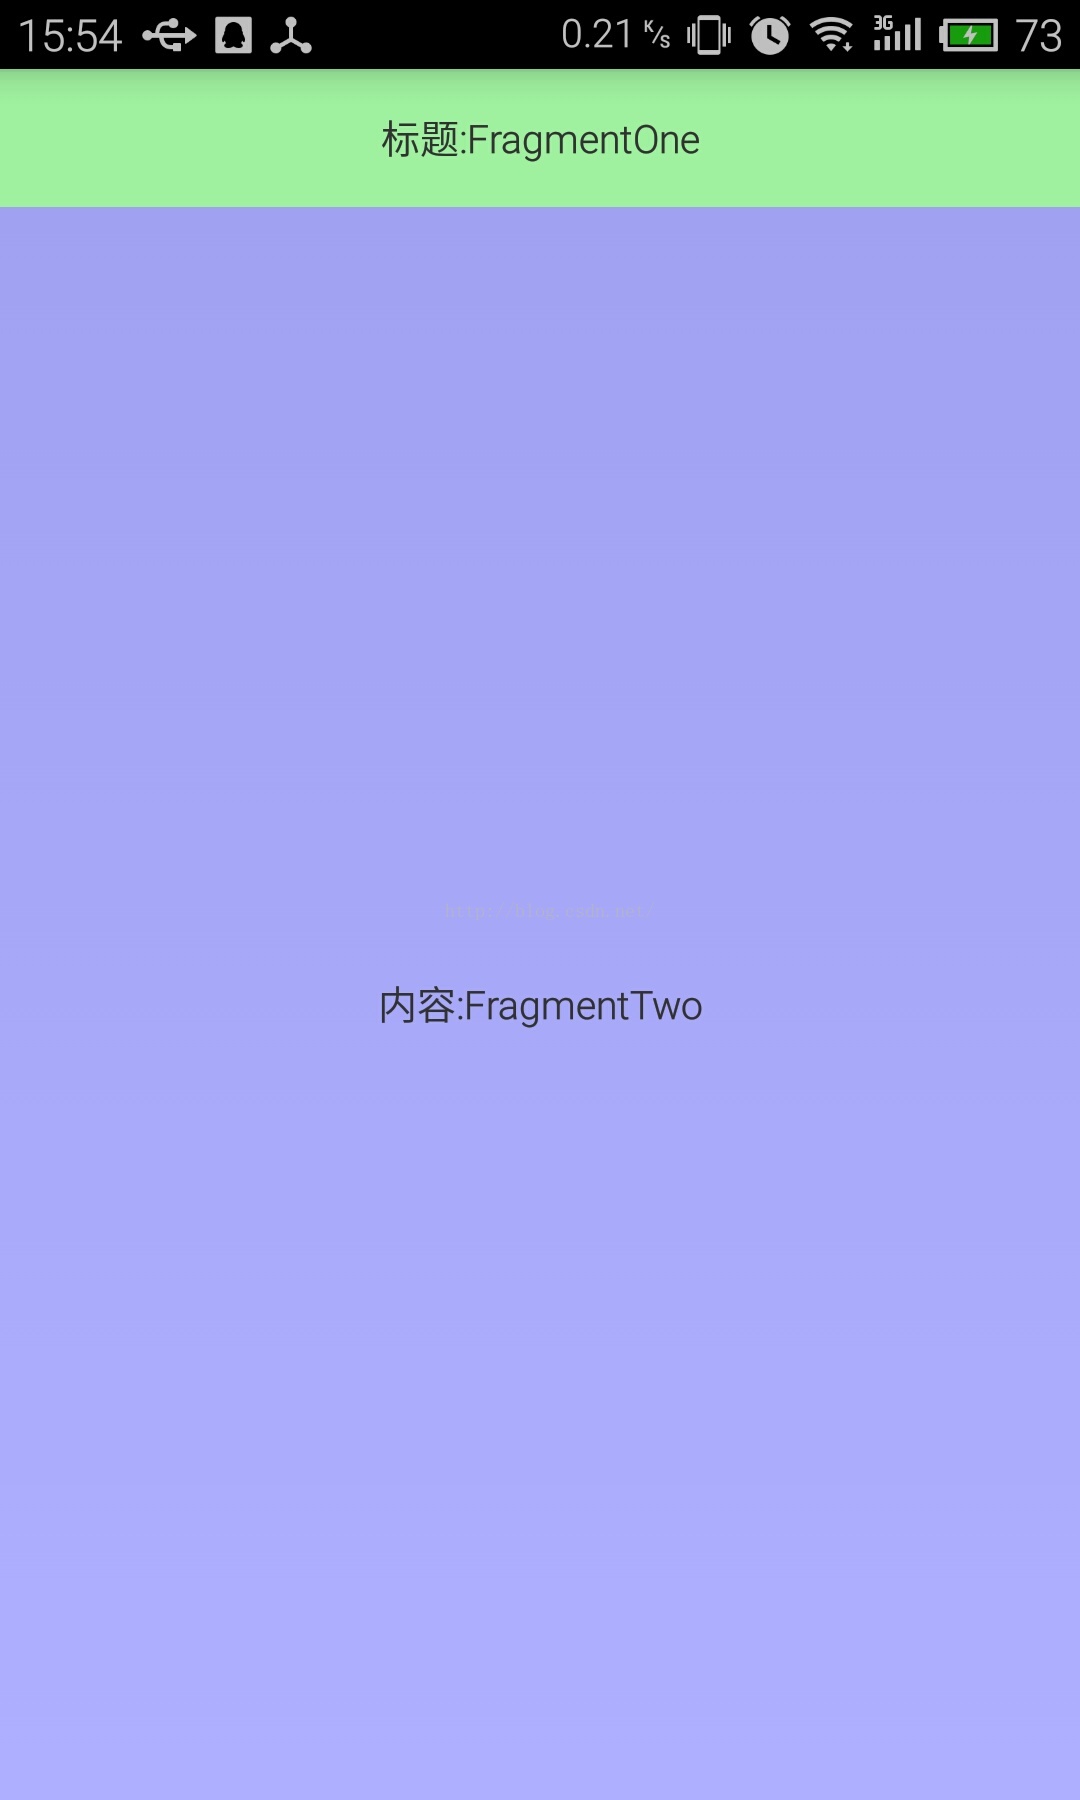
Fragment与Activity关联主要有两种方式,一种是通过在Activity的布局文件中写入fragment控件,使用name属性指定一个Fragment;另一种是在java代码中动态的添加与删除Fragment。
(一)在Activity布局中关联Fragment
这种关联方式比较简单,只需要在Activity的布局文件中关联上需要显示的fragment控件,就是把Fragment当成普通的View一样声明在Activity的布局文件中,而Activity的java代码只需要加载自己的这个布局即可,优点是比较快捷,可以提高复用性与维护性,缺点是移除与替换比较麻烦,xml布局文件如下:[html] view
plain copy
<LinearLayout xmlns:android="http://schemas.android.com/apk/res/android"
xmlns:tools="http://schemas.android.com/tools"
android:layout_width="match_parent"
android:layout_height="match_parent"
android:orientation="vertical" >
<fragment
android:id="@+id/fragmentone"
android:name="com.example.fragmentdemo.FragmentOne"
android:layout_width="match_parent"
android:layout_height="wrap_content" />
<fragment
android:id="@+id/fragmenttwo"
android:name="com.example.fragmentdemo.FragmentTwo"
android:layout_width="match_parent"
android:layout_height="match_parent" />
</LinearLayout>
FragmentOne跟FragmentTwo的布局这里就不贴出来了,就是两个简单的TextView而已。
(二)实用java代码关联Fragment
实用java代码可以动态的添加、删除与替换Fragment,实用性更广一些。首先我们在Activity的布局文件中添加两个FrameLayout控件,用来存放要显示的Fragment:
[html] view
plain copy
<LinearLayout xmlns:android="http://schemas.android.com/apk/res/android"
xmlns:tools="http://schemas.android.com/tools"
android:layout_width="match_parent"
android:layout_height="match_parent"
android:orientation="vertical" >
<FrameLayout
android:id="@+id/framelayoutone"
android:layout_width="match_parent"
android:layout_height="wrap_content" >
</FrameLayout>
<FrameLayout
android:id="@+id/framelayouttwo"
android:layout_width="match_parent"
android:layout_height="match_parent" >
</FrameLayout>
</LinearLayout>
对应Activity中的java代码为:
[java] view
plain copy
package com.example.fragmentdemo;
import android.app.Activity;
import android.app.FragmentManager;
import android.app.FragmentTransaction;
import android.os.Bundle;
import android.view.Window;
import android.widget.FrameLayout;
public class MainActivity extends Activity {
private FragmentOne fragmentOne;
private FragmentTwo fragmentTwo;
@Override
protected void onCreate(Bundle savedInstanceState) {
super.onCreate(savedInstanceState);
requestWindowFeature(Window.FEATURE_NO_TITLE);
setContentView(R.layout.activity_main);
// 初始化要显示的两个Fragment
fragmentOne = new FragmentOne();
fragmentTwo = new FragmentTwo();
// 得到Fragment的管理者FragmentManager
FragmentManager fm = getFragmentManager();
// 开启一个事务
FragmentTransaction ft = fm.beginTransaction();
/**
* 在FrameLayout中加载我们要显示的Fragment,这里我们使用了replace方法,下面我会介绍它与add的区别
* 参数:
* containerViewId:需要存放到哪个控件中;
* fragment:需要显示的Fragment;
* tag:给Fragment定义一个标签,方便我们取出使用等。
*/
ft.replace(R.id.framelayoutone, fragmentOne, "ONE");
ft.replace(R.id.framelayouttwo, fragmentTwo, "TWO");
// 最后,千万不要忘记了使用commit提交,这点有点类似数据库中的事务的使用
ft.commit();
}
}
其中的布局,Fragment我们都可以进行替换,所以就达到了动态创建Fragment的目的。
事务中其他的方法还有:
ft.add( ):添加一个Fragment到Activity中;
ft.remove( ):把Fragment从Activity中移除;
ft.hide( ):隐藏当前的Fragment,不会销毁它;
ft.show( ):显示隐藏的Fragment;
上面我们为什么要使用ft.replace( )呢?因为ft.replace( )是ft.remove( )与ft.add(
)的合体,相当于先移除Fragment后,再添加一个Fragment。

相关文章推荐
- Fragment与Activity简单使用,包括二者之间的关联与生命周期
- Activity生命周期与fragment生命周期比较
- Activity 和 Fragment的生命周期
- Android学习之路 Activity 和 Fragment 生命周期
- 使用viewpager或者fragmentActivity等一些v4包下的类,当我们按F3时无法查看到源码,这个时候就需要我们关联该源码,该源码的关联与android源码的关联不一样。
- Activity 与 Fragment 之间生命周期函数的对应同步关系图
- Activity与Fragment的生命周期
- Android Fragment---与Activity生命周期的协调
- Android 开发之 fragment 与 activity的生命周期
- 有关fragment与Activity生命周期的知识点学习
- fragment生命周期,重点是加了activity生命周期
- 动态添加fragment,改变相对应所属activity的生命周期顺序
- Fragment与Activity的生命周期调用的方法 横竖屏切换Activity执行的生命周期方法
- Activity&Fragment生命周期
- Android的Activity与Fragment之二 Activity的回调机制、生命周期、加载模式
- Activity和Fragment的生命周期和使用注意
- Android Activity生命周期以及Fragment生命周期的区别与分析
- android - activity和fragment生命周期
- Viewpager 关联Fragment 生命周期问题
- Fragment的生命周期以及与Activity生命周期联动