基础篇章:React Native 之 TextInput 的讲解
2016-12-11 21:32
731 查看
今天我们讲解的是React Native基础系列之TextInput的讲解,如果想学习更多的开发知识或者移动开发文章,欢迎大家关注我的微信公众号:非著名程序员(smart_android)。
TextInput 是一个允许用户输入文本的基础组件。它有一个onChangeText的属性,该属性接受一个函数,每当文本输入发生变化时,此函数就会被调用。它还有一个onSubmitEditing的属性,当文本输入完被提交的时候调用。
效果图如下:
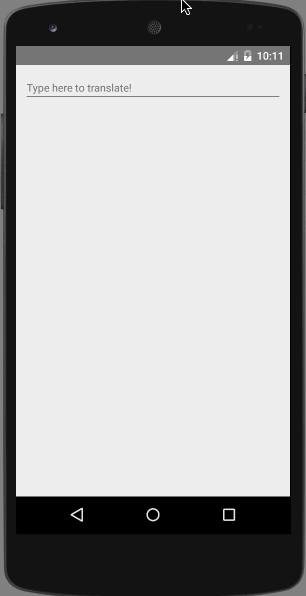
这个例子实现的功能就是当我们在文本输入框里输入一个单词时,该单词就会换成��,如果输入的是一句话或者很多单词,就会实时动态的把一句话拆成以一个一个的单词,然后替换成��。比如:”Hello there Bob”将会被翻译为”������”。
* 逻辑与 aa && bb 这里的意思是逻辑与的操作,如果逻辑与是true,则返回前面的aa,如果是false,则返回bb。这回懂了 word && ‘��’ 这个的意思了吧?
* [].map() 基本用法跟forEach方法类似,循环遍历数组,然后返回新的数组
* join() arrayObject.join(separator),返回一个字符串。该字符串是通过把 arrayObject 的每个元素转换为字符串,然后把这些字符串连接起来,在两个元素之间插入 separator 字符串而生成的。
再说一遍,以后就不解释了,不懂js语法的自行去学习。
none:不自动切换任何字符成大写
sentences:默认句话的首字母变成大写
words:每个单词的首字母变成大写
characters:每个字母全部变成大写
placeholder:占位符,默认显示信息,在输入前显示的文本内容。相当于android中的hint,当有输入的内容时被清除。
placeholdertTextColor: 占位符文本颜色。
value: 文本输入框的默认值。
password: 如果为true ,则是密码输入框,文本显示为***。
multiline: 如果为true , 则是多行输入。
editable: 如果为false , 文本框不可输入。其默认值事true。
autoFocus: 如果为true, 将自动聚焦。
clearButtonMode : 枚举类型,可选值有never,while-enditing , unless-editing,always。用于显示清除按钮。
maxLength: 输入文本框能够输入的最长字符数。
keyboardType:输入框的键盘类型(可选参数:”default”, ‘email-address’, ‘numeric’, ‘phone-pad’, “ascii-capable”, ‘numbers-and-punctuation’, ‘url’, ‘number-pad’, ‘name-phone-pad’, ‘decimal-pad’, ‘twitter’, ‘web-search’) 该功能用来选择默认弹出键盘的类型例如我们甚至numeric就是弹出数字键盘。
onChangeText: 当文本输入框的内容发生变化时,调用该函数。onChangeText接收一个文本的参数对象。
onChange: 当文本变化时,调用该函数。
onEndEditing: 当结束编辑时,调用该函数。
onBlur: 失去焦点触发事件,回调该函数。
onFocus: 获得焦点触发该监听事件。
onSubmitEditing: 当结束编辑后,点击键盘的提交按钮出发该事件。但是当multiline={true}的时候,该属性就会失效。
secureTextEntry:设置是否为密码安全输入框 ,默认为false。
textAlign:设置文本横向布局方式 可选参数(‘start’, ‘center’, ‘end’)
textAlignVertical:设置文本垂直方向布局方式 可选参数(‘top’, ‘center’, ‘bottom’)
underlineColorAndroid:设置文本输入框下划线的颜色
autoCorrect:设置拼写自动修正功能 默认为开启(true)
onLayout:当组件布局发生变化的时候调用
numberOfLines:number设置文本输入框行数,使用该功能需要先设置multiline为true,设置TextInput为多行文本。

到这里关于TextInput的知识点我们就讲的差不多了,希望大家亲自实践去实现一下上面的例子,肯定会收获很多,想学更多开发知识,欢迎大家关注微信公众号:非著名程序员(smart_android)。
TextInput 是一个允许用户输入文本的基础组件。它有一个onChangeText的属性,该属性接受一个函数,每当文本输入发生变化时,此函数就会被调用。它还有一个onSubmitEditing的属性,当文本输入完被提交的时候调用。
官网例子
import React, { Component } from 'react';
import { AppRegistry, Text, TextInput, View } from 'react-native';

class PizzaTranslator extends Component {
constructor(props) {
super(props);
this.state = {text: ''};
}

render() {
return (
<View style={{padding: 10}}>
<TextInput
style={{height: 40}}
placeholder="Type here to translate!"
onChangeText={(text) => this.setState({text})}
/>
<Text style={{padding: 10, fontSize: 42}}>
{this.state.text.split(' ').map((word) => word && '��').join(' ')}
</Text>
</View>
);
}
}

AppRegistry.registerComponent('PizzaTranslator', () => PizzaTranslator);
效果图如下:
这个例子实现的功能就是当我们在文本输入框里输入一个单词时,该单词就会换成��,如果输入的是一句话或者很多单词,就会实时动态的把一句话拆成以一个一个的单词,然后替换成��。比如:”Hello there Bob”将会被翻译为”������”。
解释
如果你们不懂js的话,可能看着有点困难,所以学React Native的时候,大家最好先去看看js,至少得懂一些。* 逻辑与 aa && bb 这里的意思是逻辑与的操作,如果逻辑与是true,则返回前面的aa,如果是false,则返回bb。这回懂了 word && ‘��’ 这个的意思了吧?
* [].map() 基本用法跟forEach方法类似,循环遍历数组,然后返回新的数组
* join() arrayObject.join(separator),返回一个字符串。该字符串是通过把 arrayObject 的每个元素转换为字符串,然后把这些字符串连接起来,在两个元素之间插入 separator 字符串而生成的。
再说一遍,以后就不解释了,不懂js语法的自行去学习。
属性方法
autoCapitalize: 控制输入框输入时字符的大写,参数有:’none’, ‘sentences’, ‘words’, ‘characters’。none:不自动切换任何字符成大写
sentences:默认句话的首字母变成大写
words:每个单词的首字母变成大写
characters:每个字母全部变成大写
placeholder:占位符,默认显示信息,在输入前显示的文本内容。相当于android中的hint,当有输入的内容时被清除。
placeholdertTextColor: 占位符文本颜色。
value: 文本输入框的默认值。
password: 如果为true ,则是密码输入框,文本显示为***。
multiline: 如果为true , 则是多行输入。
editable: 如果为false , 文本框不可输入。其默认值事true。
autoFocus: 如果为true, 将自动聚焦。
clearButtonMode : 枚举类型,可选值有never,while-enditing , unless-editing,always。用于显示清除按钮。
maxLength: 输入文本框能够输入的最长字符数。
keyboardType:输入框的键盘类型(可选参数:”default”, ‘email-address’, ‘numeric’, ‘phone-pad’, “ascii-capable”, ‘numbers-and-punctuation’, ‘url’, ‘number-pad’, ‘name-phone-pad’, ‘decimal-pad’, ‘twitter’, ‘web-search’) 该功能用来选择默认弹出键盘的类型例如我们甚至numeric就是弹出数字键盘。
onChangeText: 当文本输入框的内容发生变化时,调用该函数。onChangeText接收一个文本的参数对象。
onChange: 当文本变化时,调用该函数。
onEndEditing: 当结束编辑时,调用该函数。
onBlur: 失去焦点触发事件,回调该函数。
onFocus: 获得焦点触发该监听事件。
onSubmitEditing: 当结束编辑后,点击键盘的提交按钮出发该事件。但是当multiline={true}的时候,该属性就会失效。
secureTextEntry:设置是否为密码安全输入框 ,默认为false。
textAlign:设置文本横向布局方式 可选参数(‘start’, ‘center’, ‘end’)
textAlignVertical:设置文本垂直方向布局方式 可选参数(‘top’, ‘center’, ‘bottom’)
underlineColorAndroid:设置文本输入框下划线的颜色
autoCorrect:设置拼写自动修正功能 默认为开启(true)
onLayout:当组件布局发生变化的时候调用
numberOfLines:number设置文本输入框行数,使用该功能需要先设置multiline为true,设置TextInput为多行文本。
TextInput实践
效果图
废话不多说,结合我们之前学的一些基础,再加上TextInput的知识,我们现在练习一个demo,巩固一下以前的知识点。效果图如下:demo代码
import React, { Component } from 'react';
import {
AppRegistry,
StyleSheet,
Text,
View,
TextInput
} from 'react-native';

class TextInputDemo extends Component {
render() {
return (
<View style={styles.container}>
<View style={styles.top_half_view}>
<View style={styles.title_view}>
<Text style={styles.title_text}>
邮箱登录
</Text>
</View>

<TextInput
style={styles.textinput}
placeholder='邮箱'
numberOfLines={1}
autoFocus={true}
underlineColorAndroid={'#e1e1e1'}
/>
<TextInput
style={styles.textinput}
placeholder='密码'
numberOfLines={1}
secureTextEntry={true}
underlineColorAndroid={'#e1e1e1'}
/>
<View style={{backgroundColor:'#ffffff',flexDirection:'row',alignItems:'center',justifyContent:'center'}}>
<View style={styles.style_view_register}>
<Text style={{color:'#5ac4ef'}}>
注册
</Text>
</View>

<View style={styles.style_view_login}>
<Text style={{color:'white'}}>
登录
</Text>
</View>
</View>
<Text style={styles.bottom_text}>
忘了密码?点此找回
</Text>
</View>
<View style={styles.bottom_half_view}>
</View>
</View>
);
}
}

const styles = StyleSheet.create({
container: {
flex: 1,
backgroundColor: 'white',
},
title_view:{
flexDirection:'row',
height:50,
alignItems: 'center',
backgroundColor:'#27b5ee',
},
title_text:{
color:'white',
fontSize:22,
marginLeft:20,
textAlign:'center'
},
top_half_view:{
flex: 1.3,
backgroundColor: 'white',
},
bottom_half_view:{
flex: 1,
backgroundColor: '#eeeeee',
},
textinput: {
backgroundColor:'#fff',
marginTop:5,
marginLeft:20,
marginRight:20,
textAlign:'left',
},
style_view_login:{
flex:1,
marginTop:20,
marginLeft:20,
marginRight:20,
backgroundColor:'#27b5ee',
height:35,
borderRadius:5,
justifyContent: 'center',
alignItems: 'center',
},
style_view_register:{
flex:1,
marginTop:20,
marginLeft:20,
marginRight:20,
borderColor:'#5ac4ef',
borderWidth: 1,
height:35,
borderRadius:5,
justifyContent: 'center',
alignItems: 'center',
},
bottom_text:{
color:'#27b5ee',
fontSize:14,
marginTop:10,
marginLeft:20,
textAlign:'left',
fontWeight:'bold'
},
});

AppRegistry.registerComponent('TextInputDemo', () => TextInputDemo);
到这里关于TextInput的知识点我们就讲的差不多了,希望大家亲自实践去实现一下上面的例子,肯定会收获很多,想学更多开发知识,欢迎大家关注微信公众号:非著名程序员(smart_android)。

相关文章推荐
- 基础篇章:React Native 之 View 和 Text 的讲解
- 基础篇章:React Native 之 Image 的讲解
- 基础篇章:关于 React Native 之 Picker 组件的讲解
- 【React Native开发】React Native控件之TextInput组件讲解与QQ登录界面实现(11)
- 基础篇章:关于 React Native 的props,state,style的讲解
- 基础篇章:React Native之 ScrollView 的讲解
- 基础篇章:React Native之Flexbox的讲解(Height and Width)
- 基础篇章:React Native 之 Image 的讲解
- 基础篇章:React Native之 Image 的讲解
- react native TextInput各个参数详解,内含事例动图
- React-Native通过登录界面学习TextInput组件
- React-Native TextInput组件详解及实例代码
- react native TextInput无法弹出输入框问题
- React Native 键盘管理和 Tab Navigator 在Android TextInput遮盖,Tab Navigator上移等问题解决办法
- react native textInput随内容高度设置textinput高度
- [React Native]高度自增长的TextInput组件
- React Native 之 TextInput使用
- React Native 组件之TextInput
- 混合开发的大趋势之一React Native TextInput (文本输入)
- React-Native TextInput组件的主要属性