Self-Host ASP.NET Web API 1 (C#)
2016-10-28 10:24
555 查看
By
Mike WassonMike Wasson|January 26, 2012
213 of 239 people found this helpful
Tweet
ASP.NET Web API does not require IIS. You can self-host a web API in your own host process. This tutorial shows how to host a web API inside a console application.
New applications should use OWIN to self-host Web API. See
Use OWIN to Self-Host ASP.NET Web API 2.
Software versions used in the tutorial
Web API 1Visual Studio 2012
Create the Console Application Project
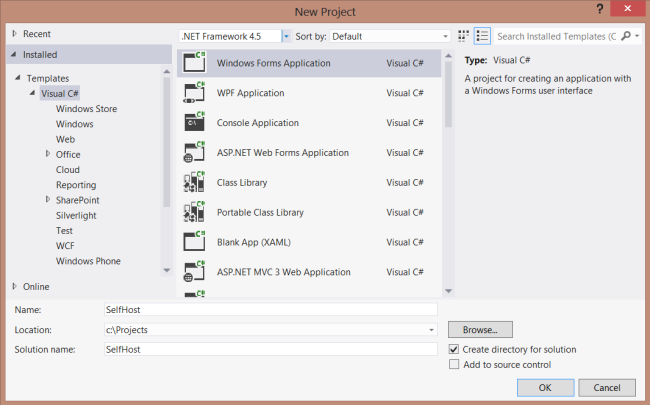
Start Visual Studio and select New Project from the Start page. Or, from theFile menu, select New and then Project.
In the Templates pane, select Installed Templates and expand the
Visual C# node. Under Visual C#, select
Windows. In the list of project templates, select Console Application. Name the project "SelfHost" and click
OK.
Set the Target Framework (Visual Studio 2010)
If you are using Visual Studio 2010, change the target framework to .NET Framework 4.0. (By default, the project template targets the.Net Framework Client Profile.)
In Solution Explorer, right-click the project and select Properties. In the
Target framework dropdown list, change the target framework to .NET Framework 4.0. When prompted to apply the change, click
Yes.

Install NuGet Package Manager
The NuGet Package Manager is the easiest way to add the Web API assemblies to a non-ASP.NET project.To check if NuGet Package Manager is installed, click the Tools menu in Visual Studio. If you see a menu item called
Library Package Manager, then you have NuGet Package Manager.
To install NuGet Package Manager:
Start Visual Studio.
From the Tools menu, select Extensions and Updates.
In the Extensions and Updates dialog, select Online.
If you don't see "NuGet Package Manager", type "nuget package manager" in the search box.
Select the NuGet Package Manager and click Download.
After the download completes, you will be prompted to install.
After the installation completes, you might be prompted to restart Visual Studio.

Add the Web API NuGet Package
After NuGet Package Manager is installed, add the Web API Self-Host package to your project.From the Tools menu, select Library Package Manager.
Note: If do you not see this menu item, make sure that NuGet Package Manager installed correctly.
Select Manage NuGet Packages for Solution...
In the Manage NugGet Packages dialog, select Online.
In the search box, type "Microsoft.AspNet.WebApi.SelfHost".
Select the ASP.NET Web API Self Host package and click Install.
After the package installs, click Close to close the dialog.
Make sure to install the package named Microsoft.AspNet.WebApi.SelfHost, not AspNetWebApi.SelfHost.

Create the Model and Controller
This tutorial uses the same model and controller classes as theGetting Started tutorial.
Add a public class named
Product.
namespace SelfHost
{
public class Product
{
public int Id { get; set; }
public string Name { get; set; }
public string Category { get; set; }
public decimal Price { get; set; }
}
}
Add a public class named
ProductsController. Derive this class from
System.Web.Http.ApiController.
namespace SelfHost
{
using System;
using System.Collections.Generic;
using System.Linq;
using System.Net;
using System.Web.Http;

public class ProductsController : ApiController
{
Product[] products = new Product[]
{
new Product { Id = 1, Name = "Tomato Soup", Category = "Groceries", Price = 1 },
new Product { Id = 2, Name = "Yo-yo", Category = "Toys", Price = 3.75M },
new Product { Id = 3, Name = "Hammer", Category = "Hardware", Price = 16.99M }
};

public IEnumerable<Product> GetAllProducts()
{
return products;
}

public Product GetProductById(int id)
{
var product = products.FirstOrDefault((p) => p.Id == id);
if (product == null)
{
throw new HttpResponseException(HttpStatusCode.NotFound);
}
return product;
}

public IEnumerable<Product> GetProductsByCategory(string category)
{
return products.Where(p => string.Equals(p.Category, category,
StringComparison.OrdinalIgnoreCase));
}
}
}
For more information about the code in this controller, see the
Getting Started tutorial. This controller defines three GET actions:
| URI | Description |
|---|---|
| /api/products | Get a list of all products. |
| /api/products/id | Get a product by ID. |
| /api/products/?category=category | Get a list of products by category. |
Host the Web API
Open the file Program.cs and add the following using statements:using System.Web.Http; using System.Web.Http.SelfHost;
Add the following code to the Program class.
var config = new HttpSelfHostConfiguration("http://localhost:8080");

config.Routes.MapHttpRoute(
"API Default", "api/{controller}/{id}",
new { id = RouteParameter.Optional });

using (HttpSelfHostServer server = new HttpSelfHostServer(config))
{
server.OpenAsync().Wait();
Console.WriteLine("Press Enter to quit.");
Console.ReadLine();
}
(Optional) Add an HTTP URL Namespace Reservation
This application listens to http://localhost:8080/. By default, listening at a particular HTTP address requires administrator privileges. When you run the tutorial, therefore, you may get this error: "HTTP could not register URL http://+:8080/" There aretwo ways to avoid this error:
Run Visual Studio with elevated administrator permissions, or
Use Netsh.exe to give your account permissions to reserve the URL.
To use Netsh.exe, open a command prompt with administrator privileges and enter the following command:following command:
netsh http add urlacl url=http://+:8080/ user=machine\username
where machine\username is your user account.
When you are finished self-hosting, be sure to delete the reservation:
netsh http delete urlacl url=http://+:8080/
Call the Web API from a Client Application (C#)
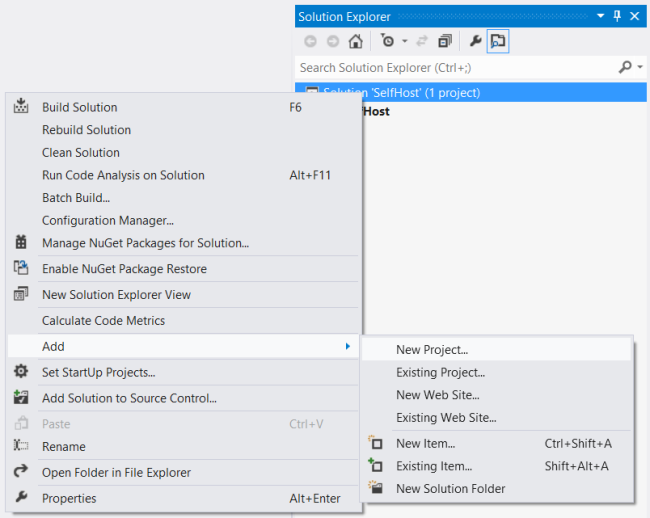
Let's write a simple console application that calls the web API.Add a new console application project to the solution:
In Solution Explorer, right-click the solution and select Add New Project.
Create a new console application named "ClientApp".
Use NuGet Package Manager to add the ASP.NET Web API Core Libraries package:
From the Tools menu, select Library Package Manager.
Select Manage NuGet Packages for Solution...
In the Manage NuGet Packages dialog, select Online.
In the search box, type "Microsoft.AspNet.WebApi.Client".
Select the Microsoft ASP.NET Web API Client Libraries package and click
Install.
Add a reference in ClientApp to the SelfHost project:
In Solution Explorer, right-click the ClientApp project.
Select Add Reference.
In the Reference Manager dialog, under Solution, select
Projects.
Select the SelfHost project.
Click OK.

Open the Client/Program.cs file. Add the following using statement:
using System.Net.Http;
Add a static HttpClient instance:
namespace Client
{
class Program
{
static HttpClient client = new HttpClient();
}
}
Add the following methods to list all products, list a product by ID, and list products by category.
static void ListAllProducts()
{
HttpResponseMessage resp = client.GetAsync("api/products").Result;
resp.EnsureSuccessStatusCode();

var products = resp.Content.ReadAsAsync<IEnumerable<SelfHost.Product>>().Result;
foreach (var p in products)
{
Console.WriteLine("{0} {1} {2} ({3})", p.Id, p.Name, p.Price, p.Category);
}
}

static void ListProduct(int id)
{
var resp = client.GetAsync(string.Format("api/products/{0}", id)).Result;
resp.EnsureSuccessStatusCode();

var product = resp.Content.ReadAsAsync<SelfHost.Product>().Result;
Console.WriteLine("ID {0}: {1}", id, product.Name);
}

static void ListProducts(string category)
{
Console.WriteLine("Products in '{0}':", category);

string query = string.Format("api/products?category={0}", category);

var resp = client.GetAsync(query).Result;
resp.EnsureSuccessStatusCode();

var products = resp.Content.ReadAsAsync<IEnumerable<SelfHost.Product>>().Result;
foreach (var product in products)
{
Console.WriteLine(product.Name);
}
}
Each of these methods follows the same pattern:
Call HttpClient.GetAsync to send a GET request to the appropriate URI.
Call HttpResponseMessage.EnsureSuccessStatusCode. This method throws an exception if the HTTP response status is an error code.
Call ReadAsAsync<T> to deserialize a CLR type from the HTTP response. This method is an extension method, defined in
System.Net.Http.HttpContentExtensions.
The GetAsync and ReadAsAsync methods are both asynchronous. They return
Task objects that represent the asynchronous operation. Getting the
Result property blocks the thread until the operation completes.
For more information about using HttpClient, including how to make non-blocking calls, see
Calling a Web API From a .NET Client.
Before calling these methods, set the BaseAddress property on the HttpClient instance to "http://localhost:8080". For example:
static void Main(string[] args)
{
client.BaseAddress = new Uri("http://localhost:8080");

ListAllProducts();
ListProduct(1);
ListProducts("toys");

Console.WriteLine("Press Enter to quit.");
Console.ReadLine();
}
This should output the following. (Remember to run the SelfHost application first.)
1 Tomato Soup 1.0 (Groceries)
2 Yo-yo 3.75 (Toys)
3 Hammer 16.99 (Hardware)
ID 1: Tomato Soup
Products in 'toys':
Yo-yo
Press Enter to quit.

This article was originally created on January 26, 2012
Tweet
Author Information

Mike Wasson – Mike Wasson is a programmer-writer at Microsoft.

相关文章推荐
- Self-Host c#学习笔记之Application.DoEvents应用 不用IIS也能執行ASP.NET Web API
- Self Host模式下的ASP. NET Web API是如何进行请求的监听与处理的?
- ASP.NET Web API消息处理管道:Self Host下的消息处理管道[下篇]
- Use OWIN to Self-Host ASP.NET Web API 2 来访问我的webapi
- asp.net web api的自托管模式HttpSelfHostServer可以以控制台程序或windows服务程序为宿主,不单单依赖于IIS web服务器
- Self Host模式下的ASP. NET Web API是如何进行请求的监听与处理的?
- ASP.NET Web API Selfhost宿主环境中管道、路由
- ASP.NET WEB API的服务托管(Self-HOST)
- 使用 OWIN Self-Host ASP.NET Web API 2
- 使用 OWIN Self-Host ASP.NET Web API 2
- ASP.NET Web API Selfhost宿主环境中管道、路由
- Self-Host ASP.NET Web API 1
- ASP.NET Web API的消息处理管道: Self Host下的消息处理管道[上篇]
- Use OWIN to Self-Host ASP.NET Web API 2
- ASP.NET(C#) Web Api通过文件流下载文件的实例
- 1、入门--ASP.NET Web API 2 (C#)
- Getting Started with ASP.NET Web API 2 (C#)
- ASP.NET Web API Selfhost宿主环境中管道、路由 推荐
- 入门 ASP.NET Web API 2 (C#)
- Microshaoft Cross-Domain + ASP.NET MVC 5 WebAPI 2 + Self-Host + JsonpMediaTypeFormatter + WCF + JsonP + PerformaceCounterFilter + Knockout.js + MVVM