Android之通过AIDL机制实现进程间的通讯实例
2016-10-08 14:16
846 查看
在Android中,每个应用程序都有自己的进程,当需要在不同的进程之间传递对象时,则采用AIDL(Android Interface Definition Language :接口定义语言)方式实现。
AIDL (Android Interface Definition Language)是一种IDL 语言,用于生成可以在Android设备上两个进程之间进行进程间通信(interprocess
communication, IPC)的代码。如果在一个进程中(例如Activity)要调用另一个进程中(例如Service)对象的操作,就可以使用AIDL生成可序列化的参数。AIDL
IPC机制是面向接口的,它是使用代理类在客户端和实现端传递数据。
AIDL接口文件,和普通的接口内容没有什么特别,只是它的扩展名为.aidl,保存在src目录下。如果其他应用程序需要IPC,则那些应用程序的src也要带有这个文件。Android SDK tools就会在gen目录自动生成一个IBinder接口文件。service必须适当地实现这个IBinder接口。那么客户端程序就能绑定这个service并在IPC时从IBinder调用方法。每个aidl文件只能定义一个接口,而且只能是接口的声明和方法的声明。
[b]使用AIDL实现IPC的步骤:[/b]
1. 创建.aidl文件。该文件(YourInterface.aidl)定义了客户端可用的方法和数据的接口。
2. 在makefile文件中加入.aidl文件。(Eclipse中的ADT插件提供管理功能)Android包括名为AIDL的编译器,位于tools/文件夹。
3. 实现接口。AIDL编译器从AIDL接口文件中利用Java语言创建接口,该接口有一个继承的命名为Stub的内部抽象类(并且实现了一些IPC调用的附加方法),要做的就是创建一个继承于YourInterface.Stub的类并且实现在.aidl文件中声明的方法。
4. 向客户端公开接口。如果是编写服务,应该继承Service并且重载Service.onBind(Intent) 以返回实现了接口的对象实例
创建.aidl文件
AIDL使用简单的语法来声明接口,描述其方法以及方法的参数和返回值。这些参数和返回值可以是任何类型,甚至是其他AIDL生成的接口。重要的是必须导入所有非内置类型,哪怕是这些类型是在与接口相同的包中。下面是AIDL能支持的数据类型:
1.Java编程语言的主要类型 (int, boolean等) — 不需要 import 语句。
2.以下的类 (不需要import 语句):
String
List -列表中的所有元素必须是在此列出的类型,包括其他AIDL生成的接口和可打包类型。List可以像一般的类(例如List<String>)那样使用,另一边接收的具体类一般是一个ArrayList,这些方法会使用List接口。
Map - Map中的所有元素必须是在此列出的类型,包括其他AIDL生成的接口和可打包类型。一般的maps(例如Map<String,Integer>)不被支持,另一边接收的具体类一般是一个HashMap,这些方法会使用Map接口。
CharSequence -该类是被TextView和其他控件对象使用的字符序列。
3.通常引引用方式传递的其他AIDL生成的接口,必须要import 语句声明
4.实现了Parcelable protocol 以及按值传递的自定义类,必须要import 语句声明。
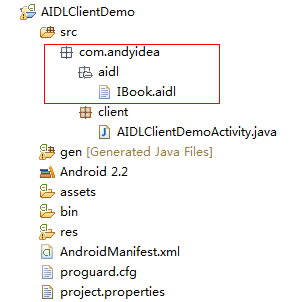
通过对上面的基本了解,下面我就以一个具体的实例来说明Android中如何通过AIDL机制来实现两个进程中实现通讯:(情景假设:例如A应用通过服务Service方式向B应用提供通过书籍编号来查询书籍名称的服务)
A应用程序结构图如下:

通过上面的结构图可以看到,在A应用程序中创建一个 aidl 的接口,然后系统在 gen 目录下自动生成相应的 java 文件。
其中 IBook.aidl 文件的源码:
[html] view
plain copy
package com.andyidea.aidl;
interface IBook {
String queryBook(int bookNo);
}
其中 BookService.java 类中的源码如下:
[html] view
plain copy
package com.andyidea.service;
import com.andyidea.aidl.IBook;
import android.app.Service;
import android.content.Intent;
import android.os.IBinder;
import android.os.RemoteException;
/**
* 查询书籍的服务
*
*/
public class BookService extends Service {
private String[] bookNames = {"Java编程思想","设计模式","Android开发设计"};
private IBinder mIBinder = new BookBinder();
@Override
public IBinder onBind(Intent intent) {
return mIBinder;
}
/**
* 服务中交互的方法
* @param bookNo
* @return
*/
public String queryBookName(int bookNo){
if(bookNo > 0 && bookNo <= bookNames.length){
return bookNames[bookNo-1];
}
return null;
}
private class BookBinder extends IBook.Stub{
@Override
public String queryBook(int bookNo) throws RemoteException {
return queryBookName(bookNo);
}
}
}
Stub是什么?
要使用AIDL,Service需要以aidl文件的方式提供服务接口,AIDL工具将生成一个相应的java接口,并且在生成的服务接口中包含一个功能调用的stub服务桩类。Service的实现类需要去继承这个stub服务桩类。Service的onBind方法会返回实现类的对象,之后你就可以使用它了。
交互过程client<-->proxy<-->stub<-->service搜索
stub和proxy是为了方便client/service交互而生成出来的代码,这样client/service的代码就会比较干净,不会嵌入很多很难懂的与业务无关的代码
同时别忘了在 Manifest.xml中配置该服务对象(标红色的部分),建议采用隐式方式激活该服务,适合不同的进程的意图。
[html] view
plain copy
<?xml version="1.0" encoding="utf-8"?>
<manifest xmlns:android="http://schemas.android.com/apk/res/android"
package="com.andyidea.service"
android:versionCode="1"
android:versionName="1.0" >
<uses-sdk android:minSdkVersion="8" />
<application
android:icon="@drawable/ic_launcher"
android:label="@string/app_name" >
<service android:name=".BookService">
<intent-filter>
<action android:name="com.andyidea.aidl.bookservice"/>
</intent-filter>
</service>
</application>
</manifest>
以上我们已经实现了A应用程序提供服务的功能,下面我们来实现B应用(或者其它需要用到A应用提供服务的应用程序)
B应用程序结构图如下:
我们看到B应用程序也要和服务端同样的 .aidl 文件,我们可以从A应用程序中把该 aidl 文件中拷贝过来就是了,呵。由于B应用中 .aidl 文件和 A应用中的 .aidl 文件源码一样,我在这里就不列出来了。
其中AIDLClientDemoActivity.java源码如下:【注:其中该客户端类要通过 bindService 方式来启动另外一个进程的服务,这样才能实现和服务进行交互。如果通过startService方式来启动服务,则不能与服务进行交互】
[html] view
plain copy
package com.andyidea.client;
import android.app.Activity;
import android.content.ComponentName;
import android.content.Intent;
import android.content.ServiceConnection;
import android.os.Bundle;
import android.os.IBinder;
import android.os.RemoteException;
import android.view.View;
import android.widget.Button;
import android.widget.EditText;
import android.widget.TextView;
import com.andyidea.aidl.IBook;
public class AIDLClientDemoActivity extends Activity {
private EditText numberText;
private TextView resultView;
private Button query;
private IBook bookQuery;
private BookConnection bookConn = new BookConnection();
/** Called when the activity is first created. */
@Override
public void onCreate(Bundle savedInstanceState) {
super.onCreate(savedInstanceState);
setContentView(R.layout.main);
numberText = (EditText) this.findViewById(R.id.number);
resultView = (TextView) this.findViewById(R.id.resultView);
query = (Button)findViewById(R.id.query);
Intent service = new Intent("com.andyidea.aidl.bookservice");
bindService(service, bookConn, BIND_AUTO_CREATE);
query.setOnClickListener(new View.OnClickListener() {
@Override
public void onClick(View v) {
String number = numberText.getText().toString();
int num = Integer.valueOf(number);
try {
resultView.setText(bookQuery.queryBook(num));
} catch (RemoteException e) {
e.printStackTrace();
}
}
});
}
@Override
protected void onDestroy() {
unbindService(bookConn);
super.onDestroy();
}
private final class BookConnection implements ServiceConnection{
@Override
public void onServiceConnected(ComponentName name, IBinder service) {
bookQuery = IBook.Stub.asInterface(service);
}
@Override
public void onServiceDisconnected(ComponentName name) {
bookQuery = null;
}
}
}
其中界面布局文件 main.xml 源码:
[html] view
plain copy
<?xml version="1.0" encoding="utf-8"?>
<LinearLayout xmlns:android="http://schemas.android.com/apk/res/android"
android:layout_width="fill_parent"
android:layout_height="fill_parent"
android:orientation="vertical" >
<TextView
android:layout_width="fill_parent"
android:layout_height="wrap_content"
android:text="书籍编号" />
<EditText
android:id="@+id/number"
android:layout_width="fill_parent"
android:layout_height="wrap_content"/>
<Button
android:id="@+id/query"
android:layout_width="wrap_content"
android:layout_height="wrap_content"
android:text="查询"/>
<TextView
android:id="@+id/resultView"
android:layout_width="fill_parent"
android:layout_height="wrap_content"/>
</LinearLayout>
至此,我们已经完成了B应用程序的代码实现部分,我们要先把A应用程序部署到机器上,然后我们再运行B应用程序。下面我们通过截图来看下程序运行的结果:

通过上面的截图,我们输入书籍编号 1,就可以查询出相应的书籍名称,到此,我们就可以了解了 Android应用中如何通过AIDL机制实现两个进程的通讯。
5、Permission权限
如果Service在AndroidManifest.xml中声明了全局的强制的访问权限,其他引用必须声明权限才能来start,stop或bind这个service.
另外,service可以通过权限来保护她的IPC方法调用,通过调用checkCallingPermission(String)方法来确保可以执行这个操作。AndroidManifest.xml的Service元素:
android:process=":remote",代表在应用程序里,当需要该service时,会自动创建新的进程。而如果是android:process="remote",没有“:”分号的,则创建全局进程,不同的应用程序共享该进程。
示例代码:http://download.csdn.net/detail/lvxiangan/9647615
1.什么是aidl:aidl是 Android Interface
definition language的缩写,一看就明白,它是一种android内部进程通信接口的描述语言,通过它我们可以定义进程间的通信接口
icp:interprocess communication :内部进程通信
2.既然aidl可以定义并实现进程通信,那么我们怎么使用它呢?文档/android-sdk/docs/guide/developing/tools/aidl.html中对步骤作了详细描述:
--1.Create your .aidl file - This file defines an interface (YourInterface.aidl) that defines the methods and fields available to a client.
创建你的aidl文件,我在后面给出了一个例子,它的aidl文件定义如下:写法跟Java代码类似,但是这里有一点值得注意的就是它可以引用其它aidl文件中定义的接口,但是不能够引用你的java类文件中定义的接口
[java] view
plain copy
package com.cao.android.demos.binder.aidl;
import com.cao.android.demos.binder.aidl.AIDLActivity;
interface AIDLService {
void registerTestCall(AIDLActivity cb);
void invokCallBack();
}
--2.Add the .aidl file to your makefile - (the ADT Plugin for Eclipse manages this for you). Android includes the compiler, called AIDL, in the tools/ directory.
编译你的aidl文件,这个只要是在eclipse中开发,你的adt插件会像资源文件一样把aidl文件编译成java代码生成在gen文件夹下,不用手动去编译:编译生成AIDLService.java如我例子中代码

--3.Implement your interface methods - The AIDL compiler creates an interface in the Java programming
language from your AIDL interface. This interface has an inner abstract class named Stub that inherits the interface (and implements a few additional methods necessary for the IPC call). You must create a class that extends YourInterface.Stub and implements
the methods you declared in your .aidl file.
实现你定义aidl接口中的内部抽象类Stub,public static abstract class Stub extends android.os.Binder implements com.cao.android.demos.binder.aidl.AIDLService
Stub类继承了Binder,并继承我们在aidl文件中定义的接口,我们需要实现接口方法,下面是我在例子中实现的Stub类:
[java] view
plain copy
private final AIDLService.Stub mBinder = new AIDLService.Stub() {
@Override
public void invokCallBack() throws RemoteException {
Log("AIDLService.invokCallBack");
Rect1 rect = new Rect1();
rect.bottom=-1;
rect.left=-1;
rect.right=1;
rect.top=1;
callback.performAction(rect);
}
@Override
public void registerTestCall(AIDLActivity cb) throws RemoteException {
Log("AIDLService.registerTestCall");
callback = cb;
}
};
Stub翻译成中文是存根的意思,注意Stub对象是在被调用端进程,也就是服务端进程,至此,服务端aidl服务端得编码完成了。
--4.Expose your interface to clients - If you're writing a service, you should extend Service and override Service.onBind(Intent) to return an instance of your class
that implements your interface.
第四步告诉你怎么在客户端如何调用服务端得aidl描述的接口对象,doc只告诉我们需要实现Service.onBind(Intent)方法,该方法会返回一个IBinder对象到客户端,绑定服务时不是需要一个ServiceConnection对象么,在没有了解aidl用法前一直不知道它是什么作用,其实他就是用来在客户端绑定service时接收service返回的IBinder对象的:
[java] view
plain copy
AIDLService mService;
private ServiceConnection mConnection = new ServiceConnection() {
public void onServiceConnected(ComponentName className, IBinder service) {
Log("connect service");
mService = AIDLService.Stub.asInterface(service);
try {
mService.registerTestCall(mCallback);
} catch (RemoteException e) {
}
}
public void onServiceDisconnected(ComponentName className) {
Log("disconnect service");
mService = null;
}
};
mService就是AIDLService对象,具体可以看我后面提供的示例代码,需要注意在客户端需要存一个服务端实现了的aidl接口描述文件,但是客户端只是使用该aidl接口,不需要实现它的Stub类,获取服务端得aidl对象后mService =
AIDLService.Stub.asInterface(service);,就可以在客户端使用它了,对mService对象方法的调用不是在客户端执行,而是在服务端执行。
4.aidl中使用java类,需要实现Parcelable接口,并且在定义类相同包下面对类进行声明:
上面我定义了Rect1类
之后你就可以在aidl接口中对该类进行使用了
package com.cao.android.demos.binder.aidl;
import com.cao.android.demos.binder.aidl.Rect1;
interface AIDLActivity {
void performAction(in Rect1 rect);
}
注意in/out的说明,我这里使用了in表示输入参数,out没有试过,为什么使用in/out暂时没有做深入研究。
5.aidl使用完整示例,为了清除说明aidl使用,我这里写了一个例子,例子参考了博客:
http://blog.csdn.NET/saintswordsman/archive/2010/01/04/5130947.aspx
作出说明
例子实现了一个AIDLTestActivity,AIDLTestActivity通过bindservice绑定一个服务AIDLTestService,通过并获取AIDLTestActivity的一个aidl对象AIDLService,该对象提供两个方法,一个是registerTestCall注册一个aidl对象,通过该方法,AIDLTestActivity把本身实现的一个aidl对象AIDLActivity传到AIDLTestService,在AIDLTestService通过操作AIDLActivity这个aidl远端对象代理,使AIDLTestActivity弹出一个toast,完整例子见我上传的资源:
http://download.csdn.net/source/3284820
AIDL (Android Interface Definition Language)是一种IDL 语言,用于生成可以在Android设备上两个进程之间进行进程间通信(interprocess
communication, IPC)的代码。如果在一个进程中(例如Activity)要调用另一个进程中(例如Service)对象的操作,就可以使用AIDL生成可序列化的参数。AIDL
IPC机制是面向接口的,它是使用代理类在客户端和实现端传递数据。
AIDL接口文件,和普通的接口内容没有什么特别,只是它的扩展名为.aidl,保存在src目录下。如果其他应用程序需要IPC,则那些应用程序的src也要带有这个文件。Android SDK tools就会在gen目录自动生成一个IBinder接口文件。service必须适当地实现这个IBinder接口。那么客户端程序就能绑定这个service并在IPC时从IBinder调用方法。每个aidl文件只能定义一个接口,而且只能是接口的声明和方法的声明。
[b]使用AIDL实现IPC的步骤:[/b]
1. 创建.aidl文件。该文件(YourInterface.aidl)定义了客户端可用的方法和数据的接口。
2. 在makefile文件中加入.aidl文件。(Eclipse中的ADT插件提供管理功能)Android包括名为AIDL的编译器,位于tools/文件夹。
3. 实现接口。AIDL编译器从AIDL接口文件中利用Java语言创建接口,该接口有一个继承的命名为Stub的内部抽象类(并且实现了一些IPC调用的附加方法),要做的就是创建一个继承于YourInterface.Stub的类并且实现在.aidl文件中声明的方法。
4. 向客户端公开接口。如果是编写服务,应该继承Service并且重载Service.onBind(Intent) 以返回实现了接口的对象实例
创建.aidl文件
AIDL使用简单的语法来声明接口,描述其方法以及方法的参数和返回值。这些参数和返回值可以是任何类型,甚至是其他AIDL生成的接口。重要的是必须导入所有非内置类型,哪怕是这些类型是在与接口相同的包中。下面是AIDL能支持的数据类型:
1.Java编程语言的主要类型 (int, boolean等) — 不需要 import 语句。
2.以下的类 (不需要import 语句):
String
List -列表中的所有元素必须是在此列出的类型,包括其他AIDL生成的接口和可打包类型。List可以像一般的类(例如List<String>)那样使用,另一边接收的具体类一般是一个ArrayList,这些方法会使用List接口。
Map - Map中的所有元素必须是在此列出的类型,包括其他AIDL生成的接口和可打包类型。一般的maps(例如Map<String,Integer>)不被支持,另一边接收的具体类一般是一个HashMap,这些方法会使用Map接口。
CharSequence -该类是被TextView和其他控件对象使用的字符序列。
3.通常引引用方式传递的其他AIDL生成的接口,必须要import 语句声明
4.实现了Parcelable protocol 以及按值传递的自定义类,必须要import 语句声明。
通过对上面的基本了解,下面我就以一个具体的实例来说明Android中如何通过AIDL机制来实现两个进程中实现通讯:(情景假设:例如A应用通过服务Service方式向B应用提供通过书籍编号来查询书籍名称的服务)
A应用程序结构图如下:
通过上面的结构图可以看到,在A应用程序中创建一个 aidl 的接口,然后系统在 gen 目录下自动生成相应的 java 文件。
其中 IBook.aidl 文件的源码:
[html] view
plain copy
package com.andyidea.aidl;
interface IBook {
String queryBook(int bookNo);
}
其中 BookService.java 类中的源码如下:
[html] view
plain copy
package com.andyidea.service;
import com.andyidea.aidl.IBook;
import android.app.Service;
import android.content.Intent;
import android.os.IBinder;
import android.os.RemoteException;
/**
* 查询书籍的服务
*
*/
public class BookService extends Service {
private String[] bookNames = {"Java编程思想","设计模式","Android开发设计"};
private IBinder mIBinder = new BookBinder();
@Override
public IBinder onBind(Intent intent) {
return mIBinder;
}
/**
* 服务中交互的方法
* @param bookNo
* @return
*/
public String queryBookName(int bookNo){
if(bookNo > 0 && bookNo <= bookNames.length){
return bookNames[bookNo-1];
}
return null;
}
private class BookBinder extends IBook.Stub{
@Override
public String queryBook(int bookNo) throws RemoteException {
return queryBookName(bookNo);
}
}
}
Stub是什么?
要使用AIDL,Service需要以aidl文件的方式提供服务接口,AIDL工具将生成一个相应的java接口,并且在生成的服务接口中包含一个功能调用的stub服务桩类。Service的实现类需要去继承这个stub服务桩类。Service的onBind方法会返回实现类的对象,之后你就可以使用它了。
交互过程client<-->proxy<-->stub<-->service搜索
stub和proxy是为了方便client/service交互而生成出来的代码,这样client/service的代码就会比较干净,不会嵌入很多很难懂的与业务无关的代码
同时别忘了在 Manifest.xml中配置该服务对象(标红色的部分),建议采用隐式方式激活该服务,适合不同的进程的意图。
[html] view
plain copy
<?xml version="1.0" encoding="utf-8"?>
<manifest xmlns:android="http://schemas.android.com/apk/res/android"
package="com.andyidea.service"
android:versionCode="1"
android:versionName="1.0" >
<uses-sdk android:minSdkVersion="8" />
<application
android:icon="@drawable/ic_launcher"
android:label="@string/app_name" >
<service android:name=".BookService">
<intent-filter>
<action android:name="com.andyidea.aidl.bookservice"/>
</intent-filter>
</service>
</application>
</manifest>
以上我们已经实现了A应用程序提供服务的功能,下面我们来实现B应用(或者其它需要用到A应用提供服务的应用程序)
B应用程序结构图如下:
我们看到B应用程序也要和服务端同样的 .aidl 文件,我们可以从A应用程序中把该 aidl 文件中拷贝过来就是了,呵。由于B应用中 .aidl 文件和 A应用中的 .aidl 文件源码一样,我在这里就不列出来了。
其中AIDLClientDemoActivity.java源码如下:【注:其中该客户端类要通过 bindService 方式来启动另外一个进程的服务,这样才能实现和服务进行交互。如果通过startService方式来启动服务,则不能与服务进行交互】
[html] view
plain copy
package com.andyidea.client;
import android.app.Activity;
import android.content.ComponentName;
import android.content.Intent;
import android.content.ServiceConnection;
import android.os.Bundle;
import android.os.IBinder;
import android.os.RemoteException;
import android.view.View;
import android.widget.Button;
import android.widget.EditText;
import android.widget.TextView;
import com.andyidea.aidl.IBook;
public class AIDLClientDemoActivity extends Activity {
private EditText numberText;
private TextView resultView;
private Button query;
private IBook bookQuery;
private BookConnection bookConn = new BookConnection();
/** Called when the activity is first created. */
@Override
public void onCreate(Bundle savedInstanceState) {
super.onCreate(savedInstanceState);
setContentView(R.layout.main);
numberText = (EditText) this.findViewById(R.id.number);
resultView = (TextView) this.findViewById(R.id.resultView);
query = (Button)findViewById(R.id.query);
Intent service = new Intent("com.andyidea.aidl.bookservice");
bindService(service, bookConn, BIND_AUTO_CREATE);
query.setOnClickListener(new View.OnClickListener() {
@Override
public void onClick(View v) {
String number = numberText.getText().toString();
int num = Integer.valueOf(number);
try {
resultView.setText(bookQuery.queryBook(num));
} catch (RemoteException e) {
e.printStackTrace();
}
}
});
}
@Override
protected void onDestroy() {
unbindService(bookConn);
super.onDestroy();
}
private final class BookConnection implements ServiceConnection{
@Override
public void onServiceConnected(ComponentName name, IBinder service) {
bookQuery = IBook.Stub.asInterface(service);
}
@Override
public void onServiceDisconnected(ComponentName name) {
bookQuery = null;
}
}
}
其中界面布局文件 main.xml 源码:
[html] view
plain copy
<?xml version="1.0" encoding="utf-8"?>
<LinearLayout xmlns:android="http://schemas.android.com/apk/res/android"
android:layout_width="fill_parent"
android:layout_height="fill_parent"
android:orientation="vertical" >
<TextView
android:layout_width="fill_parent"
android:layout_height="wrap_content"
android:text="书籍编号" />
<EditText
android:id="@+id/number"
android:layout_width="fill_parent"
android:layout_height="wrap_content"/>
<Button
android:id="@+id/query"
android:layout_width="wrap_content"
android:layout_height="wrap_content"
android:text="查询"/>
<TextView
android:id="@+id/resultView"
android:layout_width="fill_parent"
android:layout_height="wrap_content"/>
</LinearLayout>
至此,我们已经完成了B应用程序的代码实现部分,我们要先把A应用程序部署到机器上,然后我们再运行B应用程序。下面我们通过截图来看下程序运行的结果:
通过上面的截图,我们输入书籍编号 1,就可以查询出相应的书籍名称,到此,我们就可以了解了 Android应用中如何通过AIDL机制实现两个进程的通讯。
几个容易存在的误区:
1.不能将第一个工程复制粘贴来使用当做第二个工程,会导致应用包名重名。
2.action name=""的值不能跟包名的字段相同
3.A程序没有Activity,加载UI界面,与B程序的的Activity不能重名
4、无法由aidl文件生成java类文件:将java se的等级由1.5改为1.65、Permission权限
如果Service在AndroidManifest.xml中声明了全局的强制的访问权限,其他引用必须声明权限才能来start,stop或bind这个service.
另外,service可以通过权限来保护她的IPC方法调用,通过调用checkCallingPermission(String)方法来确保可以执行这个操作。AndroidManifest.xml的Service元素:
android:process=":remote",代表在应用程序里,当需要该service时,会自动创建新的进程。而如果是android:process="remote",没有“:”分号的,则创建全局进程,不同的应用程序共享该进程。
示例代码:http://download.csdn.net/detail/lvxiangan/9647615
1.什么是aidl:aidl是 Android Interface
definition language的缩写,一看就明白,它是一种android内部进程通信接口的描述语言,通过它我们可以定义进程间的通信接口
icp:interprocess communication :内部进程通信
2.既然aidl可以定义并实现进程通信,那么我们怎么使用它呢?文档/android-sdk/docs/guide/developing/tools/aidl.html中对步骤作了详细描述:
--1.Create your .aidl file - This file defines an interface (YourInterface.aidl) that defines the methods and fields available to a client.
创建你的aidl文件,我在后面给出了一个例子,它的aidl文件定义如下:写法跟Java代码类似,但是这里有一点值得注意的就是它可以引用其它aidl文件中定义的接口,但是不能够引用你的java类文件中定义的接口
[java] view
plain copy
package com.cao.android.demos.binder.aidl;
import com.cao.android.demos.binder.aidl.AIDLActivity;
interface AIDLService {
void registerTestCall(AIDLActivity cb);
void invokCallBack();
}
--2.Add the .aidl file to your makefile - (the ADT Plugin for Eclipse manages this for you). Android includes the compiler, called AIDL, in the tools/ directory.
编译你的aidl文件,这个只要是在eclipse中开发,你的adt插件会像资源文件一样把aidl文件编译成java代码生成在gen文件夹下,不用手动去编译:编译生成AIDLService.java如我例子中代码
--3.Implement your interface methods - The AIDL compiler creates an interface in the Java programming
language from your AIDL interface. This interface has an inner abstract class named Stub that inherits the interface (and implements a few additional methods necessary for the IPC call). You must create a class that extends YourInterface.Stub and implements
the methods you declared in your .aidl file.
实现你定义aidl接口中的内部抽象类Stub,public static abstract class Stub extends android.os.Binder implements com.cao.android.demos.binder.aidl.AIDLService
Stub类继承了Binder,并继承我们在aidl文件中定义的接口,我们需要实现接口方法,下面是我在例子中实现的Stub类:
[java] view
plain copy
private final AIDLService.Stub mBinder = new AIDLService.Stub() {
@Override
public void invokCallBack() throws RemoteException {
Log("AIDLService.invokCallBack");
Rect1 rect = new Rect1();
rect.bottom=-1;
rect.left=-1;
rect.right=1;
rect.top=1;
callback.performAction(rect);
}
@Override
public void registerTestCall(AIDLActivity cb) throws RemoteException {
Log("AIDLService.registerTestCall");
callback = cb;
}
};
Stub翻译成中文是存根的意思,注意Stub对象是在被调用端进程,也就是服务端进程,至此,服务端aidl服务端得编码完成了。
--4.Expose your interface to clients - If you're writing a service, you should extend Service and override Service.onBind(Intent) to return an instance of your class
that implements your interface.
第四步告诉你怎么在客户端如何调用服务端得aidl描述的接口对象,doc只告诉我们需要实现Service.onBind(Intent)方法,该方法会返回一个IBinder对象到客户端,绑定服务时不是需要一个ServiceConnection对象么,在没有了解aidl用法前一直不知道它是什么作用,其实他就是用来在客户端绑定service时接收service返回的IBinder对象的:
[java] view
plain copy
AIDLService mService;
private ServiceConnection mConnection = new ServiceConnection() {
public void onServiceConnected(ComponentName className, IBinder service) {
Log("connect service");
mService = AIDLService.Stub.asInterface(service);
try {
mService.registerTestCall(mCallback);
} catch (RemoteException e) {
}
}
public void onServiceDisconnected(ComponentName className) {
Log("disconnect service");
mService = null;
}
};
mService就是AIDLService对象,具体可以看我后面提供的示例代码,需要注意在客户端需要存一个服务端实现了的aidl接口描述文件,但是客户端只是使用该aidl接口,不需要实现它的Stub类,获取服务端得aidl对象后mService =
AIDLService.Stub.asInterface(service);,就可以在客户端使用它了,对mService对象方法的调用不是在客户端执行,而是在服务端执行。
4.aidl中使用java类,需要实现Parcelable接口,并且在定义类相同包下面对类进行声明:
上面我定义了Rect1类
之后你就可以在aidl接口中对该类进行使用了
package com.cao.android.demos.binder.aidl;
import com.cao.android.demos.binder.aidl.Rect1;
interface AIDLActivity {
void performAction(in Rect1 rect);
}
注意in/out的说明,我这里使用了in表示输入参数,out没有试过,为什么使用in/out暂时没有做深入研究。
5.aidl使用完整示例,为了清除说明aidl使用,我这里写了一个例子,例子参考了博客:
http://blog.csdn.NET/saintswordsman/archive/2010/01/04/5130947.aspx
作出说明
例子实现了一个AIDLTestActivity,AIDLTestActivity通过bindservice绑定一个服务AIDLTestService,通过并获取AIDLTestActivity的一个aidl对象AIDLService,该对象提供两个方法,一个是registerTestCall注册一个aidl对象,通过该方法,AIDLTestActivity把本身实现的一个aidl对象AIDLActivity传到AIDLTestService,在AIDLTestService通过操作AIDLActivity这个aidl远端对象代理,使AIDLTestActivity弹出一个toast,完整例子见我上传的资源:
http://download.csdn.net/source/3284820

相关文章推荐
- Android应用中通过AIDL机制实现进程间的通讯实例
- Android应用中通过AIDL机制实现进程间的通讯实例
- Android应用中通过AIDL机制实现进程间的通讯实例
- Android应用中通过AIDL机制实现进程间的通讯实例
- Android应用中通过AIDL机制实现进程间的通讯实例
- Android应用中通过AIDL机制实现进程间的通讯实例
- Android应用中通过AIDL机制实现进程间的通讯实例
- Android应用中通过AIDL机制实现进程间的通讯实例
- Android应用中通过AIDL机制实现进程间的通讯实例
- Android应用中通过AIDL机制实现进程间的通讯实例
- Android应用中通过AIDL机制实现进程间的通讯实例
- (4.1.18.6)Android应用中通过AIDL机制实现进程间的通讯实例
- Android应用中通过AIDL机制实现进程间的通讯实例
- Android应用中通过AIDL机制实现进程间的通讯实例
- AIDL机制实现进程间的通讯实例
- Android开发中实现跨进程通讯的AIDL接口
- Android IPC机制(三)在Android Studio中使用AIDL实现跨进程方法调用
- AIDL-Android接口描述语言实现跨进程通讯
- Android Binder机制实现进程间数据交换(不使用aidl实现)
- Android开发中实现跨进程通讯的AIDL接口