Heartbeat+Haproxy实现负载均衡高可用 推荐
2016-10-01 02:56
525 查看
环境说明:
一、环境准备
在mylinux1和mylinux2上安装heartbeat,可以手动安装,当然也可以使用前面发布的一篇heartbeat脚本的博文,里面有heartbeat快速安装脚本。
然后在mylinux2上安装haproxy,并将mylinux1上的haproxy配置文件和启停脚本都拷贝到mylinux2上。
要保证mylinux1和mylinux2的heartbeat+haproxy环境一致。
1、首先在mylinux1和mylinux2上先关闭haproxy服务
1、首先,检查mylinux1的状态
五、测试故障切换
1、停止mylinux1上的heartbeat服务
4、查看mylinux2上的heartbeat日志
[root@mylinux2 ~]# >/var/log/ha-log
[root@mylinux2 ~]# tail -f /var/log/ha-log
Oct 01 02:44:31 mylinux2.contoso.com heartbeat: [3534]: info: Received shutdown notice from 'mylinux1.contoso.com'.
Oct 01 02:44:31 mylinux2.contoso.com heartbeat: [3534]: info: Resources being acquired from mylinux1.contoso.com.
Oct 01 02:44:31 mylinux2.contoso.com heartbeat: [3655]: info: acquire local HA resources (standby).
Oct 01 02:44:31 mylinux2.contoso.com heartbeat: [3656]: info: No local resources [/usr/share/heartbeat/ResourceManager listkeys mylinux2.contoso.com] to acquire.
Oct 01 02:44:31 mylinux2.contoso.com heartbeat: [3655]: info: local HA resource acquisition completed (standby).
Oct 01 02:44:31 mylinux2.contoso.com heartbeat: [3534]: info: Standby resource acquisition done [all].
harc(default)[3681]:2016/10/01_02:44:31 info: Running /etc/ha.d//rc.d/status status
mach_down(default)[3698]:2016/10/01_02:44:31 info: Taking over resource group IPaddr::192.168.100.120/24/eth0
ResourceManager(default)[3725]:2016/10/01_02:44:31 info: Acquiring resource group: mylinux1.contoso.com IPaddr::192.168.100.120/24/eth0 haproxy
/usr/lib/ocf/resource.d//heartbeat/IPaddr(IPaddr_192.168.100.120)[3753]: 2016/10/01_02:44:31 INFO: Resource is stopped
ResourceManager(default)[3725]:2016/10/01_02:44:31 info: Running /etc/ha.d/resource.d/IPaddr 192.168.100.120/24/eth0 start
IPaddr(IPaddr_192.168.100.120)[3878]:2016/10/01_02:44:32 INFO: Adding inet address 192.168.100.120/24 with broadcast address 192.168.100.255 to device eth0
IPaddr(IPaddr_192.168.100.120)[3878]:2016/10/01_02:44:32 INFO: Bringing device eth0 up
IPaddr(IPaddr_192.168.100.120)[3878]:2016/10/01_02:44:32 INFO: /usr/libexec/heartbeat/send_arp -i 200 -r 5 -p /var/run/resource-agents/send_arp-192.168.100.120 eth0 192.168.100.120 auto not_used not_used
/usr/lib/ocf/resource.d//heartbeat/IPaddr(IPaddr_192.168.100.120)[3852]: 2016/10/01_02:44:32 INFO: Success
ResourceManager(default)[3725]:2016/10/01_02:44:32 info: Running /etc/init.d/haproxy start
mach_down(default)[3698]:2016/10/01_02:44:32 info: /usr/share/heartbeat/mach_down: nice_failback: foreign resources acquired
mach_down(default)[3698]:2016/10/01_02:44:32 info: mach_down takeover complete for node mylinux1.contoso.com.
Oct 01 02:44:32 mylinux2.contoso.com heartbeat: [3534]: info: mach_down takeover complete.
Oct 01 02:45:02 mylinux2.contoso.com heartbeat: [3534]: WARN: node mylinux1.contoso.com: is dead
Oct 01 02:45:02 mylinux2.contoso.com heartbeat: [3534]: info: Dead node mylinux1.contoso.com gave up resources.
Oct 01 02:45:02 mylinux2.contoso.com heartbeat: [3534]: info: Link mylinux1.contoso.com:eth1 dead.
Oct 01 02:45:02 mylinux2.contoso.com ipfail: [3543]: info: Status update: Node mylinux1.contoso.com now has status dead
Oct 01 02:45:03 mylinux2.contoso.com ipfail: [3543]: info: NS: We are dead. :<
Oct 01 02:45:03 mylinux2.contoso.com ipfail: [3543]: info: Link Status update: Link mylinux1.contoso.com/eth1 now has status dead
Oct 01 02:45:04 mylinux2.contoso.com ipfail: [3543]: info: We are dead. :<
Oct 01 02:45:04 mylinux2.contoso.com ipfail: [3543]: info: Asking other side for ping node count.
| 主机名 | 角色 | IP地址 |
| mylinux1.contoso.com | heartbeat+haproxy | eth0:192.168.100.121 eth1:172.16.100.121 |
| mylinux2.contoso.com | heartbeat+haproxy | eth0:192.168.100.122 eth1:172.16.100.122 |
| mylinux3.contoso.com | web server 1 | eth0:192.168.100.181 |
| mylinux4.contoso.com | web server 2 | eth0:192.168.100.182 |
在mylinux1和mylinux2上安装heartbeat,可以手动安装,当然也可以使用前面发布的一篇heartbeat脚本的博文,里面有heartbeat快速安装脚本。
然后在mylinux2上安装haproxy,并将mylinux1上的haproxy配置文件和启停脚本都拷贝到mylinux2上。
要保证mylinux1和mylinux2的heartbeat+haproxy环境一致。
[root@mylinux1 ~]# scp /etc/init.d/haproxy mylinux2:/etc/init.d/
root@mylinux2's password:
Permission denied, please try again.
root@mylinux2's password:
haproxy                                       100% 1567     1.5KB/s   00:00
[root@mylinux1 ~]# scp /usr/local/haproxy/conf/haproxy.cfg mylinux2:/usr/local/haproxy/conf/haproxy.cfg
root@mylinux2's password:
haproxy.cfg                                   100% 1194     1.2KB/s   00:00
[root@mylinux2 haproxy]# ll /etc/init.d/haproxy
-rwxr-xr-x 1 root root 1567 Oct  1 02:11 /etc/init.d/haproxy
[root@mylinux2 haproxy]# ll /usr/local/haproxy/conf/haproxy.cfg
-rw-r--r-- 1 root root 1194 Oct  1 02:13 /usr/local/haproxy/conf/haproxy.cfg
二、修改heartbeat的资源文件
[root@mylinux1 ~]# tail -1 /etc/ha.d/haresources
mylinux1.contoso.com IPaddr::192.168.100.120/24/eth0 haproxy
[root@mylinux2 haproxy]# tail -1 /etc/ha.d/haresources
mylinux1.contoso.com IPaddr::192.168.100.120/24/eth0 haproxy
这里还是贴出两个heartbeat节点的ha.cf配置,如下:
[root@mylinux1 ~]# egrep -v "#|^$" /etc/ha.d/ha.cf
debugfile /var/log/ha-debug
logfile/var/log/ha-log
logfacilitylocal1
keepalive 2
deadtime 30
warntime 10
initdead 120
udpport694
mcast eth1 225.0.0.1 694 1 0
auto_failback on
nodemylinux1.contoso.com
nodemylinux2.contoso.com
respawn hacluster /usr/lib64/heartbeat/ipfail
[root@mylinux2 haproxy]# egrep -v "#|^$" /etc/ha.d/ha.cf
debugfile /var/log/ha-debug
logfile/var/log/ha-log
logfacilitylocal1
keepalive 2
deadtime 30
warntime 10
initdead 120
udpport694
mcast eth1 225.0.0.1 694 1 0
auto_failback on
node    mylinux1.contoso.com
node    mylinux2.contoso.com
respawn hacluster /usr/lib64/heartbeat/ipfail
三、启动heartbeat服务
1、首先在mylinux1和mylinux2上先关闭haproxy服务
[root@mylinux1 ~]# service haproxy stop
Stop haproxy successful.
[root@mylinux2 haproxy]# service haproxy stop
Haproxy is not running. Stop haproxy failed!
2、依次启动mylinux1和mylinux2上的heartbeat服务
[root@mylinux1 ~]# /etc/init.d/heartbeat start
Starting High-Availability services: INFO:  Resource is stopped
Done.
[root@mylinux2 haproxy]# /etc/init.d/heartbeat start
Starting High-Availability services: INFO:  Resource is stopped
Done.
四、测试haproxy的高可用
1、首先,检查mylinux1的状态
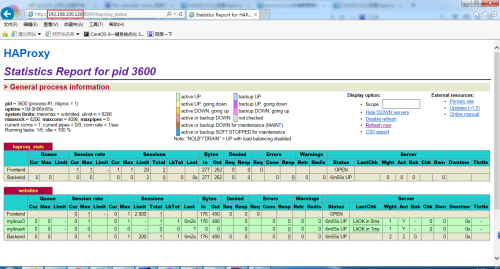
[root@mylinux1 ~]# ip a|grep 192.168.100.120
inet 192.168.100.120/24 brd 192.168.100.255 scope global secondary eth0
[root@mylinux1 ~]# service haproxy status
Haproxy (pid  3600) is running...
2、其次,检查mylinux2的状态
[root@mylinux2 haproxy]# ip a |grep 192.168.100.120
[root@mylinux2 haproxy]# service haproxy status
Haproxy is stopped.
3、查看监控界面
五、测试故障切换
1、停止mylinux1上的heartbeat服务
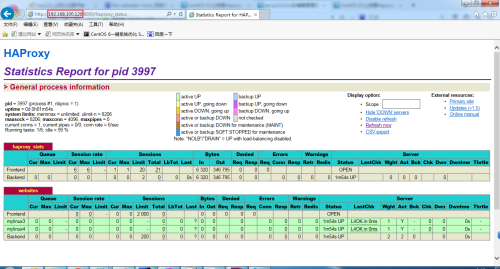
[root@mylinux1 ~]# /etc/init.d/heartbeat stop
Stopping High-Availability services: Done.
2、检查mylinux1和mylinux2的状态
[root@mylinux1 ~]# ip a |grep 192.168.100.120
[root@mylinux1 ~]# service haproxy status
Haproxy is stopped.
[root@mylinux2 haproxy]# ip a |grep 192.168.100.120
inet 192.168.100.120/24 brd 192.168.100.255 scope global secondary eth0
[root@mylinux2 haproxy]# service haproxy status
Haproxy (pid  3997) is running...
3、查看监控页面
4、查看mylinux2上的heartbeat日志
[root@mylinux2 ~]# >/var/log/ha-log
[root@mylinux2 ~]# tail -f /var/log/ha-log
Oct 01 02:44:31 mylinux2.contoso.com heartbeat: [3534]: info: Received shutdown notice from 'mylinux1.contoso.com'.
Oct 01 02:44:31 mylinux2.contoso.com heartbeat: [3534]: info: Resources being acquired from mylinux1.contoso.com.
Oct 01 02:44:31 mylinux2.contoso.com heartbeat: [3655]: info: acquire local HA resources (standby).
Oct 01 02:44:31 mylinux2.contoso.com heartbeat: [3656]: info: No local resources [/usr/share/heartbeat/ResourceManager listkeys mylinux2.contoso.com] to acquire.
Oct 01 02:44:31 mylinux2.contoso.com heartbeat: [3655]: info: local HA resource acquisition completed (standby).
Oct 01 02:44:31 mylinux2.contoso.com heartbeat: [3534]: info: Standby resource acquisition done [all].
harc(default)[3681]:2016/10/01_02:44:31 info: Running /etc/ha.d//rc.d/status status
mach_down(default)[3698]:2016/10/01_02:44:31 info: Taking over resource group IPaddr::192.168.100.120/24/eth0
ResourceManager(default)[3725]:2016/10/01_02:44:31 info: Acquiring resource group: mylinux1.contoso.com IPaddr::192.168.100.120/24/eth0 haproxy
/usr/lib/ocf/resource.d//heartbeat/IPaddr(IPaddr_192.168.100.120)[3753]: 2016/10/01_02:44:31 INFO: Resource is stopped
ResourceManager(default)[3725]:2016/10/01_02:44:31 info: Running /etc/ha.d/resource.d/IPaddr 192.168.100.120/24/eth0 start
IPaddr(IPaddr_192.168.100.120)[3878]:2016/10/01_02:44:32 INFO: Adding inet address 192.168.100.120/24 with broadcast address 192.168.100.255 to device eth0
IPaddr(IPaddr_192.168.100.120)[3878]:2016/10/01_02:44:32 INFO: Bringing device eth0 up
IPaddr(IPaddr_192.168.100.120)[3878]:2016/10/01_02:44:32 INFO: /usr/libexec/heartbeat/send_arp -i 200 -r 5 -p /var/run/resource-agents/send_arp-192.168.100.120 eth0 192.168.100.120 auto not_used not_used
/usr/lib/ocf/resource.d//heartbeat/IPaddr(IPaddr_192.168.100.120)[3852]: 2016/10/01_02:44:32 INFO: Success
ResourceManager(default)[3725]:2016/10/01_02:44:32 info: Running /etc/init.d/haproxy start
mach_down(default)[3698]:2016/10/01_02:44:32 info: /usr/share/heartbeat/mach_down: nice_failback: foreign resources acquired
mach_down(default)[3698]:2016/10/01_02:44:32 info: mach_down takeover complete for node mylinux1.contoso.com.
Oct 01 02:44:32 mylinux2.contoso.com heartbeat: [3534]: info: mach_down takeover complete.
Oct 01 02:45:02 mylinux2.contoso.com heartbeat: [3534]: WARN: node mylinux1.contoso.com: is dead
Oct 01 02:45:02 mylinux2.contoso.com heartbeat: [3534]: info: Dead node mylinux1.contoso.com gave up resources.
Oct 01 02:45:02 mylinux2.contoso.com heartbeat: [3534]: info: Link mylinux1.contoso.com:eth1 dead.
Oct 01 02:45:02 mylinux2.contoso.com ipfail: [3543]: info: Status update: Node mylinux1.contoso.com now has status dead
Oct 01 02:45:03 mylinux2.contoso.com ipfail: [3543]: info: NS: We are dead. :<
Oct 01 02:45:03 mylinux2.contoso.com ipfail: [3543]: info: Link Status update: Link mylinux1.contoso.com/eth1 now has status dead
Oct 01 02:45:04 mylinux2.contoso.com ipfail: [3543]: info: We are dead. :<
Oct 01 02:45:04 mylinux2.contoso.com ipfail: [3543]: info: Asking other side for ping node count.

相关文章推荐
- Heartbeat+Haproxy实现负载均衡高可用
- Heartbeat+Haproxy实现负载均衡高可用
- 使用ubuntu+haproxy+heartbeat搭建大规模WEB集群环境实现负载均衡。
- 实现基于haproxy和keepalived的负载均衡和高可用架构
- linux运维进阶-Haproxy和pacemaker结合corosync实现负载均衡高可用及crm命令
- Haproxy和pacemaker结合corosync实现负载均衡高可用,以及crm命令的使用
- Keepalived+HAProxy实现MySQL高可用负载均衡的配置
- 通过lvs+heartbeat实现对mysql的负载均衡高可用
- haproxy+keepalived实现负载均衡及高可用
- Nginx代理MogileFS并实现负载均衡和高可用 推荐
- HAProxy+Keepalived实现负载均衡高可用
- 基于HAProxy+Varnish实现动静分离、负载均衡的高可用集群
- heartbeat+Haproxy多VIP负载均衡高可用
- 静态路由实现负载均衡和高可用 推荐
- haproxy+keepalive双主高可用实现负载均衡
- heartbeat+Haproxy多VIP负载均衡高可用
- 使用HAproxy,keepalived实现简单LAMP架构的负载均衡与高可用
- 用haproxy结合keepalived实现基于LNMP的负载均衡和高可用
- Haproxy+Keepalived实现负载均衡高可用
- Keepalived+HAProxy实现MySQL高可用负载均衡的配置