Swift学习 之 贝塞尔曲线 绘制表情
2016-07-17 00:00
435 查看
摘要: 之前看过斯坦福大学Swift公开课,通过这次学习可以了解,Swift的基本语法,贝塞尔曲线的基本用法,自定义视图IB实时预览等。本篇将之总结如下。
注:@IBDesignable:Xcode6 的发布,苹果为开发者构建自定义控件推出了新功能IBDesignable和IBInspectable,允许在IB中实时预览设计成果。这会给实际开发提升很高效率。IBDesignable作用在于可以使改视图在IB中实时预览。
特别的:我另外定义了一个自定义参数——幸福指数。他的范围是-1~1。
注:@IBInspectable:将自定义的属性在IB中显示,以便我们更方便的控制其属性,达到动态预览的效果。
设置颜色宽度。
最后别忘了调用stroke(),将这个路径画出来。
其中控制点cp1、cp2可以通过下图来理解:


试着更改一下宽度,我改为20,发下脸皮真的变厚了呢?😂

试着更改颜色,我改为黑色,好吧我们都不喜欢黑脸!😥

试着改一下缩放比例,改为0.5,好吧脸变小了:😳

最后我们试着调一下,幸福指数:
我们发现幸福指数为1的时候是这样的:

0变成了直线,而-1变成了难过的表情:


https://github.com/ly918/Demos
1、创建一个基于UIView名为FaceView的类
我们不直接在HappinessViewController(根视图控制器) 中实现,而是将FaceView完全独立出来,这正是遵循了MVC的设计原则。我们主要通过贝塞尔曲线来实现表情的绘制。注:@IBDesignable:Xcode6 的发布,苹果为开发者构建自定义控件推出了新功能IBDesignable和IBInspectable,允许在IB中实时预览设计成果。这会给实际开发提升很高效率。IBDesignable作用在于可以使改视图在IB中实时预览。
//可以在IB中预览
@IBDesignable
class FaceView: UIView
{

}
2、定义属性
定义线宽、线颜色、缩放系数特别的:我另外定义了一个自定义参数——幸福指数。他的范围是-1~1。
注:@IBInspectable:将自定义的属性在IB中显示,以便我们更方便的控制其属性,达到动态预览的效果。
@IBInspectable
//线的宽度
var lineWidth : CGFloat = 3 { didSet {setNeedsDisplay() } }

@IBInspectable
//线的颜色
var color : UIColor = UIColor.blueColor() { didSet {setNeedsDisplay() } }

@IBInspectable
//表情缩放系数
var scale : CGFloat = 0.90 {didSet { setNeedsDisplay() } }

@IBInspectable
//微笑程度(幸福指数)
var smiliness : Double = 0.75 {didSet { setNeedsDisplay() } }
3、采用结构体来规定固定参数
我们采用结构体来规定我们想要的参数。如下所示:private struct Scaling {
static let FaceRadiusToEyeRadiusRatio:CGFloat = 10//眼睛弯曲半径比例
static let FaceRadiusToEyeOffsetRatio:CGFloat = 3//眼睛偏移比例
static let FaceRadiusToEyeSeparationRatio:CGFloat = 1.5//眼睛间隙比例
static let FaceRadiusToMouthWidthRatio:CGFloat = 1//嘴宽度比例
static let FaceRadiusToMouthHeightRatio:CGFloat = 3//嘴高度比例
static let FaceRadiusToMouthOffsetRatio:CGFloat = 3//嘴便宜比例
}4、设计一个枚举,代表眼睛的左、右
private enum Eye { case Left, Right }5、两个get属性
faceCenter:计算在父视图的中心坐标。
//在父视图上的中心坐标
var f
3ff0
aceCenter:CGPoint {
get{
return convertPoint(center, fromView: superview)
}
}
faceRadius:表情的缩放系数
var faceRadius:CGFloat {
get{
return scale * min(bounds.size.width,bounds.size.height) / 2
}
}
6、先画圆圆的脸
当然是先画脸(圆),通过UIBezierPath类方法来画(创建路径对象)一个圆(路径)。//arcCenter: 圆心 //radius:半径 //startAngle:起点角度 //endAngle:终点角度 let facePath = UIBezierPath(arcCenter: faceCenter, radius: faceRadius, startAngle: 0, endAngle: CGFloat(2*M_PI), clockwise: true)
设置颜色宽度。
//线的宽度
facePath.lineWidth = lineWidth
//线的颜色
color.set()
最后别忘了调用stroke(),将这个路径画出来。
//最终将它"画"出来
facePath.stroke()
7、其次是画眼睛:
我们封装一下画眼睛这部分代码,通过传入眼睛左右的枚举值来画。 眼睛实质还是画圆,只是不是完整的圆,我们只需要根据左右找到其中心、半径及起始角度就好了。//眼睛
private func bezierPathForEye(whichEye: Eye) -> UIBezierPath
{
//计算眼睛的半径
let eyeRadius = faceRadius/Scaling.FaceRadiusToEyeRadiusRatio
//计算眼睛垂直的偏移量
let eyeVerticalOffset = faceRadius/Scaling.FaceRadiusToEyeOffsetRatio
//计算眼睛水平的距离
let eyeHorizontalSeparation = faceRadius/Scaling.FaceRadiusToEyeSeparationRatio
//眼睛中心
var eyeCenter = faceCenter
//y值是一致的
eyeCenter.y -= eyeVerticalOffset
//根据左右来计算 眼的圆心x坐标
switch whichEye {
case .Left: eyeCenter.x -= eyeHorizontalSeparation / 2
case .Right: eyeCenter.x += eyeHorizontalSeparation / 2
}
//调用上面用过的UIBezierPath画圆的类方法来画圆
let path = UIBezierPath(arcCenter: eyeCenter, radius: eyeRadius, startAngle: 0, endAngle: CGFloat(2*M_PI), clockwise: true)
//线的宽
path.lineWidth = lineWidth
//最后返回路径
return path
}8、最后画嘴
嘴可以用曲线来画。使用UIBezierPath对象的方法:addCurveToPoint,来画曲线。需要计算的值有、起始点、控制点。//微笑
private func bezierPathForSmile(fractionOfMaxSmile : Double) -> UIBezierPath
{
//嘴宽
let mouthWidth = faceRadius/Scaling.FaceRadiusToMouthWidthRatio
//嘴高
let mouthHeight = faceRadius/Scaling.FaceRadiusToMouthHeightRatio
//嘴垂直偏移
let mouthVerticalOffset = faceRadius/Scaling.FaceRadiusToMouthOffsetRatio
//微笑高度
let smileHeight = CGFloat(max(min(fractionOfMaxSmile, 1), -1)) * mouthHeight
//开始点
let start = CGPoint(x: faceCenter.x - mouthWidth / 2, y: faceCenter.y + mouthVerticalOffset)
//结束点
let end = CGPoint(x: start.x + mouthWidth, y: start.y)
//第一个控制点
let cp1 = CGPoint(x: start.x + mouthWidth / 3, y: start.y + smileHeight)
//第二个控制点
let cp2 = CGPoint(x: end.x - mouthWidth / 3, y: cp1.y)
let path = UIBezierPath()
//路径移至起点
path.moveToPoint(start)
//增加路径的终点、控制点
path.addCurveToPoint(end, controlPoint1: cp1, controlPoint2: cp2)
path.lineWidth = lineWidth
return path
}其中控制点cp1、cp2可以通过下图来理解:
9、重绘视图
在重绘中调用以上方法,具体如下:override func drawRect(rect: CGRect){
//圆圆的脸
let facePath = UIBezierPath(arcCenter: faceCenter, radius: faceRadius, startAngle: 0, endAngle: CGFloat(2*M_PI), clockwise: true)
facePath.lineWidth = lineWidth
color.set()
facePath.stroke()
//一双大眼
bezierPathForEye(.Left).stroke()
bezierPathForEye(.Right).stroke()
//嘴
let smilePath = bezierPathForSmile(smiliness)
smilePath.stroke()
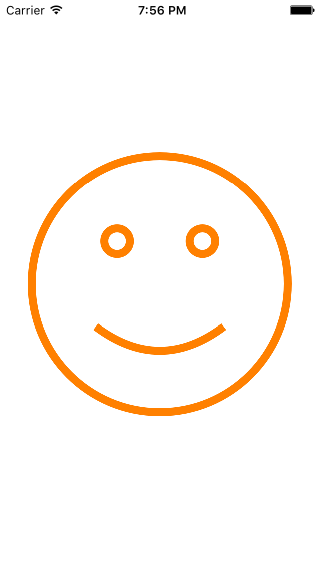
}10、运行结果如下:
11、不够幸福?好吧好像是幸福指数不够!
打开SB(故事版)、点击FaceView,可以在右侧属性栏中看到,我们自定义的属性已经绑定在右边了,我们可以手动更改,在IB中实时预览输出效果!像下面这样:试着更改一下宽度,我改为20,发下脸皮真的变厚了呢?😂
试着更改颜色,我改为黑色,好吧我们都不喜欢黑脸!😥
试着改一下缩放比例,改为0.5,好吧脸变小了:😳
最后我们试着调一下,幸福指数:
我们发现幸福指数为1的时候是这样的:
0变成了直线,而-1变成了难过的表情:
最后希望大家幸福指数都是1 !!!!
Github:https://github.com/ly918/Demos

相关文章推荐
- 峰回路转,Firefox 浏览器即将重返 iOS 平台
- 峰回路转,Firefox 浏览器即将重返 iOS 平台
- 不可修补的 iOS 漏洞可能导致 iPhone 4s 到 iPhone X 永久越狱
- iOS 12.4 系统遭黑客破解,漏洞危及数百万用户
- Apple Swift学习教程
- 每日安全资讯:NSO,一家专业入侵 iPhone 的神秘公司
- [转][源代码]Comex公布JailbreakMe 3.0源代码
- 介绍 Fedora 上的 Swift
- VB实现鼠标绘图实例代码
- Windows窗体的.Net框架绘图技术实现方法
- php绘图中显示不出图片的原因及解决
- 讲解iOS开发中基本的定位功能实现
- iOS中定位当前位置坐标及转换为火星坐标的方法
- js判断客户端是iOS还是Android等移动终端的方法
- iOS应用开发中AFNetworking库的常用HTTP操作方法小结
- iOS应用中UISearchDisplayController搜索效果的用法
- iOS App开发中的UISegmentedControl分段组件用法总结