iOS 签名板 LYDrawBoard
2016-07-20 00:00
447 查看
摘要: 上一篇,我们学习了Swift用贝塞尔曲线来实现,表情的绘制,这一篇,我们通过OC来实现一个签名板(绘图板),并且可以生成图片并保存到相册。
- (void)touchesBegan:(NSSet *)touches withEvent:(UIEvent *)event;//触摸开始时触发
过程如下,最后用下面这个方法来调用重绘视图(即通知系统调用drawRect):
[self setNeedsDisplay];//刷新帧
-(void)touchesMoved:(NSSet *)touches withEvent:(UIEvent *)event;//移动时触发
给UIView增加一个类方法(用类别),截图当前视图,当点击完成时,判断points是否为空,不为空则说明,有笔画,可截图传递给下一页图片浏览器,否则不截图传递,类别方法如下:
在故事版传递的函数中即可判断,如下所示:
点击完成后,运行效果如下:
在图片浏览器界面增加保存按钮,可以将截图保存到相册,方法如下:
并实现保存后的响应方法:
提示弹框:
设计一个画板,起名为:LYDrawBoard
1、先设计几个属性
//用于存放路径
@property(nonatomic,retain)NSMutableArray * points;
//画线的宽度 这里用IBInspectable来将该属性绑定到IB
@property(nonatomic,assign)IBInspectable CGFloat lineWidth;
//线的颜色
@property(nonatomic,strong)IBInspectable UIColor * color;
2、设计两个方法供外部使用
//退回到上一步
- (void)back;
//擦除所有
- (void)clear;
3、通过懒加载(实质是getter方法)来初始化points数组
//MARK: - lazy

- (NSMutableArray *)points
{
if (_points == nil) {
_points = [NSMutableArray array];
}
return _points;
}
4、通过getter方法来设置默认属性
//默认宽度
#define kDefaultWidth 6
//默认颜色
#define kDefaultColor [UIColor blackColor]

//MARK: - default

- (CGFloat)lineWidth{
if (!_lineWidth) {
_lineWidth = kDefaultWidth;
}
return _lineWidth;
}

- (UIColor *)color{
if (!_color) {
_color = kDefaultColor;
}
return _color;
}
5、UIView是可以接受用户触摸事件的,可以通过touches方法来实现笔画路径的记录
首先,通过下面这个方法确定起点,即开始触摸时触发的方法:- (void)touchesBegan:(NSSet *)touches withEvent:(UIEvent *)event;//触摸开始时触发
过程如下,最后用下面这个方法来调用重绘视图(即通知系统调用drawRect):
[self setNeedsDisplay];//刷新帧
确定起点:
/**
*  确定起点
*/
- (void)touchesBegan:(NSSet *)touches withEvent:(UIEvent *)event
{
UITouch *touch = [touches anyObject];
CGPoint startPos = [touch locationInView:touch.view];

//添加路径
UIBezierPath *path = [UIBezierPath bezierPath];

//设置路径的起始点为圆点
path.lineCapStyle = kCGLineCapRound;

//设置路径的结束点为圆点
path.lineJoinStyle = kCGLineJoinRound;

//路径的起始点用 moveToPoint:
[path moveToPoint:startPos];
[self.points addObject:path];

//刷新帧
[self setNeedsDisplay];
}
其次是将路径连线:
通过下面这个方法来实现移动过程中,路径的连线:-(void)touchesMoved:(NSSet *)touches withEvent:(UIEvent *)event;//移动时触发
连线:
/**
*  连线
*/
-(void)touchesMoved:(NSSet *)touches withEvent:(UIEvent *)event
{
UITouch *touch = [touches anyObject];
CGPoint currentPos = [touch locationInView:touch.view];

UIBezierPath *currentPath = self.points.lastObject;
[curr
3ff0
entPath addLineToPoint:currentPos];

//刷新帧
[self setNeedsDisplay];
}
触摸结束时:
/**
*  结束时也调用touchesMoved来将终点连线
*/
- (void)touchesEnded:(NSSet *)touches withEvent:(UIEvent *)event
{
[self touchesMoved:touches withEvent:event];
}
重绘方法:
/**
* 重绘
*/
-(void)drawRect:(CGRect)rect
{
//先设置颜色
[self.color set];
//遍历所有path,设置宽度,并分别调用stroke
for (UIBezierPath *path in self.points) {
path.lineWidth = self.lineWidth;
[path stroke];
}
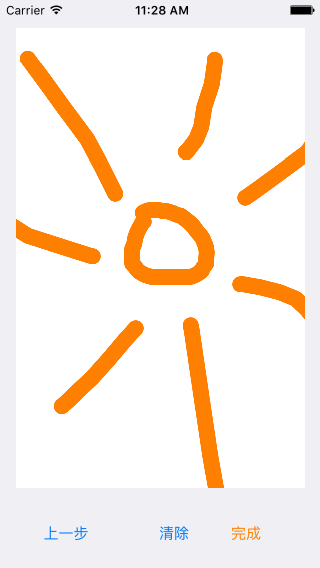
}设计一个签名板的App:
至此LYDrawBoard画板设计好了,我们可以设计一个简单的画板app了,并添加三个按钮,回退,清除,完成,运行效果图如下:上一步按钮触发方法:
//上一步
- (IBAction)previous:(id)sender {
[_pointView back];
}
清除按钮触发方法:
//清除
- (IBAction)clear:(id)sender {
[_pointView clear];
}
给UIView增加一个类方法(用类别),截图当前视图,当点击完成时,判断points是否为空,不为空则说明,有笔画,可截图传递给下一页图片浏览器,否则不截图传递,类别方法如下:
//截图
+(UIImage*)captureWithView:(UIView *)view
{

//开启上下文
UIGraphicsBeginImageContextWithOptions(view.frame.size, NO, 0.0);

//将控制器的view的layer渲染到上下文
[view.layer renderInContext:UIGraphicsGetCurrentContext()];

// 取出图片
UIImage *newImage = UIGraphicsGetImageFromCurrentImageContext();

//结束上下文
UIGraphicsEndImageContext();
return newImage;

}
在故事版传递的函数中即可判断,如下所示:
//传递image
- (void)prepareForSegue:(UIStoryboardSegue *)segue sender:(id)sender{
PhotoViewController * pvc = (PhotoViewController *)segue.destinationViewController;
if (_pointView.points.count) {
pvc.image = [UIView captureWithView:_pointView];
}
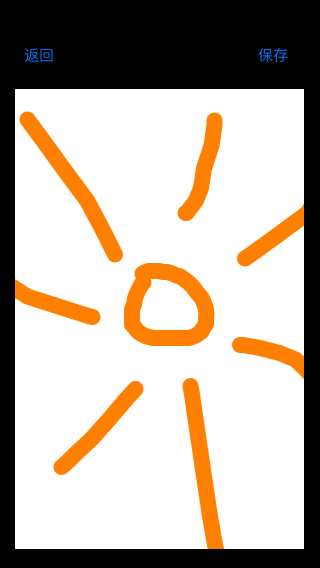
}点击完成后,运行效果如下:
在图片浏览器界面增加保存按钮,可以将截图保存到相册,方法如下:
- (IBAction)save:(id)sender {
/**
*  将图片保存到iPhone本地相册
*  UIImage *image            图片对象
*  id completionTarget       响应方法对象
*  SEL completionSelector    方法
*  void *contextInfo
*/
UIImageWriteToSavedPhotosAlbum(_image, self, @selector(image:didFinishSavingWithError:contextInfo:), nil);
}
并实现保存后的响应方法:
//响应对象
- (void)image:(UIImage *)image didFinishSavingWithError:(NSError *)error contextInfo:(void *)contextInfo{

NSString * msg = nil;

if (error == nil) {
msg = @"保存成功";

}else{

msg = @"保存失败";
}

[self showAlertForMsg:msg];

}
提示弹框:
//提示框
- (void)showAlertForMsg:(NSString *)msg{

UIAlertController * alertC = [UIAlertController alertControllerWithTitle:@"提示" message:msg preferredStyle:UIAlertControllerStyleAlert];

UIAlertAction * action = [UIAlertAction actionWithTitle:@"确定" style:UIAlertActionStyleCancel handler:^(UIAlertAction * _Nonnull action) {

}];

[alertC addAction:action];

[self presentViewController:alertC animated:true completion:nil];
}
项目地址:
https://github.com/ly918/Demos
相关文章推荐
- 峰回路转,Firefox 浏览器即将重返 iOS 平台
- 峰回路转,Firefox 浏览器即将重返 iOS 平台
- 不可修补的 iOS 漏洞可能导致 iPhone 4s 到 iPhone X 永久越狱
- iOS 12.4 系统遭黑客破解,漏洞危及数百万用户
- 每日安全资讯:NSO,一家专业入侵 iPhone 的神秘公司
- [转][源代码]Comex公布JailbreakMe 3.0源代码
- VB实现鼠标绘图实例代码
- Windows窗体的.Net框架绘图技术实现方法
- php绘图中显示不出图片的原因及解决
- 讲解iOS开发中基本的定位功能实现
- iOS中定位当前位置坐标及转换为火星坐标的方法
- js判断客户端是iOS还是Android等移动终端的方法
- iOS应用开发中AFNetworking库的常用HTTP操作方法小结
- iOS应用中UISearchDisplayController搜索效果的用法
- iOS App开发中的UISegmentedControl分段组件用法总结
- IOS开发环境windows化攻略
- iOS应用中UITableView左滑自定义选项及批量删除的实现
- iOS中UIAlertView警告框组件的使用教程