MVC5 网站开发之七 用户功能 1、角色的后台管理
2016-03-13 00:36
661 查看
角色是网站中都有的一个功能,用来区分用户的类型、划分用户的权限,这次实现角色列表浏览、角色添加、角色修改和角色删除。
目录
奔跑吧,代码小哥!
MVC5网站开发之一 总体概述
MVC5 网站开发之二 创建项目
MVC5 网站开发之三 数据存储层功能实现
MVC5 网站开发之四 业务逻辑层的架构和基本功能
MVC5 网站开发之五 展示层架构
MVC5 网站开发之六 管理员 1、登录、验证和注销
MVC5 网站开发之六 管理员 2、添加、删除、重置密码、修改密码、列表浏览
MVC5 网站开发之七 用户功能 1、角色的后台管理
一、业务逻辑层
1、角色模型
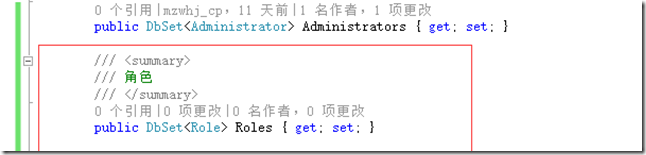
Ninesky.Core【右键】->添加->类,输入类名Role。
引用System.ComponentModel.DataAnnotations命名空间
2、添加表映射
打开Ninesky.Core/NineskyContext.cs,添加Role表映射
3、迁移数据
1)、启用数据迁移

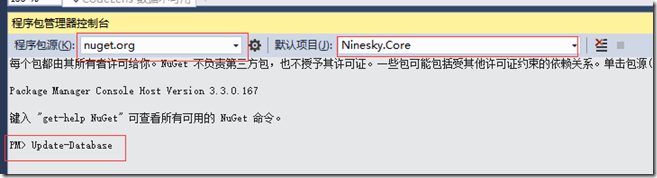
在【工具栏】->【工具】->NuGet包管理器->程序包管理器控制台。

输入命令 Enable-Migrations 回车,为Ninesk.Core启用数据迁移。
打开Ninesky.Core/Migrations/Configuration.cs文件

,将 AutomaticMigrationsEnabled = false;改为 AutomaticMigrationsEnabled = ture;来启用自动迁移。
2)、更新数据表
运行命令Update-Database。提示错误:There is already an object named 'Administrators' in the database.
这是因为先生成了Administrators表后启用的数据迁移。在更新表的时候视图创建Administrators表失败。

打开服务器资源管理器,如图选择Administrators【右键】->删除。
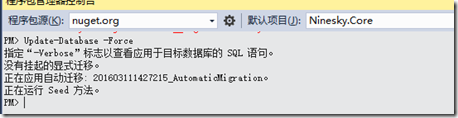
删除成功后再次运行Update-Database,执行成功。
因为刚才删除表的时候把管理员账号也删掉了,记得打开Administrators表添加一个管理员账号,记得密码可以输入jZae727K08KaOmKSgOaGzww/XVqGr/PKEgIMkjrcbJI= 这是123456加密后的字符串。
4、角色管理
Ninesky.Core【右键】->添加->类,输入类名RoleManager,类继承自BaseManager<Role>
二、展示层
Ninesky.Web/Areas/Control/Controllers【右键】->添加->控制器。选择 MVC5 控制器 – 空, 输入控制器名称RoleController。
在控制器中引入命名空间Ninesky.Core;
添加变量private RoleManager roleManager = new RoleManager();
为控制器添加身份验证[AdminAuthorize]
1、消息提示
在进行操作的时候经常会需要对操作成功、失败、发生错误进行提示,所以专门做一个提示的模型类Prompt。
1)、添加类
Ninesky.Web/Models【右键】->添加->类 输入类名Prompt
2、在控制器中引入类的命名空间
在Rolecontroller中引用命名空间Ninesky.Web.Models。
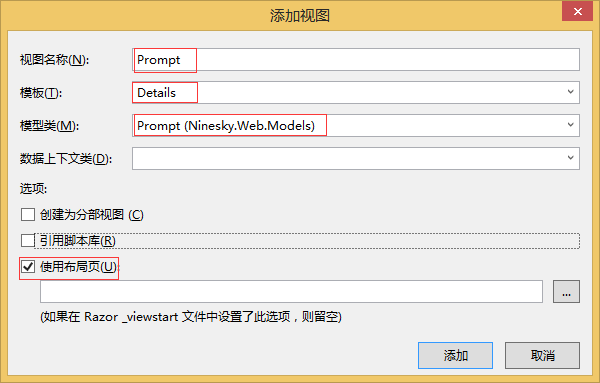
3、添加视图
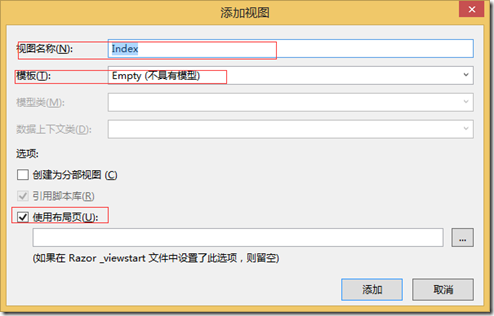
在Ninesky.Web/Areas/Control/Views/Shared【右键】->添加->视图

2、管理员列表
1)、返回列表方法(Json方式)
在控制中添加方法 ListJson() ,返回类型 JsonResoult
2、添加角色首页视图
在index()方法【右键】->添加视图
3、导航视图
导航视图显示在视图的左侧,对该控制器下的功能进行导航
Ninesky.Web/Areas/Control/Views/Role【右键】->添加->视图
4、添加角色
1)、添加方法
在控制器中添加Add方法
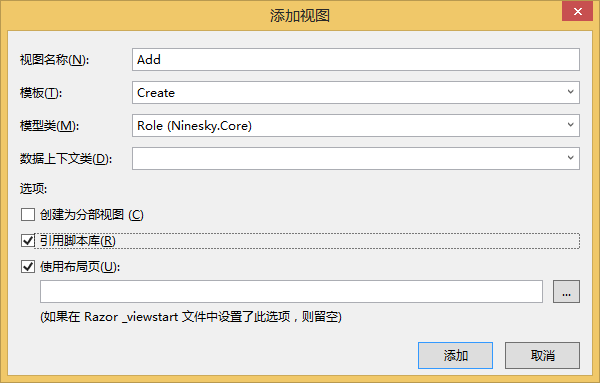
2)、添加视图
在方法上右键添加视图
3)、添加提交数据的接收处理方法
在控制器中添加Add方法的post方法
5、管理员资料修改
1)、添加方法
在控制器中添加Modify方法。
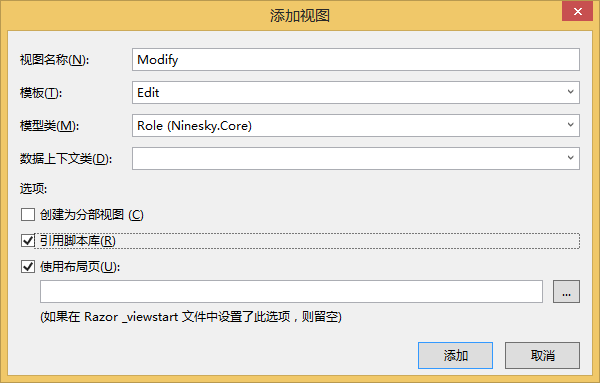
2)、添加视图
在方法中右键添加视图
代码如下:
3)、添加提交数据的接收处理方法
在控制器中添加post方式的提交处理方法Modify方法。
6、删除角色
在控制器中添加Modify方法。
角色功能完成,按F5浏览器中预览效果
---------------------------------------------------------------------------------------
代码见:https://ninesky.codeplex.com/SourceControl/latest
代码下载:https://ninesky.codeplex.com 点击SOURCE CODE 点击Download下载源文件。
目录
奔跑吧,代码小哥!
MVC5网站开发之一 总体概述
MVC5 网站开发之二 创建项目
MVC5 网站开发之三 数据存储层功能实现
MVC5 网站开发之四 业务逻辑层的架构和基本功能
MVC5 网站开发之五 展示层架构
MVC5 网站开发之六 管理员 1、登录、验证和注销
MVC5 网站开发之六 管理员 2、添加、删除、重置密码、修改密码、列表浏览
MVC5 网站开发之七 用户功能 1、角色的后台管理
一、业务逻辑层
1、角色模型
Ninesky.Core【右键】->添加->类,输入类名Role。
引用System.ComponentModel.DataAnnotations命名空间
using System.ComponentModel.DataAnnotations;
namespace Ninesky.Core
{
/// <summary>
/// 角色
/// </summary>
public class Role
{
[Key]
public int RoleID { get; set; }
/// <summary>
/// 名称
/// </summary>
[Required(ErrorMessage ="必须输入{0}")]
[StringLength(20,MinimumLength =2, ErrorMessage ="{0}长度为{2}-{1}个字符")]
[Display(Name ="名称")]
public string Name { get; set; }
/// <summary>
/// 说明
/// </summary>
[StringLength(1000, ErrorMessage = "{0}必须少于{1}个字符")]
[Display(Name = "说明")]
public string Description { get; set; }
}
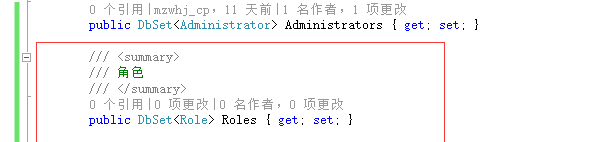
}2、添加表映射
打开Ninesky.Core/NineskyContext.cs,添加Role表映射
3、迁移数据
1)、启用数据迁移
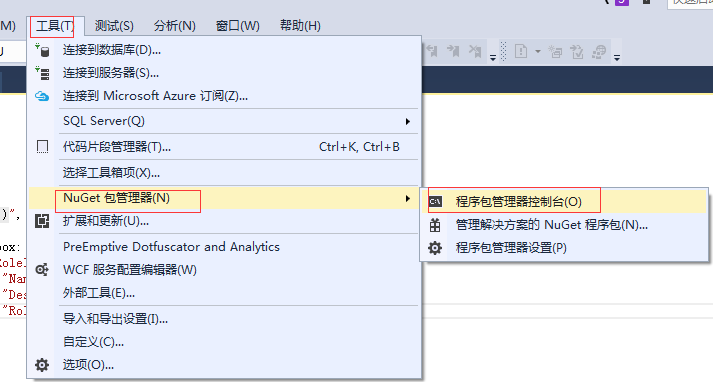
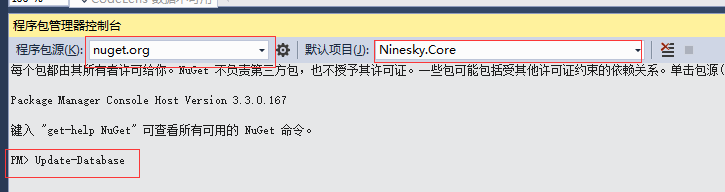
在【工具栏】->【工具】->NuGet包管理器->程序包管理器控制台。

输入命令 Enable-Migrations 回车,为Ninesk.Core启用数据迁移。
打开Ninesky.Core/Migrations/Configuration.cs文件

,将 AutomaticMigrationsEnabled = false;改为 AutomaticMigrationsEnabled = ture;来启用自动迁移。
2)、更新数据表
运行命令Update-Database。提示错误:There is already an object named 'Administrators' in the database.
这是因为先生成了Administrators表后启用的数据迁移。在更新表的时候视图创建Administrators表失败。
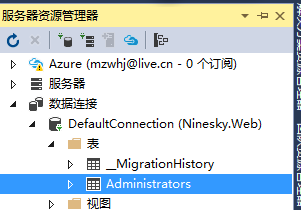
打开服务器资源管理器,如图选择Administrators【右键】->删除。
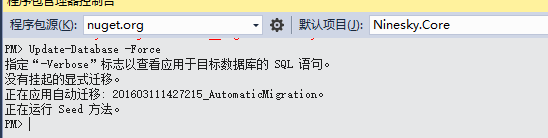
删除成功后再次运行Update-Database,执行成功。
因为刚才删除表的时候把管理员账号也删掉了,记得打开Administrators表添加一个管理员账号,记得密码可以输入jZae727K08KaOmKSgOaGzww/XVqGr/PKEgIMkjrcbJI= 这是123456加密后的字符串。
4、角色管理
Ninesky.Core【右键】->添加->类,输入类名RoleManager,类继承自BaseManager<Role>
using System;
using System.Collections.Generic;
using System.Linq;
using System.Text;
using System.Threading.Tasks;

namespace Ninesky.Core
{
/// <summary>
/// 角色管理
/// </summary>
public class RoleManager:BaseManager<Role>
{
}
}
二、展示层
Ninesky.Web/Areas/Control/Controllers【右键】->添加->控制器。选择 MVC5 控制器 – 空, 输入控制器名称RoleController。
在控制器中引入命名空间Ninesky.Core;
添加变量private RoleManager roleManager = new RoleManager();
为控制器添加身份验证[AdminAuthorize]
1、消息提示
在进行操作的时候经常会需要对操作成功、失败、发生错误进行提示,所以专门做一个提示的模型类Prompt。
1)、添加类
Ninesky.Web/Models【右键】->添加->类 输入类名Prompt
using System.Collections.Generic;

namespace Ninesky.Web.Models
{
/// <summary>
/// 提示
/// </summary>
public class Prompt
{
/// <summary>
/// 标题
/// </summary>
public string Title { get; set; }

/// <summary>
/// 消息
/// </summary>
public string Message { get; set; }

/// <summary>
/// 按钮组
/// </summary>
public List<string> Buttons { get; set; }
}
}
2、在控制器中引入类的命名空间
在Rolecontroller中引用命名空间Ninesky.Web.Models。
3、添加视图
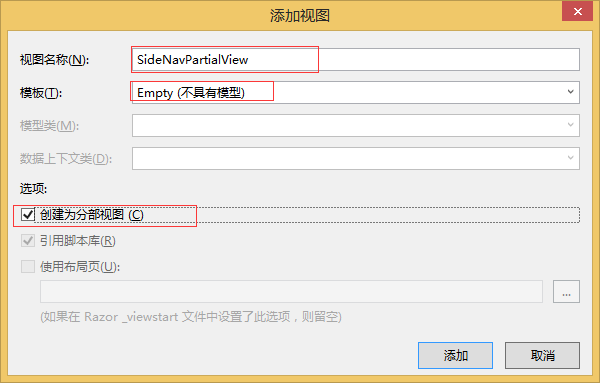
在Ninesky.Web/Areas/Control/Views/Shared【右键】->添加->视图
@model Ninesky.Web.Models.Prompt

@{
ViewBag.Title = Model.Title;
}

@section SideNav{@Html.Partial("SideNavPartialView")}

<ol class="breadcrumb">
<li><span class="glyphicon glyphicon-home"></span>  @Html.ActionLink("首页", "Index", "Home")</li>
<li class="active">@Model.Title</li>
</ol>

<div class="panel panel-default">
<div class="panel-heading"><div class="panel-title">@Model.Title</div></div>
<div class="panel-body">
<p>@Html.Raw(Model.Message)</p>
@if(Model.Buttons!=null && Model.Buttons.Count > 0) {
<p>
@foreach(var item in Model.Buttons)
{
@Html.Raw(item+ "  ")

}
</p>
}
</div>
</div>
2、管理员列表
1)、返回列表方法(Json方式)
在控制中添加方法 ListJson() ,返回类型 JsonResoult
/// <summary>
///  列表【Json】
/// </summary>
/// <returns></returns>
public JsonResult ListJson()
{
return Json(roleManager.FindList());
}
2、添加角色首页视图
在index()方法【右键】->添加视图

@{
ViewBag.Title = "角色管理";
}

@section SideNav{@Html.Partial("SideNavPartialView")}

<ol class="breadcrumb">
<li><span class="glyphicon glyphicon-home"></span>  @Html.ActionLink("首页", "Index", "Home")</li>
<li>@Html.ActionLink("用户管理", "Index", "User")</li>
<li class="active">@Html.ActionLink("角色管理", "Index", "Role")</li>
</ol>

<table id="admingrid"></table>
@section style{
@Styles.Render("~/Content/bootstrapplugincss")
}

@section scripts{
@Scripts.Render("~/bundles/jqueryval")
@Scripts.Render("~/bundles/bootstrapplugin")
<script type="text/javascript">
$(document).ready(function () {
//表格
var $table = $('#admingrid');
$table.bootstrapTable({
showRefresh: true,
showColumns: true,
showFooter: true,
method: "post",
url: "@Url.Action("ListJson")",
columns: [
{ title: "ID", field: "RoleID" },
{ title: "名称", field: "Name", formatter: function (value, row, index) { return "<a href='@Url.Action("Modify", "Role")/" + row.RoleID + "'>" + value + "</a>" } },
{ title: "说明", field: "Description" },
{ title: "操作", field: "RoleID", formatter: function (value) { return "<a class='btn btn-sm btn-danger' data-operation='deleterole' data-value='" + value + "'>删除</a>" } }
],
onLoadSuccess: function () {
//删除按钮
$("a[data-operation='deleterole']").click(function () {
var id = $(this).attr("data-value");
BootstrapDialog.confirm("你确定要删除" + $(this).parent().parent().find("td").eq(1).text() + "吗?", function (result) {
if (result) {
$.post("@Url.Action("DeleteJson", "Role")", { id: id }, function (data) {
if (data.Code == 1) {
BootstrapDialog.show({
message: "删除角色成功",
buttons: [{
icon: "glyphicon glyphicon-ok",
label: "确定",
action: function (dialogItself) {
$table.bootstrapTable("refresh");
dialogItself.close();
}
}]

});
}
else BootstrapDialog.alert(data.Message);
}, "json");
}
});
});
//删除按钮结束
}
});
//表格结束
});
</script>
}
3、导航视图
导航视图显示在视图的左侧,对该控制器下的功能进行导航
Ninesky.Web/Areas/Control/Views/Role【右键】->添加->视图
<div class="panel panel-default">
<div class="panel-heading">
<div class="panel-title"><span class="glyphicon glyphicon-user"></span> 用户管理</div>
</div>
<div class="panel-body">
<div class="list-group">
<div class="list-group-item"><span class="glyphicon glyphicon-plus"></span>  @Html.ActionLink("角色添加", "Add", "Role")</div>
<div class="list-group-item"><span class="glyphicon glyphicon-list"></span>  @Html.ActionLink("角色管理", "Index", "Role")</div>
</div>
</div>
</div>
4、添加角色
1)、添加方法
在控制器中添加Add方法
/// <summary>
/// 添加
/// </summary>
/// <returns></returns>
public ActionResult Add()
{
return View();
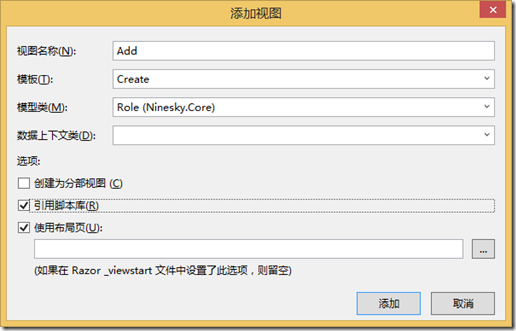
}2)、添加视图
在方法上右键添加视图
@model Ninesky.Core.Role

@{
ViewBag.Title = "添加角色";
}

@section SideNav{@Html.Partial("SideNavPartialView")}

<ol class="breadcrumb">
<li><span class="glyphicon glyphicon-home"></span>  @Html.ActionLink("首页", "Index", "Home")</li>
<li>@Html.ActionLink("用户管理", "Index", "User")</li>
<li>@Html.ActionLink("角色管理", "Index", "Role")</li>
<li class="active">添加角色</li>
</ol>

@using (Html.BeginForm())
{
@Html.AntiForgeryToken()

<div class="form-horizontal">
@Html.ValidationSummary(true, "", new { @class = "text-danger" })
<div class="form-group">
@Html.LabelFor(model => model.Name, htmlAttributes: new { @class = "control-label col-md-2" })
<div class="col-md-10">
@Html.EditorFor(model => model.Name, new { htmlAttributes = new { @class = "form-control" } })
@Html.ValidationMessageFor(model => model.Name, "", new { @class = "text-danger" })
</div>
</div>

<div class="form-group">
@Html.LabelFor(model => model.Description, htmlAttributes: new { @class = "control-label col-md-2" })
<div class="col-md-10">
@Html.EditorFor(model => model.Description, new { htmlAttributes = new { @class = "form-control" } })
@Html.ValidationMessageFor(model => model.Description, "", new { @class = "text-danger" })
</div>
</div>

<div class="form-group">
<div class="col-md-offset-2 col-md-10">
<input type="submit" value="保存" class="btn btn-default" />
</div>
</div>
</div>
}

@section Scripts {
@Scripts.Render("~/bundles/jqueryval")
}
3)、添加提交数据的接收处理方法
在控制器中添加Add方法的post方法
[HttpPost]
[ValidateAntiForgeryToken]
public ActionResult Add(Role role)
{
if (ModelState.IsValid)
{
if (roleManager.Add(role).Code == 1)
{
return View("Prompt", new Prompt() { Title = "添加角色成功",
Message ="你已成功添加了角色【"+ role.Name+"】",
Buttons = new List<string>() { "<a href=\"" + Url.Action("Index", "Role") + "\" class=\"btn btn-default\">角色管理</a>", "<a href=\"" + Url.Action("Add", "Role") + "\" class=\"btn btn-default\">继续添加</a>"}
});
}
}
return View(role);
}
5、管理员资料修改
1)、添加方法
在控制器中添加Modify方法。
/// <summary>
/// 修改
/// </summary>
/// <param name="id">RoleID</param>
/// <returns></returns>
public ActionResult Modify(int id)
{
var _role = roleManager.Find(id);
if(_role == null) return View("Prompt", new Prompt()
{
Title = "错误",
Message = "ID为【" + id + "】的角色不存在",
Buttons = new List<string>() { "<a href=\"" + Url.Action("Index", "Role") + "\" class=\"btn btn-default\">角色管理</a>"}
});
return View(_role);
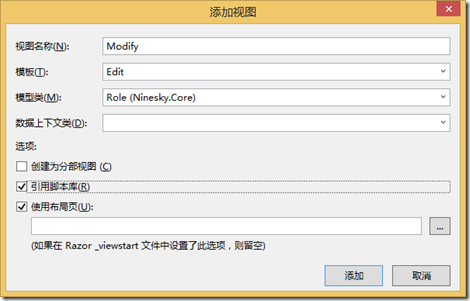
}2)、添加视图
在方法中右键添加视图
代码如下:
@model Ninesky.Core.Role

@{
ViewBag.Title = Model.Name;
}

@section SideNav{@Html.Partial("SideNavPartialView")}

<ol class="breadcrumb">
<li><span class="glyphicon glyphicon-home"></span>  @Html.ActionLink("首页", "Index", "Home")</li>
<li>@Html.ActionLink("用户管理", "Index", "User")</li>
<li>@Html.ActionLink("角色管理", "Index", "Role")</li>
<li class="active">修改</li>
</ol>

@using (Html.BeginForm())
{
@Html.AntiForgeryToken()

<div class="form-horizontal">
@Html.ValidationSummary(true, "", new { @class = "text-danger" })
@Html.HiddenFor(model => model.RoleID)

<div class="form-group">
@Html.LabelFor(model => model.Name, htmlAttributes: new { @class = "control-label col-md-2" })
<div class="col-md-10">
@Html.EditorFor(model => model.Name, new { htmlAttributes = new { @class = "form-control" } })
@Html.ValidationMessageFor(model => model.Name, "", new { @class = "text-danger" })
</div>
</div>

<div class="form-group">
@Html.LabelFor(model => model.Description, htmlAttributes: new { @class = "control-label col-md-2" })
<div class="col-md-10">
@Html.EditorFor(model => model.Description, new { htmlAttributes = new { @class = "form-control" } })
@Html.ValidationMessageFor(model => model.Description, "", new { @class = "text-danger" })
</div>
</div>

<div class="form-group">
<div class="col-md-offset-2 col-md-10">
<input type="submit" value="保存" class="btn btn-default" />
</div>
</div>
</div>
}

@section Scripts {
@Scripts.Render("~/bundles/jqueryval")
}
3)、添加提交数据的接收处理方法
在控制器中添加post方式的提交处理方法Modify方法。
[HttpPost]
[ValidateAntiForgeryToken]
public ActionResult Modify(Role role)
{
if (ModelState.IsValid)
{
var _resp = roleManager.Update(role);
if (_resp.Code == 1) return View("Prompt", new Prompt()
{
Title = "修改角色成功",
Message = "你已成功修改了角色【" + role.Name + "】",
Buttons = new List<string>() { "<a href=\"" + Url.Action("Index", "Role") + "\" class=\"btn btn-default\">角色管理</a>", "<a href=\"" + Url.Action("Modify", "Role", new { id = role.RoleID }) + "\" class=\"btn btn-default\">查看</a>", "<a href=\"" + Url.Action("Add", "Role") + "\" class=\"btn btn-default\">添加</a>" }
});
else return View("Prompt", new Prompt()
{
Title = "修改角色失败",
Message = "失败原因:"+ _resp.Message,
Buttons = new List<string>() { "<a href=\"" + Url.Action("Index", "Role") + "\" class=\"btn btn-default\">角色管理</a>", "<a href=\"" + Url.Action("Modify", "Role", new { id = role.RoleID }) + "\" class=\"btn btn-default\">返回</a>"}
});
}
else return View(role);
}
6、删除角色
在控制器中添加Modify方法。
/// <summary>
/// 删除【Json】
/// </summary>
/// <param name="id">RoleID</param>
/// <returns></returns>
[HttpPost]
public JsonResult DeleteJson(int id)
{
return Json(roleManager.Delete(id));
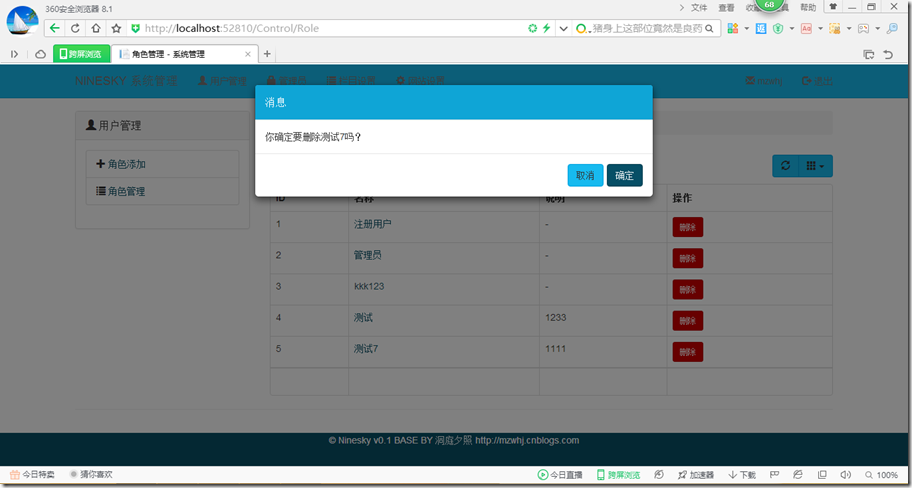
}角色功能完成,按F5浏览器中预览效果

---------------------------------------------------------------------------------------
代码见:https://ninesky.codeplex.com/SourceControl/latest
代码下载:https://ninesky.codeplex.com 点击SOURCE CODE 点击Download下载源文件。

相关文章推荐
- lamp环境搭建
- 如何成为一名java架构师
- Corosync+Pacemaker+Isici实现MySQL的高可用
- ActiveMQ实现负载均衡+高可用部署方案
- 视觉直观感受 7 种常用的排序算法
- banq 质疑Lambda架构
- 九天鸟p2p网贷系统的架构设计
- Lambda架构与推荐在电商网站实践
- 网站缓存技术
- hadoop 实战——网站日志数据分析
- 一个适合初学者学习Web开发的网站(入门到精通)
- 程序猿关注的微信公众号和网站--小结
- Java中常用的网站
- 部署网站常用
- VR相关网站
- Backbone源码分析-Backbone架构+流程图
- rabbitmq 学习网站
- 漫谈架构4
- 漫谈架构3
- HA高可用集群测试过程 及 因为hostname无法启动heartbeat