使用nexus、ant和ivy建立开发环境
2015-11-01 00:00
513 查看
摘要: 利用nexus搭建本地仓库,ant和ivy进行打包、依赖管理
新公司技术部门已经有半年了,目前项目管理还是使用svn管理所有的源码和依赖,jar包直接丢到svn的lib目录下,每次公共jar包更新时,由于目前使用的jackson使用默认的配置,必须更新每个项目的jar包,公共依赖越来越有必要,于是趁周末研究了相关的工具使用,笔记整理如下:
直接解压,然后通过cmd切换目前到nexus的bin目录,执行
即可将nexus安装为windows服务,然后再用
即可启动服务,正常安装和启动如下:

如果出现如下异常信息:

请用管理员权限运行CMD即可。
启动后使用:http://localhost:8081/nexus 打开主页,默认管理员:密码是admin:admin123
###ivy-setting.xml
此文件主要配置nexus的认证信息,用于公共jar包的发布;以及ivy依赖的仓库地址。
###ivy.xml
此文件主要是设置发布的jar包信息和工程的依赖信息,其中依赖包加上conf="default"将不会引入resources.jar和doc.jar
###ivy-settings.properties
主要项目的信息,便于ivy.xml和ivy-setting.xml在各个工程的相对通用。
###build.xml
###build.xml的target说明
download-ivy:下载指定的ivy.jar
init-ivy:引入ivy.jar,之后才能ivy相关的ant命令
clean-lib:清理ivy的cache,重新从依赖库下载jar包
get-lib:下载依赖包
publish:发布公告jar包
新公司技术部门已经有半年了,目前项目管理还是使用svn管理所有的源码和依赖,jar包直接丢到svn的lib目录下,每次公共jar包更新时,由于目前使用的jackson使用默认的配置,必须更新每个项目的jar包,公共依赖越来越有必要,于是趁周末研究了相关的工具使用,笔记整理如下:
nexus搭建
在nexus官网下载最新版的nexus:nexus-2.11.4-01-bundle.zip直接解压,然后通过cmd切换目前到nexus的bin目录,执行
nexus install
即可将nexus安装为windows服务,然后再用
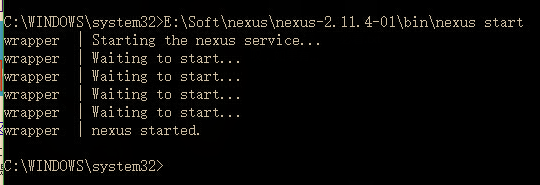
nexus start
即可启动服务,正常安装和启动如下:
如果出现如下异常信息:
请用管理员权限运行CMD即可。
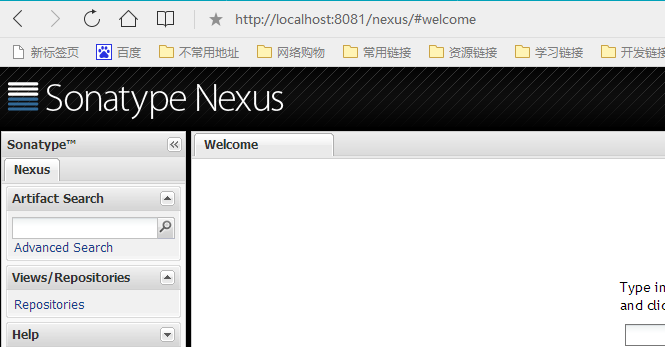
启动后使用:http://localhost:8081/nexus 打开主页,默认管理员:密码是admin:admin123
###ivy-setting.xml
此文件主要配置nexus的认证信息,用于公共jar包的发布;以及ivy依赖的仓库地址。
<ivysettings>
<properties file="${basedir}/ivy-settings.properties"/>
<settings defaultResolver="local"/>
<credentials host="127.0.0.1" username="${repo.user}" passwd="${repo.user.password}" realm="Sonatype Nexus Repository Manager"/>
<property name="nexus-public" value="${repo.url}/content/groups/public"/>
<property name="nexus-releases" value="${repo.url}/content/repositories/releases"/>
<property name="nexus-snapshots" value="${repo.url}/content/repositories/snapshots"/>
<resolvers>
<ibiblio name="local" m2compatible="true" root="${nexus-public}"/>
<ibiblio name="releases" m2compatible="true" root="${nexus-releases}"/>
<ibiblio name="snapshots" m2compatible="true" root="${nexus-snapshots}"/>
</resolvers>
</ivysettings>
###ivy.xml
此文件主要是设置发布的jar包信息和工程的依赖信息,其中依赖包加上conf="default"将不会引入resources.jar和doc.jar
<ivy-module version="2.0">
<info organisation="${organisation}.2" module="${module}"/>
<publications>
<artifact name="${module}" type="jar"/>
</publications>
<dependencies>
<dependency org="commons-lang" name="commons-lang" rev="2.0" conf="default"/>
<dependency org="org.springframework" name="spring-web" rev="4.1.8.RELEASE" conf="default"/>
<dependency org="commons-cli" name="commons-cli" rev="1.0" conf="default"/>
<dependency org="com.ichson" name="ichson-um" rev="2.0" conf="default"/>
</dependencies>
</ivy-module>
###ivy-settings.properties
主要项目的信息,便于ivy.xml和ivy-setting.xml在各个工程的相对通用。
organisation=com.ichson
module=ichson-um
pubrevision=2.0
repo.url=http://127.0.0.1:8081/nexus
repo.user=admin
repo.user.password=admin123
###build.xml
<?xml version="1.0" encoding="UTF-8"?>
<project xmlns:ivy="antlib:org.apache.ivy.ant" name="test-ivy" default="init-ivy"
basedir="." xmlns="antlib:org.apache.tools.ant">
<property name="ivy.install.version" value="2.4.0"/>
<property name="ivy.home" value="${user.home}/.ant"/>
<property name="ivy.jar.dir" value="${ivy.home}/lib"/>
<property name="ivy.jar.file" value="${ivy.jar.dir}/ivy.jar"/>
<condition property="ivy.exist">
<available file="${ivy.jar.file}"/>
</condition>

<target name="download-ivy" if="!ivy.exist">
<echo message="ivy.exist:${ivy.exist}"></echo>
<mkdir dir="${ivy.jar.dir}"/>
<get
src="http://maven.oschina.net/service/local/repositories/central/content/org/apache/ivy/ivy/${ivy.install.version}/ivy-${ivy.install.version}.jar"
dest="${ivy.jar.file}" usetimestamp="true"/>
</target>
<target name="init-ivy" depends="download-ivy">
<path id="ivy.lib.path">
<fileset dir="${ivy.jar.dir}" includes="*.jar"/>
</path>
<taskdef resource="org/apache/ivy/ant/antlib.xml" uri="antlib:org.apache.ivy.ant"
classpathref="ivy.lib.path"/>
<ivy:settings file="${basedir}/ivy-settings.xml"/>
</target>

<target name="clean-lib" depends="init-ivy">
<ivy:cleancache/>
<delete dir="lib"></delete>
</target>

<target name="get-lib" depends="init-ivy">
<ivy:cleancache/>
<ivy:retrieve />
</target>

<target name="publish" description="publish" depends="init-ivy">
<ivy:retrieve/>
<ivy:publish resolver="releases" pubrevision="${pubrevision}"
overwrite="true" update="true" forcedeliver="true" status="release">
<artifacts pattern="dist/[module].[ext]"/>
</ivy:publish>
</target>
</project>
###build.xml的target说明
download-ivy:下载指定的ivy.jar
init-ivy:引入ivy.jar,之后才能ivy相关的ant命令
clean-lib:清理ivy的cache,重新从依赖库下载jar包
get-lib:下载依赖包
publish:发布公告jar包

相关文章推荐
- JavaScript 组件之旅(三):用 Ant 构建组件
- 使用YUI+Ant 实现JS CSS压缩
- ubuntu 14.04 安装 apache ant教程
- Windows下apache ant安装、环境变量配置教程
- java ant 配置及构建项目图文教程
- ant使用指南详细入门教程
- ANT集成SVNANT访问SVN(Subversion)
- 【笔记】试玩 cocos2d-x-3.0beta on android
- 使用Ant构建SSH项目(Intellij IDEA版)
- Android ANT多渠道打包
- maven解决第三方jar部署问题
- ant 编译报 Cannot load 63-bit SWT libraries on 32-...
- 使用Ant构建简单项目
- Android项目导出jar包的小技巧
- Ant编译android,并Proguard代码混淆,v4混淆配置
- Ant基础知识
- Ant小总结
- Maven的使用,Nexus建立本地仓库以及Eclipse导入Maven项目(一): 准备篇
- Maven仓库之安装Nexus