Tutorial #Facebook Relay文档翻译#
2015-09-23 21:22
411 查看
原文地址:Tutorial
上一篇 Getting Start
Relay文档翻译目录
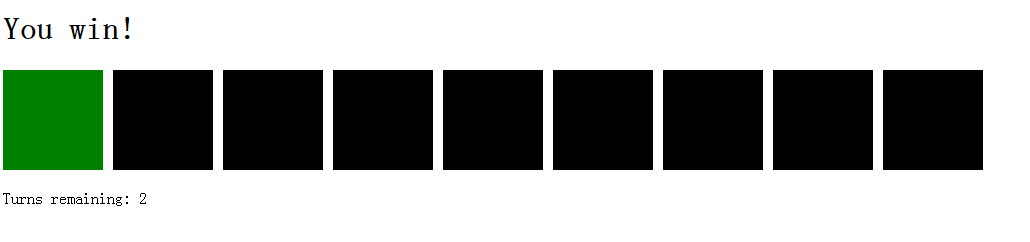
In this tutorial, we will build a game using GraphQL mutations. The goal of the game is to find a hidden treasure in a grid of 9 squares. We will give players three tries to find the treasure. This should give us an end-to-end look at Relay – from the GraphQL schema on the server, to the React application on the client.
在本篇教程中,我们将用GraphQL mutations构建一个小游戏。游戏的目标是在9个格子内找到1个宝贝。玩家共有3次机会。它将带你领略Relay的全貌,从服务器端的GraphQL schema,到客户端的React应用程序。运行后截图如下:
我们以Relay Start Kit为基础来构建该应用
我们需要藏匿宝贝的地方,可以检查宝贝的隐藏地点,还可以追踪玩家剩余的挑战次数。简单起见,我们就把这些数据直接存放于内存。
What we have written here is a mock database interface. We can imagine hooking this up to a real database, but for now let’s move on.
以上代码是模拟了数据库接口,我们可以假想它为一个真实的数据库。
an associated set of resolve methods that know how to fetch data. We will use
graphql-js and
graphql-relay-js to build our
schema.
一个GraphQL schema包含了数据模型的描述,并提供了一组相关的解析方法,用于说明如何获取所需数据。我们使用graphql-js 和
graphql-relay-js 构建schema。
Let’s open up the starter kit’s schema, and replace the database imports with the ones we just created:
我们打开starter kit的schema,用我们刚创建的模拟数据库替换代码中的database import。
At this point, you can delete everything up until
现在你可以删除
Next, let’s define a node interface and type. We need only provide a way for Relay to map from an object to the GraphQL type associated with that object, and from a global ID to the object it points to:
接下来,我们通过nodeDefinitions方法(graphql-relay.js提供的帮助方法)定义一个node interface和type。我们需要的是给Relay提供一种方式,可以从object映射到与之对应的GraphQL type,还有可以通过global ID得到与之对应的对象。
Next, let’s define our game and hiding spot types, and the fields that are available on each.
接下来,我们定义game type和hiding spot type,以及定义在它们上的有效fields。
Since one game can have many hiding spots, we need to create a connection that we can use to link them together.
因为一个游戏可以有很多藏匿地点(格子),我们需要创建一个connection用于建立它们之间的联系。
注解:connectionDefinitions参见graphql-relay.js 解释一下该方法返回connectionType,名字叫hidingSpotConnection。用于表示关系的,例如刚才gameType中,hidingSpots的类型指定为hidingSpotConnection,hidingSpotConnection由hidingSpotType组成。即反映了hidingSpots由hidingSpot组成,这里可以理解为一对多的关系。
Now let’s associate these types with the root query type.
现在我们这些types与root query type关联起来。root query是schema的入口。
With the queries out of the way, let’s start in on our only mutation: the one that spends a turn by checking a spot for treasure. Here, we define the input to the mutation (the id of a spot to check for treasure) and a list of all of the possible fields that the client might want updates about after the mutation has taken place. Finally, we implement a method that performs the underlying mutation.
queries我们准备好了,接下来处理mutation。该应用中的mutation是用户每点击一次格子检查是否有宝贝,将使用掉一次挑战机会。我们定义了mutation的input为格子的ID,和mutation发生改变后用户还可以点击的格子列表。我们用下述方法实现它:
Let’s associate the mutation we just created with the root mutation type:
接下来将该mutation与root mutation type关联起来。
Finally, we construct our schema (whose starting query type is the query type we defined above) and export it.
最后,我们构建schema并且export它,正如你所见,它的入口query被配置为queryType,mutation被配置为mutationType。
在继续之前,我们通过Realy.QL提供的转码工具,将schema序列化为JSON,然后启动服务:
编辑
Next, let’s create a file in
之后,我们创建
Finally, let’s tie it all together in
最后,我们在
A working copy of the treasure hunt can be found in the
例子的完整代码可以在
Now that we’ve gone end-to-end with Relay, let’s dive into more detail in the guides section.
我们完成了Relay的概要之旅,接下来深入的学习每一个章节吧。
上一篇 Getting Start
Relay文档翻译目录
In this tutorial, we will build a game using GraphQL mutations. The goal of the game is to find a hidden treasure in a grid of 9 squares. We will give players three tries to find the treasure. This should give us an end-to-end look at Relay – from the GraphQL schema on the server, to the React application on the client.
在本篇教程中,我们将用GraphQL mutations构建一个小游戏。游戏的目标是在9个格子内找到1个宝贝。玩家共有3次机会。它将带你领略Relay的全貌,从服务器端的GraphQL schema,到客户端的React应用程序。运行后截图如下:
Warm up
Let’s start a project using the Relay Starter Kit as a base.我们以Relay Start Kit为基础来构建该应用
git clone https://github.com/relayjs/relay-starter-kit.git relay-treasurehunt
cd relay-treasurehunt
npm install
A simple database
We need a place to hide our treasure, a way to check hiding spots for treasure, and a way to track our turns remaining. For the purposes of this tutorial, we’ll hide these data in memory.我们需要藏匿宝贝的地方,可以检查宝贝的隐藏地点,还可以追踪玩家剩余的挑战次数。简单起见,我们就把这些数据直接存放于内存。
/**
* ./data/database.js
*  代码为es6语法
*/

// Model types
export class Game extends Object {}
export class HidingSpot extends Object {}

// Mock data
var game = new Game();
game.id = '1';

var hidingSpots = [];
(function() {
var hidingSpot;
var indexOfSpotWithTreasure = Math.floor(Math.random() * 9);//随机取0-9之间一个数字作为宝贝藏匿地点
for (var i = 0; i < 9; i++) {
hidingSpot = new HidingSpot();
hidingSpot.id = `${i}`;
hidingSpot.hasTreasure = (i === indexOfSpotWithTreasure);
hidingSpot.hasBeenChecked = false;
hidingSpots.push(hidingSpot);
}
})();

var turnsRemaining = 3;

export function checkHidingSpotForTreasure(id) {
if (hidingSpots.some(hs => hs.hasTreasure && hs.hasBeenChecked)) {
return;
}
turnsRemaining--;
var hidingSpot = getHidingSpot(id);
hidingSpot.hasBeenChecked = true;
};
export function getHidingSpot(id) {
return hidingSpots.find(hs => hs.id === id)
}
export function getGame() { return game; }
export function getHidingSpots() { return hidingSpots; }
export function getTurnsRemaining() { return turnsRemaining; }
What we have written here is a mock database interface. We can imagine hooking this up to a real database, but for now let’s move on.
以上代码是模拟了数据库接口,我们可以假想它为一个真实的数据库。
Authoring a schema
A GraphQL schema describes your data model, and provides a GraphQL server withan associated set of resolve methods that know how to fetch data. We will use
graphql-js and
graphql-relay-js to build our
schema.
一个GraphQL schema包含了数据模型的描述,并提供了一组相关的解析方法,用于说明如何获取所需数据。我们使用graphql-js 和
graphql-relay-js 构建schema。
Let’s open up the starter kit’s schema, and replace the database imports with the ones we just created:
我们打开starter kit的schema,用我们刚创建的模拟数据库替换代码中的database import。
/**
* ./data/schema.js
*/

/* ... */

import {
Game,
HidingSpot,
checkHidingSpotForTreasure,
getGame,
getHidingSpot,
getHidingSpots,
getTurnsRemaining,
} from './database';
At this point, you can delete everything up until
queryTypein
./data/schema.js.
现在你可以删除
./data/schema.js中
from './database'以下
queryType以上的全部代码。
Next, let’s define a node interface and type. We need only provide a way for Relay to map from an object to the GraphQL type associated with that object, and from a global ID to the object it points to:
接下来,我们通过nodeDefinitions方法(graphql-relay.js提供的帮助方法)定义一个node interface和type。我们需要的是给Relay提供一种方式,可以从object映射到与之对应的GraphQL type,还有可以通过global ID得到与之对应的对象。
var {nodeInterface, nodeField} = nodeDefinitions(
//第一个方法,通过globalId得到“数据库”中的对象
(globalId) => {
var {type, id} = fromGlobalId(globalId);
if (type === 'Game') {
return getGame(id);
} else if (type === 'HidingSpot') {
return getHidingSpot(id);
} else {
return null;
}
},
//第二个方法,通过object得到对应的GraphQL type
(obj) => {
if (obj instanceof Game) {
return gameType;
} else if (obj instanceof HidingSpot)  {
return hidingSpotType;
} else {
return null;
}
}
);
Next, let’s define our game and hiding spot types, and the fields that are available on each.
接下来,我们定义game type和hiding spot type,以及定义在它们上的有效fields。
// GraphQLObjectType来自graphql.js
var gameType = new GraphQLObjectType({
name: 'Game',
description: 'A treasure search game 一个寻宝游戏',
fields: () => ({
id: globalIdField('Game'),
hidingSpots: {
type: hidingSpotConnection,
description: 'Places where treasure might be hidden 用于存放宝贝的地方,对应数据库中hidingSpots数组',
args: connectionArgs,
resolve: (game, args) => connectionFromArray(getHidingSpots(), args),
},
turnsRemaining: {
type: GraphQLInt,
description: 'The number of turns a player has left to find the treasure 玩家剩余的挑战次数',
resolve: () => getTurnsRemaining(),
},
}),
interfaces: [nodeInterface],
});

var hidingSpotType = new GraphQLObjectType({
name: 'HidingSpot',
description: 'A place where you might find treasure 具体存放宝贝的格子,就是那9个格子的任意其一',
fields: () => ({
id: globalIdField('HidingSpot'),
hasBeenChecked: {
type: GraphQLBoolean,
description: 'True if this spot has already been checked for treasure 如果为真表示,该格子已经检查过了',
resolve: (hidingSpot) => hidingSpot.hasBeenChecked,
},
hasTreasure: {
type: GraphQLBoolean,
description: 'True if this hiding spot holds treasure 如果为真表示,宝贝藏于该格子中',
resolve: (hidingSpot) => {
if (hidingSpot.hasBeenChecked) {
return hidingSpot.hasTreasure;
} else {
return null;  // Shh... it's a secret!
}
},
},
}),
interfaces: [nodeInterface],
});
Since one game can have many hiding spots, we need to create a connection that we can use to link them together.
因为一个游戏可以有很多藏匿地点(格子),我们需要创建一个connection用于建立它们之间的联系。
var {connectionType: hidingSpotConnection} =
connectionDefinitions({name: 'HidingSpot', nodeType: hidingSpotType});
注解:connectionDefinitions参见graphql-relay.js 解释一下该方法返回connectionType,名字叫hidingSpotConnection。用于表示关系的,例如刚才gameType中,hidingSpots的类型指定为hidingSpotConnection,hidingSpotConnection由hidingSpotType组成。即反映了hidingSpots由hidingSpot组成,这里可以理解为一对多的关系。
var gameType = new GraphQLObjectType({
// ...
hidingSpots: {
type: hidingSpotConnection,
Now let’s associate these types with the root query type.
现在我们这些types与root query type关联起来。root query是schema的入口。
var queryType = new GraphQLObjectType({
name: 'Query',
fields: () => ({
node: nodeField,
game: {
type: gameType,
resolve: () => getGame(),
},
}),
});
With the queries out of the way, let’s start in on our only mutation: the one that spends a turn by checking a spot for treasure. Here, we define the input to the mutation (the id of a spot to check for treasure) and a list of all of the possible fields that the client might want updates about after the mutation has taken place. Finally, we implement a method that performs the underlying mutation.
queries我们准备好了,接下来处理mutation。该应用中的mutation是用户每点击一次格子检查是否有宝贝,将使用掉一次挑战机会。我们定义了mutation的input为格子的ID,和mutation发生改变后用户还可以点击的格子列表。我们用下述方法实现它:
var CheckHidingSpotForTreasureMutation = mutationWithClientMutationId({
name: 'CheckHidingSpotForTreasure',
inputFields: {
id: { type: new GraphQLNonNull(GraphQLID) },
},
outputFields: {
hidingSpot: {
type: hidingSpotType,
resolve: ({localHidingSpotId}) => getHidingSpot(localHidingSpotId),
},
game: {
type: gameType,
resolve: () => getGame(),
},
},
mutateAndGetPayload: ({id}) => {
var localHidingSpotId = fromGlobalId(id).id;
checkHidingSpotForTreasure(localHidingSpotId);
return {localHidingSpotId};
},
});
Let’s associate the mutation we just created with the root mutation type:
接下来将该mutation与root mutation type关联起来。
var mutationType = new GraphQLObjectType({
name: 'Mutation',
fields: () => ({
checkHidingSpotForTreasure: CheckHidingSpotForTreasureMutation,
}),
});
Finally, we construct our schema (whose starting query type is the query type we defined above) and export it.
最后,我们构建schema并且export它,正如你所见,它的入口query被配置为queryType,mutation被配置为mutationType。
export var Schema = new GraphQLSchema({
query: queryType,
mutation: mutationType
});
Processing the schema
Before going any further, we need to serialize our executable schema to JSON for use by the Relay.QL transpiler, then start up the server. From the command line:在继续之前,我们通过Realy.QL提供的转码工具,将schema序列化为JSON,然后启动服务:
npm run update-schema
npm start
Writing the game
Let’s tweak the file./routes/AppHomeRoute.jsto anchor our game to the
gameroot field of the schema:
编辑
./routes/AppHomeRoute.js让game与schema中的game关联,参见Relay.Route语法。
export default class extends Relay.Route {
static path = '/';
static queries = {
game: () => Relay.QL`query { game }`,
};
static routeName = 'AppHomeRoute';
}
Next, let’s create a file in
./mutations/CheckHidingSpotForTreasureMutation.jsand create subclass of
Relay.Mutationcalled
CheckHidingSpotForTreasureMutationto hold our mutation implementation:
之后,我们创建
./mutations/CheckHidingSpotForTreasureMutation.js文件,定义继承自
Relay.Mutation的
CheckHidingSpotForTreasureMutation类,在其中实现该应用的mutation逻辑。
export default class CheckHidingSpotForTreasureMutation extends Relay.Mutation {
static fragments = {
game: () => Relay.QL`
fragment on Game {
id,
turnsRemaining,
}
`,
hidingSpot: () => Relay.QL`
fragment on HidingSpot {
id,
}
`,
};
getMutation() {
return Relay.QL`mutation{checkHidingSpotForTreasure}`;
}
getCollisionKey() {
return `check_${this.props.game.id}`;
}
getFatQuery() {
return Relay.QL`
fragment on CheckHidingSpotForTreasurePayload {
hidingSpot {
hasBeenChecked,
hasTreasure,
},
game {
turnsRemaining,
},
}
`;
}
getConfigs() {
return [{
type: 'FIELDS_CHANGE',
fieldIDs: {
hidingSpot: this.props.hidingSpot.id,
game: this.props.game.id,
},
}];
}
getVariables() {
return {
id: this.props.hidingSpot.id,
};
}
getOptimisticResponse() {
return {
game: {
turnsRemaining: this.props.game.turnsRemaining - 1,
},
hidingSpot: {
id: this.props.hidingSpot.id,
hasBeenChecked: true,
},
};
}
}
Finally, let’s tie it all together in
./components/App.js:
最后,我们在
./components/App.js将他们都装载起来。
import CheckHidingSpotForTreasureMutation from '../mutations/CheckHidingSpotForTreasureMutation';

class App extends React.Component {
_getHidingSpotStyle(hidingSpot) {
var color;
if (this.props.relay.hasOptimisticUpdate(hidingSpot)) {
color = 'lightGrey';
} else if (hidingSpot.hasBeenChecked) {
if (hidingSpot.hasTreasure) {
color = 'green';
} else {
color = 'red';
}
} else {
color = 'black';
}
return {
backgroundColor: color,
cursor: this._isGameOver() ? null : 'pointer',
display: 'inline-block',
height: 100,
marginRight: 10,
width: 100,
};
}
_handleHidingSpotClick(hidingSpot) {
if (this._isGameOver()) {
return;
}
Relay.Store.update(
new CheckHidingSpotForTreasureMutation({
game: this.props.game,
hidingSpot,
})
);
}
_hasFoundTreasure() {
return (
this.props.game.hidingSpots.edges.some(edge => edge.node.hasTreasure)
);
}
_isGameOver() {
return !this.props.game.turnsRemaining || this._hasFoundTreasure();
}
renderGameBoard() {
return this.props.game.hidingSpots.edges.map(edge => {
return (
<div
onClick={this._handleHidingSpotClick.bind(this, edge.node)}
style={this._getHidingSpotStyle(edge.node)}
/>
);
});
}
render() {
var headerText;
if (this.props.relay.getPendingTransactions(this.props.game)) {
headerText = '\u2026';
} else if (this._hasFoundTreasure()) {
headerText = 'You win!';
} else if (this._isGameOver()) {
headerText = 'Game over!';
} else {
headerText = 'Find the treasure!';
}
return (
<div>
<h1>{headerText}</h1>
{this.renderGameBoard()}
<p>Turns remaining: {this.props.game.turnsRemaining}</p>
</div>
);
}
}

export default Relay.createContainer(App, {
fragments: {
game: () => Relay.QL`
fragment on Game {
turnsRemaining,
hidingSpots(first: 9) {
edges {
node {
hasBeenChecked,
hasTreasure,
id,
${CheckHidingSpotForTreasureMutation.getFragment('hidingSpot')},
}
}
},
${CheckHidingSpotForTreasureMutation.getFragment('game')},
}
`,
},
});
A working copy of the treasure hunt can be found in the
./examples/directory.
例子的完整代码可以在
./examples/下找到。
Now that we’ve gone end-to-end with Relay, let’s dive into more detail in the guides section.
我们完成了Relay的概要之旅,接下来深入的学习每一个章节吧。

相关文章推荐
- Facebook's New Real-time Messaging System: HBase to Store 135+ Billion Messages a Month
- Facebook获得TechCrunch Crunchies 2009最佳奖
- 网页上facebook分享功能具体实现
- JSONP获取Twitter和Facebook文章数的具体步骤
- iOS 5 cocos2d 游戏开发 3ff8 实战:第4章 你的第一个游戏
- 7月国外最新技术文章翻译汇总(IT技术)
- windows phone 8 的新特性
- Facebook图片存储架构技术全解析
- Facebook揭秘HipHop项目 PHP程序大提速
- 使用Html5开发Android和iOS应用:HBuilder、Html5Plus、MUI
- 基于 Facebook 的开发笔记
- Titanium 快速入门
- Titanium 用户界面之布局结构及核心代码块
- 月光微博客
- 月光微博客
- 月光微博客
- 月光微博客
- 月光微博客