Android之LayoutInflater的使用
2014-06-23 14:26
260 查看
在实际工作中,事先写好的布局文件往往不能满足我们的需求,有时会根据情况在代码中自定义控件,这就需要用到LayoutInflater。
LayoutInflater在Android中是“扩展”的意思,作用类似于findViewById(),不同的是LayoutInflater是用来获得布局文件对象的,而
findViewById()是用来获得具体控件的。LayoutInflater经常在BaseAdapter的getView方法中用到,用来获取整个View并返回。
LayoutInflater的用法有三种:
第一种方法:
[java] view
plaincopy
LayoutInflater inflater = LayoutInflater.from(this);
View layout = inflater.inflate(R.layout.main, null);
第二种方法:
[java] view
plaincopy
LayoutInflater inflater = getLayoutInflater();
View layout = inflater.inflate(R.layout.main, null);
第三种方法:
[java] view
plaincopy
LayoutInflater inflater = (LayoutInflater) getSystemService(LAYOUT_INFLATER_SERVICE);
View layout = inflater.inflate(R.layout.main, null);
第一种方法的本质就是调用第三种方法,而第二种方法和第三种方法有什么区别,我还真不知道,有哪位知道的请留言指教啊!
下面是简单的使用示例:
[java] view
plaincopy
public class LayoutInflaterActivity extends Activity {
private EditText et;
private Button btn;
@Override
public void onCreate(Bundle savedInstanceState) {
super.onCreate(savedInstanceState);
// 第一种方法
LayoutInflater inflater = LayoutInflater.from(this);
View layout = inflater.inflate(R.layout.main, null);
// 第二种方法
// LayoutInflater inflater = getLayoutInflater();
// View layout = inflater.inflate(R.layout.main, null);
// 第三种方法
// LayoutInflater inflater = (LayoutInflater)getSystemService(LAYOUT_INFLATER_SERVICE);
// View layout = inflater.inflate(R.layout.main, null);
// 这里是通过事先获得的布局文件来实例化具体控件,并且可以根据情况自定义控件
et = (EditText) layout.findViewById(R.id.edittext);
et.setBackgroundColor(Color.YELLOW);
btn = (Button) layout.findViewById(R.id.btn);
btn.setBackgroundColor(Color.CYAN);
// 显示
setContentView(layout);
}
}
另外补充下,getSystemService是Activity中的方法,根据传入的name来取得对应的服务对象,这些服务名称参数都是Context类中的常量:
传入的Name 返回的对象 说明
WINDOW_SERVICE WindowManager 管理打开的窗口程序
LAYOUT_INFLATER_SERVICE LayoutInflater 取得xml里定义的view
ACTIVITY_SERVICE ActivityManager 管理应用程序的系统状态
POWER_SERVICE PowerManger 电源的服务
ALARM_SERVICE AlarmManager 闹钟的服务
NOTIFICATION_SERVICE NotificationManager 状态栏的服务
KEYGUARD_SERVICE KeyguardManager 键盘锁的服务
LOCATION_SERVICE LocationManager 位置的服务,如GPS
SEARCH_SERVICE SearchManager 搜索的服务
VEBRATOR_SERVICE Vebrator 手机震动的服务
CONNECTIVITY_SERVICE Connectivity 网络连接的服务
WIFI_SERVICE WifiManager Wi-Fi服务
TELEPHONY_SERVICE TeleponyManager 电话服务
在实际开发中LayoutInflater这个类还是非常有用的,它的作用类似于findViewById()。不同点是LayoutInflater是用来找res/layout/下的xml布局文件,并且实例化;而findViewById()是找xml布局文件下的具体widget控件(如Button、TextView等)。
具体作用:
1、对于一个没有被载入或者想要动态载入的界面,都需要使用LayoutInflater.inflate()来载入;
2、对于一个已经载入的界面,就可以使用Activiyt.findViewById()方法来获得其中的界面元素。
LayoutInflater 是一个抽象类,在文档中如下声明:
public abstract class LayoutInflater extends Object
获得 LayoutInflater 实例的三种方式
1. LayoutInflater inflater = getLayoutInflater();//调用Activity的getLayoutInflater()
2. LayoutInflater inflater = LayoutInflater.from(context);
3. LayoutInflater inflater = (LayoutInflater)context.getSystemService
(Context.LAYOUT_INFLATER_SERVICE);
其实,这三种方式本质是相同的,从源码中可以看出:
getLayoutInflater():
Activity 的 getLayoutInflater() 方法是调用 PhoneWindow 的getLayoutInflater()方法,看一下该源代码:
public PhoneWindow(Context context)
{
super(context);
mLayoutInflater = LayoutInflater.from(context);
}
可以看出它其实是调用 LayoutInflater.from(context)。
LayoutInflater.from(context):
public static LayoutInflater from(Context context)
{
LayoutInflater LayoutInflater = (LayoutInflater) context.getSystemService
(Context.LAYOUT_INFLATER_SERVICE);
if (LayoutInflater == null)
{
throw new AssertionError("LayoutInflater not found.");
}
return LayoutInflater;
}
可以看出它其实调用 context.getSystemService()。
结论:所以这三种方式最终本质是都是调用的Context.getSystemService()。
另外getSystemService()是Android很重要的一个API,它是Activity的一个方法,根据传入的NAME来取得对应的Object,然后转换成相应的服务对象。以下介绍系统相应的服务。
传入的Name 返回的对象
说明
WINDOW_SERVICE WindowManager
管理打开的窗口程序
LAYOUT_INFLATER_SERVICE
LayoutInflater 取得xml里定义的view
ACTIVITY_SERVICE ActivityManager
管理应用程序的系统状态
POWER_SERVICE PowerManger
电源的服务
ALARM_SERVICE AlarmManager
闹钟的服务
NOTIFICATION_SERVICE
NotificationManager
状态栏的服务
KEYGUARD_SERVICE KeyguardManager
键盘锁的服务
LOCATION_SERVICE LocationManager
位置的服务,如GPS
SEARCH_SERVICE SearchManager
搜索的服务
VEBRATOR_SERVICE Vebrator
手机震动的服务
CONNECTIVITY_SERVICE
Connectivity 网络连接的服务
WIFI_SERVICE WifiManager
Wi-Fi服务
TELEPHONY_SERVICE TeleponyManager
电话服务
inflate 方法
通过 sdk 的 api 文档,可以知道该方法有以下几种过载形式,返回值均是 View 对象,如下:
public View inflate (int resource, ViewGroup root)
public View inflate (XmlPullParser parser, ViewGroup root)
public View inflate (XmlPullParser parser, ViewGroup root, boolean attachToRoot)
public View inflate (int resource, ViewGroup root, boolean attachToRoot)
示意代码:
LayoutInflater inflater = (LayoutInflater)getSystemService(LAYOUT_INFLATER_SERVICE);
View view = inflater.inflate(R.layout.custom, (ViewGroup)findViewById(R.id.test));
//EditText editText = (EditText)findViewById(R.id.content);// error
EditText editText = (EditText)view.findViewById(R.id.content);
对于上面代码,指定了第二个参数 ViewGroup root,当然你也可以设置为 null 值。
注意:
·inflate 方法与 findViewById 方法不同;
·inflater 是用来找 res/layout 下的 xml 布局文件,并且实例化;
·findViewById() 是找具体 xml 布局文件中的具体 widget 控件(如:Button、TextView 等)。
在实际开发种LayoutInflater这个类还是非常有用的,它的作用类似于 findViewById(),
不同点是LayoutInflater是用来找layout下xml布局文件,并且实例化!而findViewById()是找具体xml下的具体 widget控件(如:Button,TextView等)。
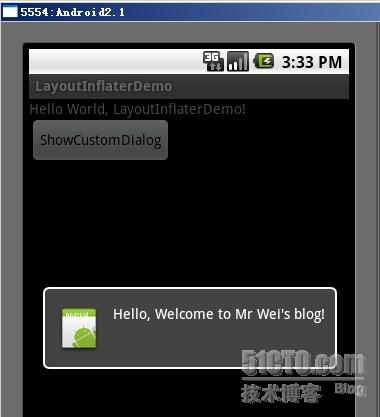
为了让大家容易理解我做了一个简单的Demo,主布局main.xml里有一个TextView和一个Button,当点击Button,出现 Dialog,而这个Dialog的布局方式是我们在layout目录下定义的custom_dialog.xml文件(里面左右分布,左边 ImageView,右边TextView)。
效果图如下:
下面我将详细的说明Demo的实现过程:
1、新建一个 Android工程,我们命名为LayoutInflaterDemo.
2、修改main.xml布局,里面主要在原来基础上增加了一个Button.代码如下:
3.定义对话框的布局方式,我们在layout目录下,新建一个名为 custom_dialog.xml文件具体代码如下:
4.修改主程序LayouInflaterDemo.java代码如下:
5、最后执行之,点击Button,将得到上述效果。
LayoutInflater用法
LayoutInflater是一个用来实例化XML布局为View对象
应用程序运行时会预先加载资源中的布局文件,如果layout布局中的资源比较多,会影响性能,所以可以选择LayoutInflater方式用的时候加载,这样减轻了应用程序运行时很多负担
从指定的XML资源中填充一个新的视图
参数resource:将要加载的XML布局id,例如R.layout.list_item
参数root:父视图,可选项,一般为Null
从给定的context获取LayoutInflater
可以通过如下三种方式获取LayoutInflater
第一种:
第二种:与第一种方法相同,即from方法封装了getSystemService(...)等
第三种:getLayoutInflater()方法是Activity的方法,归根到底还是第一种方式
所以我们在加载布局的时候可以用setContentView直接设置,然后通过findViewById()来获取控件的id
例如:我们可以用4种方式加载main.xml布局文件,不过LayoutInflater一般多用于ListView等地方,
如BaseAdapter的getView()方法会用到:/article/5002860.html
使用setContentView(R.layout.main)设置布局后布局会立刻显示,而使用inflate()方法加载的布局文件得到的是一个View视图对象,在需要的时候再setContentView(view)即可。在Activity中一般只需要setContentView即可,如果是非Acitivity,则需要使用LayoutInflater来动态加载控制控件
MenuInflater用法
MenuInflater是用来加载menu布局文件的,与上面的类似
与LayoutInflater类似,应用程序运行时会预先加载资源中的布局文件,如果Menu布局中的资源比较多,会影响性能,所以可以选择MenuInflater方式用的时候加载,这样减轻了应用程序运行时很多负担
与LayoutInflater相比,MenuInflater用法要简单很多,它只有Activity.getMenuInflater()方法。
例如:
1、在res目录下创建menu文件夹,在里面创建mymenu.xml
2、重写onCreateOptionsMenu方法和onOptionsItemSelected方法之后,在onCreateOptionsMenu中使用MenuInflater加载布局
运行结果:

LayoutInflater在Android中是“扩展”的意思,作用类似于findViewById(),不同的是LayoutInflater是用来获得布局文件对象的,而
findViewById()是用来获得具体控件的。LayoutInflater经常在BaseAdapter的getView方法中用到,用来获取整个View并返回。
LayoutInflater的用法有三种:
第一种方法:
[java] view
plaincopy
LayoutInflater inflater = LayoutInflater.from(this);
View layout = inflater.inflate(R.layout.main, null);
第二种方法:
[java] view
plaincopy
LayoutInflater inflater = getLayoutInflater();
View layout = inflater.inflate(R.layout.main, null);
第三种方法:
[java] view
plaincopy
LayoutInflater inflater = (LayoutInflater) getSystemService(LAYOUT_INFLATER_SERVICE);
View layout = inflater.inflate(R.layout.main, null);
第一种方法的本质就是调用第三种方法,而第二种方法和第三种方法有什么区别,我还真不知道,有哪位知道的请留言指教啊!
下面是简单的使用示例:
[java] view
plaincopy
public class LayoutInflaterActivity extends Activity {
private EditText et;
private Button btn;
@Override
public void onCreate(Bundle savedInstanceState) {
super.onCreate(savedInstanceState);
// 第一种方法
LayoutInflater inflater = LayoutInflater.from(this);
View layout = inflater.inflate(R.layout.main, null);
// 第二种方法
// LayoutInflater inflater = getLayoutInflater();
// View layout = inflater.inflate(R.layout.main, null);
// 第三种方法
// LayoutInflater inflater = (LayoutInflater)getSystemService(LAYOUT_INFLATER_SERVICE);
// View layout = inflater.inflate(R.layout.main, null);
// 这里是通过事先获得的布局文件来实例化具体控件,并且可以根据情况自定义控件
et = (EditText) layout.findViewById(R.id.edittext);
et.setBackgroundColor(Color.YELLOW);
btn = (Button) layout.findViewById(R.id.btn);
btn.setBackgroundColor(Color.CYAN);
// 显示
setContentView(layout);
}
}
另外补充下,getSystemService是Activity中的方法,根据传入的name来取得对应的服务对象,这些服务名称参数都是Context类中的常量:
传入的Name 返回的对象 说明
WINDOW_SERVICE WindowManager 管理打开的窗口程序
LAYOUT_INFLATER_SERVICE LayoutInflater 取得xml里定义的view
ACTIVITY_SERVICE ActivityManager 管理应用程序的系统状态
POWER_SERVICE PowerManger 电源的服务
ALARM_SERVICE AlarmManager 闹钟的服务
NOTIFICATION_SERVICE NotificationManager 状态栏的服务
KEYGUARD_SERVICE KeyguardManager 键盘锁的服务
LOCATION_SERVICE LocationManager 位置的服务,如GPS
SEARCH_SERVICE SearchManager 搜索的服务
VEBRATOR_SERVICE Vebrator 手机震动的服务
CONNECTIVITY_SERVICE Connectivity 网络连接的服务
WIFI_SERVICE WifiManager Wi-Fi服务
TELEPHONY_SERVICE TeleponyManager 电话服务
在实际开发中LayoutInflater这个类还是非常有用的,它的作用类似于findViewById()。不同点是LayoutInflater是用来找res/layout/下的xml布局文件,并且实例化;而findViewById()是找xml布局文件下的具体widget控件(如Button、TextView等)。
具体作用:
1、对于一个没有被载入或者想要动态载入的界面,都需要使用LayoutInflater.inflate()来载入;
2、对于一个已经载入的界面,就可以使用Activiyt.findViewById()方法来获得其中的界面元素。
LayoutInflater 是一个抽象类,在文档中如下声明:
public abstract class LayoutInflater extends Object
获得 LayoutInflater 实例的三种方式
1. LayoutInflater inflater = getLayoutInflater();//调用Activity的getLayoutInflater()
2. LayoutInflater inflater = LayoutInflater.from(context);
3. LayoutInflater inflater = (LayoutInflater)context.getSystemService
(Context.LAYOUT_INFLATER_SERVICE);
其实,这三种方式本质是相同的,从源码中可以看出:
getLayoutInflater():
Activity 的 getLayoutInflater() 方法是调用 PhoneWindow 的getLayoutInflater()方法,看一下该源代码:
public PhoneWindow(Context context)
{
super(context);
mLayoutInflater = LayoutInflater.from(context);
}
可以看出它其实是调用 LayoutInflater.from(context)。
LayoutInflater.from(context):
public static LayoutInflater from(Context context)
{
LayoutInflater LayoutInflater = (LayoutInflater) context.getSystemService
(Context.LAYOUT_INFLATER_SERVICE);
if (LayoutInflater == null)
{
throw new AssertionError("LayoutInflater not found.");
}
return LayoutInflater;
}
可以看出它其实调用 context.getSystemService()。
结论:所以这三种方式最终本质是都是调用的Context.getSystemService()。
另外getSystemService()是Android很重要的一个API,它是Activity的一个方法,根据传入的NAME来取得对应的Object,然后转换成相应的服务对象。以下介绍系统相应的服务。
传入的Name 返回的对象
说明
WINDOW_SERVICE WindowManager
管理打开的窗口程序
LAYOUT_INFLATER_SERVICE
LayoutInflater 取得xml里定义的view
ACTIVITY_SERVICE ActivityManager
管理应用程序的系统状态
POWER_SERVICE PowerManger
电源的服务
ALARM_SERVICE AlarmManager
闹钟的服务
NOTIFICATION_SERVICE
NotificationManager
状态栏的服务
KEYGUARD_SERVICE KeyguardManager
键盘锁的服务
LOCATION_SERVICE LocationManager
位置的服务,如GPS
SEARCH_SERVICE SearchManager
搜索的服务
VEBRATOR_SERVICE Vebrator
手机震动的服务
CONNECTIVITY_SERVICE
Connectivity 网络连接的服务
WIFI_SERVICE WifiManager
Wi-Fi服务
TELEPHONY_SERVICE TeleponyManager
电话服务
inflate 方法
通过 sdk 的 api 文档,可以知道该方法有以下几种过载形式,返回值均是 View 对象,如下:
public View inflate (int resource, ViewGroup root)
public View inflate (XmlPullParser parser, ViewGroup root)
public View inflate (XmlPullParser parser, ViewGroup root, boolean attachToRoot)
public View inflate (int resource, ViewGroup root, boolean attachToRoot)
示意代码:
LayoutInflater inflater = (LayoutInflater)getSystemService(LAYOUT_INFLATER_SERVICE);
View view = inflater.inflate(R.layout.custom, (ViewGroup)findViewById(R.id.test));
//EditText editText = (EditText)findViewById(R.id.content);// error
EditText editText = (EditText)view.findViewById(R.id.content);
对于上面代码,指定了第二个参数 ViewGroup root,当然你也可以设置为 null 值。
注意:
·inflate 方法与 findViewById 方法不同;
·inflater 是用来找 res/layout 下的 xml 布局文件,并且实例化;
·findViewById() 是找具体 xml 布局文件中的具体 widget 控件(如:Button、TextView 等)。
在实际开发种LayoutInflater这个类还是非常有用的,它的作用类似于 findViewById(),
不同点是LayoutInflater是用来找layout下xml布局文件,并且实例化!而findViewById()是找具体xml下的具体 widget控件(如:Button,TextView等)。
为了让大家容易理解我做了一个简单的Demo,主布局main.xml里有一个TextView和一个Button,当点击Button,出现 Dialog,而这个Dialog的布局方式是我们在layout目录下定义的custom_dialog.xml文件(里面左右分布,左边 ImageView,右边TextView)。
效果图如下:
下面我将详细的说明Demo的实现过程:
1、新建一个 Android工程,我们命名为LayoutInflaterDemo.
2、修改main.xml布局,里面主要在原来基础上增加了一个Button.代码如下:
view plaincopy to clipboardprint?
<?xml version="1.0"
encoding="utf-8"?>
<LinearLayout
xmlns:android="http://schemas.android.com/apk/res/android"
android:orientation="vertical"
android:layout_width="fill_parent"
android:layout_height="fill_parent"
>
<TextView
android:layout_width="fill_parent"
android:layout_height="wrap_content"
android:text="@string/hello"
/>
<Button
android:id="@+id/button"
android:layout_width="wrap_content"
android:layout_height="wrap_content"
android:text="ShowCustomDialog"
/>
</LinearLayout>
3.定义对话框的布局方式,我们在layout目录下,新建一个名为 custom_dialog.xml文件具体代码如下:
view plaincopy to clipboardprint?
<?xml version="1.0"
encoding="utf-8"?>
<LinearLayout
xmlns:android="http://schemas.android.com/apk/res/android"
android:orientation="horizontal"
android:layout_width="fill_parent"
android:layout_height="fill_parent"
android:padding="10dp"
>
<ImageView android:id="@+id/image"
android:layout_width="wrap_content"
android:layout_height="fill_parent"
android:layout_marginRight="10dp"
/>
<TextView android:id="@+id/text"
android:layout_width="wrap_content"
android:layout_height="fill_parent"
android:textColor="#FFF"
/>
</LinearLayout>
4.修改主程序LayouInflaterDemo.java代码如下:
view plaincopy to clipboardprint?
package com.android.tutor;
import android.app.Activity;
import android.app.AlertDialog;
import android.content.Context;
import android.os.Bundle;
import android.view.LayoutInflater;
import android.view.View;
import android.view.View.OnClickListener;
import android.widget.Button;
import android.widget.ImageView;
import android.widget.TextView;
public class LayoutInflaterDemo extends Activity implements
OnClickListener {

private Button button;
public void onCreate(Bundle savedInstanceState) {
super.onCreate(savedInstanceState);
setContentView(R.layout.main);

button = (Button)findViewById(R.id.button);
button.setOnClickListener(this);
}
@Override
public void onClick(View v) {

showCustomDialog();
}

public void showCustomDialog()
{
AlertDialog.Builder builder;
AlertDialog alertDialog;
Context mContext = LayoutInflaterDemo.this;

//下面俩种方法都可以
////LayoutInflater inflater = getLayoutInflater();
LayoutInflater inflater = (LayoutInflater)
mContext.getSystemService(LAYOUT_INFLATER_SERVICE);
View layout = inflater.inflate(R.layout.custom_dialog,null);
TextView text = (TextView) layout.findViewById(R.id.text);
text.setText("Hello, Welcome to Mr Wei's blog!");
ImageView image = (ImageView) layout.findViewById(R.id.image);
image.setImageResource(R.drawable.icon);
builder = new AlertDialog.Builder(mContext);
builder.setView(layout);
alertDialog = builder.create();
alertDialog.show();
}
}
5、最后执行之,点击Button,将得到上述效果。
LayoutInflater用法
LayoutInflater是一个用来实例化XML布局为View对象
应用程序运行时会预先加载资源中的布局文件,如果layout布局中的资源比较多,会影响性能,所以可以选择LayoutInflater方式用的时候加载,这样减轻了应用程序运行时很多负担
public View inflate (int
resource, ViewGroup root)
从指定的XML资源中填充一个新的视图参数resource:将要加载的XML布局id,例如R.layout.list_item
参数root:父视图,可选项,一般为Null
public static LayoutInflater from (Context context)
从给定的context获取LayoutInflater可以通过如下三种方式获取LayoutInflater
第一种:
LayoutInflater inflater = (LayoutInflater)context.getSystemService(Context.LAYOUT_INFLATER_SERVICE);
View myView = inflater.inflate(R.layout.main, null);
第二种:与第一种方法相同,即from方法封装了getSystemService(...)等
LayoutInflater inflater = LayoutInflater.from(context);
View myView = inflater.inflate(R.layout.main, null);
第三种:getLayoutInflater()方法是Activity的方法,归根到底还是第一种方式
LayoutInflater inflater = getLayoutInflater();
View myView = inflater.inflate(R.layout.main, null);
所以我们在加载布局的时候可以用setContentView直接设置,然后通过findViewById()来获取控件的id
例如:我们可以用4种方式加载main.xml布局文件,不过LayoutInflater一般多用于ListView等地方,
如BaseAdapter的getView()方法会用到:/article/5002860.html
package com.loulijun.demo6;

import android.app.Activity;
import android.content.Context;
import android.os.Bundle;
import android.view.LayoutInflater;
import android.view.View;
import android.widget.Button;
import android.widget.TextView;

public class Demo6Activity extends Activity {
private Button btn;
private TextView tv;
@Override
public void onCreate(Bundle savedInstanceState) {
super.onCreate(savedInstanceState);
//----------第一种方式----------
//        setContentView(R.layout.main);
//        btn = (Button)findViewById(R.id.btn);
//        tv = (TextView)findViewById(R.id.tv);
//----------第二种方式----------
//        LayoutInflater inflater = getLayoutInflater();
//----------第三种方式----------
//        LayoutInflater inflater = LayoutInflater.from(this);
//----------第四种方式----------
LayoutInflater inflater = (LayoutInflater)this.getSystemService(
Context.LAYOUT_INFLATER_SERVICE);
View view = inflater.inflate(R.layout.main, null);
setContentView(view);
btn = (Button)view.findViewById(R.id.btn);
tv = (TextView)view.findViewById(R.id.tv);
btn.setOnClickListener(new Button.OnClickListener()
{

@Override
public void onClick(View v) {
//...
}

});
}
使用setContentView(R.layout.main)设置布局后布局会立刻显示,而使用inflate()方法加载的布局文件得到的是一个View视图对象,在需要的时候再setContentView(view)即可。在Activity中一般只需要setContentView即可,如果是非Acitivity,则需要使用LayoutInflater来动态加载控制控件
MenuInflater用法
MenuInflater是用来加载menu布局文件的,与上面的类似
与LayoutInflater类似,应用程序运行时会预先加载资源中的布局文件,如果Menu布局中的资源比较多,会影响性能,所以可以选择MenuInflater方式用的时候加载,这样减轻了应用程序运行时很多负担
与LayoutInflater相比,MenuInflater用法要简单很多,它只有Activity.getMenuInflater()方法。
例如:
1、在res目录下创建menu文件夹,在里面创建mymenu.xml
<?xml version="1.0" encoding="utf-8"?>
<menu xmlns:android="http://schemas.android.com/apk/res/android" >
<item
android:title="打电话"
android:icon="@android:drawable/ic_menu_call"
android:id="@+id/action_call"/>
  <item
android:title="照相"
android:icon="@android:drawable/ic_menu_camera"
android:id="@+id/action_camera"/>
  <item
android:title="添加"
android:icon="@android:drawable/ic_menu_add"
android:id="@+id/action_add"/>
  <item
android:title="删除"
android:icon="@android:drawable/ic_menu_delete"
android:id="@+id/action_delete"/>
</menu>
2、重写onCreateOptionsMenu方法和onOptionsItemSelected方法之后,在onCreateOptionsMenu中使用MenuInflater加载布局
package com.loulijun.demo6;

import android.app.Activity;
import android.os.Bundle;
import android.view.Menu;
import android.view.MenuInflater;
import android.view.MenuItem;
import android.widget.Button;
import android.widget.TextView;

public class Demo6Activity extends Activity {
private Button btn;
private TextView tv;
@Override
public void onCreate(Bundle savedInstanceState) {
super.onCreate(savedInstanceState);
setContentView(R.layout.main);
}
@Override
public boolean onCreateOptionsMenu(Menu menu) {
MenuInflater inflater = getMenuInflater();
//填充菜单
inflater.inflate(R.menu.mymenu, menu);
return super.onCreateOptionsMenu(menu);
}
@Override
public boolean onOptionsItemSelected(MenuItem item) {
switch(item.getItemId())
{
case R.id.action_add:
//操作
break;
case R.id.action_call:
break;
case R.id.action_camera:
break;
case R.id.action_delete:
break;
}
return super.onOptionsItemSelected(item);
}

}
运行结果:

相关文章推荐
- Android高手进阶教程(五)之----Android 中LayoutInflater的使用!
- Android 中LayoutInflater的使用!
- Android高手进阶教程(五)之----Android 中LayoutInflater的使用!
- android 入门学习笔记 LayoutInflater的使用
- android中LayoutInflater的使用
- android中LayoutInflater的使用
- Android中利用LayoutInflater使用Dialog
- Android 中LayoutInflater的使用
- 【转】Android 中LayoutInflater的使用
- android中LayoutInflater的使用
- android LayoutInflater的使用
- Android高手进阶教程(五)之 ----Android 中LayoutInflater的使用
- Android高手进阶教程(五)之----Android 中LayoutInflater的使用!
- Android 中LayoutInflater的使用
- Android高手进阶教程(五)之----Android 中LayoutInflater的使用!
- android中LayoutInflater的使用
- Android高手进阶教程(五)之----Android 中LayoutInflater的使用!
- Android中LayoutInflater的使用 更新中....
- Android高手进阶教程(五)之----Android 中LayoutInflater的使用! (转)
- Android高手进阶教程(五)之----Android 中LayoutInflater的使用!