在Kentico CMS中使用jQuery集成图像缩放效果
2014-01-21 15:56
399 查看
在使用Kentico CMS进行网站内容建设的时候,你是否希望有这样的效果:当用户在你的网上商店浏览图像时,用户只要在图像区域移动光标,图像就随之出现放大或缩小的画面,从而可以看清更多的细节?通过下面简单的几步,你就可以做到:
一、复制以下脚本到你的母版页的<head>部分,即CMS Desk -> Content -> <root document> -> Master page 下面并保存它。注意该脚本引用了两个文件――multizoom.css和multizoom.js,所以一定要确保路径设置正确无误。点击jQuery Zoom Image Script下载这两个文件压缩包。
<pre class="brush: js;"><link rel="stylesheet" href="multizoom.css" type="text/css" />
<script type="text/javascript" src=\'#\'" //ajax.googleapis.com/ajax/libs/jquery/1.8/jquery.min.js"></script>
<script type="text/javascript" src=\'#\'" /p>
// Featured Image Zoomer (w/ optional multizoom and adjustable power)- By Dynamic Drive DHTML code library (www.dynamicdrive.com)
// Multi-Zoom code (c)2012 John Davenport Scheuer
// as first seen in http://www.dynamicdrive.com/forums/ // username: jscheuer1 - This Notice Must Remain for Legal Use
// Visit Dynamic Drive at http://www.dynamicdrive.com/ for this script and 100s more
</script>
<script type="text/javascript">
jQuery(document).ready(function($){
$('#image1').addimagezoom({ // single image zoom
zoomrange: [3, 10],
magnifiersize: [300,300],
magnifierpos: 'right',
cursorshade: true,
largeimage: 'hayden.jpg' //<-- No comma after last option!
})
$('#image2').addimagezoom() // single image zoom with default options
$('#multizoom1').addimagezoom({ // multi-zoom: options same as for previous Featured Image Zoomer's addimagezoom unless noted as '- new'
descArea: '#description', // description selector (optional - but required if descriptions are used) - new
speed: 1500, // duration of fade in for new zoomable images (in milliseconds, optional) - new
descpos: true, // if set to true - description position follows image position at a set distance, defaults to false (optional) - new
imagevertcenter: true, // zoomable image centers vertically in its container (optional) - new
magvertcenter: true, // magnified area centers vertically in relation to the zoomable image (optional) - new
zoomrange: [3, 10],
magnifiersize: [250,250],
magnifierpos: 'right',
cursorshadecolor: '#fdffd5',
cursorshade: true //<-- No comma after last option!
});
$('#multizoom2').addimagezoom({ // multi-zoom: options same as for previous Featured Image Zoomer's addimagezoom unless noted as '- new'
descArea: '#description2', // description selector (optional - but required if descriptions are used) - new
disablewheel: true // even without variable zoom, mousewheel will not shift image position while mouse is over image (optional) - new
//^-- No comma after last option!
});
})
<_/script></pre>
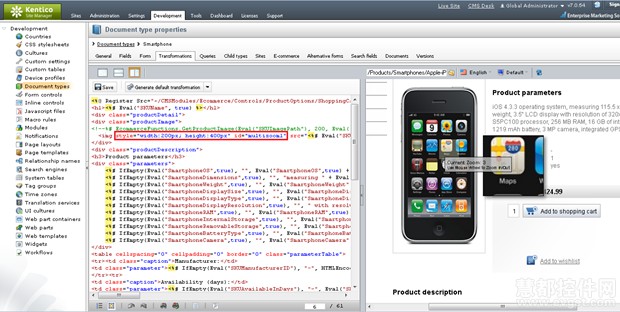
二、使用在上面代码中你定义的jQuery选择器为图像设置脚本。默认情况下,有4个选择器可供选择――‘image1’、‘image2’、‘multizoom1’、‘multizoom2’。图像需要明确定义尺寸(宽度和高度),这样就能确保脚本在任何时候都能依据原始图像的比例正确调整放大图像的大小。(选择器可用的所有选项都可以在官方网站www.dynamicdrive.com/dynamicindex4/featuredzoomer.htm 上找到)。
(点击查看大图)三、最后,你可能需要设置jQuery 到noConflict()模式使其能够正常运作。
该脚本可以免费用于个人或商业网站。
关于Kentico CMS更多资讯,尽在http ://www.evget.com/product/238/resource#p
本文出自 “非池中鱼” 博客,请务必保留此出处http://evgetlinj.blog.51cto.com/7755203/1353461
一、复制以下脚本到你的母版页的<head>部分,即CMS Desk -> Content -> <root document> -> Master page 下面并保存它。注意该脚本引用了两个文件――multizoom.css和multizoom.js,所以一定要确保路径设置正确无误。点击jQuery Zoom Image Script下载这两个文件压缩包。
<pre class="brush: js;"><link rel="stylesheet" href="multizoom.css" type="text/css" />
<script type="text/javascript" src=\'#\'" //ajax.googleapis.com/ajax/libs/jquery/1.8/jquery.min.js"></script>
<script type="text/javascript" src=\'#\'" /p>
// Featured Image Zoomer (w/ optional multizoom and adjustable power)- By Dynamic Drive DHTML code library (www.dynamicdrive.com)
// Multi-Zoom code (c)2012 John Davenport Scheuer
// as first seen in http://www.dynamicdrive.com/forums/ // username: jscheuer1 - This Notice Must Remain for Legal Use
// Visit Dynamic Drive at http://www.dynamicdrive.com/ for this script and 100s more
</script>
<script type="text/javascript">
jQuery(document).ready(function($){
$('#image1').addimagezoom({ // single image zoom
zoomrange: [3, 10],
magnifiersize: [300,300],
magnifierpos: 'right',
cursorshade: true,
largeimage: 'hayden.jpg' //<-- No comma after last option!
})
$('#image2').addimagezoom() // single image zoom with default options
$('#multizoom1').addimagezoom({ // multi-zoom: options same as for previous Featured Image Zoomer's addimagezoom unless noted as '- new'
descArea: '#description', // description selector (optional - but required if descriptions are used) - new
speed: 1500, // duration of fade in for new zoomable images (in milliseconds, optional) - new
descpos: true, // if set to true - description position follows image position at a set distance, defaults to false (optional) - new
imagevertcenter: true, // zoomable image centers vertically in its container (optional) - new
magvertcenter: true, // magnified area centers vertically in relation to the zoomable image (optional) - new
zoomrange: [3, 10],
magnifiersize: [250,250],
magnifierpos: 'right',
cursorshadecolor: '#fdffd5',
cursorshade: true //<-- No comma after last option!
});
$('#multizoom2').addimagezoom({ // multi-zoom: options same as for previous Featured Image Zoomer's addimagezoom unless noted as '- new'
descArea: '#description2', // description selector (optional - but required if descriptions are used) - new
disablewheel: true // even without variable zoom, mousewheel will not shift image position while mouse is over image (optional) - new
//^-- No comma after last option!
});
})
<_/script></pre>
二、使用在上面代码中你定义的jQuery选择器为图像设置脚本。默认情况下,有4个选择器可供选择――‘image1’、‘image2’、‘multizoom1’、‘multizoom2’。图像需要明确定义尺寸(宽度和高度),这样就能确保脚本在任何时候都能依据原始图像的比例正确调整放大图像的大小。(选择器可用的所有选项都可以在官方网站www.dynamicdrive.com/dynamicindex4/featuredzoomer.htm 上找到)。
(点击查看大图)三、最后,你可能需要设置jQuery 到noConflict()模式使其能够正常运作。
该脚本可以免费用于个人或商业网站。
关于Kentico CMS更多资讯,尽在http ://www.evget.com/product/238/resource#p
本文出自 “非池中鱼” 博客,请务必保留此出处http://evgetlinj.blog.51cto.com/7755203/1353461

相关文章推荐
- 在Kentico CMS中使用jQuery集成图像缩放效果
- 20 个具有惊艳效果的 jQuery 图像缩放插件
- 自定义裁剪和缩放图像的jQuery插件Cropit使用的大坑
- jquery cycle插件的使用,图片幻灯片播放效果
- 使用jQuery实现滑过图片展示信息效果
- jquery使用--常见前端效果实现
- jQuery全屏滚动插件fullPage.js使用中遇到的问题(滑动轮播效果无效)
- Android 使用变形矩阵实现可以拖拽,缩放,旋转的图像
- 使用HTML5和jQuery插件Reel实现一个超酷的星际争霸2兵种动画360度预览效果
- 使用jQuery来预加载图像
- 使用jQuery制作遮罩层弹出效果的极简实例分享
- 使用Jquery实现图片轮播效果
- 使用ffmpeg进行图像格式转换以及图像缩放/sws_scale/linux/c++/c/rgb-yuv420
- 一个 Qt 显示图片的控件(继承QWidget,使用QPixmap记录图像,最后在paintEvent进行绘制,可缩放)
- jQuery动画效果animate和scrollTop结合使用实例
- CSS实现透明效果通用方案以及使用javascript或jquery改变透明度
- jquery使用load开展局部刷新没有效果
- 使用jQuery完成鼠标移入移出效果制作
- 使用Jcrop.js和jQuery.form.js,用ImageIO等进行头像上传缩放及裁剪
- 【使用技巧】【图像编辑和处理】将GIF图缩放