Iphone开发用导航控制器实现视图的分层切换(UINavigationController)
2013-12-07 19:42
447 查看
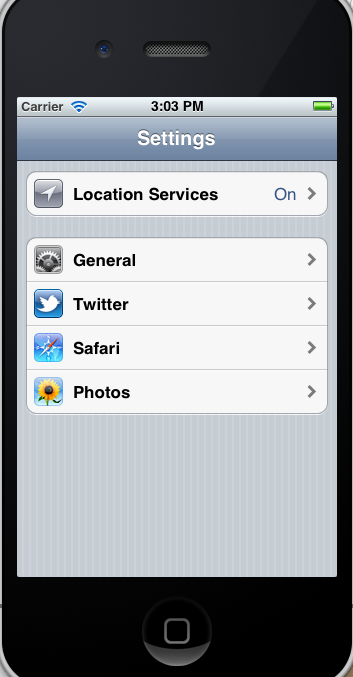
Iphone和android手机的一个不同的地方是,大部分的android手机都有返回键,而Iphone只有一个home键,所以我们会发现在Iphone的大部分应用中会在顶部有一个导航条,比如系统的设置界面,该导航条完全按照栈的方式来管理,所以可以很方便的实现后退的操作:
总结一下导航条的使用;
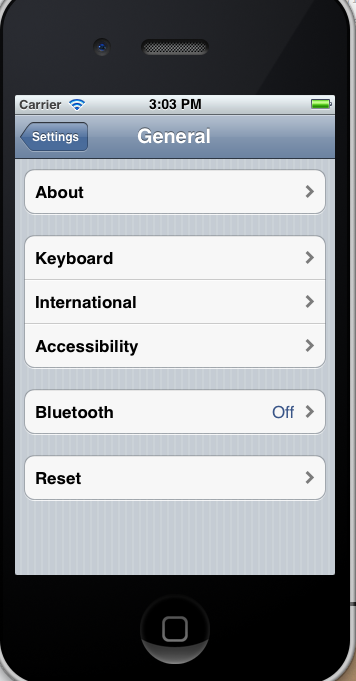
导航栏这个控件称为UINavigationController,常常用来作根视图控制器,生成对象后可以用该对象push UIViewController的对象,这样该UIViewController的对象就加到导航条的下部了,可以给视图控制器加title,会显示在导航栏上,也可以修改返回键的title,如右上图的左上角的setting按钮,如果默认的话是没有viewController的title的,返回键的title会是viewController的名字,接下来我们要用Xcode4.3中最基础的模板EmptyApplication来从头创建一个最原始的导航demo;
首先,新建一个project,选择EmptyApplication模板;

这样生成后是只有委托类的:

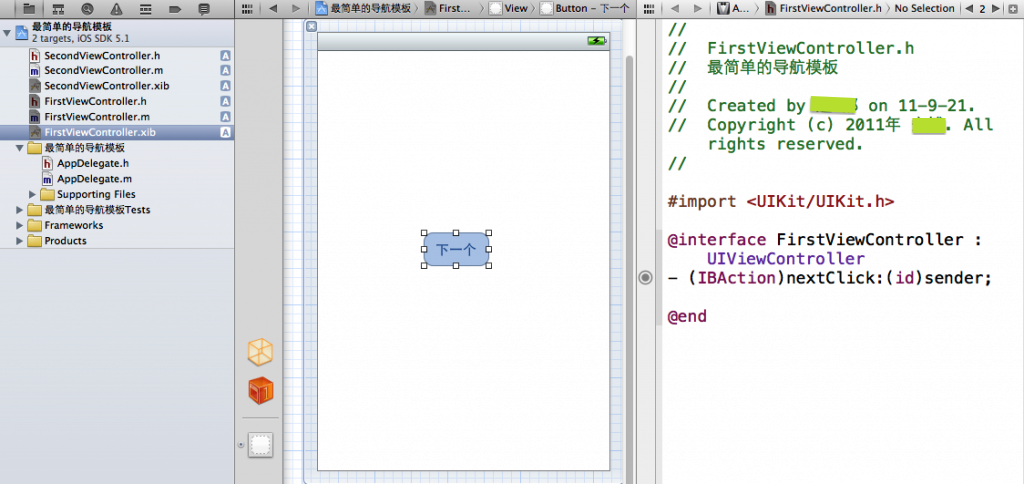
然后new两个ViewController出来,为了方便操作记得要附上xib文件;起名为FirstViewController,SecondViewController,在FirstViewController的xib文件中拖上一个button,连接一个nextClick方法用来切换到下一个视图;
现在开始操作代码
AppDelegate.h:
[plain]
view plaincopyprint?
<SPAN style="FONT-SIZE: 18px">#import <UIKit/UIKit.h> @interface AppDelegate : UIResponder <UIApplicationDelegate> @property (strong, nonatomic) UIWindow *window; @property (strong, nonatomic) UINavigationController *naviController; @end</SPAN>
AppDelegate.m:
[plain]
view plaincopyprint?
<SPAN style="FONT-SIZE: 18px">#import "AppDelegate.h" #import "FirstViewController.h" @implementation AppDelegate @synthesize window = _window; @synthesize naviController; - (BOOL)application:(UIApplication *)application didFinishLaunchingWithOptions:(NSDictionary *)launchOptions { self.window = [[UIWindow alloc] initWithFrame:[[UIScreen mainScreen] bounds]]; //生成一个ViewControlle对象作为导航栏的第一个视图; FirstViewController *firstView = [[FirstViewController alloc]init]; naviController = [[UINavigationController alloc]initWithRootViewController:firstView]; //将该导航栏作为根视图控制器; self.window.rootViewController = naviController ; [self.window makeKeyAndVisible]; return YES; }</SPAN>
FirstViewController.h:
[plain]
view plaincopyprint?
<SPAN style="FONT-SIZE: 18px">#import <UIKit/UIKit.h> @interface FirstViewController : UIViewController - (IBAction)nextClick:(id)sender; @end</SPAN>
FirstViewController.m:
[plain]
view plaincopyprint?
<SPAN style="FONT-SIZE: 18px">#import "FirstViewController.h" #import "SecondViewController.h" @interface FirstViewController () @end @implementation FirstViewController - (IBAction)nextClick:(id)sender { SecondViewController *secondView = [[SecondViewController alloc]init]; [self.navigationController pushViewController:secondView animated:YES]; }</SPAN>
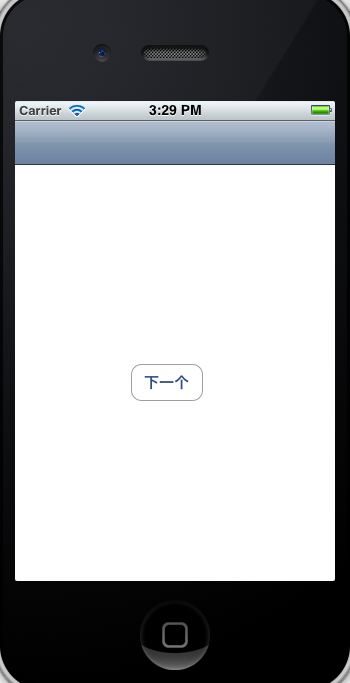
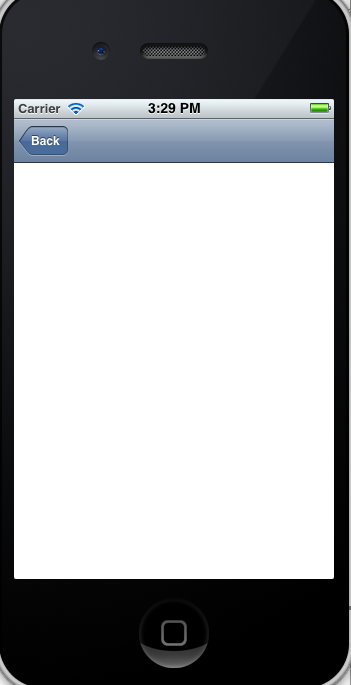
上面只是贴出了需要修改的代码,其余自动生成的都不用管,甚至SecondViewController都没有进行操作,所以我们会看到这样一种最简单的导航控制效果;
关键字:UINavigationController , IOS ,Iphone 开发 ,导航控制器
总结一下导航条的使用;
导航栏这个控件称为UINavigationController,常常用来作根视图控制器,生成对象后可以用该对象push UIViewController的对象,这样该UIViewController的对象就加到导航条的下部了,可以给视图控制器加title,会显示在导航栏上,也可以修改返回键的title,如右上图的左上角的setting按钮,如果默认的话是没有viewController的title的,返回键的title会是viewController的名字,接下来我们要用Xcode4.3中最基础的模板EmptyApplication来从头创建一个最原始的导航demo;
首先,新建一个project,选择EmptyApplication模板;
这样生成后是只有委托类的:
然后new两个ViewController出来,为了方便操作记得要附上xib文件;起名为FirstViewController,SecondViewController,在FirstViewController的xib文件中拖上一个button,连接一个nextClick方法用来切换到下一个视图;
现在开始操作代码
AppDelegate.h:
[plain]
view plaincopyprint?
<SPAN style="FONT-SIZE: 18px">#import <UIKit/UIKit.h> @interface AppDelegate : UIResponder <UIApplicationDelegate> @property (strong, nonatomic) UIWindow *window; @property (strong, nonatomic) UINavigationController *naviController; @end</SPAN>
#import <UIKit/UIKit.h>

@interface AppDelegate : UIResponder <UIApplicationDelegate>

@property (strong, nonatomic) UIWindow *window;
@property (strong, nonatomic)  UINavigationController *naviController;
@end
AppDelegate.m:
[plain]
view plaincopyprint?
<SPAN style="FONT-SIZE: 18px">#import "AppDelegate.h" #import "FirstViewController.h" @implementation AppDelegate @synthesize window = _window; @synthesize naviController; - (BOOL)application:(UIApplication *)application didFinishLaunchingWithOptions:(NSDictionary *)launchOptions { self.window = [[UIWindow alloc] initWithFrame:[[UIScreen mainScreen] bounds]]; //生成一个ViewControlle对象作为导航栏的第一个视图; FirstViewController *firstView = [[FirstViewController alloc]init]; naviController = [[UINavigationController alloc]initWithRootViewController:firstView]; //将该导航栏作为根视图控制器; self.window.rootViewController = naviController ; [self.window makeKeyAndVisible]; return YES; }</SPAN>
#import "AppDelegate.h"
#import "FirstViewController.h"
@implementation AppDelegate

@synthesize window = _window;
@synthesize naviController;

- (BOOL)application:(UIApplication *)application didFinishLaunchingWithOptions:(NSDictionary *)launchOptions
{
self.window = [[UIWindow alloc] initWithFrame:[[UIScreen mainScreen] bounds]];

//生成一个ViewControlle对象作为导航栏的第一个视图;
FirstViewController *firstView = [[FirstViewController alloc]init];

naviController = [[UINavigationController alloc]initWithRootViewController:firstView];
//将该导航栏作为根视图控制器;
self.window.rootViewController = naviController ;
[self.window makeKeyAndVisible];
return YES;
}
FirstViewController.h:
[plain]
view plaincopyprint?
<SPAN style="FONT-SIZE: 18px">#import <UIKit/UIKit.h> @interface FirstViewController : UIViewController - (IBAction)nextClick:(id)sender; @end</SPAN>
#import <UIKit/UIKit.h>

@interface FirstViewController : UIViewController
- (IBAction)nextClick:(id)sender;

@end
FirstViewController.m:
[plain]
view plaincopyprint?
<SPAN style="FONT-SIZE: 18px">#import "FirstViewController.h" #import "SecondViewController.h" @interface FirstViewController () @end @implementation FirstViewController - (IBAction)nextClick:(id)sender { SecondViewController *secondView = [[SecondViewController alloc]init]; [self.navigationController pushViewController:secondView animated:YES]; }</SPAN>
#import "FirstViewController.h"
#import "SecondViewController.h"
@interface FirstViewController ()

@end

@implementation FirstViewController

- (IBAction)nextClick:(id)sender {
SecondViewController *secondView = [[SecondViewController alloc]init];
[self.navigationController pushViewController:secondView animated:YES];
}
上面只是贴出了需要修改的代码,其余自动生成的都不用管,甚至SecondViewController都没有进行操作,所以我们会看到这样一种最简单的导航控制效果;
关键字:UINavigationController , IOS ,Iphone 开发 ,导航控制器

相关文章推荐
- Core Image Programming Guide
- Core Image Programming Guide--图像编程指南
- 如何使EnableMenuItem函数的调用有效
- easyui不规范同步树数据构建同步树
- new (addr)type(value)
- The Collatz Sequence
- ios开发-屏幕截图(UIView转为图像存储到本地)
- 极客疯人院UI设计
- ucgui 嵌入式 输入法 包含拼音、笔画、英文、数字与符号的完整输入法软件
- System.Web.UI.WebControls
- Android UI设计指南
- duilib速记
- GUI易用性测试
- UIScreen
- 【翻译】Google TV UI 设计模式 (引子)
- jlink烧写Nor Flash时出错正确解决方法汇总:PC of target system has unexpected value after programming
- jlink烧写Nor Flash时出错正确解决方法汇总:PC of target system has unexpected value after programming
- jlink烧写Nor Flash时出错正确解决方法汇总:PC of target system has unexpected value after programming
- 关于“The value for the useBean class attribute … is invalid”错误的解决
- [iOS]下拉刷新的简单源码(适用于UICollectionView)