xhtml & css 简易学习笔记(二)
2012-08-10 18:48
561 查看
1、List:
unorder List:
order List:
2、If xhtml is a core foundation, css is like a designer. It makes everything pretty and nice.
3、初用css:
4、用RGB(Red Green Blue) value修改颜色:
5、修改行与行之间的距离:修改line-height
6、设置粗体、斜体:font-weight:bold; font-style:italic;
7、文本对齐和改变背景颜色:
8、把图片设置为背景:(需把图片文件和html文件放在同一个文件夹下)
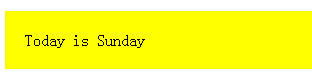
9、修改文字的背景颜色和padding(文字和文字边框的距离)
效果如下:

注:在设定padding的时候,也可以通过四个参数:padding-top\bottom\right\left来设定。
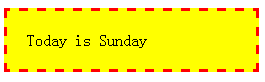
10、修改border:border有3个属性,color, width, style
接上面的例子:
效果如下:

注:设置border的时候有三行代码,当然有一行代码的替代方法:
border:3px dashed red;
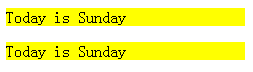
11、Margin: area outside the border and outside the padding
by default:
效果如下:

设定margin为1:
效果如下:

设定margin为40:
效果如下:

注:在设定margin的时候,也可以通过四个参数:margin-top\bottom\right\left来设定。
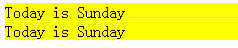
12、显式设置Width和Height,而不是随浏览器的变化而变化:
然后无论怎么缩放游览器,段落的格式(长宽)都不会发生变化。
13、styling Links: One link can have 4 different styles
分别是:
a:link
a:visited
a:hovor
a:active
14、styling tables:
例:
效果如下:


15、styling unordered list: 修改条目前面的符号(默认为实心圈圈)
例:
修改成了正方形,效果如下:

若想用自己的图标,则只需把
ul { list-style-type:square;}
修改成:
ul { list-style-image:url(xxxx.png);}
其中xxxx.png和html文件在同一个文件夹下。
16、style more than one elements:可以单独修改,但也可以一起修改,例:
效果如下:

17、应用css到一段文字中的一部分而不是全部:span
效果如下:


18、div :gives you the ability to define sections on your webpage, to place the element exactly where you want them.
例:
效果如下:

19、class:similar to span, to affect the same element in different ways.
例:
效果:

20、id:区分不同的div
例:
效果如下:

unorder List:
<ul>
<li>apple</li>
<li>banana</li>
<li>orange</li>
<li>pineapple</li>
</ul>
order List:
<ol>
<li>apple</li>
<li>banana</li>
<li>orange</li>
<li>pineapple</li>
</ol>
2、If xhtml is a core foundation, css is like a designer. It makes everything pretty and nice.
3、初用css:
<html>
<head>
<style type="text/css">     <!--新增内容-->
p{color:blue; font-family:arial;}     <!-- p代表修改段落的属性 -->
</style>
</head>
<body>
this is normal text
<p>This is paragraph text</p>
</body>
</html>
4、用RGB(Red Green Blue) value修改颜色:
<style type="text/css">     <!--新增内容-->
p {color:#33000;}                    <!-- p代表修改段落的属性>
</style>
5、修改行与行之间的距离:修改line-height
<style type="text/css">     <!--新增内容-->
p {line-height:150%;}                   <!-- 变为原来的150% -->
</style>
6、设置粗体、斜体:font-weight:bold; font-style:italic;
<html>
<head>
<style type="text/css">
ul {font-weight:bold;}
ol {font-style:italic;}
</style>
</head>
<body>
<ul>
<li>unordered list</li>
</ul>
<ol>
<li>ordered list</li>
</ol>
</body>
</html>
7、文本对齐和改变背景颜色:
<style type="text/css">
body{
background-color:blue;
color:white;                    <!-- body中的任何文本都为白色 -->
}
h3 {text-align:center;}          <!-- 居中 -->
p {text-indent:25px;}          <!-- 缩进25个pixel-->
</style>
8、把图片设置为背景:(需把图片文件和html文件放在同一个文件夹下)
<html>
<head>
<style type="text/css">
body{
background-image:url(xxxx.png);          <!--xxxx.png为选定的背景图案-->
background-repeat:no-repeat;          <!--只显示一次,而不是重复显示,这个参数也可以是repeat-x,在x轴上重复。y轴同理-->
background-position:xxx xxx               <!--xxx可是是以pixel为单位的数值,也可以是百分比-->
}
</head>
<body>
</body>
</html>
9、修改文字的背景颜色和padding(文字和文字边框的距离)
<head>
<style type="text/css">
p {
background-color:yellow;
padding:20px;
}
</style>
</head>
效果如下:
注:在设定padding的时候,也可以通过四个参数:padding-top\bottom\right\left来设定。
10、修改border:border有3个属性,color, width, style
接上面的例子:
<head>
<style type="text/css">
p {
background-color:yellow;
padding:20px;
border-color:red;
border-width:3px;
border-style:dashed;
}

</style>
</head>
效果如下:
注:设置border的时候有三行代码,当然有一行代码的替代方法:
border:3px dashed red;
11、Margin: area outside the border and outside the padding
by default:
<head>
<style type="text/css">
p {
background-color:yellow;
padding:20px;
border-color:red;
border-width:3px;
border-style:dashed;
}

</style>
</head>
效果如下:
设定margin为1:
<head>
<style type="text/css">
p {
background-color:yellow;
margin:1px;
}

</style>
</head>
效果如下:
设定margin为40:
<head>
<style type="text/css">
p {
background-color:yellow;
margin:40px;
}

</style>
</head>
效果如下:
注:在设定margin的时候,也可以通过四个参数:margin-top\bottom\right\left来设定。
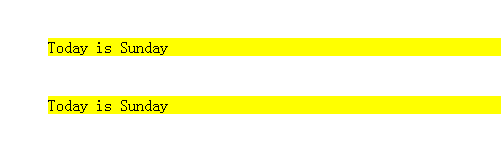
12、显式设置Width和Height,而不是随浏览器的变化而变化:
<html>
<head>
<style type="text/css">
p{
background-color:red;
color:white;
width:550px;
height:50px;
}
</style>
</head>

<body>
<p>Today is Sunday Today is Sunday Today is Sunday</p>
</body>
</html>
然后无论怎么缩放游览器,段落的格式(长宽)都不会发生变化。
13、styling Links: One link can have 4 different styles
分别是:
a:link
a:visited
a:hovor
a:active
14、styling tables:
例:
<html>
<head>
<style type="text/css">
table{ border: 3px solid blue;}
tr { background-color: yellow;}
td { border: 2px dashed red;}
</style>
</head>

<body>
<table>
<tr>
<td>This is an apple.</td>
<td>This is an apple.</td>
<td>This is an apple.</td>
</tr>
<tr>
<td>This is an apple.</td>
<td>This is an apple.</td>
<td>This is an apple.</td>
</tr>
</table>
</body>
</html>
效果如下:
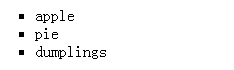
15、styling unordered list: 修改条目前面的符号(默认为实心圈圈)
例:
<html>
<head>
<style type="text/css">
ul { list-style-type:square;}
</style>
</head>

<body>
<ul>
<li>apple</li>
<li>pie</li>
<li>dumplings</li>
</ul>
</body>
</html>
修改成了正方形,效果如下:
若想用自己的图标,则只需把
ul { list-style-type:square;}
修改成:
ul { list-style-image:url(xxxx.png);}
其中xxxx.png和html文件在同一个文件夹下。
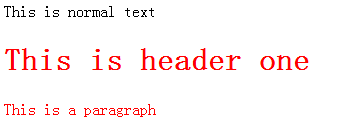
16、style more than one elements:可以单独修改,但也可以一起修改,例:
<html>
<head>
<style type="text/css">
h1, p {color:red;}
</style>
</head>

<body>
This is normal text
<h1>This is header one</h1>
<p>This is a paragraph</p>
</body>
</html>
效果如下:
17、应用css到一段文字中的一部分而不是全部:span
<html>
<head>
<style type="text/css">
span{
font-weight:bold;
color:red;
}
</style>
</head>

<body>
<p>This is a paragraph, and <span>tomorrow</span> is Monday.</p>
</body>
</html>
效果如下:
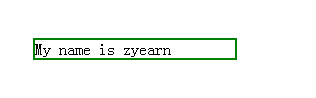
18、div :gives you the ability to define sections on your webpage, to place the element exactly where you want them.
div 全称 division 意为“区分”,称为区隔标记。作用:设定字、画、表格等的摆放位置。
例:
<html>
<head>
<style type="text/css">
div{
border:2px solid green;
position:absolute;
width:200px;
top:40px;     <!-- away from top 40 pxs -->
left:35px;     <!-- away from left 35 pxs -->
}
</style>
</head>

<body>
<div>My name is zyearn</div>
</body>
</html>
效果如下:
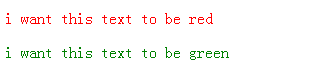
19、class:similar to span, to affect the same element in different ways.
例:
<html>
<head>
<style type="text/css">
.redtext {color:red;}
.greentext {color:green;}
</style>
</head>

<body>
<p class="redtext">i want this text to be red</p>
<p class="greentext">i want this text to be green</p>
</body>
</html>
效果:
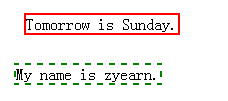
20、id:区分不同的div
例:
<html>
<head>
<style type="text/css">
#T {
border:2px solid red;
position: absolute;
top:15px;
left:25px;
}
#M {
border:2px dashed green;
position: absolute;
top:65px;
left:15px;
}
</style>
</head>

<body>
<div id="T">Tomorrow is Sunday.</div>
<div id="M">My name is zyearn.</div>
</body>
</html>
效果如下:

相关文章推荐
- xhtml & css 简易学习笔记(一)
- xhtml & css 简易学习笔记(一)
- xhtml & css 简易学习笔记(三)
- xhtml & css 简易学习笔记(三)
- xhtml & css 简易学习笔记(二)
- CSS学习笔记之<盒子模型>
- HTML && CSS 学习笔记(4)HTML <span> 标签(关键词:HTML/span)
- HTML && CSS 学习笔记(5)div、class(关键词:html/div/class)
- HTML&CSS基础学习笔记1.19-DIV标签1
- HTML&CSS基础学习笔记1.22-一个简单的注册页面
- css学习笔记之px & em
- Head first HTML&CSS ---[学习笔记第七章]
- CSS学习笔记之<!important>
- HTML&CSS基础学习笔记1.25-input标签的选择文件和隐藏元素
- HTML&CSS学习笔记
- Head First HTML & CSS 学习笔记(1)
- HTML&CSS基础学习笔记1.10-添加链接
- webpack学习笔记-1-css-loader & style-loader
- 【JAVAWEB学习笔记】02_HTML&CSS
- 张孝祥javascript学习笔记1---HTML&CSS