Android动态加载ListView中的Item【安卓进化二十三】
2011-09-18 17:07
537 查看
我这周上网看到动态增加listview的每一项item的布局,今天抽空自己写了一个,方便自己日后使用,这个效果还是很不错的,用到了Adapter的notifyDataSetChanged()方法,当点击每一个Item的时候,就通知adapter更新getView,系统得到通知就相应的加载一遍布局,就达到了动态加载item布局的效果。希望给大家带来点启迪,有问题或想要代码的可以留言,欢迎大家留言谈论listview的一些知识,以求共同进步,转载请标明出处:
/article/1393519.html
程序开启界面,默认选中贝贝item, 点击晶晶后的界面的效果,


点击欢欢后界面的效果: 点击迎迎后界面的效果:


点击妮妮后界面的效果:

代码奉上,真理还得看代码:
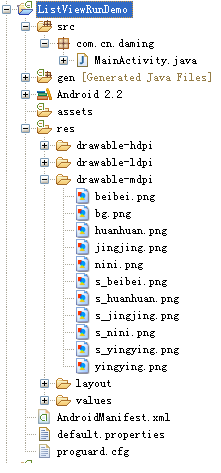
在ListViewRunDemo工程中,
com.cn.daming包中的MainActivity.java类中的代码:
说明:也可以动态加载布局文件也可以的:
在addCustomView()方法中这么写也是可以的:
工程的图片没有上传,希望大家自己找些图片就可以了:
/article/1393519.html
程序开启界面,默认选中贝贝item, 点击晶晶后的界面的效果,
点击欢欢后界面的效果: 点击迎迎后界面的效果:
点击妮妮后界面的效果:
代码奉上,真理还得看代码:
在ListViewRunDemo工程中,
com.cn.daming包中的MainActivity.java类中的代码:
package com.cn.daming;

import android.app.ListActivity;
import android.content.Context;
import android.os.Bundle;
import android.view.Gravity;
import android.view.LayoutInflater;
import android.view.View;
import android.view.ViewGroup;
import android.widget.AdapterView;
import android.widget.AdapterView.OnItemClickListener;
import android.widget.BaseAdapter;
import android.widget.ImageView;
import android.widget.LinearLayout;
import android.widget.TextView;

public class MainActivity extends ListActivity {

	private ListAddLayoutAdapter mAdapter;
	@SuppressWarnings("unused")
	private LayoutInflater lInflater;;

	int[] image = {
			R.drawable.s_beibei,
			R.drawable.s_jingjing,
			R.drawable.s_huanhuan,
			R.drawable.s_yingying,
			R.drawable.s_nini
		};

	String[] show_name = {
			"贝贝",
			"晶晶",
			"欢欢",
			"迎迎",
			"妮妮"
		};

	private int id = 0;
	@SuppressWarnings("unused")
	private int last = 0;

	@Override
    public void onCreate(Bundle savedInstanceState) {
        super.onCreate(savedInstanceState);
        mAdapter = new ListAddLayoutAdapter(this);
        this.setListAdapter(mAdapter);

        this.getListView().setOnItemClickListener(new OnItemClickListener(){
			public void onItemClick(AdapterView<?> arg0, View arg1, int position,
					long arg3) {
				id = position;
				mAdapter.notifyDataSetChanged();
				last = position;
			}
        });
    }

	 public class ListAddLayoutAdapter extends BaseAdapter {

		private Context context;
		private MainActivity activity;

		public ListAddLayoutAdapter(Context context) {
			this.context = context;
			this.activity = (MainActivity)context;
			lInflater = activity.getLayoutInflater();
		}

		public int getCount() {
			return image.length;
		}

		public Object getItem(int arg0) {
			return null;
		}

		public long getItemId(int position) {
			return position;
		}

		public View getView(int position, View arg1, ViewGroup arg2) {
			LinearLayout layout = new LinearLayout(context);
	        layout.setOrientation(LinearLayout.VERTICAL);
	        layout.setPadding(0, 8, 0, 8);

	        layout.addView(addTitleView(position));

	        if(id==position){
	        	layout.addView(addCustomView(position));
	        }

			return layout;
		}

		public View addTitleView(int i){
			LinearLayout layout = new LinearLayout(context);
	        layout.setOrientation(LinearLayout.HORIZONTAL);

	        ImageView iv = new ImageView(context);
	        iv.setImageResource(image[i]);
	        layout.addView(iv,
	        		new LinearLayout.LayoutParams(
	        				LinearLayout.LayoutParams.WRAP_CONTENT,
	        				LinearLayout.LayoutParams.WRAP_CONTENT));


	        TextView tv = new TextView(context);
	        tv.setText(show_name[i]);
	        tv.setTextSize(18f);
	        layout.addView(tv,
	        		new LinearLayout.LayoutParams(
	        				LinearLayout.LayoutParams.WRAP_CONTENT,
	        				LinearLayout.LayoutParams.WRAP_CONTENT));

	        layout.setGravity(Gravity.CENTER);
	        return layout;
		}


		public View addCustomView(int i){
			View view = new View(context);

			switch(i){
				case 0:
					ImageView iv1 = new ImageView(context);
					iv1.setImageResource(R.drawable.beibei);
					view = iv1;
					break;

				case 1:
					ImageView iv2 = new ImageView(context);
					iv2.setImageResource(R.drawable.jingjing);
					view = iv2;
					break;

				case 2:
					ImageView iv3= new ImageView(context);
					iv3.setImageResource(R.drawable.huanhuan);
					view = iv3;
					break;
				case 3:
					ImageView iv4 = new ImageView(context);
					iv4.setImageResource(R.drawable.yingying);
					view = iv4;
					break;
				case 4:
					ImageView iv5 = new ImageView(context);
					iv5.setImageResource(R.drawable.nini);
					view = iv5;
					break;
		    }
			return view;
		 }
	 }
}
说明:也可以动态加载布局文件也可以的:
在addCustomView()方法中这么写也是可以的:
case 1:
    view = lInflater.inflate(R.layout.main, null);
    break;
工程的图片没有上传,希望大家自己找些图片就可以了:

相关文章推荐
- Android动态加载ListView中的Item【安卓进化二十三】
- 关于ListView中Item动态加载的例子(android)(ExpandAbleListView)
- Android动态加载ListView中的Item
- Android listView 动态加载数据,下拉加载数据,上拉加载数据
- android 实现listview动态加载列表项
- Android笔记-ListView总结(多选框ListViiew,动态加载,多线程更新ListView中的进度条)
- Android动态改变GridView的值【安卓进化二十二】
- 安卓Android控件ListView获取item中EditText值
- [置顶] Android_ListView_Adapter使用和数据动态加载
- Android中ListView动态加载数据
- Android中ListView动态加载数据 加载中 .
- Android腾讯微博客户端开发5:利用FootView实现ListView滑动动态加载实现分页
- Android中ListView动态加载数据
- 【转】Android笔记-ListView总结(多选框ListViiew,动态加载,多线程更新ListView中的进度条)
- 安卓ListView的item中含有EditText,动态添加item时EditText值的保存
- Android_ListView_Adapter使用和数据动态加载
- 安卓开发之ListView(HorizontalListView)横向动态加载数据例子
- android 实现listview动态加载列表项www.maiziedu.com
- 安卓Android控件ListView获取item中EditText值
- Android笔记-ListView总结(多选框ListViiew,动态加载,多线程更新ListView中的进度条)