js实现element中可清空的输入框(2)
接着上一篇的:js实现element中可清空的输入框(1)继续优化,感兴趣的可以去看看哟,直通车链接:https://www.cnblogs.com/qcq0703/p/14450001.html
实现效果如下图:https://element.eleme.cn/#/zh-CN/component/input
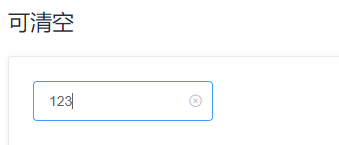
首先说明一下这一个输入框外形
1、边框圆角
2、可清空按钮
3、空值的时候显示请输入内容
嗯,就这些了。
其次是有哪些功能
1、获得焦点边框高亮
2、输入值时可清空图标
3、点击清空图标,清空内容
4、input失去焦点,不再高亮,也不再显示可清空图标
5、将输入值删除为空时,不再显示可清空图标
6、input中有值,鼠标移到input输入框时,显示可清空图标
接下来就是实现这些外形和功能了
首先分析一下啊,相信你一眼看上去,就会想到应该有一个input输入框,然后有一个放置图标的节点,然后再有一个div外层将这两个元素包围住,那好先来实现
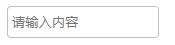
<div id="my_input_div">
<input placeholder="请输入内容"/>
<input style="width: 20px;"/>
</div>
达到效果:

这也不像啊,先别急咱们接下来调整样式。给div加一个边框,然后角度调整一下,宽度调整一下
<div id="my_input_div" style='border: solid 1px silver;width: 200px;border-radius: 4px;'>
<input placeholder="请输入内容"/>
<input style="width: 20px;"/>
</div>
</body>
达到效果:

是不是有那么点意思了,接下来再调整两个input的样式,input就别再要边框了,请输入内容你是不是也感觉到太靠左了,那么接下来也调整一下。
<div id="my_input_div" style='border: solid 1px silver;width: 150px;border-radius: 4px;height: 30px;'>
<input placeholder="请输入内容" style="width: 120px;border: none;margin-left: 4px;height: 30px;"/>
<input style="width: 20px;border: none;height: 30px;"/>
</div>
达到效果:
这么一看有点那个意思了啊,但是有个问题,input获得焦点会突出高亮的,这样边框就又出现了,截图不太好截,就只能描述了,那么接下就把这个也处理掉。
&
56c
lt;div id="my_input_div" style='border: solid 1px silver;width: 150px;border-radius: 4px;height: 30px;'>
<input placeholder="请输入内容" style="width: 120px;border: none;margin-left: 4px;height: 30px;outline: none;"/>
<input style="width: 20px;border: none;height: 30px;outline: none;"/>
</div>
效果同上,只不过这次获得焦点之后不会有高亮显示了
接下来就是鼠标,鼠标放上去,最外层边框需要高亮啊。一开始我是用的outline来做的,添加点击事 ad8 件,然后动态给div绑定outline属性
<div id="my_input_div" style='border: solid 1px silver;width: 150px;border-radius: 4px;height: 30px;'>
<input id="my_input" placeholder="请输入内容"
style="width: 120px;border: none;margin-left: 4px;height: 30px;outline: none;"
onclick="changeColor()"
/>
<input id="my_button" style="width: 20px;border: none;height: 30px;outline: none;"/>

<script>
function changeColor(){
document.getElementById('my_input_div').style.outline = "#409EFF solid 2px"
}
</script>
</div>
达到效果:

大家看到没,这个边框是一个矩形,咱们的圆角被破坏了,怎么办呢,查文档,问百度呗,结果发现用这个貌似真的只能是个矩形,具体解决可以看此连接:https://www.cnblogs.com/qcq0703/p/14450674.html,所以只能另辟蹊径
<div id="my_input_div" style='border: solid 1px silver;width: 150px;border-radius: 4px;height: 30px;'>
<input id="my_input" placeholder="请输入内容"
style="width: 120px;border: none;margin-left: 4px;height: 30px;outline: none;"
onclick="changeColor()"
onblur="hiddenClearNode()"
/>
<input id="my_button" style="width: 20px;border: none;height: 30px;outline: none;"/>
</div>
<script>
function changeColor(){
document.getElementById('my_input_div').style.boxShadow = "0 0 0 2px #409eff"
}</script>
达到效果:

哇哦,perfect!!!看到标红的没,咱们不用outline了,改用盒子阴影,离了张屠夫,就不信咱还能吃带毛的猪,黑了东方有西方,黑了南方有北方,如果四方都不亮,中间有个大月亮,如果月亮被云遮,你的头上还放光。
咳咳,扯远了,回来继续搞啊。
话说咱们input得到焦点,边框高亮,那么失去焦点就应该现原形了啊。主要是添加了一个失去焦点的事件
<div id="my_input_div" style='border: solid 1px silver;width: 150px;border-radius: 4px;height: 30px;'>
<input id="my_input" placeholder="请输入内容"
style="width: 120px;border: none;margin-left: 4px;height: 30px;outline: none;"
onclick="changeColor()"
onblur="hiddenClearNode()"
/>
<input id="my_button" style="width: 20px;border: none;height: 30px;outline: none;"/>
</div>
<script>
function changeColor(){
document.getElementById('my_input_div').style.boxShadow = "0 0 0 2px #409eff"
}
function hiddenClearNode(){
document.getElementById('my_input_div').style.boxShadow = "0 0 0"
}
</script>
达到效果同上,截图不好展示。
接下来,input输入框中输入值的时候需要显示可清空图标,那就继续调整,咱们先把清空按钮调整出来
<div id="my_input_div" style='border: solid 1px silver;width: 180px;border-radius: 4px;height: 30px;'>
<input id="my_input" placeholder="请输入内容"
style="width: 120px;border: none;margin-left: 4px;height: 30px;outline: none;"
onclick="changeColor()"
onblur="hiddenClearNode()"
/>
<input id="my_button" style="width: 50px;border: none;height: 20px;outline: none;color: #409eff;" value="清空"/>
</div>
<script>
function changeColor(){
document.getElementById('my_input_div').style.boxShadow = "0 0 0 2px #409eff";
document.getElementById('my_button').style.
}
function hiddenClearNode(){
document.getElementById('my_input_div').style.boxShadow = "0 0 0"
}
</script>
达到效果
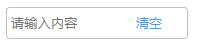
这么一直显示也不是个事啊,就先把他设置成隐藏,然后再需要他的时候让他显示,不需要就隐藏
<div id="my_input_div" style='border: solid 1px silver;width: 180px;border-radius: 4px;height: 30px;'>
<input id="my_input" placeholder="请输入内容"
style="width: 120px;border: none;margin-left: 4px;height: 30px;outline: none;"
onclick="changeColor()"
onblur="hiddenClearNode()"
/>
<input id="my_button"
style="width: 50px;border: none;height: 20px;outline: none;color: #409eff;visibility: hidden;" value="清空"/>
</div>
<script>
function changeColor(){
document.getElementById('my_input_div').style.boxShadow = "0 0 0 2px #409eff";
document.getElementById('my_button').style.visibility = "visible"
}
function hiddenClearNode(){
document.getElementById('my_input_div').style.boxShadow = "0 0 0"
document.getElementById('my_button').style.visibility = "hidden"
}
</script>
效果就不展示了,你懂得。
哎,仔细想一下不对啊,element的可清空组件是在输入框输入的时候才出现可清空的图标的,而且输入的值清零了,清空图标也会消失,那么咱们接着改。
<div id="my_input_div" style='border: solid 1px silver;width: 180px;border-radius: 4px;height: 30px;'>
<input id="my_input" placeholder="请输入内容"
style="width: 120px;border: none;margin-left: 4px;height: 30px;outline: none;"
onclick="changeColor()"
onblur="hiddenClearNode()"
oninput="addClearNode()"
/>
<input id="my_button"
style="width: 50px;border: none;height: 20px;outline: none;color: #409eff;visibility: hidden;" value="清空"/>
</div>
<script>
//改变边框颜色
function changeColor(){
document.getElementById('my_input_div').style.boxShadow = "0 0 0 2px #409eff";
//这一行肯定不对了 那么咱们注释掉
//document.getElementById('my_button').style.visibility = "visible"
}
//隐藏清空图标
function hiddenClearNode(){
document.getElementById('my_input_div').style.boxShadow = "0 0 0"
document.getElementById('my_button').style.visibility = "hidden"
}
//显示清空图标
function addClearNode(){
var value = document.getElementById('my_input').value;
if(value){
document.getElementById('my_button').style.visibility = "visible"
}else{
document.getElementById('my_button').style.visibility = "hidden"
}
}
</script>
效果还是不展示了。
接下来,点击清空按钮,就该清空输入的值了,接着搞起,不就加一个点击事件吗,点击清空图标,将input的值清空不就得了,简单
<div id="my_input_div" style='border: solid 1px silver;width: 180px;border-radius: 4px;height: 30px;'>
<input id="my_input" placeholder="请输入内容"
style="width: 120px;border: none;margin-left: 4px;height: 30px;outline: none;"
onclick="changeColor()"
onblur="hiddenClearNode()"
oninput="addClearNode()"
/>
<input id="my_button"
style="width: 50px;border: none;height: 20px;outline: none;color: #409eff;visibility: hidden;"
onclick="clearValue()"
value="清空"/>
</div>
<script>
//改变边框颜色
function changeColor(){
document.getElementById('my_input_div').style.boxShadow = "0 0 0 2px #409eff";
//这一行肯定不对了 那么咱们注释掉
//document.getElementById('my_button').style.visibility = "visible"
}
//隐藏清空图标
function hiddenClearNode(){
document.getElementById('my_input_div').style.boxShadow = "0 0 0"
document.getElementById('my_button').style.visibility = "hidden"
}
//显示清空图标
function addClearNode(){
var value = document.getElementById('my_input').value;
if(value){
document.getElementById('my_button').style.visibility = "visible"
}else{
document.getElementById('my_button').style.visibility = "hidden"
}
}
function clearValue(){
document.getElementById('my_input').value = '';
}
</script>
额.......发现没起作用呢,为什么不生效呢,仔细想想,是不是想到点什么,咱们input还有一个失去焦点的事件呢,你这边要点击,那边失去焦点,这不就冲突了吗,咋办呢,凉拌!onclick点击事件改为鼠标按下事件,然后调用window.event.preventDefault();阻止默认事件就可以了。
<div id="my_input_div" style='border: solid 1px silver;width: 180px;border-radius: 4px;height: 30px;'>
<input id="my_input" placeholder="请输入内容"
style="width: 120px;border: none;margin-left: 4px;height: 30px;outline: none;"
onclick="changeColor()"
onblur="hiddenClearNode()"
oninput="addClearNode()"
/>
<input id="my_button"
style="width: 50px;border: none;height: 20px;outline: none;color: #409eff;visibility: hidden;"
onmousedown="clearValue()"
value="清空"/>
</div>
<script>
//改变边框颜色
function changeColor(){
document.getElementById('my_input_div').style.boxShadow = "0 0 0 2px #409eff";
//这一行肯定不对了 那么咱们注释掉
//document.getElementById('my_button').style.visibility = "visible"
}
//隐藏清空图标
function hiddenClearNode(){
document.getElementById('my_input_div').style.boxShadow = "0 0 0"
document.getElementById('my_button').style.visibility = "hidden"
}
//显示清空图标
function addClearNode(){
var value = document.getElementById('my_input').value;
if(value){
document.getElementById('my_button').style.visibility = "visible"
}else{
document.getElementById('my_button').style.visibility = "hidden"
}
}
function clearValue(){
window.event.preventDefault();
document.getElementById('my_input').value = '';
}
</script>
再仔细研究一下element的可清空输入框,鼠标移上去,如果输入框内容不为空,也会显示,移开又不显示了。这时候需要注意了啊,这时候的事件就不该在input上了,而是最外层的div上面。
<div id="my_input_div"
style='border: solid 1px silver;width: 180px;border-radius: 4px;height: 30px;'
onmouseover="addClearNode()";
onmouseout="hiddenClearNode()"
>
<input id="my_input" placeholder="请输入内容"
style="width: 120px;border: none;margin-left: 4px;height: 30px;outline: none;"
onclick="changeColor()"
onblur="hiddenClearNode()"
oninput="addClearNode()"
/>
<input id="my_button"
style="width: 50px;border: none;height: 20px;outline: none;color: #409eff;visibility: hidden;"
onmousedown="clearValue()"
value="清空"/>
</div>
<script>
//改变边框颜色
function changeColor(){
document.getElementById('my_input_div').style.boxShadow = "0 0 0 2px #409eff";
//这一行肯定不对了 那么咱们注释掉
//document.getElementById('my_button').style.visibility = "visible"
}
//隐藏清空图标
function hiddenClearNode(){
document.getElementById('my_input_div').style.boxShadow = "0 0 0"
document.getElementById('my_button').style.visibility = "hidden"
}
//显示清空图标
function addClearNode(){
var value = document.getElementById('my_input').value;
if(value){
document.getElementById('my_button').style.visibility = "visible"
}else{
document.getElementById('my_button').style.visibility = "hidden"
}
}
function clearValue(){
window.event.preventDefault();
document.getElementById('my_input').value = '';
}
</script>
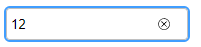
现在基本效果功能看上去差不多了,看着这个清空俩字是不是感觉很别扭,那么如你所愿,咱们换成图标。还有鼠标放上去是不是应该是一个小手的标志啊。
<div id="my_input_div"
style='border: solid 1px silver;width: 180px;border-radius: 4px;height: 30px;'
onmouseover="addClearNode()";
onmouseout="hiddenClearNode()"
>
<input id="my_input" placeholder="请输入内容"
style="width: 120px;border: none;margin-left: 4px;height: 30px;outline: none;cursor: pointer;"
onclick="changeColor()"
onblur="hiddenClearNode()"
oninput="addClearNode()"
/>
<input id="my_button"
style="width: 20px;border: none;height: 20px;outline: none;color: #409eff;visibility: hidden;
background-image: url(../image/clear.svg);
position: absolute;
background-repeat: no-repeat;
background-size: 12px;
top: 18px;
left: 140px;
display: inline-block;
cursor: pointer;"
onmousedown="clearValue()"
/>
</div>
<script>
//改变边框颜色
function changeColor(){
document.getElementById('my_input_div').style.boxShadow = "0 0 0 2px #409eff";
//这一行肯定不对了 那么咱们注释掉
//document.getElementById('my_button').style.visibility = "visible"
}
//隐藏清空图标
function hiddenClearNode(){
document.getElementById('my_input_div').style.boxShadow = "0 0 0"
document.getElementById('my_button').style.visibility = "hidden"
}
//显示清空图标
function addClearNode(){
var value = document.getElementById('my_input').value;
if(value){
document.getElementById('my_button').style.visibility = "visible"
}else{
document.getElementById('my_button').style.visibility = "hidden"
}
}
function clearValue(){
window.event.preventDefault();
document.getElementById('my_input').value = '';
}
</script>
达到效果:
现在看代码是不是感觉有点乱啊,咱们整理一下,放大招了。
<!DOCTYPE html>
<html>
<head>
<meta charset="utf-8">
<title>js实现input,选中高亮、输入值之后可清空、移除鼠标清空按钮隐藏、选中高亮</title>
</head>
<body>
<div id="app">
<div id="my_input_div"
onmouseover="addClearNode()"
onmouseout=
ad8
"hiddenClearNode()">
<input id="my_input" placeholder='请输入内容'
oninput="addClearNode()"
onclick="changeColor()"
onblur="hiddenClearNode()"/>
<input id="my_button" onmousedown="clearValue()"/>
</div>
</div>
<script>
//box-shadow: 0 0 0 20px pink;  通过添加阴影的方式显示边框
function changeColor(){
document.getElementById("my_input_div").style.boxShadow="0 0 0 2px #409eff";
//获取inpu的值
var value = document.getElementById('my_input').value;
//添加判断 如果输入框中有值 则显示清空按钮
if(value){
document.getElementById("my_button").style.visibility = "visible"
}
}
//应该输入内容之后使用该事件
function addClearNode(){
var value = document.getElementById('my_input').value;
//alert(value)
if(value){
//将button设置为可见
document.getElementById("my_button").style.visibility = 'visible'
}else{
//将button设置为不可见
document.getElementById("my_button").style.visibility = 'hidden'
}
//选中后div添加选中样式 高亮显示
document.getElementById("my_input_div").style.outline="0 0 0 2px #409eff";
}
//清空input的值并且保证在获取获取鼠标事件的同时不触发 input失去焦点的事件
function clearValue(){
//解决button获取焦点的同时不触发其他元素失去焦点的事件
window.event.preventDefault();
document.getElementById("my_input").value = "";
document.getElementById("my_button").style.visibility = "hidden";
//仍然处于选中状态 div边框突出阴影
document.getElementById("my_input_div").style.boxShadow="0 0 0 2px #409eff"
}

//隐藏清除按钮
function hiddenClearNode(){
document.getElementById("my_button").style.visibility="hidden";
//将div阴影设置为0
document.getElementById("my_input_div").style.boxShadow="0 0 0"
}
</script>

<style>
#my_input_div{
width: 150px;
border: 1px solid silver;
border-radius: 4px;
position: relative;
}
#my_input{
height: 30px;
width:100px;
margin-left: 6px;
border: none;
outline: none;
cursor: pointer;
}
#my_button{
height: 20px;
width: 15px;
text-align: center;
visibility:hidden;
border: none;
outline: none;
color: #409eff;
cursor: pointer;
background-image: url(../image/clear.svg);
background-repeat: no-repeat;
background-size: 12px;
position: absolute;
top: 10px;
left: 120px;
display: inline-block;
}
</style>
</body>
</html>
以上就是完成这个组件的全部过程了,对了,那个清空图标是怎么找到的,我得说一下,看法宝:https://www.iconfont.cn/search/index?spm=a313x.7781069.1998910419.55&searchType=icon&q=%E6%B8%85%E7%A9%BA
记录一下遇到的难点啊。
1、选中凸显边框问题,轮廓总是为矩形,最终使用box-shadow解决了,这个查了很长时间呢。
2、事件冲突问题,通过window.event.preventDefault();解决了。
3、将清空俩字改为小图标,这个直接百度到了,自己把定位调整了一下就可以了。
看官们,码字不易,你懂得。

- 用javascript实现留言板功能。要求:点击提交按钮,讲输入框中文字添加到显示留言下,并清空文本框;点击删除,将添加的姓名与内容以及删除按钮都删除。js
- JS实现点击下拉菜单把选择的内容同步到input输入框内的实例
- Spring boot + mybatis + Vue.js + ElementUI 实现数据的增删改查实例代码(二)
- 用JS来实现输入框提示文字点击时消失
- 基于JS实现类似支付宝支付密码输入框
- js中实现输入框输入字数提示
- js下拉选择框与输入框联动实现添加选中值到输入框的方法
- js实现input输入框只能输入数字的功能(完美测试通过)
- js输入框邮箱自动提示功能代码实现
- js实现input输入框只能输入数字的功能(完美测试通过)
- Js实现类似Excel工作表用方向键切换输入框焦点
- JS实现输入框只能输入数字
- 通过js实现得到焦点时文本框清空,失去焦点时又显示默认文字,值发生改变时不再恢复默认文字?
- JS实现单击输入框弹出选择框效果完整实例
- JavaScript实现输入框与清空按钮联动效果
- 前端vue+element+js实现导入导出数据表格
- js输入框邮箱自动提示功能代码实现
- js实现table添加行tr、删除行tr、清空行tr的简单实例
- 使用js函数实现的通过输入框中数据的长度来控制光标聚焦位置
- js动态修改input输入框的type属性(实现方法解析)