SpringBoot整合Shiro+MD5+Salt+Redis实现认证和动态权限管理|前后端分离(下)----筑基后期
写在前面
在上一篇文章《SpringBoot整合Shiro+MD5+Salt+Redis实现认证和动态权限管理(上)----筑基中期》当中,我们初步实现了SpringBoot整合Shiro实现认证和授权。
在这篇文章当中,我将带领大家一起完善这个Demo。当然,在这之前我们需要了解一些知识点。
本片文章与上一篇《SpringBoot整合Shiro+MD5+Salt+Redis实现认证和动态权限管理(上)----筑基中期》 紧密相连,建议您先阅读上一篇文章,再阅读本文。
知识点补充
Shiro缓存
流程分析
在原来的项目当中,由于没有配置缓存,因此每次需要验证当前主体有没有访问权限时,都会去查询数据库。由于权限数据是典型的读多写少的数据,因此,我们应该要对其加入缓存的支持。
当我们加入缓存后,shiro在做鉴权时先去缓存里查询相关数据,缓存里没有,则查询数据库并将查到的数据写入缓存,下次再查时就能从缓存当中获取数据,而不是从数据库中获取。这样就能改善我们的应用的性能。
接下来,我们去实现shiro的缓存管理部分。
Shiro会话机制
Shiro 提供了完整的企业级会话管理功能,不依赖于底层容器(如 web 容器 tomcat),不管 JavaSE 还是 JavaEE 环境都可以使用,提供了会话管理、会话事件监听、会话存储 / 持久化、容器无关的集群、失效 / 过期支持、对 Web 的透明支持、SSO 单点登录的支持等特性。
我们将使用 Shiro 的会话管理来接管我们应用的web会话,并通过Redis来存储会话信息。
整合步骤
添加缓存
CacheManager
在Shiro当中,它提供了CacheManager这个类来做缓存管理。
使用Shiro默认的EhCache实现
在shiro当中,默认使用的是EhCache缓存框架。EhCache 是一个纯Java的进程内缓存框架,具有快速、精干等特点。关于更多EhCache的内容,同学们可以自行百度了解,这里不做过多介绍。
引入shiro-EhCache依赖
<dependency>
<groupId>org.apache.shiro</groupId>
<artifactId>shiro-ehcache</artifactId>
<version>1.4.0</version>
</dependency>
在SpringBoot整合Redis的过程中,还要注意版本匹配的问题,不然有可能报方法未找到的异常。
在ShiroConfig中添加缓存配置
private void enableCache(MySQLRealm realm){
//开启全局缓存配置
realm.setCachingEnabled(true);
//开启认证缓存配置
realm.setAuthenticationCachingEnabled(true);
//开启授权缓存配置
realm.setAuthorizationCachingEnabled(true);

//为了方便操作,我们给缓存起个名字
realm.setAuthenticationCacheName("authcCache");
realm.setAuthorizationCacheName("authzCache");
//注入缓存实现
realm.setCacheManager(new EhCacheManager());
}
然后再在getRealm中调用这个方法即可。
提示:在这个实现当中,只是实现了本地的缓存。也就是说缓存的数据同应用一样共用一台机器的内存。如果服务器发生宕机或意外停电,那么缓存数据也将不复存在。当然你也可通过cacheManager.setCacheManagerConfigFile()方法给予缓存更多的配置。
接下来我们将通过Redis缓存我们的权限数据
使用Redis实现
添加依赖
<!--shiro-redis相关依赖-->
<dependency>
<groupId>org.crazycake</groupId>
<artifactId>shiro-redis</artifactId>
<version>3.1.0</version>
<!--    里面这个shiro-core版本较低,会引发一个异常
ClassNotFoundException: org.apache.shiro.event.EventBus
需要排除,直接使用上面的shiro
shiro1.3 加入了时间总线。-->
<exclusions>
<exclusion>
<groupId>org.apache.shiro</groupId>
<artifactId>shiro-core</artifactId>
</exclusion>
</exclusions>
</dependency>
配置redis
在application.yml中添加redis的相关配置
spring:
redis:
host: 127.0.0.1
port: 6379
password: hewenping
timeout: 3000
jedis:
pool:
min-idle: 5
max-active: 20
max-idle: 15
修改ShiroConfig配置类,添加shiro-redis插件配置
/**shiro配置类
* @author 赖柄沣 bingfengdev@aliyun.com
* @version 1.0
* @date 2020/10/6 9:11
*/
@Configuration
public class ShiroConfig {

private static final String CACHE_KEY = "shiro:cache:";
private static final String SESSION_KEY = "shiro:session:";
private static final int EXPIRE = 18000;
@Value("${spring.redis.host}")
private String host;
@Value("${spring.redis.port}")
private int port;
@Value("${spring.redis.timeout}")
private int timeout;
@Value("${spring.redis.password}")
private String password;

@Value("${spring.redis.jedis.pool.min-idle}")
private int minIdle;
@Value("${spring.redis.jedis.pool.max-idle}")
private int maxIdle;
@Value("${spring.redis.jedis.pool.max-active}")
private int maxActive;

@Bean
public AuthorizationAttributeSourceAdvisor authorizationAttributeSourceAdvisor(org.apache.shiro.mgt.SecurityManager securityManager) {
AuthorizationAttributeSourceAdvisor authorizationAttributeSourceAdvisor = new AuthorizationAttributeSourceAdvisor();
authorizationAttributeSourceAdvisor.setSecurityManager(securityManager);
return authorizationAttributeSourceAdvisor;
}

/**
* 创建ShiroFilter拦截器
* @return ShiroFilterFactoryBean
*/
@Bean(name = "shiroFilterFactoryBean")
public ShiroFilterFactoryBean getShiroFilterFactoryBean(DefaultWebSecurityManager securityManager){
ShiroFilterFactoryBean shiroFilterFactoryBean = new ShiroFilterFactoryBean();
shiroFilterFactoryBean.setSecurityManager(securityManager);

//配置不拦截路径和拦截路径,顺序不能反
HashMap<String, String> map = new HashMap<>(5);

map.put("/authc/**","anon");
map.put("/login.html","anon");
map.put("/js/**","anon");
map.put("/css/**","anon");

map.put("/**","authc");
shiroFilterFactoryBean.setFilterChainDefinitionMap(map);

//覆盖默认的登录url
shiroFilterFactoryBean.setLoginUrl("/authc/unauthc");
return shiroFilterFactoryBean;
}

@Bean
public Realm getRealm(){
//设置凭证匹配器,修改为hash凭证匹配器
HashedCredentialsMatcher myCredentialsMatcher = new HashedCredentialsMatcher();
//设置算法
myCredentialsMatcher.setHashAlgorithmName("md5");
//散列次数
myCredentialsMatcher.setHashIterations(1024);
MySQLRealm realm = new MySQLRealm();
realm.setCredentialsMatcher(myCredentialsMatcher);
//开启缓存
realm.setCachingEnabled(true);
realm.setAuthenticationCachingEnabled(true);
realm.setAuthorizationCachingEnabled(true);
return realm;
}

/**
* 创建shiro web应用下的安全管理器
* @return DefaultWebSecurityManager
*/
@Bean
public DefaultWebSecurityManager getSecurityManager( Realm realm){
DefaultWebSecurityManager securityManager = new DefaultWebSecurityManager();
securityManager.setRealm(realm);

securityManager.setCacheManager(cacheManager());
SecurityUtils.setSecurityManager(securityManager);
return securityManager;
}

/**
* 配置Redis管理器
* @Attention 使用的是shiro-redis开源插件
* @return
*/
@Bean
public RedisManager redisManager() {
RedisManager redisManager = new RedisManager();
redisManager.setHost(host);
redisManager.setPort(port);
redisManager.setTimeout(timeout);
redisManager.setPassword(password);
JedisPoolConfig jedisPoolConfig = new JedisPoolConfig();
jedisPoolConfig.setMaxTotal(maxIdle+maxActive);
jedisPoolConfig.setMaxIdle(maxIdle);
jedisPoolConfig.setMinIdle(minIdle);
redisManager.setJedisPoolConfig(jedisPoolConfig);
return redisManager;
}

@Bean
public RedisCacheManager cacheManager() {
RedisCacheManager redisCacheManager = new RedisCacheManager();
redisCacheManager.setRedisManager(redisManager());
redisCacheManager.setKeyPrefix(CACHE_KEY);
// shiro-redis要求放在session里面的实体类必须有个id标识
//这是组成redis中所存储数据的key的一部分
redisCacheManager.setPrincipalIdFieldName("username");
return redisCacheManager;
}

}
修改
MySQLRealm中的
doGetAuthenticationInfo方法,将
User对象整体作为
SimpleAuthenticationInfo的第一个参数。shiro-redis将根据
RedisCacheManager的
principalIdFieldName属性值从第一个参数中获取id值作为redis中数据的key的一部分。
/**
* 认证
* @param token
* @return
* @throws AuthenticationException
*/
@Override
protected AuthenticationInfo doGetAuthenticationInfo(AuthenticationToken token) throws AuthenticationException {

if(token==null){
return null;
}
String principal = (String) token.getPrincipal();
User user = userService.findByUsername(principal);
SimpleAuthenticationInfo simpleAuthenticationInfo = new MyAuthcInfo(
//由于shiro-redis插件需要从这个属性中获取id作为redis的key
//所有这里传的是user而不是username
user,
//凭证信息
user.getPassword(),
//加密盐值
new CurrentSalt(user.getSalt()),
getName());

return simpleAuthenticationInfo;
}
并修改
MySQLRealm中的
doGetAuthorizationInfo方法,从User对象中获取主身份信息。
/**
* 授权
* @param principals
* @return
*/
@Override
protected AuthorizationInfo doGetAuthorizationInfo(PrincipalCollection principals) {
User user = (User) principals.getPrimaryPrincipal();
String username = user.getUsername();
List<Role> roleList = roleService.findByUsername(username);
SimpleAuthorizationInfo authorizationInfo = new SimpleAuthorizationInfo();
for (Role role : roleList) {
authorizationInfo.addRole(role.getRoleName());
}
List<Long> roleIdList  = new ArrayList<>();
for (Role role : roleList) {
roleIdList.add(role.getRoleId());
}

List<Resource> resourceList = resourceService.findByRoleIds(roleIdList);
for (Resource resource : resourceList) {
authorizationInfo.addStringPermission(resource.getResourcePermissionTag());
}
return authorizationInfo;
}
自定义Salt
由于Shiro里面默认的
SimpleByteSource没有实现序列化接口,导致ByteSource.Util.bytes()生成的salt在序列化时出错,因此需要自定义Salt类并实现序列化接口。并在自定义的Realm的认证方法使用
new CurrentSalt(user.getSalt())传入盐值。
/**由于shiro当中的ByteSource没有实现序列化接口,缓存时会发生错误
* 因此,我们需要通过自定义ByteSource的方式实现这个接口
* @author 赖柄沣 bingfengdev@aliyun.com
* @version 1.0
* @date 2020/10/8 16:17
*/
public class CurrentSalt extends SimpleByteSource implements Serializable {
public CurrentSalt(String string) {
super(string);
}

public CurrentSalt(byte[] bytes) {
super(bytes);
}

public CurrentSalt(char[] chars) {
super(chars);
}

public CurrentSalt(ByteSource source) {
super(source);
}

public CurrentSalt(File file) {
super(file);
}

public CurrentSalt(InputStream stream) {
super(stream);
}
}
添加Shiro自定义会话
添加自定义会话ID生成器
/**SessionId生成器
* <p>@author 赖柄沣 laibingf_dev@outlook.com</p>
* <p>@date 2020/8/15 15:19</p>
*/
public class ShiroSessionIdGenerator implements SessionIdGenerator {

/**
*实现SessionId生成
* @param session
* @return
*/
@Override
public Serializable generateId(Session session) {
Serializable sessionId = new JavaUuidSessionIdGenerator().generateId(session);
return String.format("login_token_%s", sessionId);
}
}
添加自定义会话管理器
/**
* <p>@author 赖柄沣 laibingf_dev@outlook.com</p>
* <p>@date 2020/8/15 15:40</p>
*/
public class ShiroSessionManager extends DefaultWebSessionManager {

//定义常量
private static final String AUTHORIZATION = "Authorization";
private static final String REFERENCED_SESSION_ID_SOURCE = "Stateless request";
//重写构造器
public ShiroSessionManager() {
super();
this.setDeleteInvalidSessions(true);
}

/**
* 重写方法实现从请求头获取Token便于接口统一
*      * 每次请求进来,
*      Shiro会去从请求头找Authorization这个key对应的Value(Token)
* @param request
* @param response
* @return
*/
@Override
public Serializable getSessionId(ServletRequest request, ServletResponse response) {
String token = WebUtils.toHttp(request).getHeader(AUTHORIZATION);
//如果请求头中存在token 则从请求头中获取token
if (!StringUtils.isEmpty(token)) {
request.setAttribute(ShiroHttpServletRequest.REFERENCED_SESSION_ID_SOURCE, REFERENCED_SESSION_ID_SOURCE);
request.setAttribute(ShiroHttpServletRequest.REFERENCED_SESSION_ID, token);
request.setAttribute(ShiroHttpServletRequest.REFERENCED_SESSION_ID_IS_VALID, Boolean.TRUE);
return token;
} else {
// 这里禁用掉Cookie获取方式
return null;
}
}
}
配置自定义会话管理器
在ShiroConfig中添加对会话管理器的配置
/**
* SessionID生成器
*
*/
@Bean
public ShiroSessionIdGenerator sessionIdGenerator(){
return new ShiroSessionIdGenerator();
}

/**
* 配置RedisSessionDAO
*/
@Bean
public RedisSessionDAO redisSessionDAO() {
RedisSessionDAO redisSessionDAO = new RedisSessionDAO();
redisSessionDAO.setRedisManager(redisManager());
redisSessionDAO.setSessionIdGenerator(sessionIdGenerator());
redisSessionDAO.setKeyPrefix(SESSION_KEY);
redisSessionDAO.setExpire(EXPIRE);
return redisSessionDAO;
}

/**
* 配置Session管理器
* @Author Sans
*
*/
@Bean
public SessionManager sessionManager() {
ShiroSessionManager shiroSessionManager = new ShiroSessionManager();
shiroSessionManager.setSessionDAO(redisSessionDAO());
//禁用cookie
shiroSessionManager.setSessionIdCookieEnabled(false);
//禁用会话id重写
shiroSessionManager.setSessionIdUrlRewritingEnabled(false);
return shiroSessionManager;
}
目前最新版本(1.6.0)中,session管理器的setSessionIdUrlRewritingEnabled(false)配置没有生效,导致没有认证直接访问受保护资源出现多次重定向的错误。将shiro版本切换为1.5.0后就解决了这个bug。
本来这篇文章应该是昨晚发的,因为这个原因搞了好久,所有今天才发。。。
修改自定义Realm的doGetAuthenticationInfo认证方法
在认证信息返回前,我们需要做一个判断:如果当前用户已在旧设备上登录,则需要将旧设备上的会话id删掉,使其下线。
/**
* 认证
* @param token
* @return
* @throws AuthenticationException
*/
@Override
protected AuthenticationInfo doGetAuthenticationInfo(AuthenticationToken token) throws AuthenticationException {

if(token==null){
return null;
}
String principal = (String) token.getPrincipal();
User user = userService.findByUsername(principal);
SimpleAuthenticationInfo simpleAuthenticationInfo = new MyAuthcInfo(
//由于shiro-redis插件需要从这个属性中获取id作为redis的key
//所有这里传的是user而不是username
user,
//凭证信息
user.getPassword(),
//加密盐值
new CurrentSalt(user.getSalt()),
getName());

//清除当前主体旧的会话,相当于你在新电脑上登录系统,把你之前在旧电脑上登录的会话挤下去
ShiroUtils.deleteCache(user.getUsername(),true);
return simpleAuthenticationInfo;
}
修改login接口
我们将会话信息存储在redis中,并在用户认证通过后将会话Id以token的形式返回给用户。用户请求受保护资源时带上这个token,我们根据token信息去redis中获取用户的权限信息,从而做访问控制。
@PostMapping("/login")
public HashMap<Object, Object> login(@RequestBody LoginVO loginVO) throws AuthenticationException {
boolean flags = authcService.login(loginVO);
HashMap<Object, Object> map = new HashMap<>(3);
if (flags){
Serializable id = SecurityUtils.getSubject().getSession().getId();
map.put("msg","登录成功");
map.put("token",id);
return map;
}else {
return null;
}
}
添加全局异常处理
/**shiro异常处理
* @author 赖柄沣 bingfengdev@aliyun.com
* @version 1.0
* @date 2020/10/7 18:01
*/
@ControllerAdvice(basePackages = "pers.lbf.springbootshiro")
public class AuthExceptionHandler {

//==================认证异常====================//

@ExceptionHandler(ExpiredCredentialsException.class)
@ResponseBody
public String expiredCredentialsExceptionHandlerMethod(ExpiredCredentialsException e) {
return "凭证已过期";
}

@ExceptionHandler(IncorrectCredentialsException.class)
@ResponseBody
public String incorrectCredentialsExceptionHandlerMethod(IncorrectCredentialsException e) {
return "用户名或密码错误";
}

@ExceptionHandler(UnknownAccountException.class)
@ResponseBody
public String unknownAccountExceptionHandlerMethod(IncorrectCredentialsException e) {
return "用户名或密码错误";
}

@ExceptionHandler(LockedAccountException.class)
@ResponseBody
public String lockedAccountExceptionHandlerMethod(IncorrectCredentialsException e) {
return "账户被锁定";
}

//=================授权异常=====================//

@ExceptionHandler(UnauthorizedException.class)
@ResponseBody
public String unauthorizedExceptionHandlerMethod(UnauthorizedException e){
return "未授权!请联系管理员授权";
}
}
实际开发中,应该对返回结果统一化,并给出业务错误码。这已经超出了本文的范畴,如有需要,请根据自身系统特点考量。
进行测试
认证
登录成功的情况

用户名或密码错误的情况

为了安全起见,不要暴露具体是用户名错误还是密码错误。
访问受保护资源
认证后访问有权限的资源

认证后访问无权限的资源
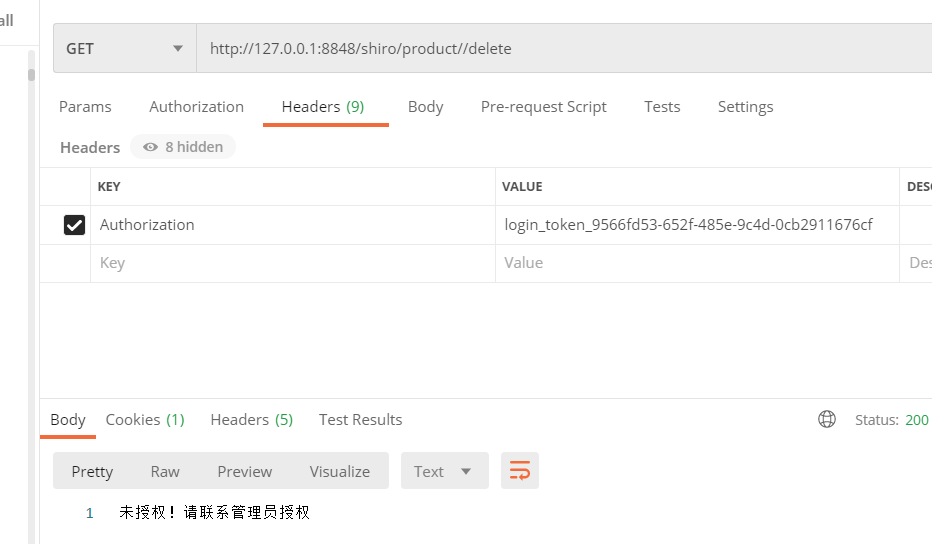
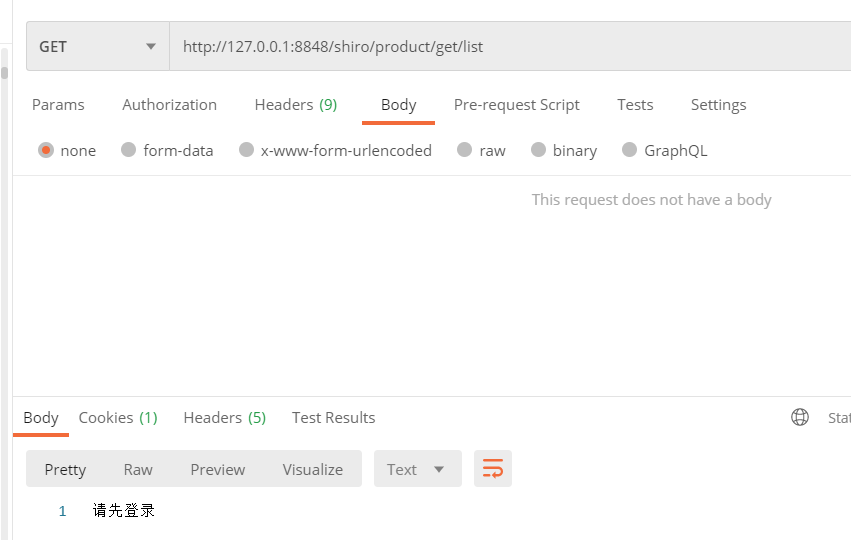
未认证直接访问的情况
查看redis

三个键值分别对应认证信息缓存、授权信息缓存和会话信息缓存。
写在最后
目前基本上把shiro的入门知识点学完了。国庆中秋小长假也结束了。后面有时间再补充shiro标签内容的使用。
最后贴出shiro的入门修仙功法链接,方便查看:
- 《走进shiro,构建安全的应用程序---shiro修仙序章》
- 《shiro认证流程源码分析--练气初期》
- 《Shiro入门学习---使用自定义Realm完成认证|练气中期》
- 《shiro入门学习--使用MD5和salt进行加密|练气后期》
- 《shiro入门学习--授权(Authorization)|筑基初期|》
- 《SpringBoot整合Shiro+MD5+Salt+Redis实现认证和动态权限管理(上)----筑基中期》
如果您觉得这篇文章能给您带来帮助,那么可以点赞鼓励一下。如有错误之处,还请不吝赐教。在此,谢过各位乡亲父老!
**代码及sql下载方式:**微信搜索【Java开发实践】,加关注并回复
20201009即可获取下载链接。

- SpringBoot整合mybatis、shiro、redis实现基于数据库的细粒度动态权限管理系统实例
- 权限管理(二)---Shiro整合SpringBoot项目实现认证和授权
- SpringBoot整合mybatis、shiro、redis实现基于数据库的细粒度动态权限管理系统实例(转)
- SpringBoot整合mybatis、shiro、redis实现基于数据库的细粒度动态权限管理系统实例
- SpringBoot整合mybatis、shiro、redis实现基于数据库的细粒度动态权限管理系统实例
- SpringBoot整合mybatis、shiro、redis实现基于数据库的细粒度动态权限管理系统实例
- SpringBoot整合mybatis、shiro、redis实现基于数据库的细粒度动态权限管理系统实例
- Shiro+Springboot+Vue前后端分离实现权限管理
- Spring Boot + Spring Cloud 实现权限管理系统 后端篇(二十四):权限控制(Shiro 注解)
- springboot(十四):springboot整合shiro-登录认证和权限管理
- Spring Boot + Spring Cloud 实现权限管理系统 后端篇(十八):服务注册和发现(Consul)
- Springboot整合token的权限管理实现(二)—— 配置服务器拦截器与跨域访问权限
- SpringBoot 整合 Shiro 实现动态权限加载更新 + Session共享 + 单点登录
- Spring Cloud之路:(七)SpringBoot+Shiro实现登录认证和权限管理
- Spring Boot + Spring Cloud 实现权限管理系统 后端篇(十二):解决跨域问题
- spring boot+iview 前后端分离架构之组织管理的实现(二十九)
- 前后端分离之SpringBoot2.x整合mybatis实现数据库的增删改查操作(二)
- Spring Boot + Spring Cloud 实现权限管理系统 后端篇(二十一):服务网关(Zuul)
- Spring boot 入门(四):集成 Shiro 实现登陆认证和权限管理
- springboot(十四):springboot整合shiro-登录认证和权限管理