IDEA使用maven创建简易SSM项目
2020-07-23 23:19
627 查看
一、概述
SSM为当前比较主流的web开发框架,分别代表着spring、springMVC、Mybatis。
二、创建
1.首先创建一个maven webapp项目的空壳
2.导入依赖:分别导入spring核心包:spring-core、spring-web、spring-oxm、spring-tx、spring-jdbc、spring-webmvc、spring-aop、spring-context-support、spring-test;
mybatis核心包:mybatis、mybatis-spring
javaee包:javaee-api
mysql链接包:mysql-connector-java;
dbcp的jar包:commons-dbcp,用来在applicationContext.xml中配置数据库
JSTL标签类:jstl
日志文件管理:log4j
数据连接池:此处使用c3p0,slf4j-api,slf4j-log4j12
导入servlet-api/jsp:javax.servlet-api,javax.servlet.jsp-api
具体的版本以及依赖自行前往MVN选定,此处只是演示简单的SSM项目,只使用了IOC容器,并未使用到AOP编程
3 编写配置文件
3.1 数据连接池的配置,注册bean
<beans xmlns="http://www.springframework.org/schema/beans"
xmlns:xsi="http://www.w3.org/2001/XMLSchema-instance"
xmlns:context="http://www.springframework.org/schema/context"
xmlns:aop="http://www.springframework.org/schema/aop"
xmlns:tx="http://www.springframework.org/schema/tx"
xsi:schemaLocation="http://www.springframework.org/schema/beans
http://www.springframework.org/schema/beans/spring-beans-4.3.xsd
http://www.springframework.org/schema/context
http://www.springframework.org/schema/context/spring-context-4.3.xsd
http://www.springframework.org/schema/aop
http://www.springframework.org/schema/aop/spring-aop-4.3.xsd
http://www.springframework.org/schema/tx
http://www.springframework.org/schema/tx/spring-tx-4.3.xsd">
<!-- 1.配置数据库相关参数properties的属性:${url} -->
<context:property-placeholder location="classpath:db.properties"/>
<!-- 2.配置数据源 -->
<bean id="dataSource" class="com.mchange.v2.c3p0.ComboPooledDataSource">
<property name="driverClass" value="${jdbc.driver}"/>
<property name="jdbcUrl" value="${jdbc.url}"/>
<property name="user" value="${jdbc.username}"/>
<property name="password" value="${jdbc.password}"/>
<property name="maxPoolSize" value="30"/>
<property name="minPoolSize" value="2"/>
</bean>
<!-- 3.配置SqlSessionFactory对象 -->
<bean id="sqlSessionFactory" class="org.mybatis.spring.SqlSessionFactoryBean">
<!-- 注入数据库连接池 -->
<property name="dataSource" ref="dataSource"/>
<!-- 扫描bean包 使用别名 -->
<property name="typeAliasesPackage" value="com.zhongruan.beans"></property>
<!--配置加载映射文件 UserMapper.xml-->
<property name="mapperLocations" value="classpath:mapper/*.xml"/
</bean>
<!-- 自动生成dao,mapper-->
<!-- 4.配置扫描Dao接口包,动态实现Dao接口,注入到spring容器中 -->
<bean class="org.mybatis.spring.mapper.MapperScannerConfigurer">
<!-- 给出需要扫描Dao接口包 -->
<property name="basePackage" value="com.zhongruan.dao"/>
<!-- 注入sqlSessionFactory -->
<property name="sqlSessionFactoryBeanName" value="sqlSessionFactory"/>
</bean>
<!--自动扫描-->
<context:component-scan base-package="com.zhongruan"/>
<!-- 配置事务-->
<!-- 5.配置事务管理器 -->
<bean id="transactionManager" class="org.springframework.jdbc.datasource.DataSourceTransactionManager">
<property name="dataSource" ref="dataSource"/>
</bean>
<!-- 6.开启事务注解-->
<tx:annotation-driven></tx:annotation-driven>
</beans>
3.2 视图解析的配置
<?xml version="1.0" encoding="UTF-8"?>
<beans xmlns="http://www.springframework.org/schema/beans"
xmlns:xsi="http://www.w3.org/2001/XMLSchema-instance"
xmlns:mvc="http://www.springframework.org/schema/mvc"
xmlns:context="http://www.springframework.org/schema/context"
xmlns:aop="http://www.springframework.org/schema/aop"
xmlns:tx="http://www.springframework.org/schema/tx"
xsi:schemaLocation="http://www.springframework.org/schema/beans
http://www.springframework.org/schema/beans/spring-beans-4.3.xsd
http://www.springframework.org/schema/mvc
http://www.springframework.org/schema/mvc/spring-mvc-4.3.xsd
http://www.springframework.org/schema/context
http://www.springframework.org/schema/context/spring-context-4.3.xsd
http://www.springframework.org/schema/aop
http://www.springframework.org/schema/aop/spring-aop-4.3.xsd
http://www.springframework.org/schema/tx
http://www.springframework.org/schema/tx/spring-tx-4.3.xsd">
<!-- 1.注解扫描位置-->
<context:component-scan base-package="com.zhongruan.controller"/>
<!-- 2.配置映射处理和适配器-->
<bean class="org.springframework.web.servlet.mvc.method.annotation.RequestMappingHandlerMapping"/>
<bean class="org.springframework.web.servlet.mvc.method.annotation.RequestMappingHandlerAdapter"/>
<!-- 3.视图的解析器-->
<bean class="org.springframework.web.servlet.view.InternalResourceViewResolver">
<property name="prefix" value="/pages/" />
<property name="suffix" value=".jsp" />
</bean>
</beans>
3.3 在web.xml中加载配置文件
<?xml version="1.0" encoding="UTF-8"?>
<web-app xmlns:xsi="http://www.w3.org/2001/XMLSchema-instance"
xmlns="http://xmlns.jcp.org/xml/ns/javaee"
xsi:schemaLocation="http://xmlns.jcp.org/xml/ns/javaee http://xmlns.jcp.org/xml/ns/javaee/web-app_3_1.xsd"
version="3.1">
<!-- 配置加载类路径的配置文件 -->
<context-param>
<param-name>contextConfigLocation</param-name>
<param-value>classpath*:applicationContext.xml</param-value>
</context-param>
<!-- 配置监听器 -->
<listener>
<listener-class>org.springframework.web.context.ContextLoaderListener</listener-class>
</listener>
<listener>
<listener-class>org.springframework.web.context.request.RequestContextListener</listener-class>
</listener>
<!-- 解决中文乱码过滤器 -->
<filter>
<filter-name>characterEncodingFilter</filter-name>
<filter-class>org.springframework.web.filter.CharacterEncodingFilter</filter-class>
<init-param>
<param-name>encoding</param-name>
<param-value>UTF-8</param-value>
</init-param>
</filter>
<filter-mapping>
<filter-name>characterEncodingFilter</filter-name>
<url-pattern>/*</url-pattern>
</filter-mapping>

<!-- 前端控制器(加载classpath:spring-mvc.xml 服务器启动创建servlet) -->
<servlet>
<servlet-name>dispatcherServlet</servlet-name>
<servlet-class>org.springframework.web.servlet.DispatcherServlet</servlet-class>
<!-- 配置初始化参数,创建完DispatcherServlet对象,加载springmvc.xml配置文件 -->
<init-param>
<param-name>contextConfigLocation</param-name>
<param-value>classpath:spring-mvc.xml</param-value>
</init-param>
<!-- 服务器启动的时候,让DispatcherServlet对象创建 -->
<load-on-startup>1</load-on-startup>
</servlet>
<servlet-mapping>
<servlet-name>dispatcherServlet</servlet-name>
<url-pattern>*.do</url-pattern>
</servlet-mapping>
</web-app>
4.编写dao层接口,并编写对应的配置文件省却访问数据库那一步:
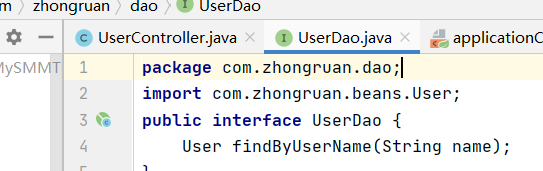
 配置文件中的id要跟dao的接口方法名匹配,类似bean
5.编写service层,并调用dao接口实现相关功能
@Service  //特殊的bean,也加入到容器中
public class UserServiceImpl implements UserService
{
@Autowired              //自动装配,依赖反转的标志
private UserDao userDao;
@Override
public int login(String username, String password) {
User user=userDao.findByUserName(username);
if (user!=null&&user.getPassword().equals(password))
return user.getId();
return -1;
}
}
6.编写controller层:
@Controller
@RequestMapping("/user")
public class UserController {
@Autowired
private UserService userService;
@RequestMapping("/login.do")
public ModelAndView login(User user){
int i= userService.login(user.getUsername(),user.getPassword());
ModelAndView mv=new ModelAndView();
if (i!=-1)
mv.setViewName("main");
else
mv.setViewName("../failer");
return mv;
}
}
由此,SSM的后端基本完成,前端可以写jsp完成。

相关文章推荐
- 使用idea创建基于maven的ssm项目步骤
- 使用Idea创建ssm项目,SpringMVC+Spring+MyBatis+Maven整合
- 使用IDEA创建maven的SSM项目
- IntelliJ IDEA-ssm使用IDEA创建一个Maven风格的ssm项目
- 使用idea maven创建SSM项目
- 使用Idea创建ssm项目,SpringMVC+Spring+MyBatis+Maven整合
- 使用idea搭建一个简单的SSM框架:(1)使用idea创建maven项目
- IDEA使用Maven模板快速搭建SSM项目(快速创建配置文件)
- 手把手教你使用idea建SSM项目——创建Maven+Web项目 Mybatis与spring的融合
- 使用Idea创建ssm项目,SpringMVC+Spring+MyBatis+Maven整合
- 使用IDEA利用Maven创建SSM项目并且实现简单的注册功能
- 使用Idea创建ssm项目,SpringMVC+Spring+MyBatis+Maven整合
- IDEA使用maven创建web项目卡住解决办法
- Eclipse/IDEA中使用Maven创建Web项目报错
- 使用IDEA创建一个maven项目
- 基于maven使用IDEA创建多模块项目
- 基于maven使用IDEA创建多模块项目-很详细
- 如何使用idea(2016.2.4)创建一个maven的项目(入门)
- 【SSM】Eclipse使用Maven创建Web项目+整合SSM框架
- IDEA maven项目创建Web时 JSP如何使用标签