redis安装常用命令和整合spring入门案例
1 redis
1.1redis 介绍
Redis 是一个开源(BSD许可)的,内存中的数据结构存储系统,它可以用作数据库、缓存和消息中间件。 它支持多种类型的数据结构,如 字符串(strings), 散列(hashes), 列表(lists), 集合(sets), 有序集合(sorted sets) 与范围查询, bitmaps, hyperloglogs 和 地理空间(geospatial) 索引半径查询。 Redis 内置了 复制(replication),LUA脚本(Lua scripting), LRU驱动事件(LRU eviction),事务(transactions) 和不同级别的 磁盘持久化(persistence), 并通过 Redis哨兵(Sentinel)和自动 分区(Cluster)提供高可用性(high availability)。
nosql:非关系型数据库 redis,mongdb,hbase
消息中间件:主要作用是为了实现数据的平滑过渡,让程序调用更加流畅
性能问题(处理速度): 写操作 8.6万/秒 读操作 11.2万/秒 平均10万/秒
1.2redis 安装
1)上传安装包

2)解压安装包
tar -xvf redis-5.0.4.tar.gz
移动压缩包到soft目录
mv redis-5.0.4.tar.gz soft/
3)安装Redis
make
make install
4)修改Redis配置文件
进入Redis目录
cd redis
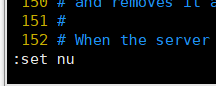
vim redis.conf
输入:
:set nu展现行号
1 注释ip绑定

2关闭保护模式

3开启后台启动

1.3redis 命令
1.启动redis
redis-server redis.conf
2.进入客户端
redis-cli -p 6379
3.关闭redis
redis-cli -p 6379 shutdown
简化操作: 如果操作的redis是默认的端口 则可以省略不写
redis-cli -p
查询redis开起了的端口
ps -ef |grep redis
详细命令和整合spring入门案列链接
Spring整合Redis
整合思路
说明:将jedis对象交给spring容器进行管理.之后哪里需要直接注入即可.
步骤:
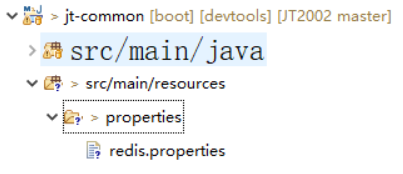
1.编辑redis.properties文件,指定redis节点的ip:port
2.由于redis比较重要,很多业务系统都需要调用,所以将redis整合写入common
3.通过配置类(配置文件)形式整合redis.
1.编辑redis.properties文件
文件位置
2.编辑配置文件
redis.host=192.168.126.129
redis.port=6379
3 编辑配置类
@Configuration 	//我是一个配置类    一般都会与@Bean联用
@PropertySource("classpath:/properties/redis.properties")
public class RedisConfig {

@Value("${redis.host}")
private String host;
@Value("${redis.port}")
private Integer port;

//将返回值的结果交给spring容器进行管理,如果以后想要使用该对象则可以直接注入.
@Bean
public Jedis jedis() {

return new Jedis(host, port);
}

}
json格式转化问题
package com.jt.test;

import java.util.Date;

import org.junit.jupiter.api.Test;

import com.fasterxml.jackson.core.JsonProcessingException;
import com.fasterxml.jackson.databind.ObjectMapper;
import com.jt.pojo.ItemDesc;

public class TestObjectMapper {

//改对象就是工具api  有且只有一份即可.并且不允许别人修改.
private static final ObjectMapper MAPPER = new ObjectMapper();
/**
* 目的: 实现对象与json串之间的转化
* 步骤1:  将对象转化为json
* 步骤2:  将json转化为对象
* 利用ObjectMapper 工具API实现
* @throws JsonProcessingException
*/
@Test
public void test01() throws JsonProcessingException {

ItemDesc itemDesc = new ItemDesc();
itemDesc.setItemId(101L).setItemDesc("json转化测试")
.setCreated(new Date()).setUpdated(itemDesc.getCreated());

//1.将对象转化为JSON   调用的是对象的get方法
String json = MAPPER.writeValueAsString(itemDesc);
System.out.println(json);

//2.将json转化为对象   传递需要转化之后的class类型   调用是对象的set方法
ItemDesc itemDesc2 = MAPPER.readValue(json, ItemDesc.class);
System.out.println(itemDesc2.getItemDesc());
}
}
封装ObjectMapperUtil
注:API主要负责将对象转化为JSON,将JSON转化为对象,同时优化异常处理.
package com.jt.util;

import org.springframework.util.StringUtils;

import com.fasterxml.jackson.core.JsonProcessingException;
import com.fasterxml.jackson.databind.ObjectMapper;

public class ObjectMapperUtil {

//json与对象的转化   优化异常处理
private static final ObjectMapper MAPPER = new ObjectMapper();

//1.将对象转化为JSON
public static String toJSON(Object target) {

if(target == null) {
throw new NullPointerException("taget数据为null");
}

try {
return MAPPER.writeValueAsString(target);
} catch (JsonProcessingException e) {
e.printStackTrace();
throw new RuntimeException(e); //如果转化过程中有问题则直接抛出异常
}

}

//2. 将json串转化为对象   用户传递什么样的类型,就返回什么样的对象!!!
// <T>  定义了一个泛型对象  代表任意类型
public static <T> T toObject(String json,Class<T> targetClass) {

if(StringUtils.isEmpty(json) || targetClass == null) {
throw new NullPointerException("参数不能为null");
}

try {
return MAPPER.readValue(json, targetClass);
} catch (JsonProcessingException e) {

e.printStackTrace();
throw new RuntimeException(e);
}
}

}

- Spring+SpringMVC+MyBatis+easyUI整合进阶篇(九)Linux下安装redis及redis的常用命令和操作...
- Spring+SpringMVC+MyBatis+easyUI整合进阶篇(九)Linux下安装redis及redis的常用命令和操作
- Spring+SpringMVC+MyBatis+easyUI整合进阶篇(九)Linux下安装redis及redis的常用命令和操作
- CentOS6.5下redis安装部署配置指南、常用命令、主从同步集群、redis-php学习资料整合详解
- 王高利:CentOS6.5下redis安装部署配置指南、常用命令、主从同步集群、redis-php学习资料整合详解
- Spring Boot整合Redis入门案例
- Docker入门实践笔记(三)一篇文章搞懂Docker下安装Redis,以及Redis与SpringBoot整合
- SpringBoot整合Thymeleaf 及常用命令案例
- SVN快速入门1——SVN的安装及常用命令
- redis入门——redis常用命令
- redis3.2.8安装和配置,及常用命令简介
- MongoDB入门教程(包含安装、常用命令、相关概念、使用技巧、常见操作等)
- linux下redis安装配置及redis常用命令
- SpringBoot 整合 SpringData 入门案例(一)
- 5.1 入门整合案例(SpringBoot+Spring-data-elasticsearch) ---- good
- redis入门——redis常用命令
- linux下redis安装配置及redis常用命令
- linux下redis安装配置及redis常用命令
- Oracle 入门安装及常用命令
- redis安装,redis项目以来,redis和spring整合,redis的service,redis的service实现类