SpringBoot 整合 SpringData 入门案例(一)
2017-02-18 23:03
453 查看
J2EE的核心框架Spring! 而SpringBoot 和SpringData也是非常强大的,大大简化了开发,使我们可以把精力专注于业务上!
看看两者的功能:
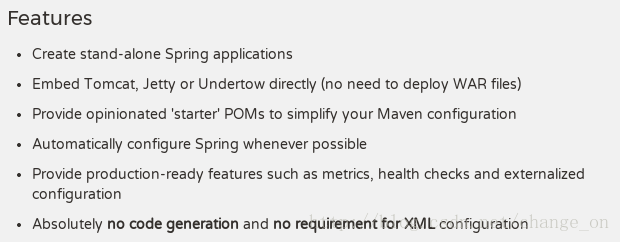
SpringBoot
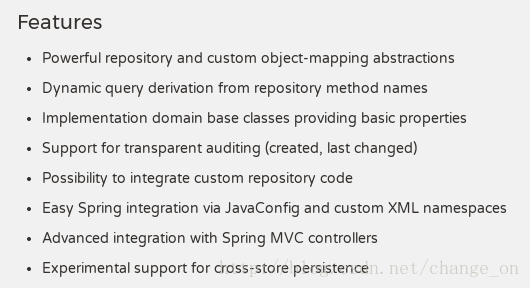
SpringData
环境: linux + myeclipse2015 + jdk1.7 + maven3.3.3 + SpringBoot 1.5.1+ SpringData + mysql5.5
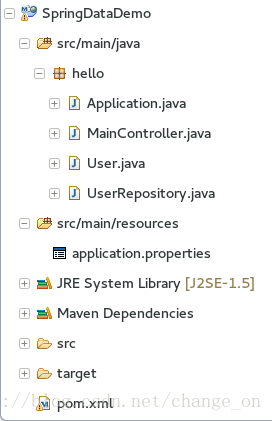
项目结构图:
1).pom.xml
2).User.java
3).UserRepository.java
4).MainController.java
5).Application.java
6).application.properties
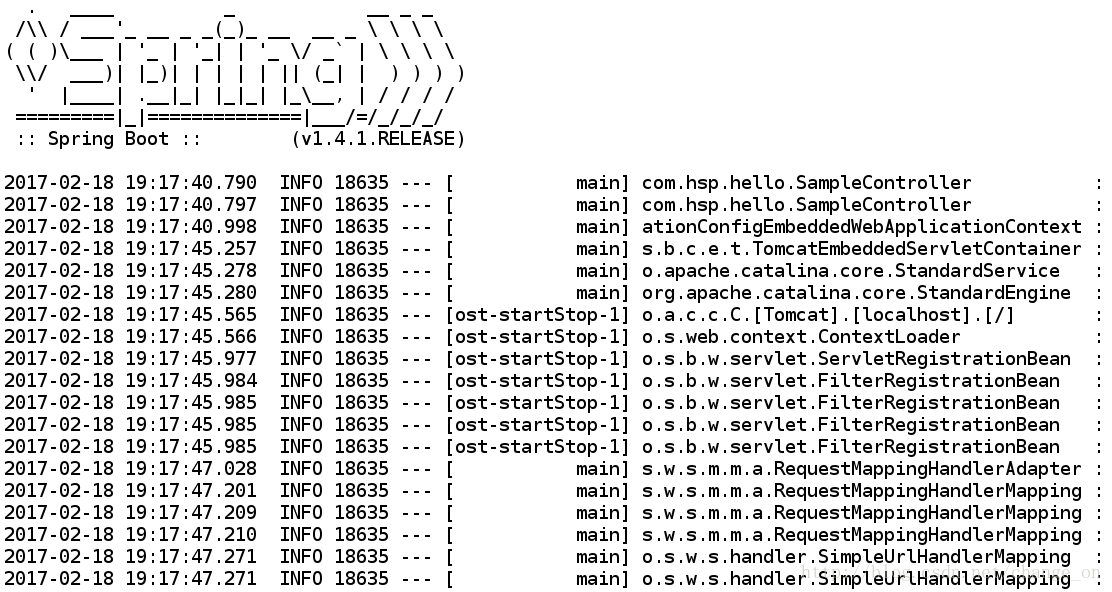
7).启动springboot
8).在浏览器输入:http://localhost:8080/spring/add?name=First&email=someemail@someemailprovider.com
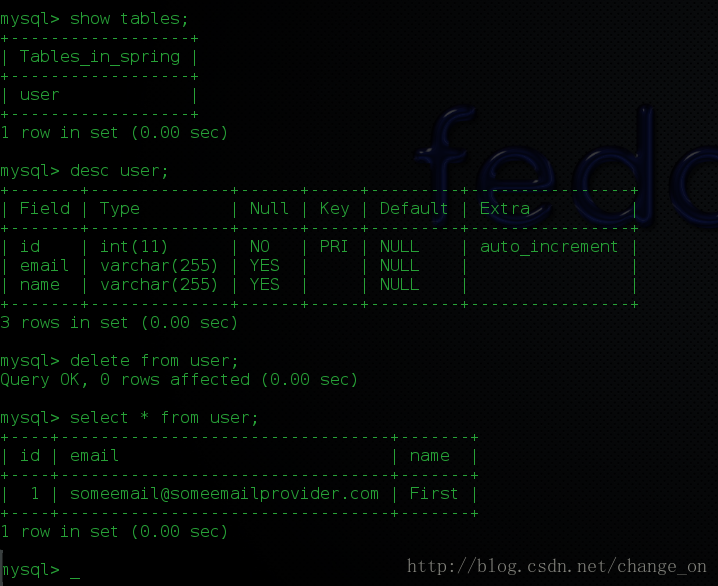
数据库反向生成数据库表,也插入了数据:
9).在浏览器输入:http://localhost:8080/spring/all

10).一个小小的整合就成功了
看看两者的功能:
SpringBoot
SpringData
环境: linux + myeclipse2015 + jdk1.7 + maven3.3.3 + SpringBoot 1.5.1+ SpringData + mysql5.5
项目结构图:
1).pom.xml
<project xmlns="http://maven.apache.org/POM/4.0.0" xmlns:xsi="http://www.w3.org/2001/XMLSchema-instance"
xsi:schemaLocation="http://maven.apache.org/POM/4.0.0 http://maven.apache.org/maven-v4_0_0.xsd"> <modelVersion>4.0.0</modelVersion>
<groupId>com.hsp.spring</groupId>
<artifactId>SpringDataDemo</artifactId>
<packaging>war</packaging>
<version>0.0.1-SNAPSHOT</version>
<name>SpringDataDemo Maven Webapp</name>
<url>http://maven.apache.org</url>

<parent>
<groupId>org.springframework.boot</groupId>
<artifactId>spring-boot-starter-parent</artifactId>
<version>1.5.1.RELEASE</version>
</parent>

<dependencies>
<dependency>
<groupId>javax.servlet</groupId>
<artifactId>javax.servlet-api</artifactId>
<version>3.1-b07</version>
</dependency>
<dependency>
<groupId>junit</groupId>
<artifactId>junit</artifactId>
<version>3.8.1</version>
<scope>test</scope>
</dependency>
<!-- SpringBoot 里面包含spring mvc -->
<dependency>
<groupId>org.springframework.boot</groupId>
<artifactId>spring-boot-starter-web</artifactId>
</dependency>

<!-- 引进JPA-->

<dependency>
<groupId>org.springframework.boot</groupId>
<artifactId>spring-boot-starter-data-jpa</artifactId>
</dependency>

<!-- mysql连接的jar包 -->

<dependency>
<groupId>mysql</groupId>
<artifactId>mysql-connector-java</artifactId>
</dependency>

<dependency>
<groupId>org.springframework.boot</groupId>
<artifactId>spring-boot-starter-test</artifactId>
<scope>test</scope>
</dependency>
</dependencies>
<build>
<plugins>
<plugin>
<groupId>org.springframework.boot</groupId>
<artifactId>spring-boot-maven-plugin</artifactId>
</plugin>
</plugins>
<finalName>SpringDataDemo</finalName>
</build>
</project>
2).User.java
package hello;

import javax.persistence.Entity;
import javax.persistence.GeneratedValue;
import javax.persistence.GenerationType;
import javax.persistence.Id;

@Entity // 实体类,利用对象关系映射生成数据库表
public class User {
@Id
@GeneratedValue(strategy=GenerationType.AUTO)
private Integer id;

private String name;

private String email;

public Integer getId() {
return id;
}

public void setId(Integer id) {
this.id = id;
}

public String getName() {
return name;
}

public void setName(String name) {
this.name = name;
}

public String getEmail() {
return email;
}

public void setEmail(String email) {
this.email = email;
}

}
3).UserRepository.java
package hello;

import org.springframework.data.repository.CrudRepository;

import hello.User;

// 该接口会自动被实现,springdata已经帮我们实现了基本的增删改查
// CRUD --> Create(增), Read(查), Update(改), Delete(删)

public interface UserRepository extends CrudRepository<User, Long> {

}
4).MainController.java
package hello;

import org.springframework.beans.factory.annotation.Autowired;
import org.springframework.stereotype.Controller;
import org.springframework.web.bind.annotation.RequestMapping;
import org.springframework.web.bind.annotation.GetMapping;
import org.springframework.web.bind.annotation.RequestParam;
import org.springframework.web.bind.annotation.ResponseBody;

import hello.User;
import hello.UserRepository;

@Controller    // 表示这是一个Controller
@RequestMapping(path="/spring") // 访问url从Application/spring/开始
public class MainController {
@Autowired//自动从spring容器中加载userRepository
private UserRepository userRepository;

@GetMapping(path="/add") // “/add”路径映射到addNewUser方法上
public @ResponseBody String addNewUser (@RequestParam String name
, @RequestParam String email) {
// @ResponseBody 表示返回的string是一个回应(response),不是一个视图
// @RequestParam 表示接收的参数可以是get或post

User n = new User();
n.setName(name);
n.setEmail(email);
userRepository.save(n);
return "Saved";
}

@GetMapping(path="/all")
public @ResponseBody Iterable<User> getAllUsers() {
// 返回一个json类型的user
return userRepository.findAll();
}
}
5).Application.java
package hello;

import org.springframework.boot.SpringApplication;
import org.springframework.boot.autoconfigure.SpringBootApplication;

@SpringBootApplication
public class Application {

public static void main(String[] args) {
/*Spring-boot已经集成了tomcat,main函数被执行时,SpringApplication引导应用启动spring
进而启动tomcat启动应用*/
SpringApplication.run(Application.class, args);
}
}
6).application.properties
spring.jpa.hibernate.ddl-auto=create
spring.datasource.url=jdbc:mysql://localhost:3306/spring
spring.datasource.username=xxxxxx
spring.datasource.password=xxxxxx
7).启动springboot
8).在浏览器输入:http://localhost:8080/spring/add?name=First&email=someemail@someemailprovider.com
数据库反向生成数据库表,也插入了数据:
9).在浏览器输入:http://localhost:8080/spring/all
10).一个小小的整合就成功了

相关文章推荐
- 5.1 入门整合案例(SpringBoot+Spring-data-elasticsearch) ---- good
- 5.1 入门整合案例(SpringBoot+Spring-data-elasticsearch) ---- good
- 入门整合案例(SpringBoot+Spring-data-elasticsearch) ---- (指定分词器)
- springBoot入门总结(三)整合SpringDataJPA
- Spring boot入门,整合mybatis开发案例
- springboot 入门教程(6)--- 整合Spring data JPA实现CRUD(附源码)
- dubbo整合springboot入门案例
- Spring Boot Dubbo 整合和入门理解
- Springboot 整合 Dubbo/ZooKeeper 详解 SOA 案例
- SpringBoot 整合 Redis 的简单案例
- springboot+mybatis整合(入门)
- Spring Boot 整合 Mybatis Annotation 注解的完整 Web 案例
- Springboot 整合 Mybatis 的完整 Web 案例
- Springboot 整合 Dubbo/ZooKeeper 详解 SOA 案例
- spring整合cxf入门案例
- SpringBoot整合WebSocket案例
- spring整合zookeeper与dubbo的入门案例(一)
- spring boot学习系列:spring boot与jdbcTemplate的整合案例
- Springboot 整合 Mybatis 的完整 Web 案例
- Springboot 整合 Mybatis 的完整 Web 案例