Nginx 虚拟主机、反向代理与代理缓存
一、虚拟主机
环境:
[root@localhost ~]# cat /etc/redhat-release
CentOS Linux release 7.7.1908 (Core)
[root@localhost ~]# ifconfig |grep inet
inet 192.168.1.111  netmask 255.255.255.0  broadcast 192.168.1.255
安装配置nginx,见我以前写的文章
https://blog.csdn.net/oToyix/article/details/106212135
案例、配置虚拟主机
1、创建网站代码目录及新建首页文件
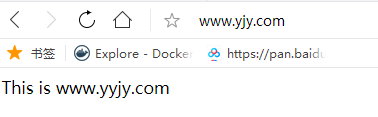
[root@localhost conf]# mkdir ../html/yjy
# echo "This is www.yyjy.com">../html/yjy/index.html
2、配置主配置文件-添加引用
#vim /usr/local/nginx/conf/nginx.conf
include /usr/local/nginx/conf/vhost/*.conf;
此行放在http {} 块中
3、虚拟主机配置文件
[root@localhost conf]# mkdir vhost
[root@localhost conf]# vim vhost/www.yjy.com.conf
server{
listen 80;
server_name www.yjy.com;
location / {
root html/yjy;
index index.html;
}
}
[root@localhost conf]# nginx -s reload  重启nginx
4、C:\Windows\System32\drivers\etc修改此文件
192.168.1.111	www.yjy.com	111.yjy.com
192.168.1.107	107.yjy.com
添加至最后,这里因为要做下面实验,一起写了
5、浏览器访问
二、反向代理
环境:
代理服务器:192.168.1.111
后端服务器 :192.168.1.107
案例一:
客户端浏览器上访问www.yjy.com得到结果”This is 107.yjy.jcom”,并得到真实远程客户端口的信息,如IP等
1、在111服务器上配置
[root@localhost ~]#vim /usr/local/nginx/conf/nginx.conf
include /usr/local/nginx/conf/vhost/*.conf;
此行放在http {} 块中[root@localhost ~]# vim /usr/local/nginx/conf/vhost/www.yjy.com.conf
server{
listen 80;
server_name www.yjy.com;

location / {
proxy_pass http://107.yjy.com;
}
}
2、在107服务器上配置
创建107.yjy.com网站代码目录
[root@localhost ~]# mkdir /usr/local/nginx/html/107.yjy.com
新建首页文件
[root@localhost ~]# echo "This is 107.yjy.com">/usr/local/nginx/html/107.yjy.com/index.html
主配置文件上添加引用
[root@localhost ~]# vim /usr/local/nginx/conf/nginx.conf
include /usr/local/nginx/conf/vhost/*.conf;
[root@localhost ~]# vim /usr/local/nginx/conf/vhost/107.yjy.con.conf
server{
listen 80;
server_name 107.yjy.com;
location / {
root html/107.yjy.com;
index index.html;
}
}
~
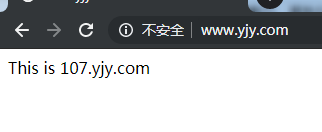
3、效果
案例二、配置反向代理,向真实服务器107传递远程客户端信息
配置111代理服务器
[root@localhost ~]# vim /usr/local/nginx/conf/vhost/www.yjy.com.conf
server{
listen 80;
server_name www.yjy.com;

location / {
proxy_pass http://192.168.1.107;
proxy_set_header Host $http_host;
proxy_set_header X-Real-IP $remote_addr;
proxy_set_header X-Forwarded-For $proxy_add_x_forwarded_for;
}
}
配置107后端服务器主配置文件
[root@localhost ~]# vim /usr/local/nginx/conf/nginx.conf
log_format  main  '$remote_addr - $remote_user [$time_local] "$request" '
'$status $body_bytes_sent "$http_referer" '
'"$http_user_agent" "$http_x_real_ip" "$http_x_forwarded_for"';

access_log  logs/access.log  main;
效果:
1、在浏览器上输入www.yjy.com,得出’This is 107.yjy.com’
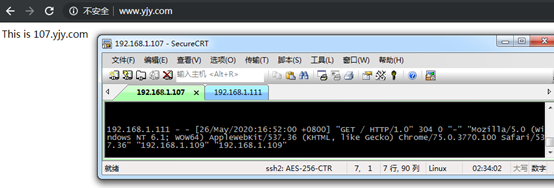
2、在107上查看访问日志,可以得出远程客户端的真实IP
#tailf /usr/local/nginx/logs/access.log
三、部署nginx代理缓存服务器,并验证缓存是否生效
1、配置111代理配置文件
[root@localhost ~]# vim /usr/local/nginx/conf/vhost/www.yjy.com.conf
1 proxy_cache_path /usr/local/nginx/cache max_size=10g levels=1:2 keys_zone=nginx_cache:10m inactive=10m use_temp_path=off;
2
3 server{
4         listen 80;
5         server_name www.yjy.com;
6
7         location / {
8                 #root html/yjy;
9                 #index index.html;
10                 proxy_pass http://192.168.1.107;
11                 proxy_set_header Host $http_host;
12                 proxy_set_header X-Real-IP $remote_addr;
13                 proxy_set_header X-Forwarded-For $proxy_add_x_forwarded_for;
14                 proxy_cache nginx_cache;#定义缓存空间,与第一行值要一致
15                 proxy_cache_key $host$uri$is_args$args;定义何时去缓存空间拿数据
16                 proxy_cache_valid 200 302 1d;正确访问信息及重定向 保存1天,超过1天将删除文件
17         }
18 }
~
[root@localhost html]# nginx -s reload 重启服务
2、浏览器访问http://www.yjy.com/test.jpg
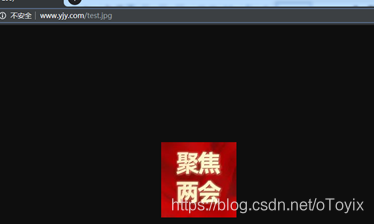
3、查看nginx缓存空间/usr/local/nginx/cache
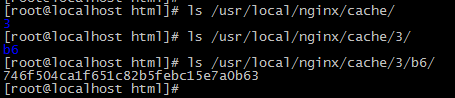
有缓存文件产生,证明代理缓存成功。
注:
/usr/local/nginx/cache #缓存资源存放路径
levels #设置缓存资源的递归级别,默认为
levels=1:2,表示Nginx为将要缓存的资源生成的key从后依次设置两级保
存。
key_zone #在共享内存中设置一块存储区域来存放缓存的key和
metadata,这样nginx可以快速判断一个request是否命中或者未命中缓存,
1m可以存储8000个key,10m可以存储80000个key
max_size #最大cache空间,如果不指定,会使用掉所有disk
space,当达到配额后,会删除不活跃的cache文件
inactive #未被访问文件在缓存中保留时间,本配置中如果10分钟未被访问则不论状态是否为expired,缓存控制程序会删掉文件。
inactive默认是10分钟。需要注意的是,inactive和expired配置项的含义是不同的,
expired只是缓存过期,但不会被删除,inactive是删除指定时间内未被访问
的缓存文件
use_temp_path #如果为off,则nginx会将缓存文件直接写入指定的
cache文件中,而不是使用temp_path存储,official建议为off,避免文件
在不同文件系统中不必要的拷贝
proxy_cache #启用proxy cache,并指定key_zone。如果
proxy_cache off表示关闭掉缓存。
------------------end

- nginx的配置、虚拟主机、负载均衡和反向代理
- (转载)nginx的配置、虚拟主机、负债均衡和反向代理(1)
- Nginx 反向代理 负载均衡 虚拟主机
- nginx 反向代理 tomcat (https、虚拟主机)
- (转载)nginx的配置、虚拟主机、负债均衡和反向代理(2)
- nginx的虚拟主机配置和反向代理,负载均衡
- 用nginx来作反向代理(调度器)来访问虚拟web主机
- nginx 反向代理 tomcat (https、虚拟主机)
- nginx的配置、虚拟主机、负债均衡和反向代理(2)
- LNMP(二)Nginx默认虚拟主机、用户认证、域名重定向、访问日志、日志切割、防盗链、访问控制、静态文件不记录日志和过期时间、Nginx解析php相关配置、Nginx代理
- nginx反向代理服务器地址重写、负载均衡、证书认证、虚拟主机
- (转载)nginx的配置、虚拟主机、负债均衡和反向代理(3)
- nginx的配置、虚拟主机、负债均衡和反向代理(3)
- Nginx服务器 、 Nginx虚拟主机 、 Nginx反向代理
- Nginx的基本配置:虚拟主机、日志文件、缓存、自动列目录的配置
- nginx介绍,包括,虚拟主机,反向代理,负载均衡,以及基本命令
- Nginx反向代理多虚拟主机及记录真实客户IP
- nginx的配置、虚拟主机、负载均衡和反向代理
- Nginx配置解读,虚拟主机,https配置,反向代理,https重定向
- nginx的虚拟主机、反向代理、负载均衡的应用