HTML+CSS+JS模仿win10亮度调节效果
2020-06-05 16:41
78 查看
钉钉、微博极速扩容黑科技,点击观看阿里云弹性计算年度发布会!>>>

HTML+CSS+JS模仿win10亮度调节效果
代码
<!doctype html>
<html>
<head>
<meta charset="utf-8">
<title>模仿win10的亮度调节</title>
<style>
.control_bar{
height:200px;
width:500px;
border-bottom:3px solid #888888;

}
.control_bar_cursor{
height:25px;
width:8px;
background: #505151;
border-radius:5px;
margin-top:-12.5px;
position:relative;
top:0;
left:0;
}
.control_bar_cursor:hover{
background:white;
}
#control_bar_mask{
margin-top:-203px;
width:0px;
}
.mask{
position:fixed;
bottom:0;
top:0;
left:0;
right:0;
background:black;
z-index:-1;
}</style>
</head>
<body>
<div class="mask"></div><div class="control_bar"></div>
<div class="control_bar" style="border-bottom:3px solid #505151;" id="control_bar_mask"></div>
<div class="control_bar_cursor"></div>
</body>
<script>
window.onload = function(){
var control_bar = document.getElementsByClassName("control_bar")[0];
var control_bar_mask = document.getElementById("control_bar_mask");
var control_bar_cursor = document.getElementsByClassName("control_bar_cursor")[0];
var def_left = control_bar_cursor.offsetLeft;
var mask = document.getElementsByClassName("mask")[0];
document.body.onmousedown = function(){
window.onmousemove = function(){
var cursor_X = event.clientX;
var cursor_Y = event.clientY;
if(cursor_X < def_left){
control_bar_cursor.style.left = 0;
}else if(cursor_X > control_bar.offsetWidth + def_left){
control_bar_cursor.style.left = control_bar.offsetWidth;
}else{
control_bar_cursor.style.left = cursor_X - def_left + "px";
}
//亮度比
var proportion = parseInt(control_bar_cursor.offsetLeft - def_left) / parseInt(control_bar.offsetWidth - 1);
control_bar_mask.style.width = proportion * control_bar.offsetWidth + "px";
mask.style.opacity = 1 - proportion;
};
window.onmouseup = function(){
window.onmousemove = null;
};
};
};
</script>
</html>
1.将各个元素的样子写 1000 出来
这里为了方便好观察给body添加了一个背景颜色
-
html
<div class="control_bar"></div>
<div class="control_bar" style="border-bottom:3px solid #505151;"  id="control_bar_mask></div>
<div class="control_bar_cursor"></div>
-
css
body{ background:back; } .control_bar{ height:200px; width:500px; border-bottom:3px solid #888888; } .control_bar_cursor{ height:25px; width:8px; background: #505151; border-radius:5px; } -
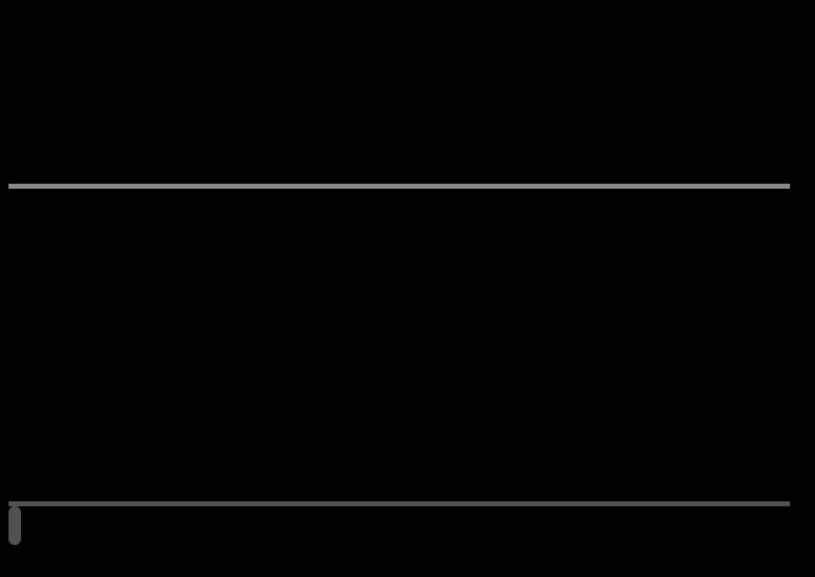
效果图
2. 将各个元素叠到一起
-
css
body{
background:black;
}
.control_bar{
height:200px;
width:500px;
border-bottom:3px solid #888888;

}
.control_bar_cursor{
height:25px;
width:8px;
background: #505151;
border-radius:5px;
margin-top:-12.5px;
position:relative;
top:0;
left:0;
}
.control_bar_cursor:hover{
background:white;
}
#control_bar_mask{
margin-top:-203px;
width:100px;
}
这里为了显示遮罩效果把遮罩层的div宽度设小了

3. 添加js
-
js
window.onload = function(){
var control_bar = document.getElementsByClassName("control_bar")[0];
var control_bar_mask = document.getElementById("control_bar_mask");
var control_bar_cursor = document.getElementsByClassName("control_bar_cursor")[0];
var def_left = control_bar_cursor.offsetLeft;
document.body.onmousedown = function(){
window.onmousemove = function(){
var cursor_X = event.clientX;
var cursor_Y = event.clientY;
if(cursor_X < def_left){
control_bar_cursor.style.left = 0;
}else if(cursor_X > control_bar.offsetWidth + def_left){
control_bar_cursor.style.left = control_bar.offsetWidth;
}else{
control_bar_cursor.style.left = cursor_X - def_left + "px";
}
var proportion = parseInt(control_bar_cursor.offsetLeft - def_left) / parseInt(control_bar.offsetWidth - 1);
control_bar_mask.style.width = proportion * control_bar.offsetWidth + "px";
};
window.onmouseup = function(){
window.onmousemove = null;
};
};
};
4. 添加一个mask用控制条来控制其透明度达到亮度调节效果
<div class="mask"></div>
.mask{
position:fixed;
bottom:0;
top:0;
left:0;
right:0;
background:black;
z-index:-1;
}
window.onload = function(){ var control_bar = document.getElementsByClassName("control_bar")[0]; var control_bar_mask = document.getElementById("control_bar_mask"); var control_bar_cursor = document.getElementsByClassName("control_bar_cursor")[0]; var def_left = control_bar_cursor.offsetLeft; var mask = document.getElementsByClassName("mask")[0]; document.body.onmousedown = function(){ window.onmousemove = function(){ var cursor_X = event.clientX; var cursor_Y = event.clientY; if(cursor_X < def_left){ control_bar_cursor.style.left = 0; }else if(cursor_X > control_bar.offsetWidth + def_left){ control_bar_cursor.style.left = control_bar.offsetWidth; }else{ control_bar_cursor.style.left = cursor_X - def_left + "px"; } ff9 //亮度比 var proportion = parseInt(control_bar_cursor.offsetLeft - def_left) / parseInt(control_bar.offsetWidth - 1); control_bar_mask.style.width = proportion * control_bar.offsetWidth + "px"; mask.style.opacity = 1 - proportion; }; window.onmouseup = function(){ window.onmousemove = null; }; }; };

相关文章推荐
- HTML+CSS+JS模仿win10亮度调节效果的示例代码
- html+css+js(+JQuery)制作扑克牌图片切换效果
- fieldset实现下订单的分页效果(js+css+html)
- Html+Css+Js图片阴影动画效果(完整代码+详解)
- 用html+css+js实现选项卡切换效果
- HTML+CSS 模仿Windows 7 桌面效果
- 初识网站前端--用简单的HTML+CSS+js实现的选项卡切换效果
- 使用html+js+css 实现页面轮播图效果(实例讲解)
- html 使用js+css+html实现图片划过预览效果
- 使用Html+Css+js技术编写一个完整的表格列表内容中 实现 复选框的全选 反选效果
- html,css,原生js——实现Tab(tab)选项卡切换效果——立刻切换
- HTML+CSS 模仿Windows 7 桌面效果
- html,css,原生js——实现常见的Tab(tab)选项卡切换效果——延迟切换
- 纯js+html和纯css+html制作手风琴效果
- 使用html+css+js技术编写一个完整的表格列表内容中 复选框的全选 反选效果
- 关于Sublime Text 3使用SublimeLinter配置JS,CSS,HTML语法检查,插件安装后没有提示效果的解决办法
- js+css 模仿淘宝评分效果
- HTML+CSS项目实践一:单纯利用CSS制作图片轮播效果(不使用JS)
- HTML+CSS项目实践二:单纯利用CSS制作导航栏下拉菜单效果(不使用JS)
- 自己写的js评分【大佬绕道】,js jq html css 评分效果。