微信小程序学习笔记1 ——关于微信小程序云开发登录注册功能
2020-04-26 19:58
477 查看
本科课程作业写了个基础的小程序在这里记录分享一下,如有错误欢迎指出。
注册功能的实现
注册功能,本质上是向数据库里添加一条用户的信息,我的思路是首先判断该用户有没有注册过账号,若有则跳转登录,若无则直接注册。
根据云开发自带的login云函数获取到用户的openid,然后根据此openid在用户集合中查询,为空跳转注册,不为空则跳转提示“已经注册请直接登录”
js代码
- 现在登录的js文件开头申明:
const app = getApp()
const db = wx.cloud.database({   //引用云数据库
env: '云开发环境名'			//云开发环境ID
});
const 自己起的名userListDB = db.collection('集合名');
- 在登录的js文件中onload方法调用云函数login获取用户openid:
var that = this
//  调用login云函数获取openid
wx.cloud.callFunction({
name: 'login',
data: {},
success: res => {
console.log('[云函数] [login] user openid: ', res.result.openid)
that.setData({
openid: res.result.openid
})
app.globalData.openid = res.result.openid
}
- 之后在集合中利用openid查询:
register() {
let that = this; //查询用户是否已经注册
userListDB.where({
_openid: app.globalData.openid // 填入当前用户 openid
}).get({
success: function (res) {
console.log('all',res.data)  //输出查询到的所有
}
})
},
- 在其中加入判断用户是否注册过,如果查出来的结果长度>0则出现提示,否则运行saveuserinfo()函数:`
//注册
register() {
let that = this;
//查询用户是否已经注册
userListDB.where({
_openid: app.globalData.openid // 填入当前用户 openid
}).get({
success: function (res) {
let userInfos = res.data;
console.log('all',res.data)
if (userInfos && userInfos.length > 0) {
let user = userInfos[0];
if (user && user.name) {
wx.showModal({
title: '提示',
content: '您已注册,请直接登录',
success: function (res) {
if (res.confirm) {
console.log('用户点击确定')
wx.navigateTo({//跳转登录界面
url: '/pages/login/login',//这里的URL是你登录完成后跳转的界面
})
}
}
})
}
} else {
that.saveuserinfo();
}
}
})
},`
- 向数据库里添加,获取wxml页面中用户填入的数据存入云数据库,成功后跳转登录:
saveuserinfo() {
let that = this;
userListDB.add({
data: {
name: name,
password: password,
phone: phone,
userimg: '/images/logo.png' //默认头像
}
}).then(res => {
wx.showModal({
title: '成功',
content: '您已注册成功',
showCancel: false
})
wx.navigateTo({//跳转登录界面
url: '/pages/login/login',//这里的URL是你登录完成后跳转的界面
})
})
},
- 获取wxml页面用户填入数据:
这是获取用户名的,获取其他的根据wxml页面改一下函数名即可
bindKeyInputName: function (e) {
this.setData({
name: e.detail.value
})
},
wxml代码
- 让用户输入用户名、手机号、密码
<view class="con">
<view class="kong"></view>
<form>
<view class="cu-form-group">
<view class="title">昵称</view>
<input placeholder="请输入您的昵称"  bindinput="inputName"></input>
</view>
<view class="kong1"></view>
<view class="cu-form-group">
<view class="title">手机号码</view>
<input placeholder="请输入手机号"  bindinput="inputPhone"></input>
<view class="cu-capsule radius">
<view class="cu-tag bg-blue">
+86
</view>
<view class="cu-tag line-blue">
中国大陆
</view>
</view>
</view>
<view class="kong1"></view>
<view class="cu-form-group">
<view class="title">密码</view>
<input class= 'info-input' placeholder="请输入密码" bindinput="inputPassword"></input>
</view>
</form>
<button class='button' bindtap='register'>注册</button>
</view>
wxss用的colorUI
登录功能的实现
登录则是从用户集合中验证有无该用户,并且比对手机号和密码。我写的思路是,根据用户填入的手机号进行查询,查到该用户的数据,然后输入的密码跟数据库中的比对,成功则登录,失败则提示。
js代码
- 在js文件申明环境及调用数据库,如上述。
- 再调用云函数login获得用户openid。
- 获取wxml页面的数据。
- 查询数据库并进行比对。
//  单击“登录”按钮执行该函数
queryData: function () {
var _this = this
console.log('输入的手机号', _this.data.phone)
//  根据记录ID搜索数据集
userListDB.where({
_openid: app.globalData.openid
}).get({
success: function (res) {
console.log('数据库的密码', res.data[0].password)
console.log('输入的密码', _this.data.password)
console.log('用户名', res.data[0].name)
if (_this.data.password != res.data[0].password) {  //判断密码是否正确
wx.showToast({
title: '密码错误!!',
icon: 'success',
duration: 2500
})
} else {
console.log('登陆成功!')
wx.showToast({
title: '登陆成功!!',
icon: 'success',
duration: 2500
})

wx.reLaunch({//跳转个人中心
url: '/pages/wd/wd' //?useropenid=' + res.data[0]._openid,//利用reLaunch跳转到带tabbar的页面          })
}
},
//  未查到数据时调用
fail: function (res) {
wx.showModal({
title: '错误',
content: '请先注册',
showCancel: false
})
}
})
},
wxml代码
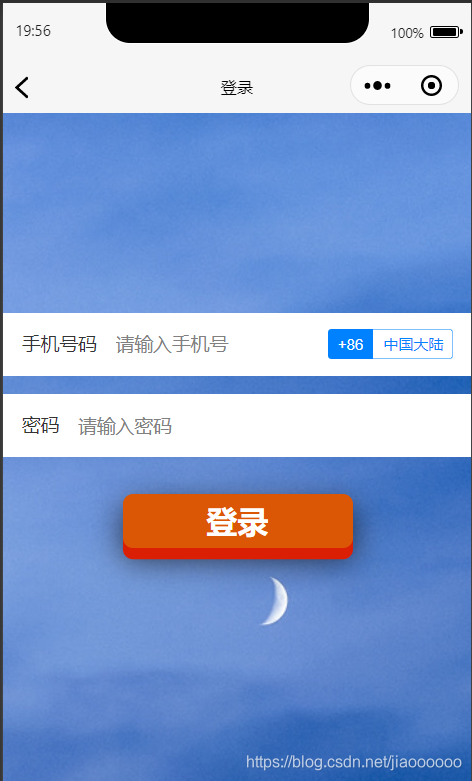
- 登录wxml页面。
<view class="con">
<view class="kong"></view>
<form>
<view class="cu-form-group">
<view class="title">手机号码</view>
<input placeholder="请输入手机号" value="{{phone}}" bindinput="bindKeyInputPhone"></input>
<view class="cu-capsule radius">
<view class="cu-tag bg-blue">
+86
</view>
<view class="cu-tag line-blue">
中国大陆
</view>
</view>
</view>
<view class="kong1"></view>
<view class="cu-form-group">
<view class="title">密码</view>
<input placeholder="请输入密码" value="{{password}}" bindinput="bindKeyInputPassword"></input>
</view>
</form>
<button class="button" bindtap='queryData'>登录</button>
</view>
wxss用的colorUI
最后就可以实现了,没有用用户授权登录的那种,一开始想着跟web开发的注册登录一样。
附上效果图:


相关文章推荐
- 微信小程序学习笔记2——关于个人中心实现登录后隐藏登录注册按钮显示头像及用户名
- App后台开发运维和架构实践学习总结(4)——APP的注册和登录功能设计
- App后台开发运维和架构实践学习总结(4)——APP的注册和登录功能设计
- 微信小程序开发记账应用实战服务端之用户注册与登录基于Codeigniter3描述
- 微信小程序开发学习笔记001--认识微信小程序,第一个微信小程序
- 微信小程序学习笔记-开发工具的准备-基于微信开发文档
- 微信小程序开发学习笔记008--微信小程序项目02
- 学习笔记_微信小程序开发--常用快捷键
- 微信小程序开发3-用户登录.注册模块
- 学习笔记_微信小程序开发--组建Swiper的使用
- 3小时入门微信小程序开发 --公开课学习笔记(2)
- 黑马程序员小程序学习笔记(2)——微信开发工具介绍
- JFinal使用笔记3-注册和登录功能开发记录
- .NET微信开发之PC 端微信扫码注册和登录功能实现
- [Silverlight学习笔记]关于用户注册之后不能直接登录的问题
- 微信平台开发学习笔记二(翻译功能的实现)
- 微信小程序开发学习笔记005--微信小程序组件详解
- 微信小程序学习笔记--20170425--登录验证实现
- 宠物店微信小程序包含预约和拼团功能从零开始学习开发步骤简单
- .NET微信开发之PC 端微信扫码注册和登录功能实现