Spring自动装配Bean实现过程详解
2020-03-11 17:51
375 查看
这篇文章主要介绍了Spring自动装配Bean实现过程详解,文中通过示例代码介绍的非常详细,对大家的学习或者工作具有一定的参考学习价值,需要的朋友可以参考下
要使用自动装配,就需要配置 <bean> 元素的 autowire 属性。autowire 属性有五个值,具体说明如表 1 所示。
表 1 autowire 的属性和作用
| 名称 | 说明 |
|---|---|
| byName | 根据 Property 的 name 自动装配,如果一个 Bean 的 name 和另一个 Bean 中的 Property 的 name 相同,则自动装配这个 Bean 到 Property 中。 |
| byType | 根据 Property 的数据类型(Type)自动装配,如果一个 Bean 的数据类型兼容另一个 Bean 中 Property 的数据类型,则自动装配。 |
| constructor | 根据构造方法的参数的数据类型,进行 byType 模式的自动装配。 |
| autodetect | 如果发现默认的构造方法,则用 constructor 模式,否则用 byType 模式。 |
| no | 默认情况下,不使用自动装配,Bean 依赖必须通过 ref 元素定义。 |
下面通过案例演示如何实现自动装配。首先将 applicationContext.xml 配置文件修改成自动装配形式,如下所示。
<?xml version="1.0" encoding="UTF-8"?>
<beans xmlns="http://www.springframework.org/schema/beans"
xmlns:xsi="http://www.w3.org/2001/XMLSchema-instance"
xmlns:aop="http://www.springframework.org/schema/aop"
xmlns:p="http://www.springframework.org/schema/p"
xmlns:tx="http://www.springframework.org/schema/tx"
xmlns:context="http://www.springframework.org/schema/context"
xsi:schemaLocation="
http://www.springframework.org/schema/beans
http://www.springframework.org/schema/beans/spring-beans-2.5.xsd
http://www.springframework.org/schema/aop
http://www.springframework.org/schema/aop/spring-aop-2.5.xsd
http://www.springframework.org/schema/tx
http://www.springframework.org/schema/tx/spring-tx-2.5.xsd
http://www.springframework.org/schema/context
http://www.springframework.org/schema/context/spring-context.xsd">
<bean id="personDao" class="com.mengma.annotation.PersonDaoImpl" />
<bean id="personService" class="com.mengma.annotation.PersonServiceImpl"
autowire="byName" />
<bean id="personAction" class="com.mengma.annotation.PersonAction"
autowire="byName" />
</beans>
在上述配置文件中,用于配置 personService 和 personAction 的 <bean> 元素中除了 id 和 class 属性以外,还增加了 autowire 属性,并将其属性值设置为 byName(按属性名称自动装配)。
默认情况下,配置文件中需要通过 ref 装配 Bean,但设置了 autowire="byName",Spring 会在配置文件中自动寻找与属性名字 personDao 相同的 <bean>,找到后,通过调用 setPersonDao(PersonDao personDao)方法将 id 为 personDao 的 Bean 注入 id 为 personService 的 Bean 中,这时就不需要通过 ref 装配了。
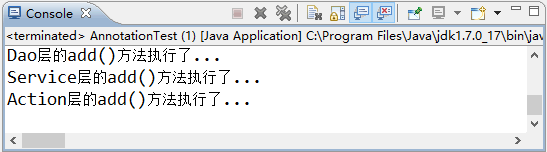
使用 JUnit 再次运行测试类中的 test() 方法,控制台的显示结果如图所示。
以上就是本文的全部内容,希望对大家的学习有所帮助
您可能感兴趣的文章:

相关文章推荐
- 关于spring @Autowired 自动装配bean过程
- spring-使用注解实现Bean自动装配2
- Java注解机制之Spring自动装配实现原理详解
- Spring 源码(九)@Autowired注解实现原理(Spring Bean的自动装配)
- spring对于bean的javaconfig,xml,自动装配三种装配方式实现
- spring-使用注解实现Bean自动装配1
- Spring Cloud应用实现配置自动刷新过程详解
- spring入门教程之bean的继承与自动装配详解
- [Spring开发笔记]Spring中自动装配详解(协作者关系)
- Java的注解机制——Spring自动装配的实现原理
- [Spring]Bean的自动装配Autowire【学习笔记】
- Spring中Bean的作用域和自动装配
- java spring - 自动装配Bean 注解大全
- Spring自动扫描装配bean
- Spring学习笔记 使用annotation配置实现Bean的auto-wiring (自动绑定)
- Quartz SchedulerFactoryBean异常--Spring自动装配惹的祸
- mybatis+spring 中自动实现mapper接口调用存储过程
- JavaWeb项目获取Spring自动装配的Bean对象
- Spring的IOC容器—Bean的自动装配
- SPRING IN ACTION 第4版笔记-第三章ADVANCING WIRING-004-消除BEAN自动装配的歧义@QUALIFIER及自定义注解