PyQt5+Python3.6.5实现简易安卓Apk装包器
2020-01-31 22:03
501 查看
PyQt5+Python3.6.5实现简易安卓Apk装包器
导读
人生第一篇博客,之前从来都是找别人分享的博客,现在和大家分享自己尝试做了个简易的AndroidApk装包器,虽然不是很完善,但是还是实现了基本功能的,希望能有大佬指出不足指出,共同探讨技术。
一、准备工作
- 配置Python的开发环境:Python3.6.5 + pycharm + PyQt5,这些网上都有详细的安装教程,这里不再赘述
- 稍微说一下PyQt5的安装和基本使用
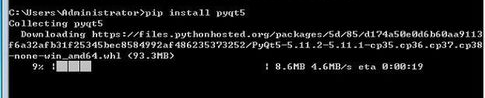
(1)pip方式安装PyQt5
pip install pyqt5
(2)安装完成之后,再安装pyqt5-tools
pip install pyqt5-tools
(3)配置环境变量
需要将PyQt5-tools的安装目录添加到系统环境变量Path中。在桌面上右键单击“我的电脑”,在弹出的快捷菜单中选择“属性”->“高级系统设置”->“高级”,单击环境变量按钮,在系统变量Path中添加pyqt5-tools目录的绝对路径,例如我的path是:D:\install\python365\Lib\site-packages\pyqt5_tools。
(4)PyQt5的使用
第一种方式:在pyqt5-tools目录下,找到designer.exe文件,双击就可以启动,有些需要右键以管理员的身份运行;第二种方式:在pycharm中配置之后,可以直接在pycharm中启动,启动之后的Qt designer如下:

新建窗体之后就可以设计自己想要的界面。
二、设计装包器安装界面

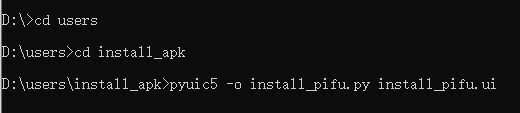
这个在Qt designer上面设计的界面,保存下来的文件是.ui格式的,我们需要的把它转换成.py格式,运行cmd进入到保存ui文件的目录下,输入指令:pyuic5 -o install_pifu.py install_pifu.ui 然后回车键就行,在该目录下就会生成一个对应的.py文件,如图

完整代码:
install_pifu.py.
- # -*- coding: utf-8 -*-

# Form implementation generated from reading ui file 'uninstall_pifu.ui'
#
# Created by: PyQt5 UI code generator 5.11.3
#
# WARNING! All changes made in this file will be lost!

from PyQt5 import QtCore, QtGui, QtWidgets

""" 安卓装包器界面绘制,使用Qt designer设计界面,把ui文件转换成py文件就可生成一下代码 """

class Ui_MainWindow(object):
def setupUi(self, MainWindow):
MainWindow.setObjectName("MainWindow")
MainWindow.resize(535, 380)
MainWindow.setStyleSheet("background-color: rgb(35, 35, 35);")
self.centralwidget = QtWidgets.QWidget(MainWindow)
self.centralwidget.setObjectName("centralwidget")
self.label = QtWidgets.QLabel(self.centralwidget)
self.label.setGeometry(QtCore.QRect(110, 170, 48, 21))
self.label.setStyleSheet("color: rgb(232, 232, 232);\n" "background-color: rgb(35, 35, 35);")
self.label.setObjectName("label")
self.pushButton = QtWidgets.QPushButton(self.centralwidget)
self.pushButton.setGeometry(QtCore.QRect(270, 220, 75, 23))
self.pushButton.setStyleSheet("color: rgb(232, 232, 232);\n" "background-color: rgb(57, 57, 57);")
self.pushButton.setObjectName("pushButton")
self.label_3 = QtWidgets.QLabel(self.centralwidget)
self.label_3.setGeometry(QtCore.QRect(160, 170, 201, 21))
self.label_3.setStyleSheet("color: rgb(232, 232, 232);\n" "background-color: rgb(156, 156, 156);")
self.label_3.setObjectName("label_3")
self.label_2 = QtWidgets.QLabel(self.centralwidget)
self.label_2.setGeometry(QtCore.QRect(370, 0, 161, 31))
self.label_2.setStyleSheet("color: rgb(232, 232, 232);")
self.label_2.setObjectName("label_2")
self.pushButton_3 = QtWidgets.QPushButton(self.centralwidget)
self.pushButton_3.setGeometry(QtCore.QRect(170, 220, 75, 23))
self.pushButton_3.setStyleSheet("color: rgb(232, 232, 232);\n" "background-color: rgb(57,57, 57);")
self.pushButton_3.setObjectName("pushButton_3")
self.pushButton_2 = QtWidgets.QPushButton(self.centralwidget)
self.pushButton_2.setGeometry(QtCore.QRect(360, 170, 75, 23))
self.pushButton_2.setStyleSheet("color: rgb(232, 232, 232);\n" "background-color: rgb(57, 57, 57);")
self.pushButton_2.setObjectName("pushButton_2")
self.textEdit = QtWidgets.QTextEdit(self.centralwidget)
self.textEdit.setGeometry(QtCore.QRect(0, 0, 361, 121))
self.textEdit.setStyleSheet("color: rgb(232, 232, 232);\n" "background-color: rgb(50, 50, 50);")
self.textEdit.setObjectName("textEdit")
self.label_4 = QtWidgets.QLabel(self.centralwidget)
self.label_4.setGeometry(QtCore.QRect(10, 210, 111, 21))
self.label_4.setStyleSheet("color: rgb(232, 232, 232);")
self.label_4.setObjectName("label_4")
self.label_5 = QtWidgets.QLabel(self.centralwidget)
self.label_5.setGeometry(QtCore.QRect(10, 240, 120, 20))
self.label_5.setStyleSheet("background-color: rgb(35, 35, 35);\n" "color: rgb(255, 255, 255);")
self.label_5.setText("")
self.label_5.setObjectName("label_5")
self.label_6 = QtWidgets.QLabel(self.centralwidget)
self.label_6.setGeometry(QtCore.QRect(10, 260, 111, 20))
self.label_6.setStyleSheet("background-color: rgb(35, 35, 35);\n" "color: rgb(255, 255, 255);")
self.label_6.setText("")
self.label_6.setObjectName("label_6")
self.label_7 = QtWidgets.QLabel(self.centralwidget)
self.label_7.setGeometry(QtCore.QRect(10, 280, 111, 21))
self.label_7.setStyleSheet("background-color: rgb(35, 35, 35);\n" "color: rgb(255, 255, 255);")
self.label_7.setText("")
self.label_7.setObjectName("label_7")
self.label_8 = QtWidgets.QLabel(self.centralwidget)
self.label_8.setGeometry(QtCore.QRect(370, 40, 161, 16))
self.label_8.setStyleSheet("color: rgb(255, 255, 255);")
self.label_8.setText("")
self.label_8.setObjectName("label_8")
self.label_9 = QtWidgets.QLabel(self.centralwidget)
self.label_9.setGeometry(QtCore.QRect(370, 60, 161, 20))
self.label_9.setStyleSheet("color: rgb(255, 255, 255);")
self.label_9.setText("")
self.label_9.setObjectName("label_9")
self.label_10 = QtWidgets.QLabel(self.centralwidget)
self.label_10.setGeometry(QtCore.QRect(370, 80, 161, 20))
self.label_10.setStyleSheet("color: rgb(255, 255, 255);")
self.label_10.setText("")
self.label_10.setObjectName("label_10")
self.label_11 = QtWidgets.QLabel(self.centralwidget)
self.label_11.setGeometry(QtCore.QRect(370, 100, 161, 20))
self.label_11.setText("")
self.label_11.setObjectName("label_11")
self.label_12 = QtWidgets.QLabel(self.centralwidget)
self.label_12.setGeometry(QtCore.QRect(370, 300, 61, 20))
self.label_12.setStyleSheet("color: rgb(232, 232, 232);")
self.label_12.setObjectName("label_12")
self.label_13 = QtWidgets.QLabel(self.centralwidget)
self.label_13.setGeometry(QtCore.QRect(370, 320, 161, 16))
self.label_13.setStyleSheet("color: rgb(232, 232, 232);")
self.label_13.setObjectName("label_13")
MainWindow.setCentralWidget(self.centralwidget)
self.menubar = QtWidgets.QMenuBar(MainWindow)
self.menubar.setGeometry(QtCore.QRect(0, 0, 535, 23))
self.menubar.setObjectName("menubar")
MainWindow.setMenuBar(self.menubar)
self.statusbar = QtWidgets.QStatusBar(MainWindow)
self.statusbar.setObjectName("statusbar")
MainWindow.setStatusBar(self.statusbar)

self.retranslateUi(MainWindow)
QtCore.QMetaObject.connectSlotsByName(MainWindow)

def retranslateUi(self, MainWindow):
_translate = QtCore.QCoreApplication.translate
MainWindow.setWindowTitle(_translate("MainWindow", "安卓装包器"))
self.label.setText(_translate("MainWindow", "请选择:"))
self.pushButton.setText(_translate("MainWindow", "连接检测"))
self.label_3.setText(_translate("MainWindow", "未选择"))
self.label_2.setText(_translate("MainWindow", "已连接设备:"))
self.pushButton_3.setText(_translate("MainWindow", "安装"))
self.pushButton_2.setText(_translate("MainWindow", "选择路径"))
self.textEdit.setHtml(_translate("MainWindow", "<!DOCTYPE HTML PUBLIC \"-//W3C//DTD HTML 4.0//EN\"
\"http://www.w3.org/TR/REC-html40/strict.dtd\">\n" "<html><head><meta
name=\"qrichtext\" content=\"1\" /><style type=\"text/css\">\n" "p,
li { white-space: pre-wrap; }\n" "</style></head><body style=\"
font-family:\'SimSun\'; font-size:9pt; font-weight:400;
font-style:normal;\">\n" "<p style=\" margin-top:0px;
margin-bottom:0px; margin-left:0px; margin-right:0px;
-qt-block-indent:0; text-indent:0px;\"><span style=\" font-size:10pt;\">使用说明</span></p>\n" "<p style=\" margin-top:0px;
margin-bottom:0px; margin-left:0px; margin-right:0px;
-qt-block-indent:0; text-indent:0px;\"><span style=\" font-size:10pt;\">1、手动操作</span></p>\n" "<p style=\" margin-top:0px;
margin-bottom:0px; margin-left:0px; margin-right:0px;
-qt-block-indent:0; text-indent:0px;\"><span style=\" font-size:10pt;\">(1)在真机上手动打开[开发者模式-打开USB调试模式]  </span></p>\n" "<p
style=\" margin-top:0px; margin-bottom:0px; margin-left:0px;
margin-right:0px; -qt-block-indent:0; text-indent:0px;\"><span
style=\" font-size:10pt;\">(2)使用UBS线连接手机到电脑</span></p>\n" "<p
style=\" margin-top:0px; margin-bottom:0px; margin-left:0px;
margin-right:0px; -qt-block-indent:0; text-indent:0px;\"><span
style=\"
font-size:10pt;\">(3)部分机型连接电脑后弹出几种连接模式,默认选择[仅充电],需要手动选择[文件传输]</span></p>\n"
"<p style=\" margin-top:0px; margin-bottom:0px; margin-left:0px;
margin-right:0px; -qt-block-indent:0; text-indent:0px;\"><span
style=\" font-size:10pt;\">2、装包操作</span></p></body></html>"))
self.label_4.setText(_translate("MainWindow", "安装日志:"))
self.label_12.setText(_translate("MainWindow", "<html><head/><body><p><span style=\" font-size:8pt;\">版本
2.0.0</span></p></body></html>"))
install_androidApk.py
#!/usr/bin/env python3
# -*- coding: utf-8 -*-

import sys
import os
import install_pifu
from PyQt5.QtCore import *
from PyQt5 import QtWidgets
from PyQt5.QtWidgets import *
Ui_MainWindow = install_pifu.Ui_MainWindow

path = ""
install = ""

"""
创建安装类,继承Ui_MainWindow类,以在执行的时候绘制界面
"""

class InstallApk(QtWidgets.QMainWindow, Ui_MainWindow):
trigger = pyqtSignal()

def __init__(self):
QtWidgets.QMainWindow.__init__(self)  # 创建主界面对象
Ui_MainWindow.__init__(self)  # 主界面对象初始化
self.setupUi(self)  # 配置主界面对象
# 连接QPushButton的点击信号到槽函数getDevicesName等
self.pushButton.clicked.connect(self.getDevicesAttachment)
self.pushButton_2.clicked.connect(self.filePathMsg)
self.pushButton_3.clicked.connect(self.install)

# 获取设备连接信息函数
def getDevicesAttachment(self):
devices = []
devicesname = []
try:
for dAttachment in os.popen("adb devices"):  # 打开adb连接设备指令,连接设备
if "\t" in dAttachment:
if dAttachment.find("emulator") < 0:
devices.append(dAttachment.split("\t")[0]);
devices.sort(cmp=None, key=None, reverse=False);
except:
pass
for name in devices:
# 获取设备类型
deviceName = os.popen('adb -s ' + name + ' shell getprop ro.product.brand').read()
# 获取设备型号
device = os.popen('adb -s ' + name + ' shell getprop ro.product.name ').read()
deviceName = str(deviceName).replace("\n", "")
deviceName1 = deviceName + ": " + device
print(deviceName1)
devicesname.append(deviceName1)
print(u"\n设备名称: %s \n总数量:%s台" % (devices, len(devices)));

if devices == []:
self.label_8.setText("设备未连接")
else:
self.label_8.setText(str(devicesname))
return devices, devicesname
# 获取所有手机数量
x = 0;
isinstall = False;

# 选取Apk文件路径函数
def filePathMsg(self):
global path  # 定义path(路径)全局变量
fileName, filetype = QFileDialog.getOpenFileName(self, "选择文件", "/", "All Files (*);;Text Files (*.txt)")
print(fileName)  # 打印文件全部路径(包括文件名和后缀名)
path = fileName
self.label_3.setText(fileName)  # 把路径的名称写进文本框中
# 获取所有手机数量
x = 0
isinstall = False

def install(self):
"""
a = InstallApk.getDevicesAttachment(devices)
if a == []:
self.label_6.setText("设备未连接")
else:
self.label_6.setText("")
"""
# 每次点击安装按钮,把界面安装日志清空
self.label_5.setText("")
self.label_6.setText("")
# 清空事件
QApplication.processEvents()
# 开始安装提示。。。
self.label_5.setText("安装中...请查看设备")
# 创建线程对象
self.workThread = WorkThread()
# 启动子线程,开始安装操作
self.workThread.start()
# 获得子线程执行结束信号,进行安装结果判断,输出结果到界面
self.workThread.trigger.connect(self.installOut)

# 子线程执行安装,安装结束之后根据安装结果进行处理
def installOut(self):
if "Success" in install:
self.label_6.setText("安装成功")
else:
self.label_6.setText("安装失败")

"""
创建一个线程类,通过重写线程里面的run方法,实现Ui和安装业务逻辑分离,
解决在安装的时候会出现界面会出现“未响应”、“鼠标转圈”的情况
"""

class WorkThread(QThread):
# 定义一个子线程执行结束,给主线程发送结束信号
trigger = pyqtSignal()

def __int__(self):
super(WorkThread, self).__init__()

def run(self):
# 重写run方法
WorkThread.insatallNow(self)
# 安装完成后发出信号给主线程
self.trigger.emit()

def insatallNow(self):
devices = self.getAllDevices()
self.installApk(devices);

def getAllDevices(self):
devices = [];
try:
for dName_ in os.popen("adb devices"):
if "\t" in dName_:
if dName_.find("emulator") < 0:
devices.append(dName_.split("\t")[0]);
devices.sort(cmp=None, key=None, reverse=False);
except:
pass
print(u"\n设备名称: %s \n总数量:%s台" % (devices, len(devices)));
return devices

def installApk(self, devices):
global x, isinstall, path, install

for dname in devices:
try:
print('Installing...')
print("adb  -s " + dname + " install -r" + r" C:\Users\Administrator\Desktop\platform-tools\target.apk")
print("安装文件路径:"+path)
# ADb开始安装
install = os.popen("adb  -s " + dname + " install -r" + r" " + path).read()
# install = subprocess.popen("adb  -s "+ dname + " install -r"+ r" "+path)
if "Success" in install:
print(os.popen("adb -s " + dname + " install -r" + r" " + path).read())
print("安装成功")
else:
print("安装失败")
print("处理后的path:" + path)
# 如果安装出现异常
except TypeError as e:
print(e)
self.label_5.setText(str(e))
x = 0
isinstall = True

if __name__ == "__main__":
app = QApplication(sys.argv)
window = InstallApk()
window.show()  # QT对象显示
window.getDevicesAttachment()  # 但启动程序的时候就会执行这个函数,自动检测设备连接情况
sys.exit(app.exec_())
三、程序运行效果

四、小结
1.主要是应用了PyQt5 + python结合的一个软件架构,在Qt上设计界面,保存好之后转换成py文件就可以生成Python代码,非常的方便,我们主要做的就是把界面的控件(按钮)和业务逻辑代码建立链接,给各控件配置槽函数。
2.技术难点:使用多线程实现ui界面绘制和业务主逻辑的分离,主线程主要执行ui界面绘制部分,创建子线程专门执行安装操作,这样就可以解决了在安装过程中,当拖动或者点击界面时,界面会出现“未响应”和“鼠标转圈”的情况。
3.可扩展:本文只是实现了装包器的基本功能,还可以更加的完善,例如,文件选择时,可以通过直接拖动Apk文件到文本框,就不用一个个文件目录去打开了;二是按钮失效化,在安装过程中,界面的“安装”、“选择文件”等按钮就失效了,点不会有反应;三是添加log功能,在安装过程中实时捕获安装数据等
4.欢迎大家一起来交流~~~
- 点赞 2
- 收藏
- 分享
- 文章举报
 半粒糖~
发布了3 篇原创文章 · 获赞 3 · 访问量 472
私信
关注
半粒糖~
发布了3 篇原创文章 · 获赞 3 · 访问量 472
私信
关注

相关文章推荐
- python+PyQT实现系统桌面时钟
- python+PyQT实现系统桌面时钟
- pyqt实现窗口边框阴影效果(python)
- python3+PyQt5+Qt Designer实现堆叠窗口部件
- python实现简易采集爬虫
- python3+PyQt5 图形项的自定义和交互--实现page Designer应用程序
- 基于python3 pyQt5 QtDesignner实现窗口化猜数字游戏功能
- 逻辑烧脑:python 区块链的简易实现
- python实现简易数据库之二——单表查询和top N实现
- python3+PyQt5 实现Tab标签页式编辑器
- 【简易Python爬虫】 初试爬虫_简易Python图片爬虫实现
- Python实现一个简易的斐波那契数列
- python实现简易数码时钟
- python实现简易数码时钟
- python学习06-简易登录接口测试,使用元组和字典实现三级菜单
- 用python实现的百度音乐下载器-python-pyqt-改进版
- python实现简易数据库之一——存储和索引建立
- python搭建简易服务器分析与实现
- python+pyqt实现12306图片验证效果
- python 模拟斗地主发牌(简易代码实现)