详解Vue 换肤方案验证
2019-08-28 09:01
302 查看
本文的换肤方案灵感来自于 element-ui
需求:网站换肤,主题切换。网站的主题色可以在几种常用颜色之间进行切换,还有相关图片、图标也要跟随主题进行切换。
不多说,先看下最终的实现效果:
文章由两部分组成:css切换,图片图标切换
css切换
1.在 static 目录下新建一个 styles 文件夹,在 styles 下新建一个 theme.scss 文件(项目使用了sass,会自动编译成css文件,如果没有使用这些预处理工具可以直接新建 theme.css),将需要替换的 CSS 声明在此文件中。
.theme-test-btn {
background-color: #409eff;
border-color: #409eff;
}

.theme-test-btn:hover,
.theme-test-btn:focus {
background-color: #66b1ff;
border-color: #66b1ff;
}
2.在 src/assets/js/const/ 目录下新建 theme-colors.js,用于声明所有可选的主题,每种颜色都对应一个关键词,方便区分
const colors = [
{
themeId: 0,
primaryBtn: '#409eff', // 主要按钮的背景色
priBtnHover: '#66b1ff', // 主要按钮的悬浮、聚焦背景色
},
{
themeId: 1,
primaryBtn: '#67c23a',
priBtnHover: '#85ce61',
},
{
themeId: 2,
primaryBtn: '#e6a23c',
priBtnHover: '#ebb563',
},
];

export default colors;
3.通过 ajax 获取 theme.css ,将颜色值替换为关键词。
data() {
return {
active: 0,
themeStyleStr: '', // 存放 替换成关键词的 theme.css 内容
colors: themeColors, // 所有可选的主题颜色数组。即:theme-colors.js 文件export的数组
};
},
mounted() {
// 通过 ajax 获取 theme.css 的内容,并将颜色值替换为关键词
this.$http.getThemeFile().then(res => {
this.themeStyleStr = this.getStyleTemplate(res);
});
},
methods: {
// 获取样式模板:将颜色值替换为关键词。
getStyleTemplate(data) {
let color = this.colors[0];
delete color.themeId;
let colorMap = {};
Object.keys(color).forEach(key => {
colorMap[color[key]] = key;
});
Object.keys(colorMap).forEach(key => {
data = data.replace(new RegExp(key, 'ig'), colorMap[key]);
});
return data;
},
}
this.$http.getThemeFile 方法
// 使用原生ajax获取换肤的样式文件
getThemeFile() {
return new Promise(resolve => {
const url = location.origin + '/static/styles/theme.css';
const xhr = new XMLHttpRequest();
xhr.onreadystatechange = () => {
if (xhr.readyState === 4 && xhr.status === 200) {
resolve(xhr.responseText);
}
};
xhr.open('GET', url);
xhr.send();
});
}
4.把关键词再换回刚刚生成的相应的颜色值,并在页面上添加 style 标签
methods: {
// 点击切换主题
changeTheme(index) {
this.active = index;
this.setNewStyle(this.themeStyleStr, this.colors[index]);
},
// 根据选择的主题颜色,把关键词换成相应的主题颜色,并在页面上添加 style 标签
setNewStyle(originalStyle, colors) {
let oldEl = document.getElementById('theme-style');
let cssText = originalStyle;
Object.keys(colors).forEach(key => {
cssText = cssText.replace(new RegExp(key, 'ig'), colors[key]);
});
const style = document.createElement('style');
style.innerHTML = cssText;
style.id = 'theme-style';
oldEl ? document.head.replaceChild(style, oldEl) : document.head.appendChild(style);
}
}
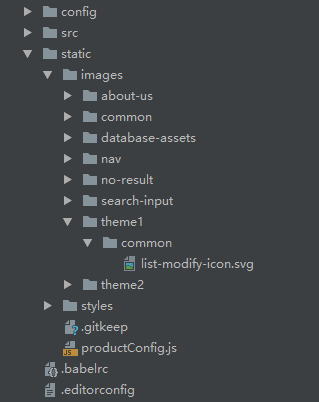
图片图标切换
1.图片切换和图标切换是同样的原理。在之前新建好的 theme.scss 文件追加图标引入的样式。
.theme-test-icon {
background: url("/static/images/common/list-modify-icon.svg");
}
2.在之前新建好的 theme-colors.js 文件追加图标路径
/*图片统一使用一个路径,更换主题时需要在images文件夹下新建主题文件夹,与原始路径对应,图片文件名须一致
应避免 primaryBtn 与 primaryBtnHover 同时出现,因为正则匹配 primaryBtn 会把 primaryBtnHover 部分匹配出来,达不到效果*/
const colors = [
{
themeId: 0,
primaryBtn: '#409eff', // 主要按钮的背景色
priBtnHover: '#66b1ff', // 主要按钮的悬浮、聚焦背景色
imagePath: '/static/images', // 图片绝对路径
},
{
themeId: 1,
primaryBtn: '#67c23a',
priBtnHover: '#85ce61',
imagePath: '/static/images/theme1',
},
{
themeId: 2,
primaryBtn: '#e6a23c',
priBtnHover: '#ebb563',
imagePath: '/static/images/theme2',
},
];
export default colors;
3.引入需要主题切换的图片/图标,存放于 /static/images/ 之下,每个额外的主题图片需要一个文件夹进行存放,例如 /theme1 或者 /theme2。注意:各个主题的图片文件名要保持不变;图片路径是根据 theme.scss 里面引入图片样式的路径来决定的,可以根据项目实际情况进行调整。
以上,就是Vue项目实现换肤功能的一种方案。换肤功能的实现还有其他方法,欢迎一起交流学习。
您可能感兴趣的文章:

相关文章推荐
- vue.js表单验证插件(vee-validate)的使用教程详解
- 详解vue表单验证组件 v-verify-plugin
- Vue表单验证插件Vue Validator使用方法详解
- 详解vue项目中使用token的身份验证的简单实践
- 详解vue父子组件关于模态框状态的绑定方案
- vue中路由验证和相应拦截的使用详解
- 详解基于vue-router的动态权限控制实现方案
- 详解Vue 全局引入bass.scss 处理方案
- vue 移动端适配方案详解
- 详解VScode编辑器vue环境搭建所遇问题解决方案
- 详解vue中移动端自适应方案
- 详解vuelidate 对于vueJs2.0的验证解决方案
- Vue 短信验证码组件开发详解
- vue elementui el-form rules动态验证的实例代码详解
- vue 移动端适配方案详解
- Shrio-6-session 会话方案和详解----sessionDAO,缓存,验证
- 详解VUE单页应用骨架屏方案
- Vue 短信验证码组件开发详解
- 详解vue-cli开发环境跨域问题解决方案
- vue+elementUI 复杂表单的验证、数据提交方案问题