ant-design-vue运行时切换主题
目录
创建项目
可以参照https://vue.ant.design/docs/vue/use-with-vue-cli-cn/创建项目并引入ant-design-vue
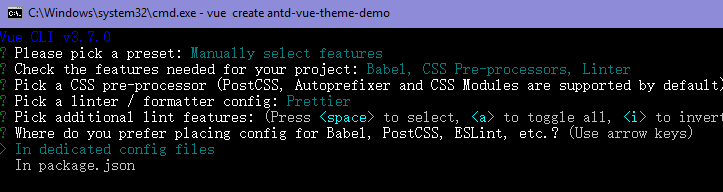
1、使用vue-cli V3.0+创建项目

2、选择css预处理器(其他的根据项目所需选择)

3、由于ant-design-vue的样式使用的是less作为开发语言,所以这里我们选择Less

4、其他的根据自己的需要配置即可

5、注意:项目创建完成后,需要将less的版本号改成3.0以下,否则后面再更改主题时会出错!!!这里改成了2.7.2

改完后保存,并重新下载依赖
[code]npm install
6、下载完后启动项目,在浏览器输入localhost:8080就可以看到创建好的项目啦
[code]npm run serve


安装并引入 ant-design-vue
1、在项目目录下输入命令安装ant-design-vue
2、然后在main.js中添加所需的antd组件(全局添加样式)
[code]// 全局引入antd import
Button from "ant-design-vue/lib/button";
import "ant-design-vue/dist/antd.css";

Vue.component(Button.name, Button);

3、在HelloWorld.vue中使用组件,删除其他不必要的代码,然后添加一个按钮
[code]<a-button type="primary">测试</a-button>

4、重新启动项目,刷新浏览器,即可看到默认主题的按钮

按需引入antd
可以使用 babel-plugin-import 的方式按需引入组件
https://vue.ant.design/docs/vue/use-with-vue-cli-cn/#高级配置
1、首先安装babel-plugin-import
[code]npm add babel-plugin-import --dev
2、然后在babel.config.js中添加配置
[code]plugins: [ [ "import", { libraryName: "ant-design-vue", libraryDirectory: "es", style: true } ] ]

3、移除前面在 src/main.js 里全量添加的 import 'ant-design-vue/dist/antd.css'; 样式代码,并且按下面的格式引入模块。
[code]// 按需引入antd
import { Button } from "ant-design-vue";

4、最后重启 npm run serve 访问页面,antd 组件的 js 和 css 代码都会按需加载
定制主题
https://vue.ant.design/docs/vue/customize-theme-cn/#在-vue-cli-3中定制主题
1、项目根目录下新建文件vue.config.js,添加如下代码
[code]// vue.config.js
module.exports = {
css: {
loaderOptions: {
less: {
modifyVars: {
"primary-color": "#1DA57A",
"link-color": "#1DA57A",
"border-radius-base": "2px"
},
javascriptEnabled: true
}
}
}
};
2、保存重启并访问页面后就可以看到定制的主题了

但官方提供的这种方式只能在编译时改变主题,无法在运行性动态切换。下面就是本文的重点,如何实现在运行时动态切换主题。
提取antd的less变量文件
我们的思路就是提取ant-design-vue中所有的less代码汇总到一个文件中,然后在index.html页面中直接饮用,最后使用less.js中的modifyVars方法修改主题变量,这样antd的样式就不会被编译,实现运行时动态切换
1、首先安装提取less文件的插件antd-theme-webpack-plugin
[code]npm install -D antd-theme-webpack-plugin
2、修改vue.config.js,配置并使用插件,详细说明见以下两个网址
https://github.com/mzohaibqc/antd-theme-webpack-plugin
https://medium.com/@mzohaib.qc/ant-design-dynamic-runtime-theme-1f9a1a030ba0
[code]const AntDesignThemePlugin = require("antd-theme-webpack-plugin");
const path = require("path");

const options = {
antDir: path.join(__dirname, "./node_modules/ant-design-vue"), //antd包位置
stylesDir: path.join(__dirname, "./src/styles/theme"), //主题文件所在文件夹
varFile: path.join(__dirname, "./src/styles/theme/variables.less"), // 自定义默认的主题色
mainLessFile: path.join(__dirname, "./src/styles/theme/index.less"), // 项目中其他自定义的样式(如果不需要动态修改其他样式,该文件可以为空)
outputFilePath: path.join(__dirname, "./public/color.less"), //提取的less文件输出到什么地方
themeVariables: ["@primary-color"], //要改变的主题变量
indexFileName: "./public/index.html", // index.html所在位置
generateOnce: false // 是否只生成一次(if you don't want to generate color.less on each chnage in code to make build process fast in development mode, assign it true value. But if you have new changes in your styles, you need to re-run your build process npm start.)
};

module.exports = {
css: {
loaderOptions: {
less: {
modifyVars: {
// "primary-color": "#1DA57A",
// "link-color": "#1DA57A",
// "border-radius-base": "2px"
},
javascriptEnabled: true
}
}
},

configureWebpack: {
plugins: [new AntDesignThemePlugin(options)]
}
};
3、options 中的路径一定要和实际项目一致!

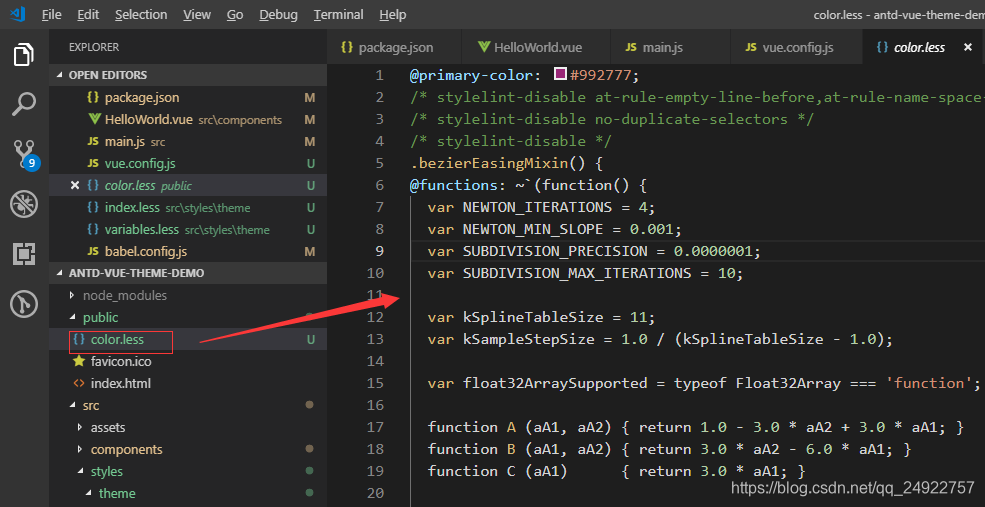
4、在variables.less文件中添加主题变量(一定要与options中的themeVariables一致!)
//variables.less //一定要加上这一行!!! @import "~ant-design-vue/lib/style/themes/default.less"; @primary-color: #992777;
5、index.less可以为空
6、然后npm run serve 运行项目就可以在你设置的目录下看到提取的less文件了
切换主题
拿到color.less文件,下面就好办了。
1、修改index.html
首先引入提取的color.less文件;
然后定义并配置全局变量less
最后引入less.js文件(放在最后)
[code]<!DOCTYPE html>
<html lang="en">
<head>
<meta charset="utf-8">
<meta http-equiv="X-UA-Compatible" content="IE=edge">
<meta name="viewport" content="width=device-width,initial-scale=1.0">
<link rel="icon" href="<%= BASE_URL %>favicon.ico">
<title>antd-vue-theme-demo</title>
</head>
<body>
<noscript>
<strong>We're sorry but antd-vue-theme-demo doesn't work properly without JavaScript enabled. Please enable it to continue.</strong>
</noscript>
<!-- 引入提取的color.less文件 -->
<link rel="stylesheet/less" type="text/css" href="./color.less" />
<script>
window.less = {
async: false,
env: 'production'//production  development
};
</script>
<div id="app"></div>
<!-- 引入less.js文件(放在最后) -->
<script src="https://cdn.bootcss.com/less.js/2.7.3/less.min.js"></script>
<!-- built files will be auto injected -->
</body>
</html>
2、下面写个简单的例子,使用window.less.modifyVars()方法修改主题
修改HelloWorld.vue,代码如下
[code]<template>
<div class="hello">
<h1>{{ msg }}</h1>
<a-button type="primary" @click="changeTheme('#992777')">默认</a-button
><br /><br />
<a-button type="primary" @click="changeTheme('#F5222D')">薄暮</a-button
><br /><br />
<a-button type="primary" @click="changeTheme('#FA541C')">火山</a-button
><br /><br />
<a-button type="primary" @click="changeTheme('#FAAD14')">日暮</a-button
><br /><br />
<a-button type="primary" @click="changeTheme('#13C2C2')">明青</a-button
><br /><br />
<a-button type="primary" @click="changeTheme('#52C41A')">极光绿</a-button
><br /><br />
<a-button type="primary" @click="changeTheme('#1890FF')">拂晓蓝</a-button
><br /><br />
<a-button type="primary" @click="changeTheme('#2F54EB')">极客蓝</a-button
><br /><br />
<a-button type="primary" @click="changeTheme('#722ED1')">酱紫</a-button
><br /><br />
</div>
</template>

<script>
export default {
name: "HelloWorld",
props: {
msg: String
},
methods: {
changeTheme(primaryColor) {
window.less.modifyVars({
"@primary-color": primaryColor
});
}
}
};
</script>

<!-- Add "scoped" attribute to limit CSS to this component only -->
<style scoped lang="less"></style>
3、重启项目,大功告成!!!
项目地址

- nodejs(13):使用 ant-design-pro-vue 修改配置文件打包 ,去掉sourceMap,保证代码安全
- Vue 2.x折腾记 - (16) 基于Ant Design Vue 封装一个配置式的表单搜索组件
- Vue + ElementUI 手撸后台管理网站基本框架(四)主题切换
- Ant Design Vue项目解析-前言
- vue+element-ui的主题颜色切换
- Vue 2.x折腾记 - (17) 基于Ant Design Vue 封装一个配置式的表单组件
- vue动态切换主题
- vue.ant.design配置
- vue-cli2里定制antd-design-vue主题.md.md
- ant-design-vue组件的三种加载方式
- ant design TreeSelect支持搜索,切换value和title属性
- nodejs(9): 使用vue + ant design 开发后台admin项目
- ant-design-pro 项目运行报错解决
- 感觉略炫酷的将正在运行的程序切换到后台运行
- Eclipse运行多个程序时控制台的切换
- Vue实现移动端页面切换效果
- Android 源码系列之<五>从源码的角度深入理解LayoutInflater.Factory之主题切换(中)
- 在vue中,使用echarts的自定义主题
- 【VUE组件开发】VUE随意点击列表元素切换选中样式,并有序数组添加索引和数值
- Vue + Element UI 实现权限管理系统 前端篇(六):更换皮肤主题